
Set up the Unity Editor
Tutorial
Beginner
+10XP
15 mins
(501)
Unity Technologies
In this tutorial, you’ll set up your workspace, import assets and packages, and get your Unity project ready for development.
Languages available:
1. Set up the Editor’s Layout
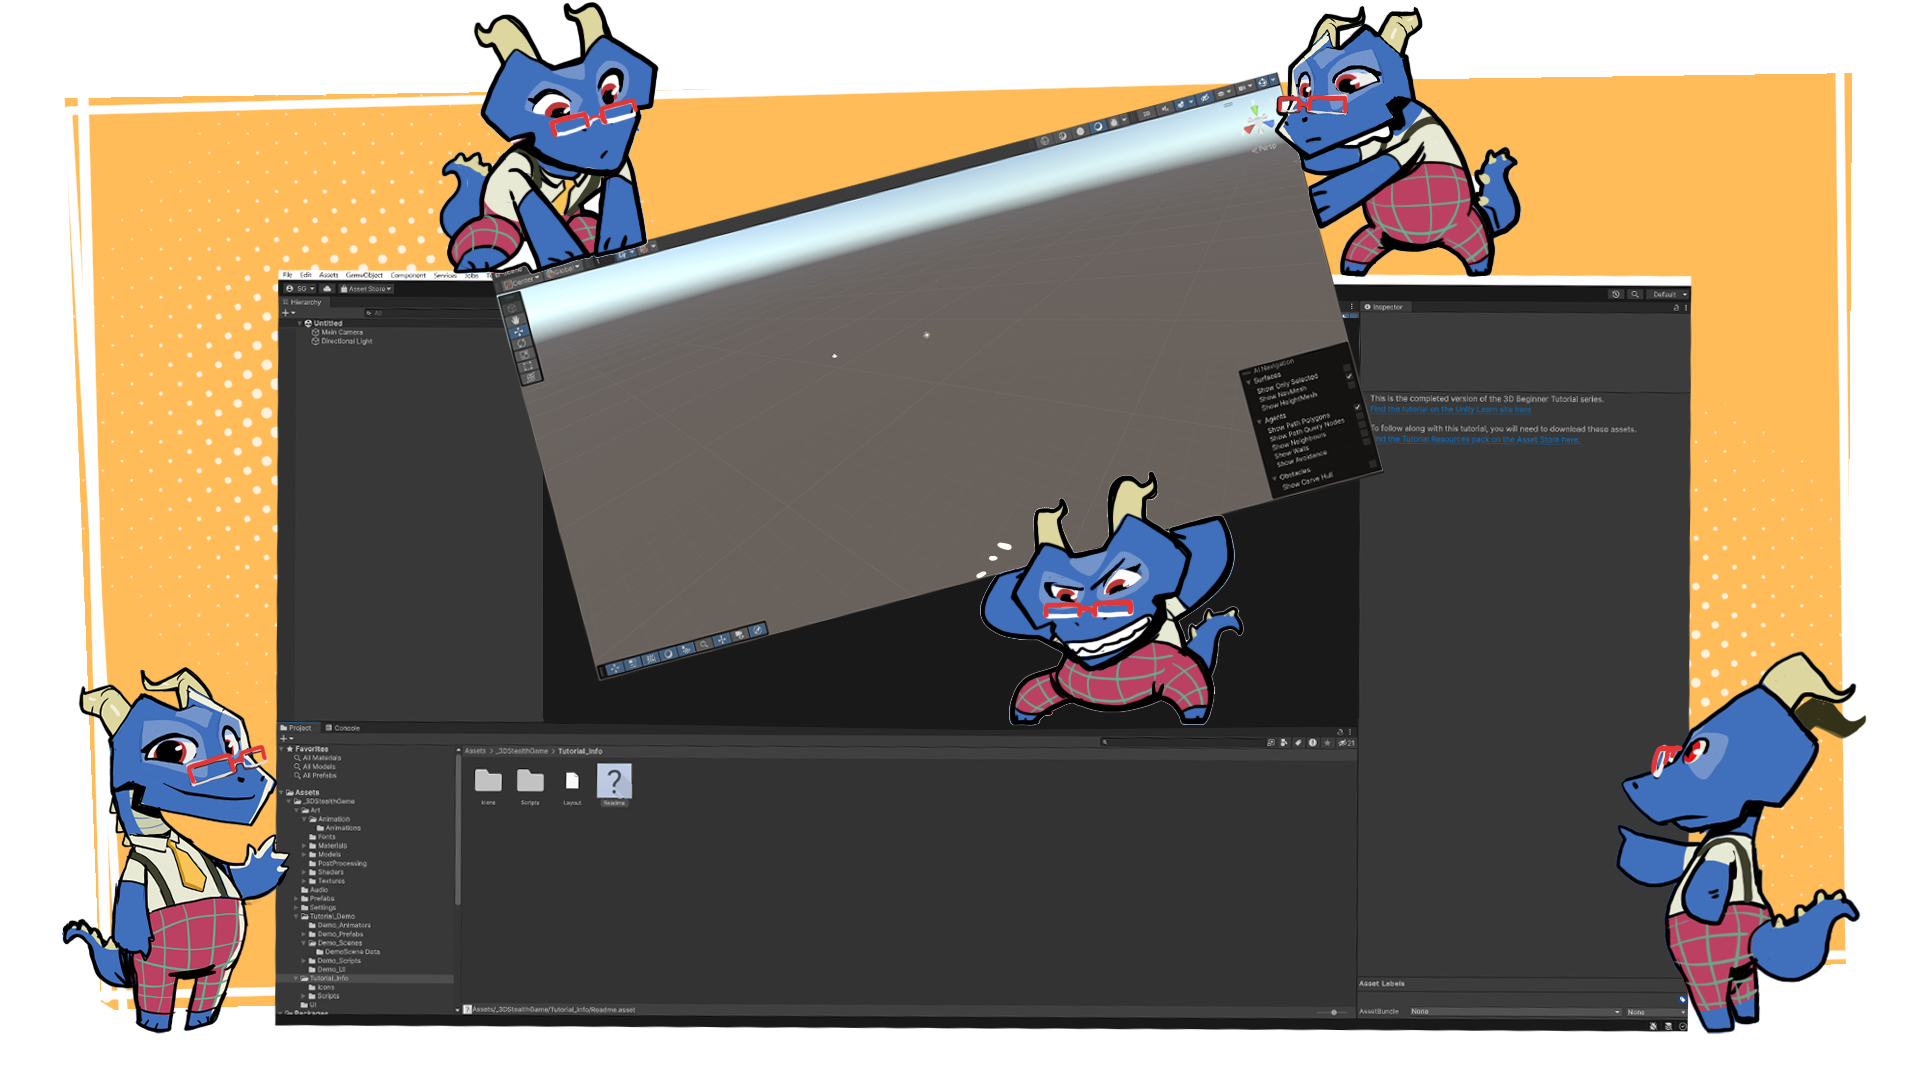
The Unity Editor includes a variety of tools and features for creating your project. Many of these have their own dedicated windows for editing and adjusting specific properties. That’s why it’s important to set up your workspace in a way that’s both efficient and visually clear, with the windows most relevant to your project.
The main Unity Editor interface consists of the following four windows:
- Hierarchy window: Lists all GameObjects that exist in the current scene.
- Scene window: Main work area.
- Inspector window: Lists the properties of a selected GameObject or asset.
- Project window: Lists all the assets, scenes, and scripts contained in your project.
The best layout for the Editor depends on what you’re doing and your own personal preferences. For example:
- If you’re spending a lot of time configuring components, you might want to have both the Inspector and Hierarchy windows visible.
- If you’re doing a lot of environment design, you might want to make the Scene view as large as possible.
If you’re editing the user interface (UI), you’ll want to make sure the Game view is visible at all times.
Change to a different Layout
You can use the Layout dropdown menu, found at the upper-right corner of the Editor window, to change to a different layout setting of the Editor. Unity offers several premade layouts to choose from. You can also create and save your own custom layouts, or import external ones into your project.
Docking and undocking windows
You can rearrange the layout of the Editor windows by clicking and dragging the title tabs of any window. This lets you undock it to use as a standalone window or dock it to another section of the Editor.
If you follow our learning content, one common layout we use and recommend is selecting the Tall Layout and then docking the Game window under the Scene view.
Another commonly used and recommended layout is the following setup:
- Open the Layout dropdown and select 2 by 3.
- Select the Project window and drag and dock it below the Hierarchy window, then drag it up so that it’s about the same height as the Hierarchy window.
In the Project window, select the More (⋮) menu in the upper-right corner and select One Column Layout.
2. Organize your project files
Unity projects can quickly become overwhelming as they grow—with more features comes a growing number of assets, which can make navigation and project management more difficult. Fortunately, with a little purposeful organization, you can keep things clean, efficient, and easy to manage.
In Unity, you’ll primarily interact with two areas for organizing your assets:
- The Project window: Here you’ll find all the available assets in your project inside the Assets folder.
- The Hierarchy window: Here you’ll find the assets used in your current scene. Once an asset is placed in the scene, it's referred to as a GameObject.
How to organize assets in the Assets folder
Unity assets are not file path dependent—meaning you can move files and folders within the Assets directory without breaking references between them or with GameObjects placed in a scene. To create a new folder:
1. In the Project window, right-click and select Create > Folder.
2. Give the folder a descriptive name that will reference what it will contain—for example, name it “Scripts” if it will hold your script files.
3. Drag and drop the desired assets into the new folder.
You can also nest folders inside one another to build more layers of organization.
How to organize GameObjects in the Hierarchy
As scenes get more complex, the Hierarchy window can become cluttered with a long list of GameObjects. You can use Empty GameObjects as containers to group related items and improve organization.
1. In the Hierarchy window, right-click and select Create Empty.
2. With the new GameObject selected, at the top of the Inspector window, rename it to reflect what it will group (for example, Environment, Enemies, UI).
3. Even though empty GameObjects have no physical presence in the scene, it's good practice to position them meaningfully:
- If the child GameObjects are scattered all around the scene, reset the Transform component’s Position property values to (X = 0, Y = 0, and Z = 0).
- If the child GameObjects are located at a particular area, position the parent near the group’s center or pivot.
4. Select all the GameObjects you want to group using Shift or Ctrl (macOS: Cmd) for individual selection, then drag them onto the empty parent.
Tip: Instead of creating an empty GameObject first, you can also select the GameObjects you want to group, then right-click and selecet Create Empty Parent to group them instantly.
3. Install a package via the Package Manager
A package is a container that stores various types of features or assets, such as:
- Editor tools and libraries, such as a text editor, an animation viewer, or test frameworks.
- Runtime tools and libraries, such as the Physics API or a Graphics pipeline.
- Asset collections, such as Textures or animations.
- Project templates to share common project types with others.
Packages deliver a wide range of enhancements to Unity through the Package Manager. To help find and use these packages, the Package Manager window provides collections of packages that you can use together, called feature sets.
To install a package via the Package Manager, follow these instructions:
1. Open your Unity project.
2. From the main menu, select Window > Package Management > Package Manager.
3. Browse the Unity Registry section (default view) and use the search bar to find the package that you want to install.
4. When you’ve found your required package, select Install to install it in your Unity project.
4. Update a package in your Unity project
To update a package in your Unity project, follow these instructions:
1. Open the Unity project.
2. From the main menu, select Window > Package Management > Package Manager.
3. In the leftmost panel of the Package Manager window, under the In Project tab, select Updates.
This section lists all the packages that are currently in your Unity project and have available updates.
4. Select the relevant package from the list available, then select Update to [version number].
5. Import assets to your project
There are a number of ways to import assets into your project: from the Asset Store, from a local asset package, or by importing individual assets from your computer.
From the Asset Store
To import a package from the Asset Store, follow these instructions:
1. Open the project in the Unity Editor.
2. In your internet browser, go to the Asset Store and find the package you want to download.
3. Select Add to My Assets.
4. If a Terms of Service window appears, select Accept to agree.
5. In the completion dialog, select Open in Unity.
6. Once the package has opened in the Package Manager window, select the Download button.
If you previously downloaded the assets, you will go straight to the next step in this process.
7. In the Package manager window, select the Import button.
8. A dialog will warn you about overwriting your project settings — if you haven't customized your project settings, you can ignore this warning and select Import. If you have customized your project settings, select New Project.
9. Another dialog might warn you that there are Package Manager dependencies — if so, select Install/Upgrade.
The Import Unity Package window will open, listing the contents of the package. In most cases, you’ll want to keep all of the contents of the asset package selected.
10. In the lower-right corner of the window, select Import.
The assets will be added to the Assets folder of your Unity project. When this process is completed, close the Package Manager window.
Note: This is the basic set-up process. If you’re importing assets into a complicated project, you can review Download and import an asset package in the Unity Manual for more detailed instructions.
Import a local asset package
To import a local asset package, you can review Import local Asset packages in the Unity Manual for a detailed overview of the options available in this process.
Import individual assets from your computer
To import individual assets from your computer, you can review Introduction to importing assets in the Asset workflow section of the Unity Manual for a detailed overview of importing files into Unity projects.
6. Next steps
If you're learning Unity for the first time, the best place to start is the Get Started with Unity in-Editor tutorial direct from the Unity Hub! This guided journey will take you through the basics of navigating in the Editor and give you some hands-on experience as you create your first 3D scene.
Then, work through the Essentials Pathway. Here you’ll learn the foundational skills of creating with Unity, such as 2D/3D building blocks, programming, audio, and more, providing you with the essential knowledge you’ll need to bring your creative ideas to life.