[iOS] Setting up your IDE (Xcode) for AR development
Tutorial
Beginner
+10XP
30 mins
195
Unity Technologies
![[iOS] Setting up your IDE (Xcode) for AR development](https://connect-mediagw.unity.com/h1/20201103/learn/images/475139b8-238f-49f6-8418-40cc087f7386_98.png)
In this tutorial, you will learn how to set up XCode and deploy your Unity project for mobile AR development.
Languages available:
1. Overview
In this tutorial, you will set up your IDE environment (XCode) to develop iOS mobile applications with Unity and export your build. You will download the environment and learn how to open your Unity project file with the IDE. Finally, you will export your project to your device and see your camera view.
Note: You must have a Mac in order to complete this tutorial.
2. Install XCode
In this section, you will install XCode. NOTE: XCode allows us to build to iOS devices. This guide uses XCode version 11.6 in macOS Catalina. You must use a Mac to publish to iOS.
1. Go to https://developer.apple.com/xcode/ or open XCode from the App Store
a. Follow the installation instructions.
b. For more information, visit the official Apple XCode guide here.
c. Watch this video for more information.
3. Connect iOS Device to Your Computer
Connect your device to your computer to deploy your project
- NOTE: These steps may vary based on the type of iOS device you are using
1. Connect your iOS device to your computer’s USB or USB-C port.
a. If your computer does not automatically detect your iOS device, please check the following
sites:
i. If your computer doesn't recognize your iPhone, iPad, or iPod
ii. Unable to Sync iPhone or iPad with macOS Catalina? Check these tips
4. Save the Unity Project Build
Save your Unity project to import to XCode
1. Go back to the Unity Editor
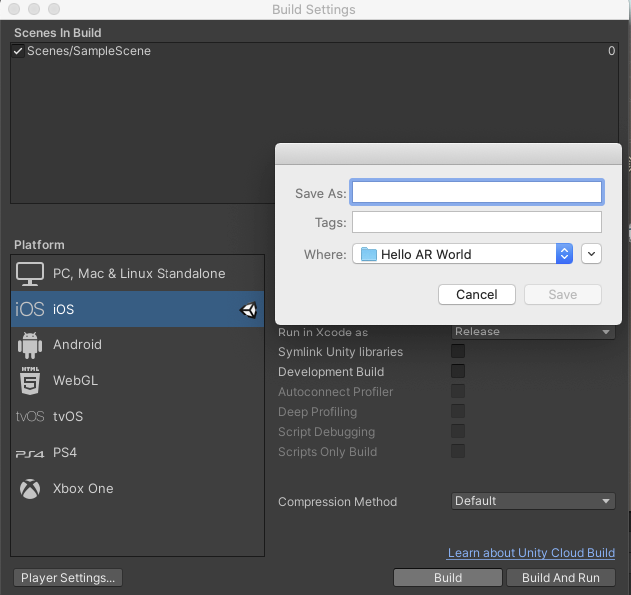
2. Click on File > Build Settings > Build
3. Enter a name for the Build. In this case, “HelloARWorld” is entered
4. Save the Build in the default location
5. Click Save (Figure 1)
5. Run the Unity-iPhone.xcodeproj File
Open your Unity project in XCode
Run the Unity-iPhone.xcodeproj File
Locate and double-click on the Unity-iPhone.xcodeproj file. (Figure 2)
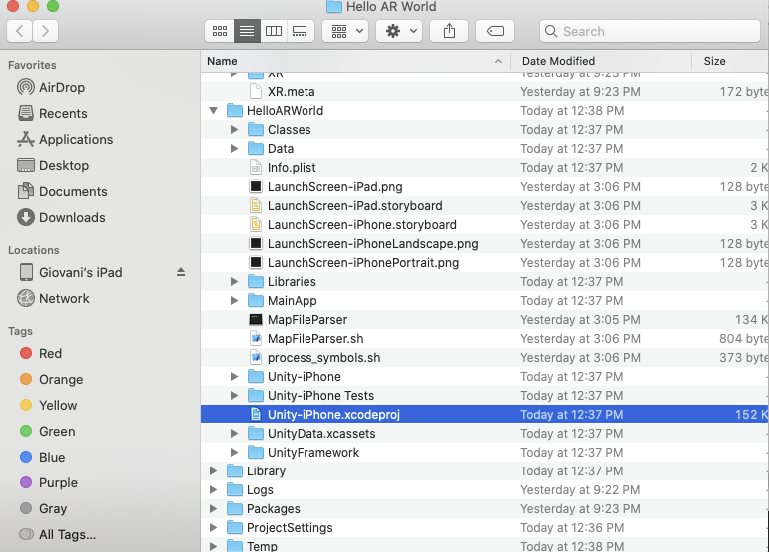
- NOTE: the file will open in XCode
6. Configure XCode Developer Settings
Set up XCode settings and register your developer account
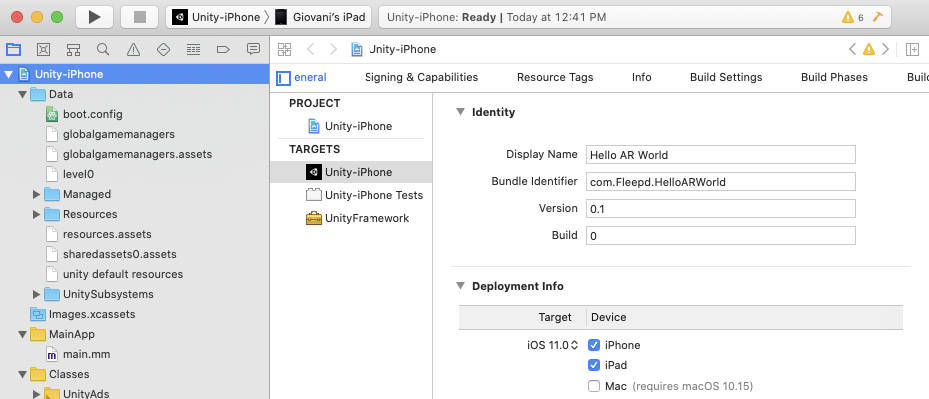
1. Click on Unity-iPhone (Figure 3)
2. If you do not have this already, you may need to add a new account in XCode.
3. Go to XCode > Preferences > Click on the Accounts tab > Click on the + button (Figure 4)
- Note: For more information on setting up your account, view this Unity tutorial here.
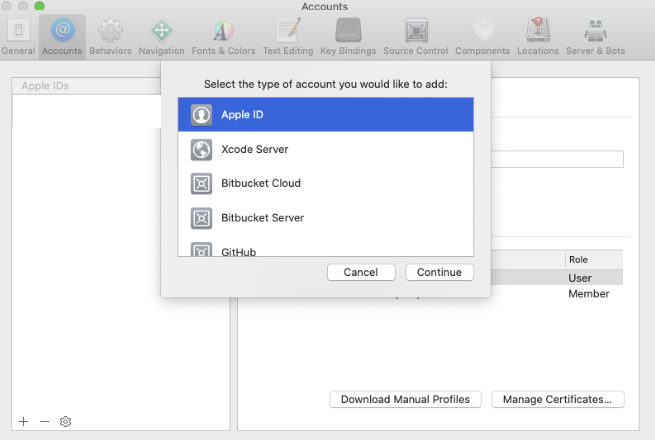
4. Select Apple ID then click on Continue
5. Enter the credential/login details
6. Go back to the Unity-iPhone file
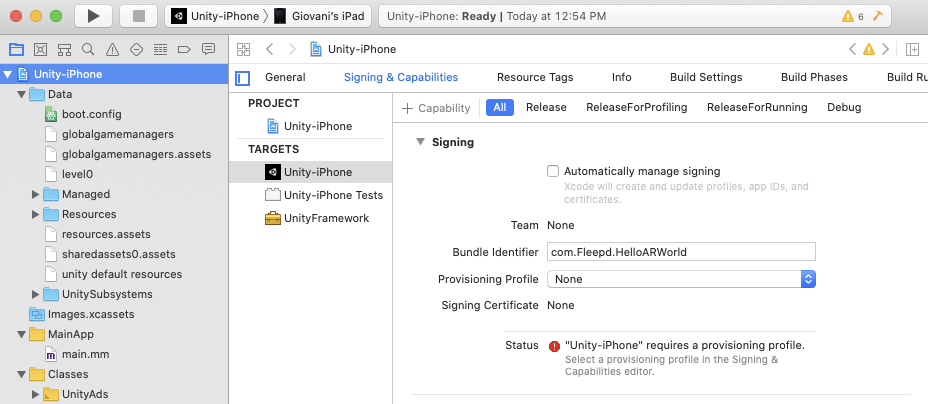
7. Click on Signing and Capabilities
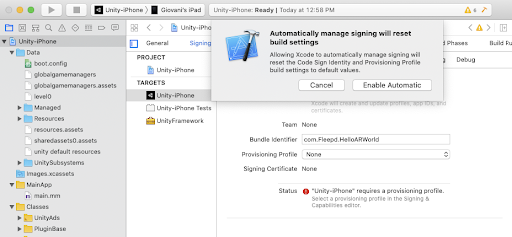
8. Check the automatically manage signing checkbox (Figure 5)
9. In the window that comes up next, click on the Enable Automatic button (Figure 6)
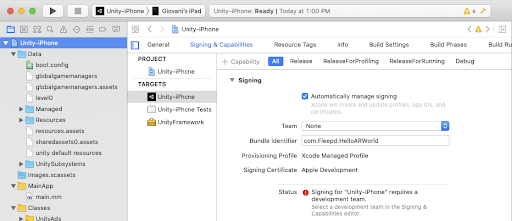
10. Click on the drop-down menu next to Team.
11. Select a team (Figure 7)
- NOTE: This is usually the name of the Apple ID account that you added earlier.
7. Deploy Project to Device
Export your build to your device and see the camera view
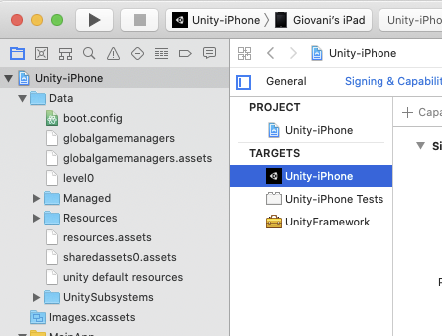
1. Lastly, click on the Play button to build the app to your device (Figure 8)
2. If everything goes well, you will see some of the following windows: (Figure 9)

3. IMPORTANT: if you see this window, unlock your iOS device (Figure 10)

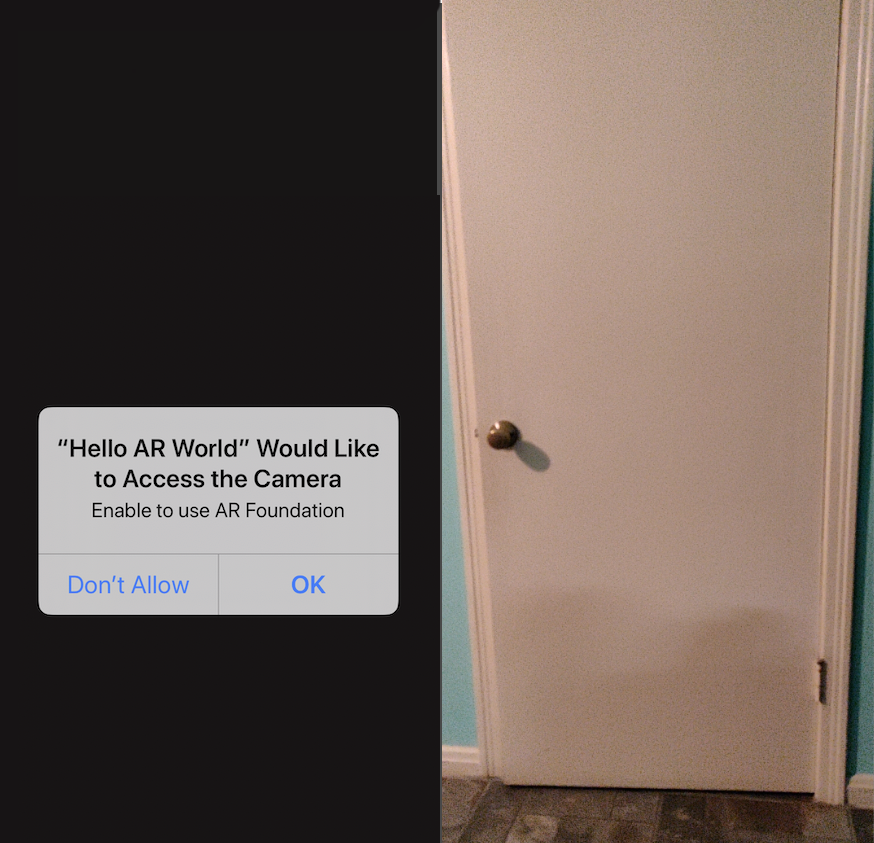
4. NOTE: If you do not see any errors, the Hello AR World application will run on your device. Your device may ask you to allow the application to Access the Camera. Tap on OK.
5. You will now see a view of your environment. Hello AR World! (Figure 11)
8. Conclusion
You have learned how to download an IDE, set up settings to enable development, and deployed your project to see your camera view.