
Sound Effects Scripting
Tutorial
Beginner
+10XP
45 mins
(125)
Unity Technologies
The Unity Editor enables you with the tools to work with scripts in the C# programming language. You can easily incorporate and attach custom script components onto GameObjects, which can control their functionality in any manner of customization.
In this tutorial, you will learn how to script with basic C# commands to trigger and control audio sound effects in your Scene, as well as customize certain audio properties such as incorporating conditional statements and elements of randomization.
You will learn how to use C# scripting to trigger and customize GameObject and sound features including:
- Scripting a character controller to shoot cube projectiles.
- Scripting a sound effect to play when shooting projectiles.
- Scripting a smashing sound to play, when blocks are hit.
- Scripting variances in pitch, by incorporating randomness.
- Scripting a conditional statement to play different sound clips, depending on how hard the blocks are hit.
By the end of the tutorial, you will have a solid understanding of how scripting with audio works, and how easy it is to create customized audio events.
Resources
Languages available:
1. Getting Set Up
1. Create a new project using the Universal Render Pipeline (URP) Project Template from the Unity Hub.
2. Install the sample Assets for this project by first downloading the Unity Package file, located in the Tutorial Materials tab above. Double click the .unitypackage file named SoundFX_Scripting_Tutorial.unitypackage, and import its contents into your Project.
We will demonstrate with the example Assets provided in a sample Scene, containing a First Person Controller and SmashBoxes Prefabs. The character controller will be able to launch a cube projectile, knocking down a stack of blocks. The GameObjects will contain audio sound effects that will be triggered by code.
We will be scripting with the C# programming language, easily accomplished through the use of an external code editor. Code editors are software programs that are specifically designed to help assist developers in writing code. There are many different third-party code editors available, however in this tutorial we will be using the Visual Studio Code Integrated Development Environment (IDE), which is the default code editor included when installing Unity in either the Mac or Windows operating system from the Unity Hub.
3. To ensure that the default code editor is functioning with Unity, verify that the
External Script Editor is listed, by selecting from the top menu drop-down:
Unity > Preferences, and selecting External Tools from the left-hand menu.
4. Open the Visual Studio code editor, or your preferred code editor on your machine to make sure that it is properly installed and running.
5. Open the example Scene named Sound_Effects_Scripting_Scene, contained within the Scenes folder.
The example Scene contains a character controller set up to launch projectiles from a GameObject named Launch_Origin. In the Hierarchy window, expand the FPSController GameObject, and then expand the FirstPersonCharacter GameObject to reveal Launch_Origin.
6. Add an Audio Source component to the Launch_Origin GameObject. Select the
Add Component button in the Inspector, type audio in the search field, and then select Audio Source. We will access this component later using code.
2. Scripting The Character Controller To Shoot Projectiles
Now that we are all set up, we are ready to write code. We will begin by creating a C# script, and editing it in the Visual Studio code editor.
1. Create a new C# script inside the Scripts folder by either selecting the + button at the top-left of the Project window, or by right-clicking in a Project window’s folder, and then selecting: Create > C# Script.
2. Rename the C# script to “LaunchProjectile” in the Project window.
3. Double-click the LaunchProjectile.cs script in the Project window to open it in the Visual Studio code editor.
4. Starting on line 7 beneath the Class opening brace, press Enter/Return to start writing code on a new line. Let’s define a public variable of the type: GameObject, and we’ll name it projectile. On the next line, let’s define another public variable of the type float, and we’ll call it launchVelocity. We’ll assign it to have the value of 2000. Type in the code to appear as:
public GameObject projectile;
public float launchVelocity = 2000f;
Note that the letter f after the float variable’s numeric value is a syntax requirement when working with Unity. It simply keeps the floating point number type value to remain as a float, instead of confusing C#’s default floating point type as a double.
We will give our script some logic of course, however at this point, let’s save it, and attach the script to a GameObject in our Scene so we can understand how it is structured.
5. Save your script in the code editor by selecting from the top menu drop-down: File > Save, or by using the keyboard shortcut Cmd+S (Mac), or Ctrl+S (Windows).
6. Switch back to the Unity Editor. Select the LaunchProjectile.cs script in the Project window, and drag to attach it to the Launch_Origin GameObject in the Hierarchy window.
You are able to see the script’s public variable fields within the script component shown in the Inspector window. You are able to modify their values from the Unity Editor. If you wish to keep the values hidden, simply change their variable assignment from public to private in the C# script.
7. To assign the projectile_cube to the C# script’s Projectile field, first select the projectile_cube Prefab within the Prefabs folder in the Project window, and then drag / drop it into the LaunchProjectile (Script) Projectile field in the Inspector.
We will now give our script some logic.
8. Switch back to the C# script still open in the code editor. Within the Update method, on the line after its opening brace, let’s create a conditional statement, sensing whether the mouse button is pressed. Type in the code:
// Update is called once per frame
void Update()
   {
         if (Input.GetButtonDown("Fire1"))
{9. The Fire1 command has been established with the UnityEngine.Input API. Fire1 corresponds to the left mouse button. Depending on your machine’s specific input controls, the Fire1 command may also correspond to either the left Control key on the keyboard, or the Joystick button 0. To check this specific input, or refer to other input commands, select from the Unity Editor’s top menu drop-down: Edit > Project Settings, and then select the Input Manager on the left column. Ensure that the left mouse button is active for either the Positive Button, or the Alt Positive Button’s fields.
10. With the C# script open in the code editor, we will script some logic. Inside the conditional if statement braces, write the following code.
if (Input.GetButtonDown("Fire1"))
  {
    GameObject LaunchCube = Instantiate(projectile,
    transform.position, transform.rotation) as GameObject;

    LaunchCube.GetComponent<Rigidbody>().AddRelativeForce(new Vector3(0, 0,
    launchVelocity));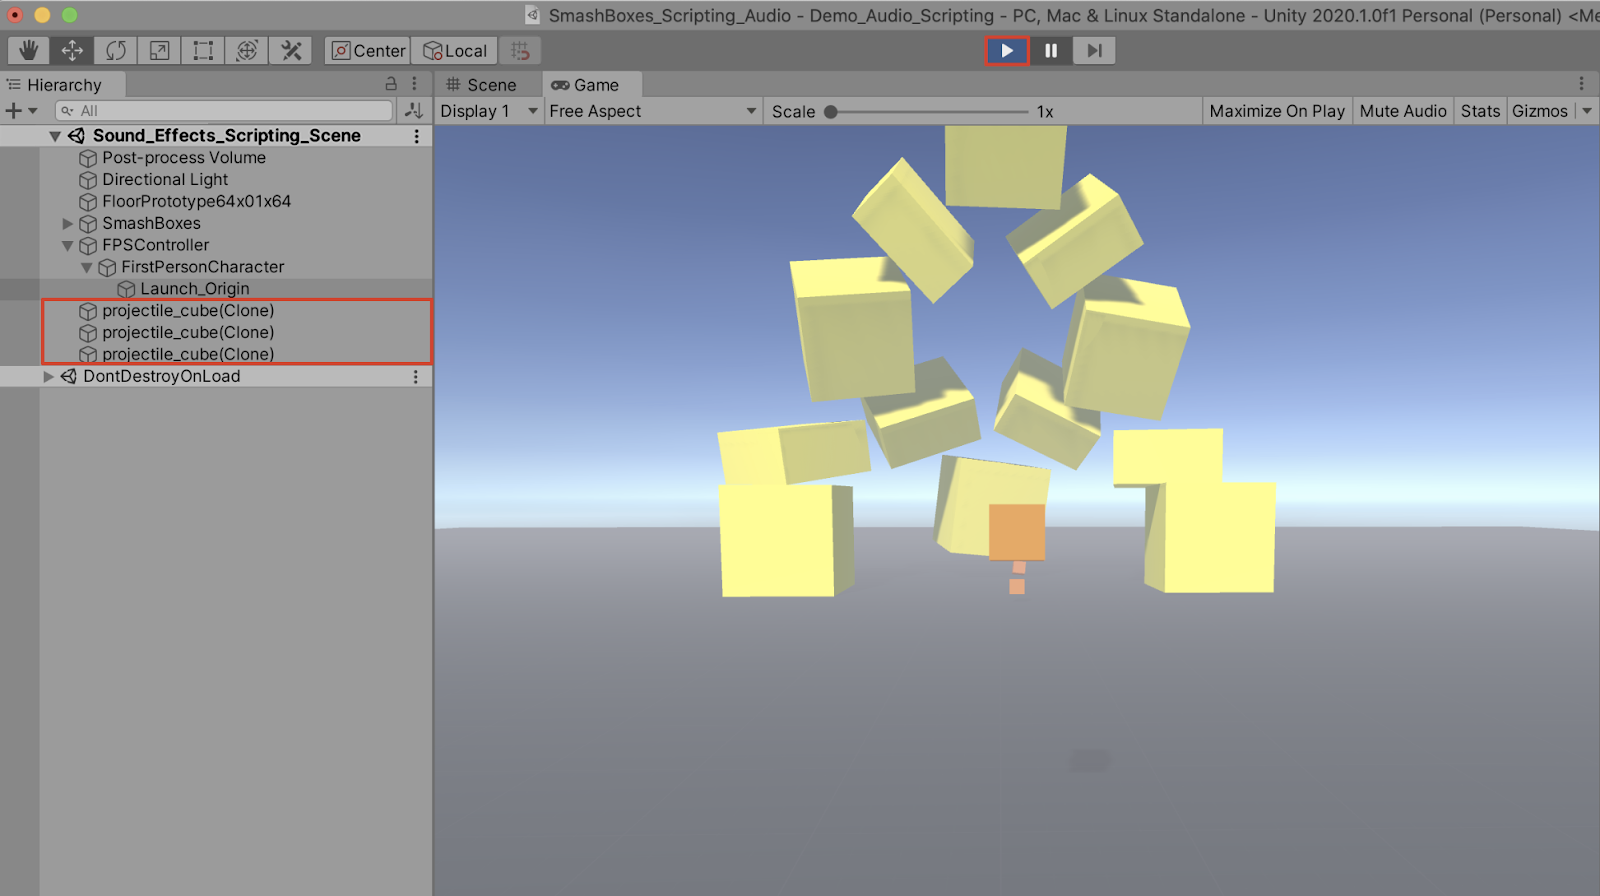
}11. Save the C# script. Switch back to the Unity Editor, and enter Play Mode to test your game. Activate the left mouse button or alternate Fire1 input button during Play Mode to successfully launch the projectiles.
3. Scripting the Projectile Sound Effect
Let’s now trigger our Launch_Origin GameObject to play a sound effect whenever a projectile is launched.
1. Create two more class variables. Declare a private variable of the type AudioSource, and name it source. Next, declare another public variable of the type AudioClip, and name it launchSound. Within the Start braces, we will initialize the AudioSource component by adding the following code to the LaunchProjectile.cs script.
public class LaunchProjectile : MonoBehaviour
{
   public GameObject projectile;
   public float launchVelocity = 2000f;
   private AudioSource source;
   public AudioClip launchSound;

   // Start is called before the first frame update
   void Start()
      {
         source = GetComponent<AudioSource>();
}2. Add a new line within the if statement. Script the PlayOneShot() method to play the audio clip. Pass in two arguments, the launchSound variable, and the playback volume.
if (Input.GetButtonDown("Fire1"))
   {
      source.PlayOneShot(launchSound, 1.0f);
      GameObject LaunchCube = Instantiate(projectile, transform.position,
      transform.rotation) as GameObject;

      LaunchCube.GetComponent<Rigidbody>().AddRelativeForce(new Vector3
      (0, 0, launchVelocity));
}3. Save your script in the code editor by selecting from the top menu drop-down: File > Save, or by using the keyboard shortcut Cmd+S (Mac), or Ctrl+S (Windows).
4. Switch to the Unity Editor. With the Launch_Origin GameObject selected in the Hierarchy window, assign an audio clip to its Launch Projectile (Script) component. Select an audio clip within the SoundFX folder in the Project window, and then drag / drop it into the newly created public variable Launch Sound field in the Inspector.
5. Enter Play Mode to test your game. Activate the left mouse button or alternate Fire1 input button during Play Mode to launch the projectiles. You should hear the sound effect play each time a projectile is launched.
4. Scripting Randomness to the Volume
The sound effect volume is set to play at 1.0 each time a projectile is launched. Let’s incorporate some randomness in our script, so that the sound clip plays back at a random volume level.
1. Create two more class variables. Declare two public variables of the type float, and name them lowVolRange and highVolRange. Next, set their values to be between 0.5 and 1.0. You can always adjust this range later on from within the Unity Editor.
public class LaunchProjectile : MonoBehaviour
{

  public GameObject projectile;
  public float launchVelocity = 2000f;

  private AudioSource source;
  public AudioClip launchSound;

  public float lowVolRange = 0.5f;
public float highVolRange = 1.0f;2. Within the if statement, declare a local variable of the type float, and name it vol. Call the Random.Range() method, passing in the lowVolRange and highVolRange arguments. Modify the next line’s PlayOneShot() method, replacing 1.0f with the local vol variable in the second argument.
void Update()
 {
     if (Input.GetButtonDown("Fire1"))
       {
       float vol = Random.Range(lowVolRange, highVolRange);
       source.PlayOneShot(launchSound, vol);

       GameObject LaunchCube = Instantiate(projectile,
       transform.position, transform.rotation) as GameObject;

       LaunchCube.GetComponent<Rigidbody>().AddRelativeForce(new
       Vector3(0, 0, launchVelocity));
}3. Save the script, switch back to the Unity Editor, and enter Play Mode to test your game. Activate the left mouse button or alternate Fire1 input button during Play Mode to launch the projectiles. You should be able to hear the random differences in volume.
The completed script is coded as:
using System.Collections;
using System.Collections.Generic;
using UnityEngine;

public class LaunchProjectile : MonoBehaviour
{

   public GameObject projectile;
   public float launchVelocity = 2000f;
   private AudioSource source;
   public AudioClip launchSound;
   public float lowVolRange = 0.5f;
   public float highVolRange = 1.0f;


   void Start()
   {
         source = GetComponent<AudioSource>();
   }

void Update()
   {
         if (Input.GetButtonDown("Fire1"))
    {
         float vol = Random.Range(lowVolRange, highVolRange);
         source.PlayOneShot(launchSound, vol);

         GameObject LaunchCube = Instantiate(projectile,
         transform.position, transform.rotation) as GameObject;

          LaunchCube.GetComponent<Rigidbody>().AddRelativeForce(new
          Vector3(0, 0, launchVelocity));
    }
  }
}5. Scripting a Crash Sound
Let’s establish a crashing sound when the boxes are hit.
1. Expand the SmashBoxes GameObject Prefab in the Hierarchy window, and select all of its contents by first selecting the top Cube GameObject, holding down the Shift key, and then selecting the bottom Platform GameObject. They should all be selected in blue. Next, select the Add Component button in the Inspector, type audio in the search field, and then select Audio Source.
2. Create a new C# script inside the Scripts folder by either selecting the + Button at the top-left of the Project window, or by right-clicking in a Project window’s folder, and then selecting: Create > C# Script. Rename it to “CrashSound”.
3. With the containing SmashBoxes Prefab GameObjects selected in the Hierarchy window, select the Add Component button in the Inspector, type crash in the search field, and then select Crash Sound.
4. Double click on the newly created CrashSound C# script in the Project window to open it up in the code editor. Just as before, declare our two class variables. Again, within the Start() method’s braces, activate our Audio Source component.
public class CrashSound : MonoBehaviour
{
   private AudioSource source;

   public AudioClip crashSound;

// Start is called before the first frame update

void Start()
   {
      source = GetComponent<AudioSource>();
}5. For this script, we won’t need the Update() method. Go ahead and delete it. Instead, we will be using the OnCollisionEnter() method to trigger a sound effect upon colliding with the GameObject. Within the OnCollisionEnter method, call the PlayOneShot method, passing in the crashSound and volume level arguments.
public class CrashSound : MonoBehaviour
{

   private AudioSource source;
   public AudioClip crashSound;

void Start()
   {
      source = GetComponent<AudioSource>();
   }

void OnCollisionEnter (Collision collide)
   {
      source.PlayOneShot(crashSound, 1.0f);
   }
}6. Save the script, and switch back to the Unity Editor. With the containing SmashBoxes Prefab GameObjects selected in the Hierarchy window, assign an audio clip to its Crash Sound (Script) component. First select an audio clip within the SoundFX folder in the Project window, and then drag / drop it into the newly created public variable Crash Sound field in the Inspector.
7. Enter Play Mode to test your game. Launch projectiles at the SmashBoxes. You should be able to hear the sound effect play upon colliding with the boxes.
6. Adding Complexity by Scripting Conditional Logic
1. As before, we can add some randomness to our audio clip. Instead of randomizing volume levels, let’s play back our sound clip with a variance in pitch. Create two class variables of the type float, with the names lowPitchRange and highPitchRange. Assign them a range between 0.75 and 1.25. The range can always be adjusted later within the Unity Editor. Within the OnCollisionEnter method, add the line to randomize the pitch change.
public class CrashSound : MonoBehaviour
{

   private AudioSource source;
   public AudioClip crashSound;
   public float lowPitchRange = 0.75f;
   public float highPitchRange = 1.25f;

   void Start()
      {
         source = GetComponent<AudioSource>();
      }

   void OnCollisionEnter (Collision collide)
      {
         source.PlayOneShot(crashSound, 1.0f);
         source.pitch = Random.Range(lowPitchRange,
         highPitchRange);
      }
}
Let’s script additional functionality to trigger two separate sound clips, depending on the impact velocity of the projectile. In addition, we will set the volume of the clip to be in proportion to how hard the projectile hits the box.
Instead of using a single public AudioClip crashSound variable, we will instead define two separate class variables representing two sound effect variants.
2. Remove the single public AudioClip crashSound variable.
3. Create two new public variables of the type AudioClip, and label them soundVariant1 and soundVariant2. Create two public variables of the type float, and name them influenceOfMagnitude and velocityLimit. Set their values to .01f and 15f.
4. Since we will invoke the source.PlayOneShot method to use our newly created sound effect variants, we will need to modify our code. Remove the line: source.PlayOneShot(crashSound, 1.0f);. We will soon add it again inside a conditional if statement.
5. Within the OnCollisionEnter method, script a new local variable named hitVol, and set it equal to the magnitude of the collision, multiplied by the influenceOfMagnitude. Next, script a conditional statement to be: If the magnitude of the collision is less than the velocityLimit, then play the soundVariant1 clip by invoking the PlayOneShot method, and passing in the soundVariant1 and hitVol arguments. Else, invoke the PlayOneShot method, passing in the soundVariant2 clip and hitVol arguments. The completed script is coded as:
using System.Collections;
using System.Collections.Generic;
using UnityEngine;


public class CrashSound : MonoBehaviour
{

   private AudioSource source;
   public AudioClip soundVariant1;
   public AudioClip soundVariant2;
   public float lowPitchRange = 0.75f;
   public float highPitchRange = 1.25f;
   public float influenceOfMagnitude = .01f;
   public float velocityLimit = 15f;

void Start()
   {
      source = GetComponent<AudioSource>();
   }

void OnCollisionEnter (Collision collide)
   {
      source.pitch = Random.Range(lowPitchRange, highPitchRange);
      float hitVol = collide.relativeVelocity.magnitude *
      influenceOfMagnitude;

      if (collide.relativeVelocity.magnitude < velocityLimit)
         source.PlayOneShot(soundVariant1, hitVol);
      else
         source.PlayOneShot(soundVariant2, hitVol);
   }
}3. Save the script and switch back to the Unity Editor. Add the audio clips to both soundVariant1 and soundVariant2 fields, and test your game in Play Mode.
7. Next Steps
With practice, you can accomplish a wide range of additional functionality with audio and game design through scripting in C#. Experiment by creating your own customized scripts, and attaching them to GameObjects in your Scene. Practice creating additional variables, and utilize them by passing them through various method arguments. Trigger how different audio clips might interact with your environment, and adjust how they may be potentially played back with an element of randomness or variance. Go forth and script with confidence!