
State Machines in Visual Scripting
Tutorial
Beginner
+10XP
25 mins
50
Unity Technologies
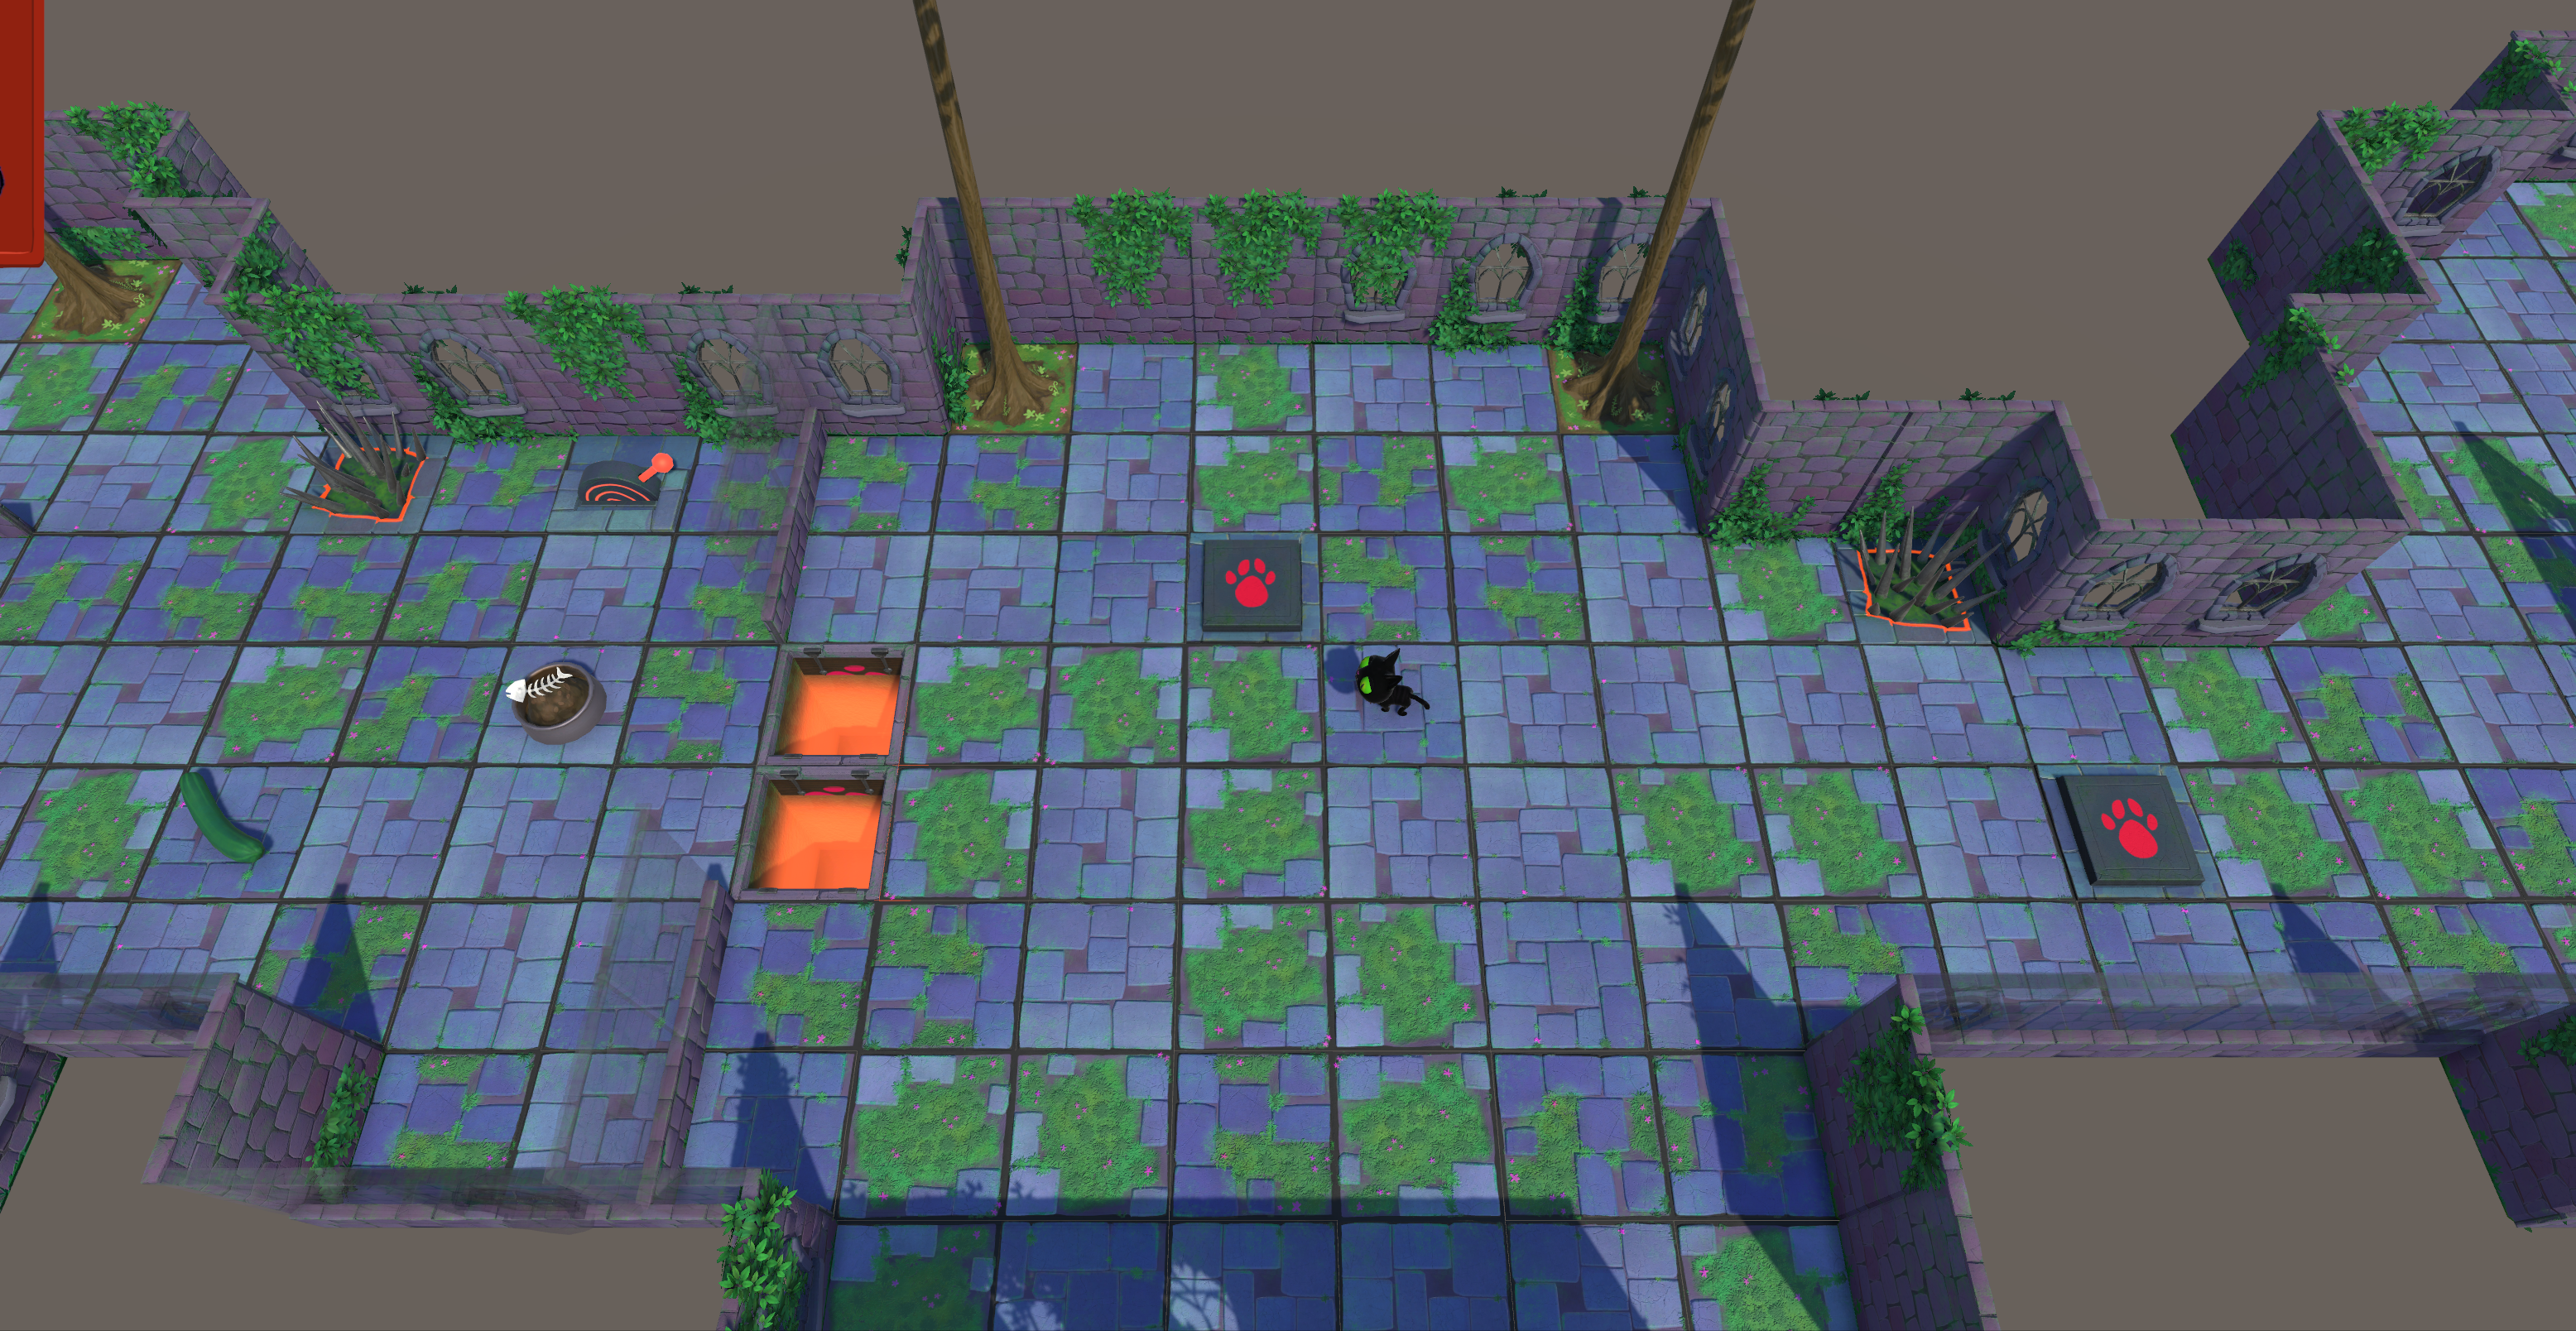
State Machines give you sophisticated control over the behavior of objects in your project. It allows you to give a GameObject different interchangeable statuses, such as Standing, Running, Fighting, and Hurt, each of which responds to different events under different circumstances. In this tutorial, you will build a State Machine for the trap door in Clive’s Crypt.
By the end of this tutorial, you’ll be able to:
- Distinguish a State Graph from a Script Graph.
- Build a new State Graph.
- Build Script Graphs for the states in a State Machine.
- Navigate among the various scripts in a State Machine.
- Given a desired result, devise and configure transitions in a State Graph.
- Interpret an existing complex visual script.
- Adapt an existing Script Graph for use in a State Machine.
Resources
Languages available:
1. Overview
In Visual Scripting, States are behaviors or statuses that you define for a GameObject. If you have used Animation State Machines with Animator Controllers, the concept behind Visual Scripting State Machines will be familiar. You can also think of states as interchangeable “personalities” — in each state, the GameObject acts differently and responds to different stimuli (such as events).
For example, a door can be Open, Locked, or Unlocked; a player character in a game can be Standing, Running, Fighting, or Hurt. In each case, you want the GameObject to do something different when you press a button or key, and you want to change states only under certain conditions. Although it’s possible to program these situations using events, variables, and lots of If nodes, State Machines are much easier and more efficient.
In this tutorial, you’ll create a State Machine for a trap door with three States: Open, Closed, and Filled. Clive will use a lever to change the states between Open and Closed, and he will be able to make it Filled by pushing a crate into the hole beneath the doors.
In each state, the trap door will respond to a different set of events. For example, when the trap door’s state is Open, Clive won’t be able to enter the cell, but a crate will be able to enter and fall into the hole. But when the trap door is Closed or Filled, both Clive and any other moving object will be able to pass normally. Also, Clive will only be able to fill the hole in the Open state. A State Machine is ideal for managing these different sets of behaviors.
2. How State Machines Work
Here’s a quick tour of a State Machine to help you get familiar with its structure:
1. In the Hierarchy, select ObjectRoot > Trap Door.
2. In the Inspector, you will see a Script Machine and a State Machine. We provided the Script Machine so you could test the TrapDoorLever earlier. Disable the Script Machine by unchecking its checkbox and enable the State Machine.
3. Select the Edit Graph button. You are now viewing a State Graph, and the name of the window has changed to State Graph. State Graphs contain states and transitions instead of nodes.
This State Graph contains one Script State named Open. The text on this node indicates the events inside it.
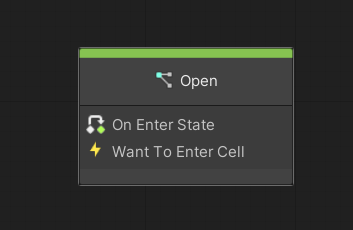
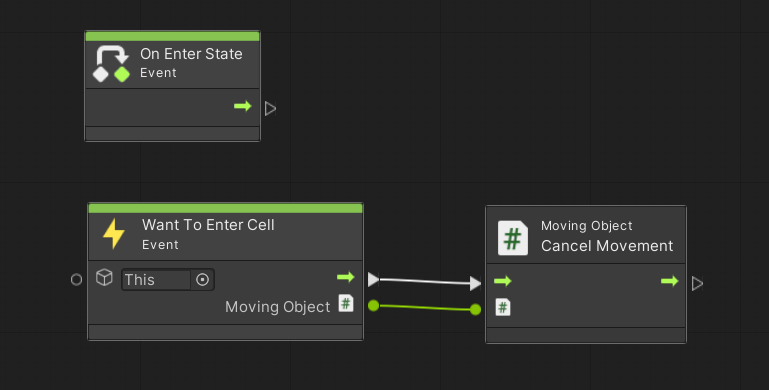
4. Double-click the Open state to open its Script Graph. This is like the graphs you have created before. You’ll see an On Enter State node that initiates a flow to animate the trap door, and a Want To Enter Cell node that leads to Cancel Movement. You will complete this script later.
5. At the top left of the menu bar of the Script Graph window, to the left of Zoom, select TrapDoor to return to the State Graph.
6. Right-click in the Graph window of the State Graph and select Create Script State. A new Script State will appear.
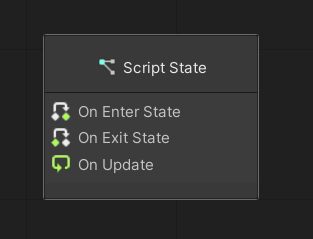
7. In the Graph Inspector (can be toggled on/off in the menu bar of the State Graph window), change the Title of this Script State to Closed.
8. Double-click the Closed state to open its Script Graph. By default, the Script Graph includes three events. Delete On Update and On Exit State. You will come back and edit On Enter State later.
9. At the top left of the menu of the Script Graph window, select TrapDoor to return again to the State Graph.
10. Right-click the Closed state and select Duplicate.
11. In the Graph Inspector, change the Title of this Script State to Filled.
Your State Graph should look like the image below.
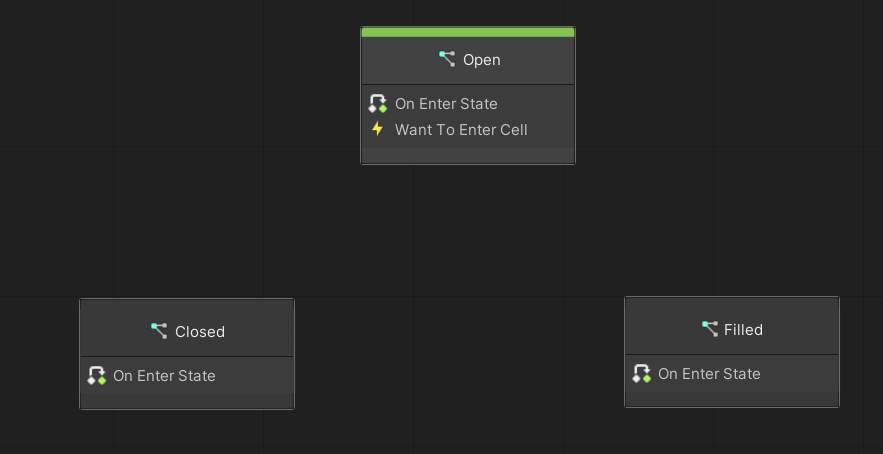
You will define the behaviors in each state by editing their Script Graphs.
3. Script the Open state
The Open state is the most complex in this State Graph. Let’s begin by editing the two existing flows, which will both be familiar to you.
On Enter State
On Enter State runs once each time this state is entered. What happens when the state changes to Open? The trap door opens, of course!
Make that happen using the AnimAndFX subgraph. For the TrapDoor GameObject’s animation, the parameter name is Switched, and an input of True will play the opening animation.
Want To Enter Cell
The existing flow here is just a locked door with no way to open it. Instead, this flow must prevent Clive from entering the trap door when it is open, but allow the crate or any other object that can fall into the hole.
What can distinguish objects that can fall from objects that can’t? You can do this with an Object variable that we’ll call “CanFall”, which will only be created on the objects that can fall. Then you can check for the existence of this variable using the Has Variable node, which outputs a Boolean. (That’s a lot easier than adding a Boolean CanFall variable to every GameObject!)
Script this flow so that if the CanFall variable is not present (Has Variable outputs False), then Cancel Movement. This will stop Clive from falling into the hole.
If CanFall is present, then what? How will you script an object falling into the hole? You saw this effect in the first level of the game. Instead of repeating work that has already been done, let’s borrow a visual script from the first game level.
4. Take a trip to the Sample Scene
In the first level of the game, Clive has to push a crate into a hole in order to get the key. Let’s find that visual script and borrow it.
1. Save your work before leaving the current Scene.
2. In the Project window, navigate to Assets > UnityTechnologies > VisualScriptingTutorial > CompleteGame > Scenes and open the Sample scene.
3. In the Scene view, select the hole that Clive fills to get to the key. In the Hierarchy, you can see it is a child GameObject of ObjectRoot named Pit.
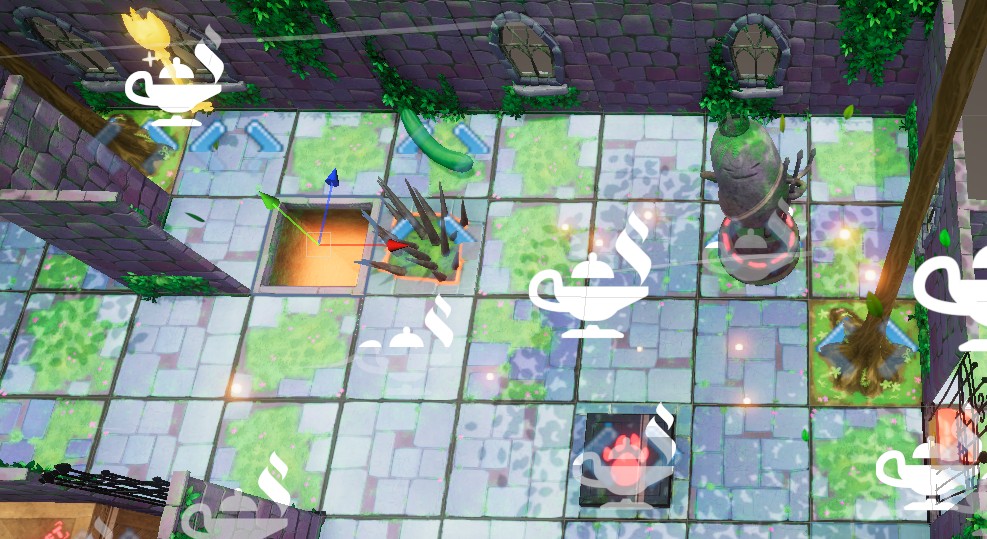
4. In the Inspector window, find the Script Machine component and select the Edit Graph button.
Interpret this script
This is a complex visual script, but you have enough expertise to understand it. Try reading the visual script before you read the summary below.
In summary:
- In the Want To Enter Cell flow, if CanFall is found, then a Graph variable named FallingMovingObject is set to a copy of the Moving Object that wants to enter the cell.
- The Update flow does the following in each frame:
- It looks at FallingMovingObject to see if it is Null.
- If it is Null, nothing happens this frame.
- If it is Not Null, then it gets that copy of the falling GameObject.
- It moves FallingMovingObject towards the bottom of the hole a very short distance.
- If the distance between the bottom of the hole and the object is effectively 0 (Less Or Equal 0.001), it sets FallingMovingObject back to Null to stop this flow from continuing to move the object in the next frame.
Given this information, see if you can follow this logic and make this Update flow work in the Open state. Check your work using the image in the next step as needed. Be sure to save your work with Ctrl+S (macOS: Cmd+S).
You won’t be able to test it quite yet — you must finish building the State Machine first. If you want to check your work, see Final_TrapDoorOpenState in the Samples subfolder.
When you are successful, mark the next step complete. If you get stuck, you can follow the instructions in the next step.
5. Apply the borrowed Update flow (instructions)
Follow these instructions to prepare to use this Update flow:
1. Copy all of the nodes of the Update flow from the ObjectRoot > Pit GameObjects’ Visual Script in the SampleScene and paste them into a blank area in the Open state’s Script Graph located in the ObjectRoot > TrapDoor state graph(in TutorialScene).
2. Create the Graph variable named "FallingMovingObject" on the TrapDoor in the Blackboard. Leave its Type as Null.
3. In the Want To Enter Cell flow in the SampleScene’s visual script, if CanFall is present, the variable FallingMovingObject is set to the Moving Object that is output by the event. That enables the Update flow to do its thing.
Let’s adapt this Update flow to the Open state:
4. The final node in the Update flow is a node to set a variable named Passable to True, but you don’t need to keep track of whether the trap door is passable because the State Machine handles that. Delete this node.
5. At the end of the Update flow, add a Trigger Custom Event node. Name this event “HoleFilled”. (You will write the script for this event later).
6. How would you improve this flow with groups and comments? Add them as desired to help you keep track of what is happening in this script.
7. Save your work.
This script is too large to fit in an image, but if you want to check your work, see Final_TrapDoorOpenState in the Samples subfolder.
The Open state is now ready: it will play the animation when the state is entered, it will allow entry only to objects specified to fall (with the CanFall variable), and it will move the falling object into the hole, frame by frame using the Update event. You will test this later.
6. Script the Closed State
When the TrapDoor is in the Closed state, it is just like any other cell — any object can pass through it. The only behavior you need in the Closed state is to play the animation when the state is entered.
Add the AnimAndFX subgraph to the Closed state’s Script Graph in the same way you did in the Open state, with the Animation Name "Switched" and the Animation Value, in this case, False.
7. Script the Filled state
The Filled state has no animation — the object was already put in the hole by the Update flow in the Open state. Follow these instructions to make something happen when the hole is filled:
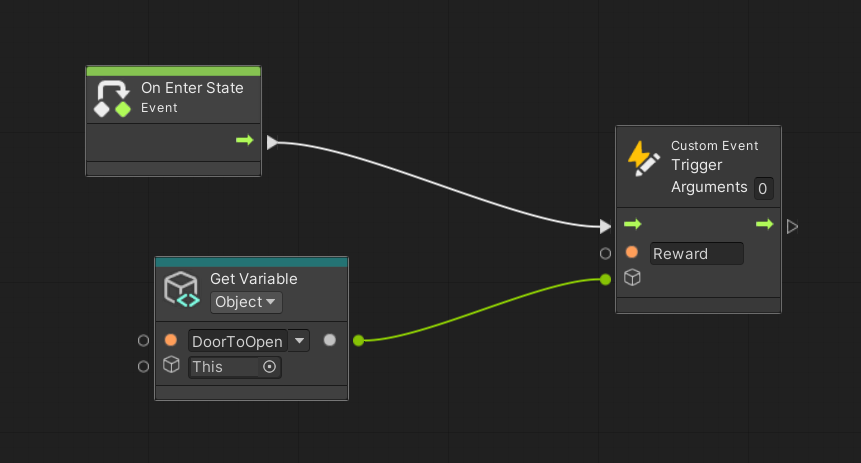
1. Create an Object variable named “DoorToOpen”. Set its Type to GameObject and set its Value as the FourthDoor GameObject.
2. Script the Filled state’s Script Graph to match the image below:
8. Script the Transitions
The Script Graphs for the three states are ready, but part of the logic of this State Machine is still missing. Under what conditions will the TrapDoor GameObject change from state to state? Next you will add transitions to the State Graph to configure these conditions.
Transitions allow us to specify the conditions under which any state is allowed to change to any other state. Here are the rules for this State Machine’s transitions:
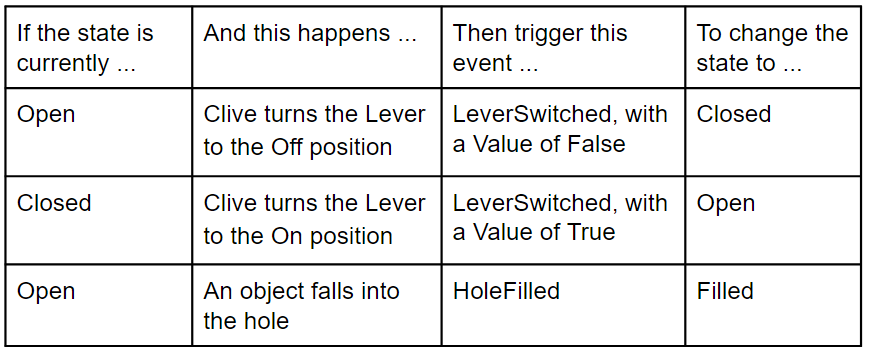
Notice there is no way to change the state once the hole is filled! Only a limited number of transitions are possible. The State Machine gives you a logical structure for specifying which situations are possible while your game is in play.
Follow these instructions to add the transitions to this State Machine, following the table above:
1. Open the TrapDoor GameObject’s State Graph.
2. To make the transition from Open to Closed, right-click the Open state, select Make Transition, and click the Closed state. The State Graph will look like the image below.
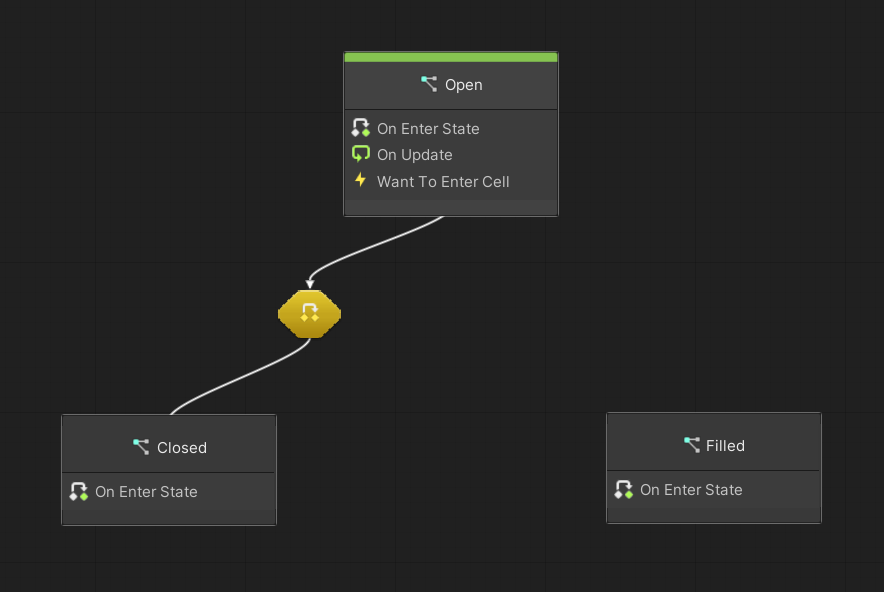
3. Double-click the transition between the two states to open the Script Graph for this transition. The State: Trigger Transition node will be in the script by default — you must end the script with this node to allow the transition to occur.
4. The event that will cause this transition is named LeverSwitched. (Remember? That event is triggered when the Lever is turned on or off.) That event passes a Boolean value. Add a Custom Event node, name it “Switched”, and set the Arguments value to 1. (This matches the Custom Event Trigger node in the TrapDoorLeverScript.)
5. Add an If node, and connect both the flow and value connectors from the Custom Event node.
6. Connect the False branch of the If node to the State: Trigger Transition node.

7. Return to the State Graph.
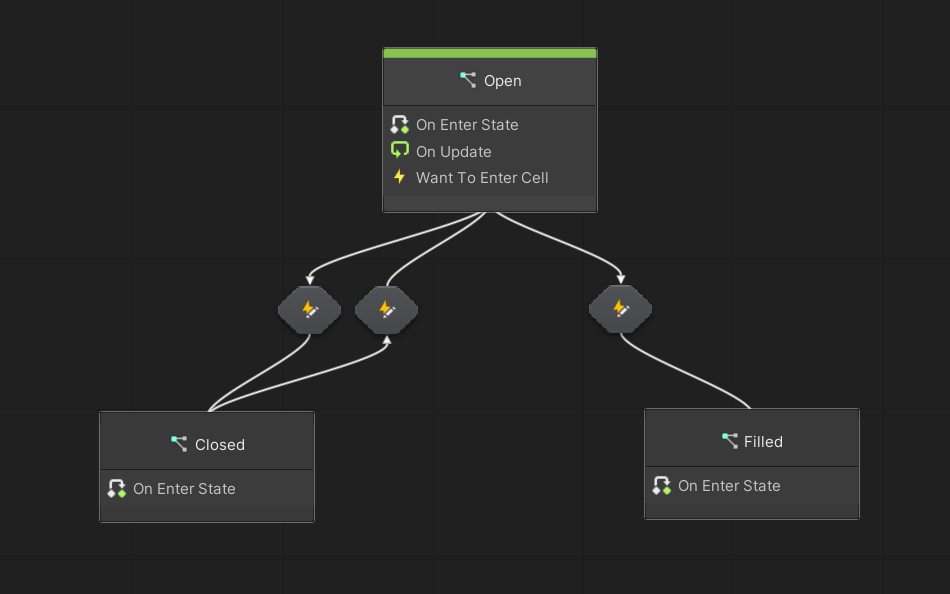
8. To create the Closed to Open transition, repeat the steps above; However, in this case, create the transition from the Closed state to the Open state and allow the transition to occur if the value from the LeverSwitched event is True.

9. Return to the State Graph.
10. Create the transition from Open to Filled. In the transition script, simply specify that when the HoleFilled event is triggered, make the transition.

11. Save your work!
Your final State Graph should look like the image below.
9. Test your State Machine
You are ready to test! Once you figure out how Clive can get the crate into the hole of the trap door, you will have seen all the states and transitions of your State Machine. We have even scripted a reward when Clive’s task is complete!
In case you encounter errors or miss a step, the completed State Machine is in the file Final_TrapDoorStates in the Samples subfolder.
Note: The subgraph used in Final_TrapDoorStates is a sample copy, not the subgraph visual script you created.