Understanding Rendering Paths
Tutorial
intermediate
+10XP
10 mins
233
Unity Technologies

Realtime lights can be expensive to performance due the calculations that have to be done to determine the valid pixel color when there is a light in range. So, when you have a scene with varying amounts of light that need to be rendered, there are two rendering paths you should consider. In this tutorial, you will learn about the different rendering paths.
Languages available:
1. Understanding Rendering Paths
This tutorial has been verified using Unity 2019.4.12f1 LTS - https://learn.unity.com/tutorial/understanding-rendering-paths-2019-3
Realtime lights can be expensive to performance due the calculations that have to be done to determine the valid pixel color when there is a light in range. So, when you have a Scene with varying amounts of light that need to be rendered, there are two rendering paths you should consider.
Rendering Paths are techniques or paths for rendering. When starting a new project, you’ll need to decide which path to use. There are two to choose from Forward Rendering and Deferred Rendering. Each path has its own advantages and disadvantages. Unity defaults to the Forward Rendering path.
2. Forward Rendering
With Forward Rendering, lit objects are rendered in a separate passes. Some objects might be rendered multiple times depending on how many lights are in the Scene and if they affect the GameObject.
The advantage to using Forward Rendering is that the rendering can be very fast. This helps reduce hardware requirements. Forward Rendering offers a wide range of custom shading models and can handle transparency quickly. This rendering path is also used for working with multi-sample anti-aliasing, a technique used in creating graphics to improve image quality, which is not available in the Deferred Rendering path.
The disadvantage of using this rendering path is that it has a rendering cost on a per-light basis, meaning that the more lights within your Scene, the more time-intensive the rendering is going to be. This is because there are more lights affecting each object causing the rendering path to render that object multiple times per light.
3. Deferred Rendering
Deferred Rendering, as its name suggests, defers the shading and blending of light information until after a first pass over the screen. This first pass takes in the Positions, Normals, and Materials for each surface and are rendered to the geometry buffer as a series of Screen SpaceTextures. This rendering path then composites all the results together with the lighting pass.
The advantage to this method is that the rendering cost is proportional to the number of pixels that the light illuminates instead of the number of lights themselves. This is incredibly useful when you have a Scene with lots of lights — Deferred Rendering will cut down the cost of the rendering by quite a bit.
The disadvantage to Deferred Rendering is that it generally requires more powerful hardware and is not supported by certain mobile devices. This means there’s no guarantee it will work across all platforms. Setting Up the Rendering Path
To choose your desired rendering path, you want to do the following:
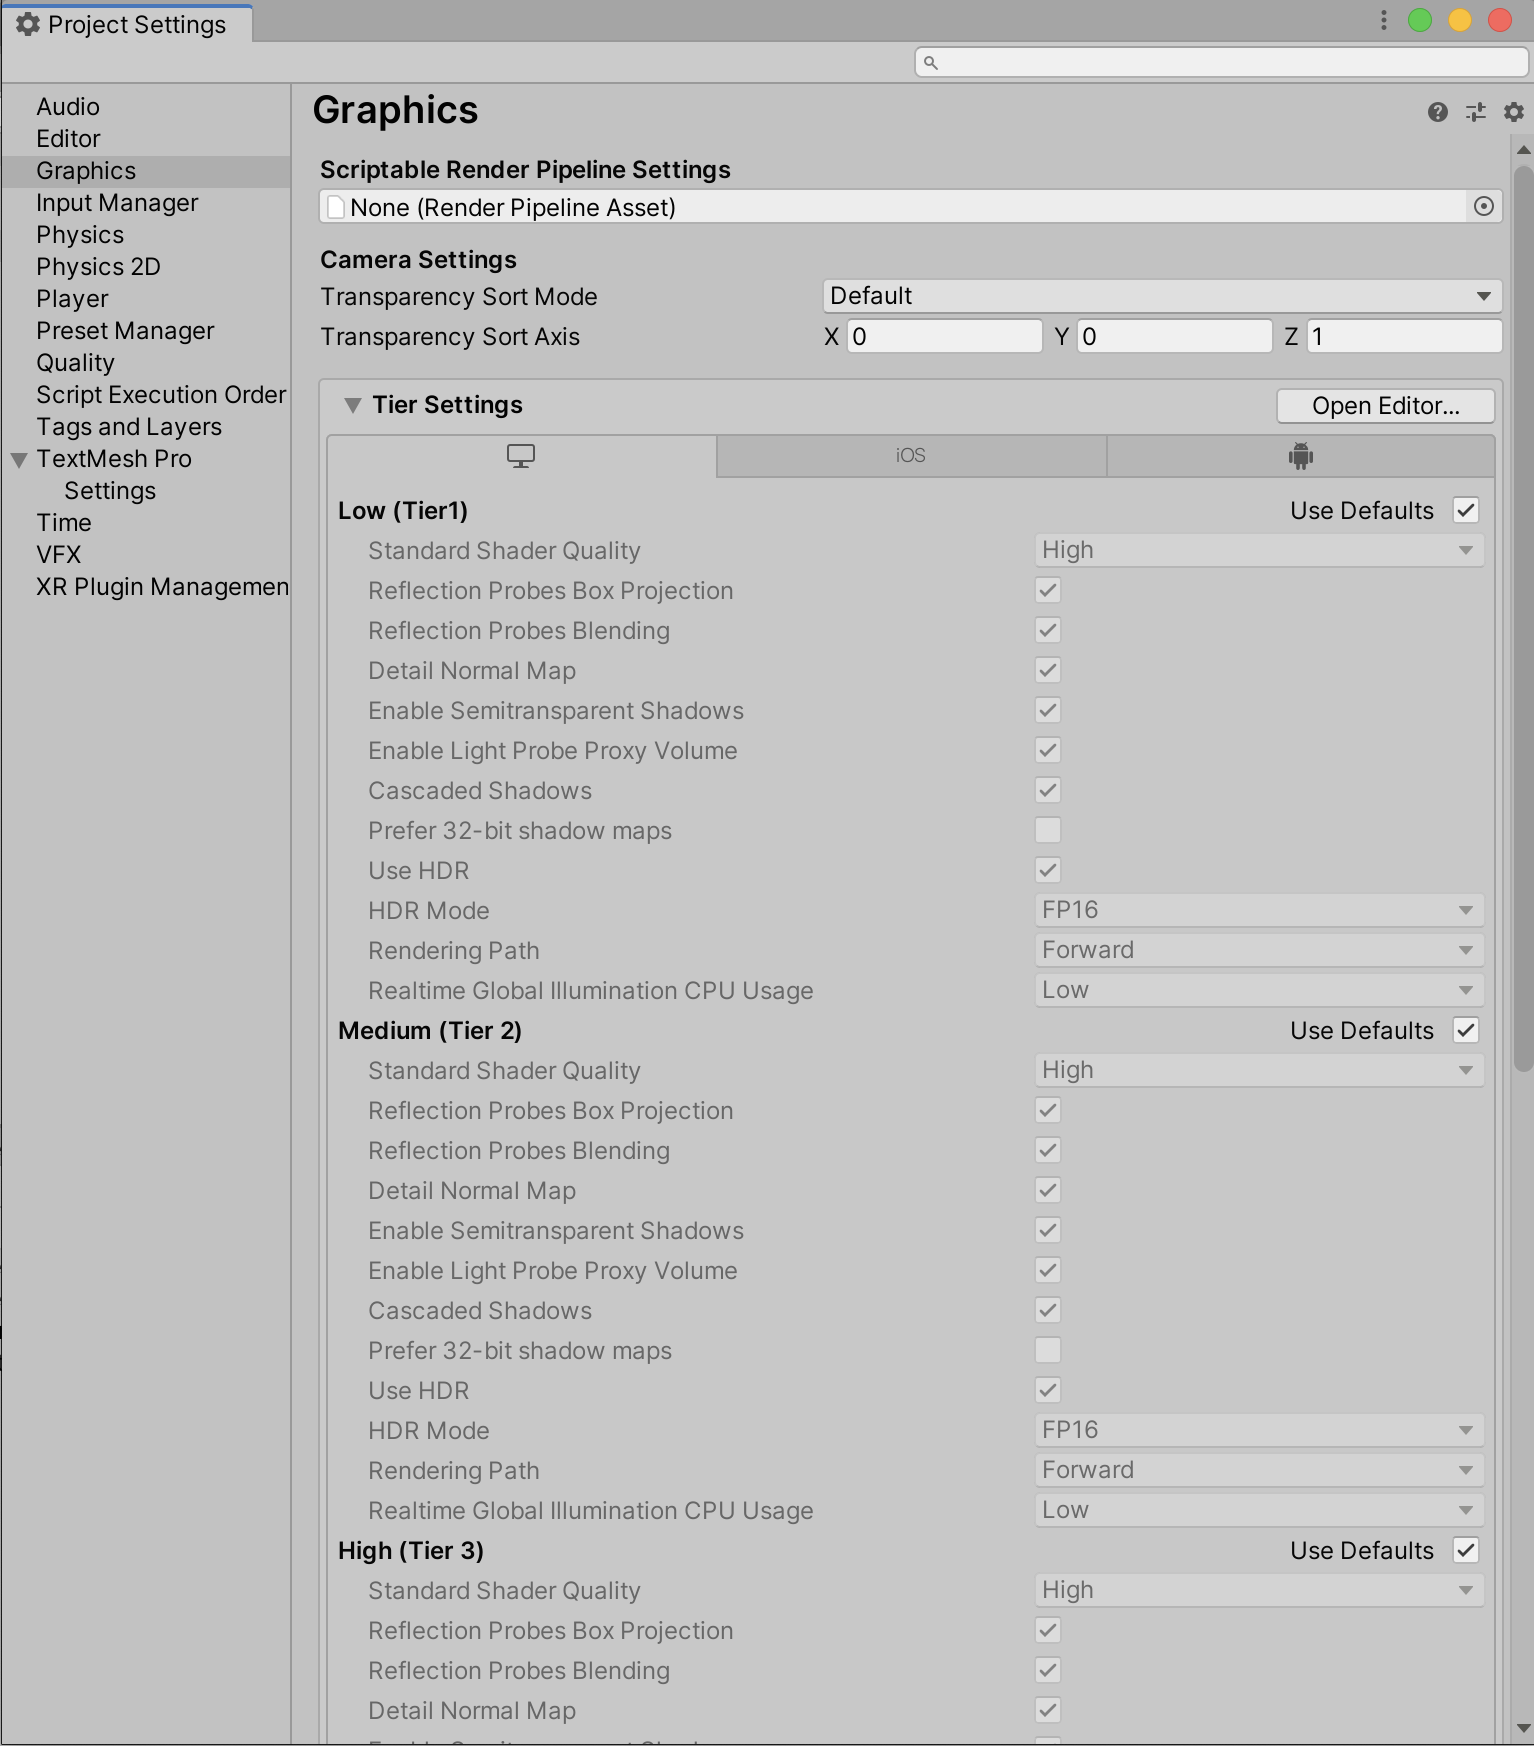
1. Go to the Edit dropdown and select Project Settings > Graphics
2. This will populate the Inspector with information (Figure 01).

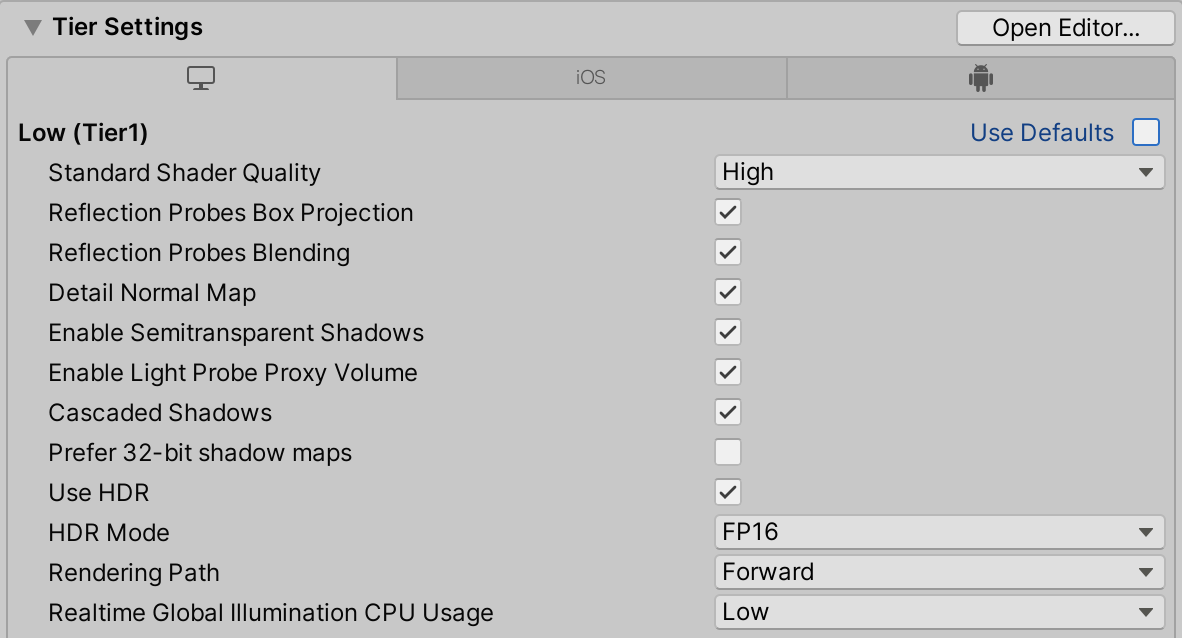
3. You can either click the Open Editor button on the Tier Settings, or simply uncheck the Use Defaults box next to the tier you wish to modify (Figure 02).

The settings are as follows:
- Standard Shader Quality: Allows you to select from Low, Medium, and High quality settings.
- Reflection Probes Box Projection: Allows you to specify whether Reflection Probes Box projection should be used.
- Reflection Probes Blending: Allows you to specify whether Reflection Probes Blending should be enabled.
- Detail Normal Map: Allows you to specify whether Detail Normal Maps should be sampled, if assigned.
- Enable Semitransparent Shadows: Allows you to specify whether these type of shadows should be enabled.
- Enable Light Probe Proxy Volume: Enable rendering a 3D grid of interpolated Light Probes.
- Cascaded Shadows: Allows you to specify whether these type of shadows should be used.
- Prefer 32-bit Shadow Maps: Enable 32-bit float shadow map when you are targeting PS4 or platforms using DX11 or DX12. Most platforms have a fixed shadow map format that you can’t adjust. These vary in format, and can be 16-bit, 24-bit, or 32-bit, and can also be either float- or integer-based. 32-bit shadow maps give higher quality shadows than 16-bit, but use increased memory and bandwidth on the GPU. Note: To use 32-bit shadow maps, make sure the depth buffer is also set to 32-bit.
- Use HDR: Setting this field to True enables HDR rendering; unchecking the box sets it to False.
- Rendering Path: Allows you to choose between Forward or Deferred Rendering Paths.
- Realtime Global Illumination CPU Usage: Allows you to specify the GI usage on the CPU from Low, Medium, High, or Unlimited.
4. Select the dropdown of the Rendering Path and change it to Deferred or leave it at Forward.
Which rendering path you choose depends on how many lights you’re dealing with and the quality of the rendering passes. Consider the advantages and disadvantages of each path to help determine which is best for your project, keeping in mind the needs of your desired platform and the expected look for your final outcome.