
Unity Project Setup and Asset import
Tutorial
intermediate
+10XP
20 mins
(20)
Unity Technologies
In this tutorial, you will set up your Unity project with ML-Agents and import several 3d Mesh Assets that will be used later in the tutorial.
Resources
Languages available:
1. Unity project setup
In this section, you will create a new Unity project, add the Barracuda package, and import the ML-Agents code to your project.
1. Open the Unity Hub on your computer.
2. Create a new Unity project using version 2019.3 or newer.
3. Select the 3D template.
4. Enter a Project Name, for example Penguins.
5. Choose a Location.
6. Click the Create button.
7. Allow Unity to create the project.
8. Click Window > Package Manager to open the Package Manager.
Within the Package Manager window (Figure 02):
1. Click the Advanced drop-down button and select Show preview packages.
2. Find the latest version of the Barracuda package in the list and select it.
3. Click Install.
Unity is now ready to import the ML-Agents code. There is a UnitySDK directory in the project you downloaded from GitHub. This contains files that need to be imported to your Unity project.
1. Open the ml-agents source code directory that you downloaded from GitHub in your system file explorer (external to Unity).
2. Navigate to the UnitySDK\Assets directory inside the ml-agents source code directory.
3. Click and drag the ML-Agents directory from the Explorer window into the Assets directory in your Unity Editor to import the entire directory (Figure 03).
Note: You may get some warnings in the console. Warnings are okay and expected because ML-Agents is in beta. Unlike the yellow warnings, red errors indicate a problem. If you see any, something will not work. Do your best to read the error messages and try to fix them on your own. As a programmer, some of the best learning happens when you dig in and read error messages to understand why they’re happening. If you get stuck, ask for help.
2. Import Assets
In this section, you’ll download, import, and set up 3D Meshes for the tutorial.
1. Download the resources for this tutorial (Under the Tutorial Materials tab).
2. Create a new folder in Unity called Penguin inside Assets.
3. Create another folder called Meshes inside Assets\Penguin.
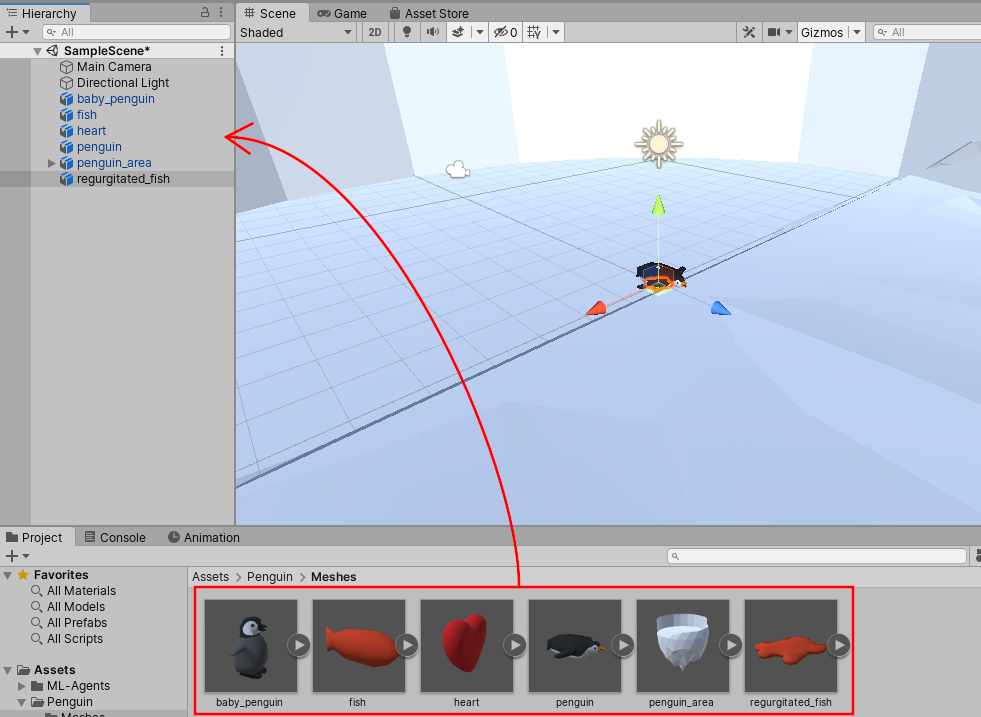
4. Import the .fbx files (3d Meshes) to the Meshes folder.
5. Drag each of the Meshes into the Scene, one at a time (Figure 05). It’s okay if they overlap.
6. Rename each item as follows:
a. baby_penguin > BabyPenguin
b. fish > Fish
c. heart > Heart
d. penguin > Penguin
e. penguin_area > PenguinArea
f. regurgitated_fish > RegurgitatedFish
7. Create a new folder called Prefabs inside Assets\Penguin.
8. Drag each renamed object down into the Prefabs folder, one at a time (Figure 06).
9. Click the Original Prefab button on each to create a set of Prefabs.
10. Delete all of the Prefabs from the Scene except PenguinArea.
3. Conclusion
You should now have a Unity project containing the ML-Agents directory and several 3d Mesh files. This is the standard way to set up a new ML-Agents project. You’ve also created Prefabs for each of the Meshes that will be used in subsequent tutorials.