Uploading projects and assets to the EdLab Editor
Tutorial
·
foundational
·
+0XP
·
10 mins
·
Unity Technologies
Overview:
With Unity EdLab you have the creative freedom to bring in your own 3D models, audio files, and pre-existing Unity projects. This tutorial will teach you how to upload these assets to the EdLab Editor.
Project Outcome:
Learn how to upload files to the session and open them in the EdLab Editor.
Languages available:
1. Zip your files
Files must be in .zip file format to be uploaded to the session.
On Windows: Right-click a file or folder > Send to > Compressed (zipped) folder
On Mac: Right-click a file or folder > Compress “[File Name]”
Give the folder a memorable name and store it somewhere convenient so you can easily find it in the next step.
2. Upload the zipped folder
Upload the zipped folder into the session by clicking the folder icon from the menu.
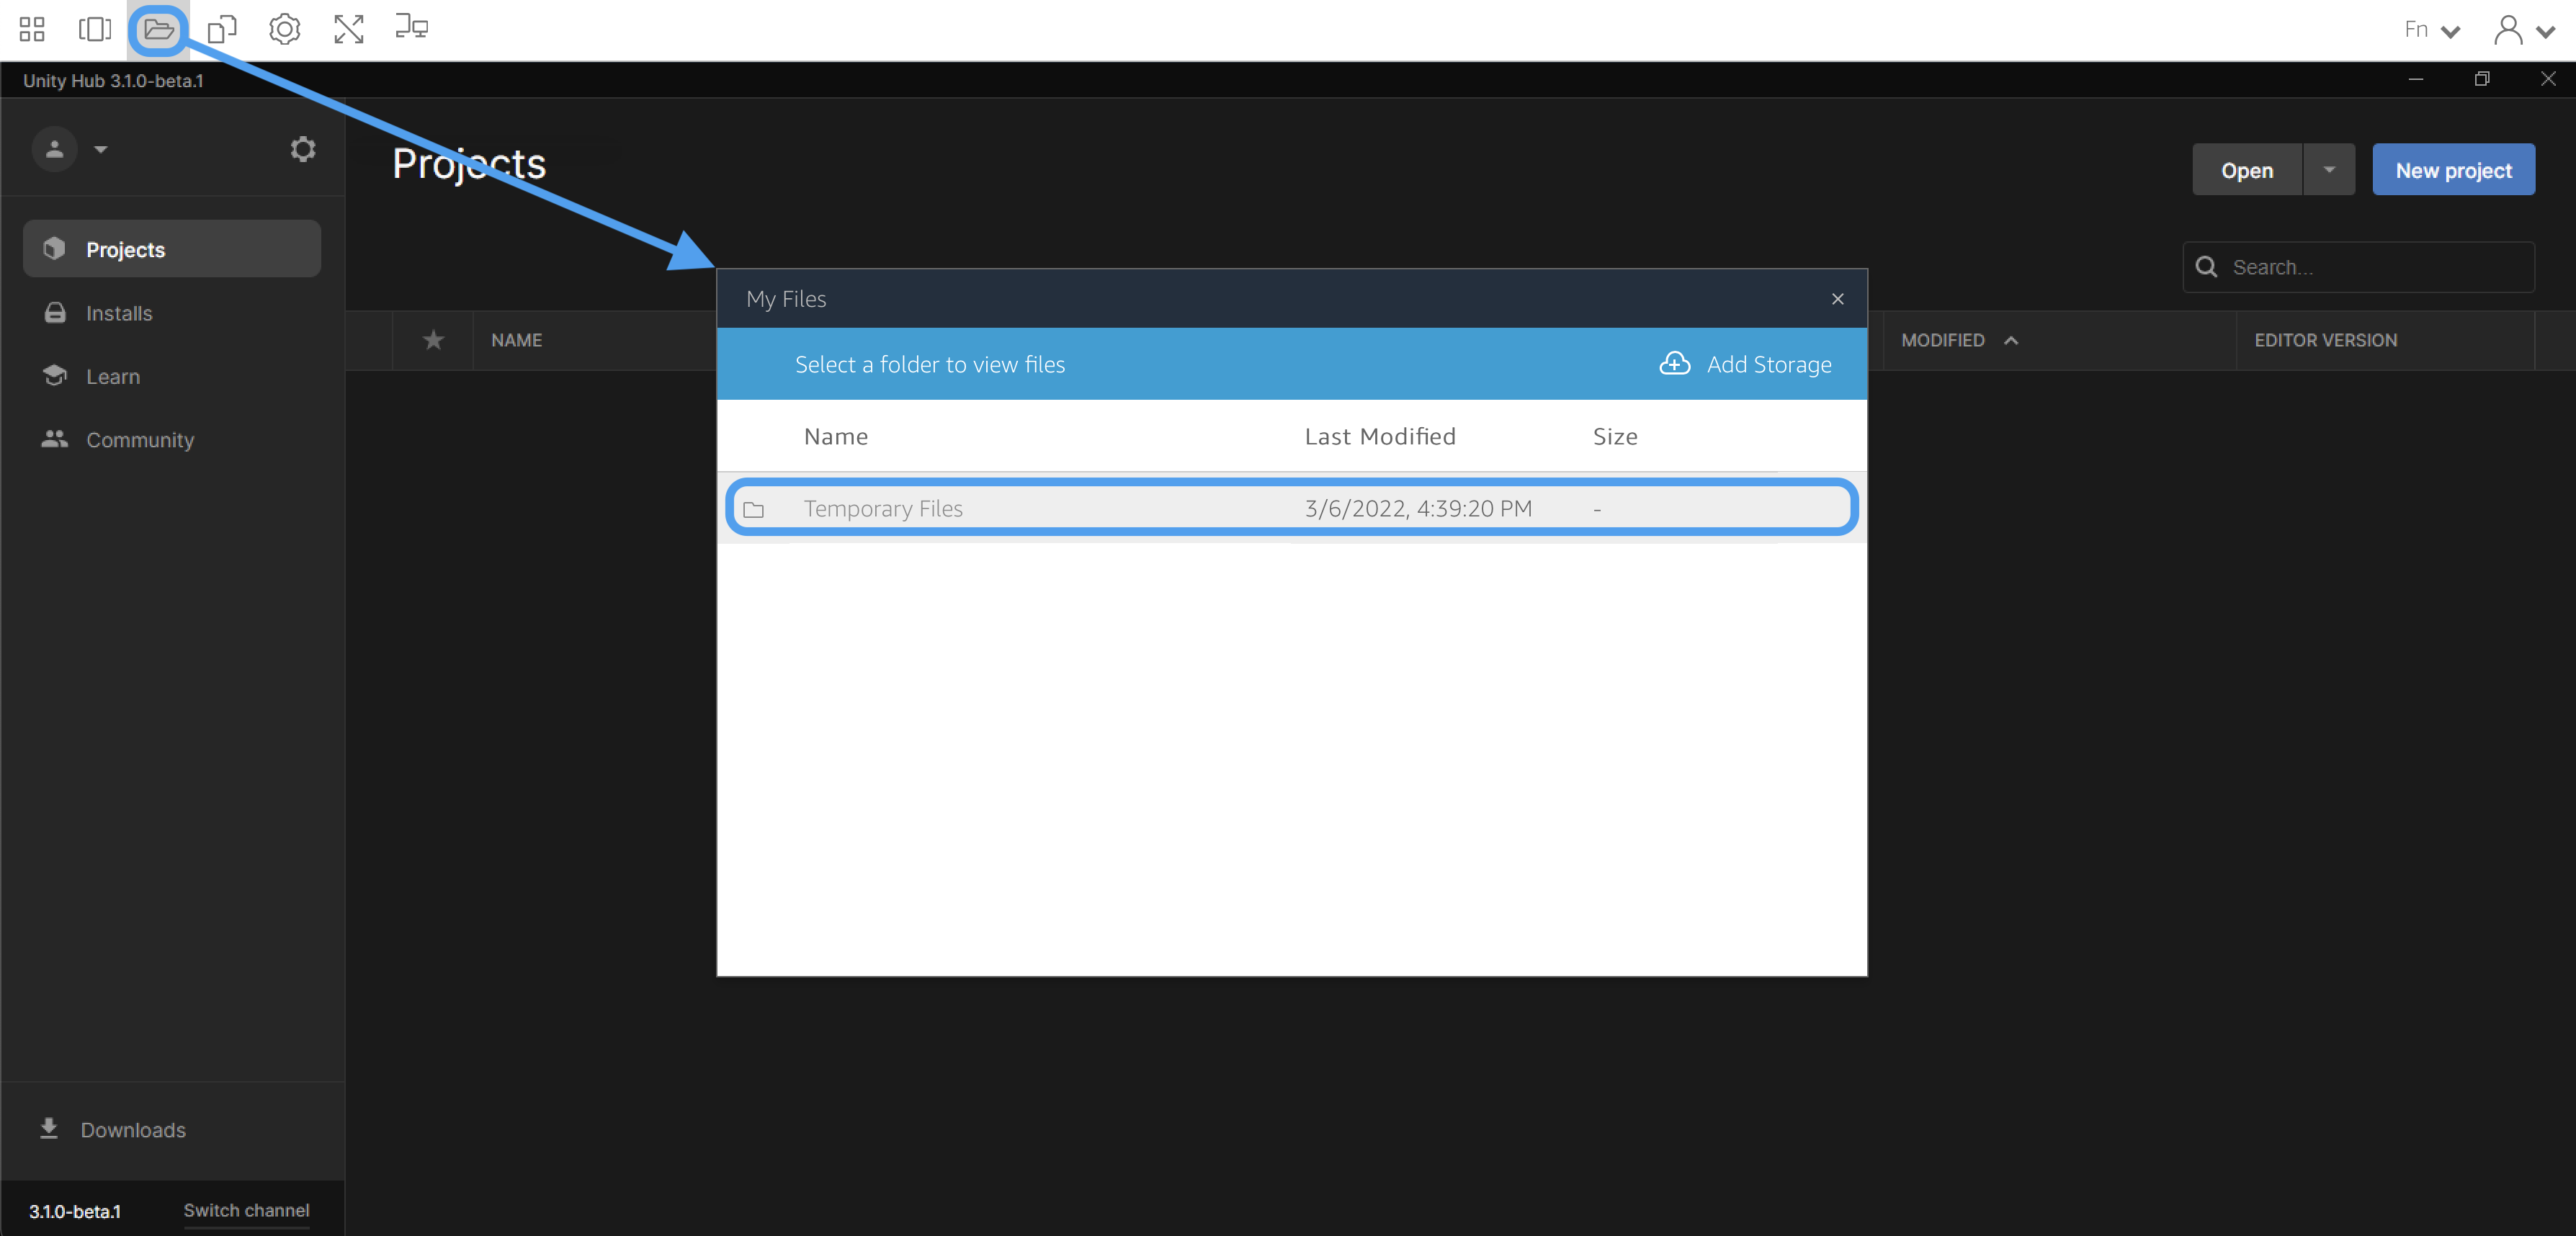
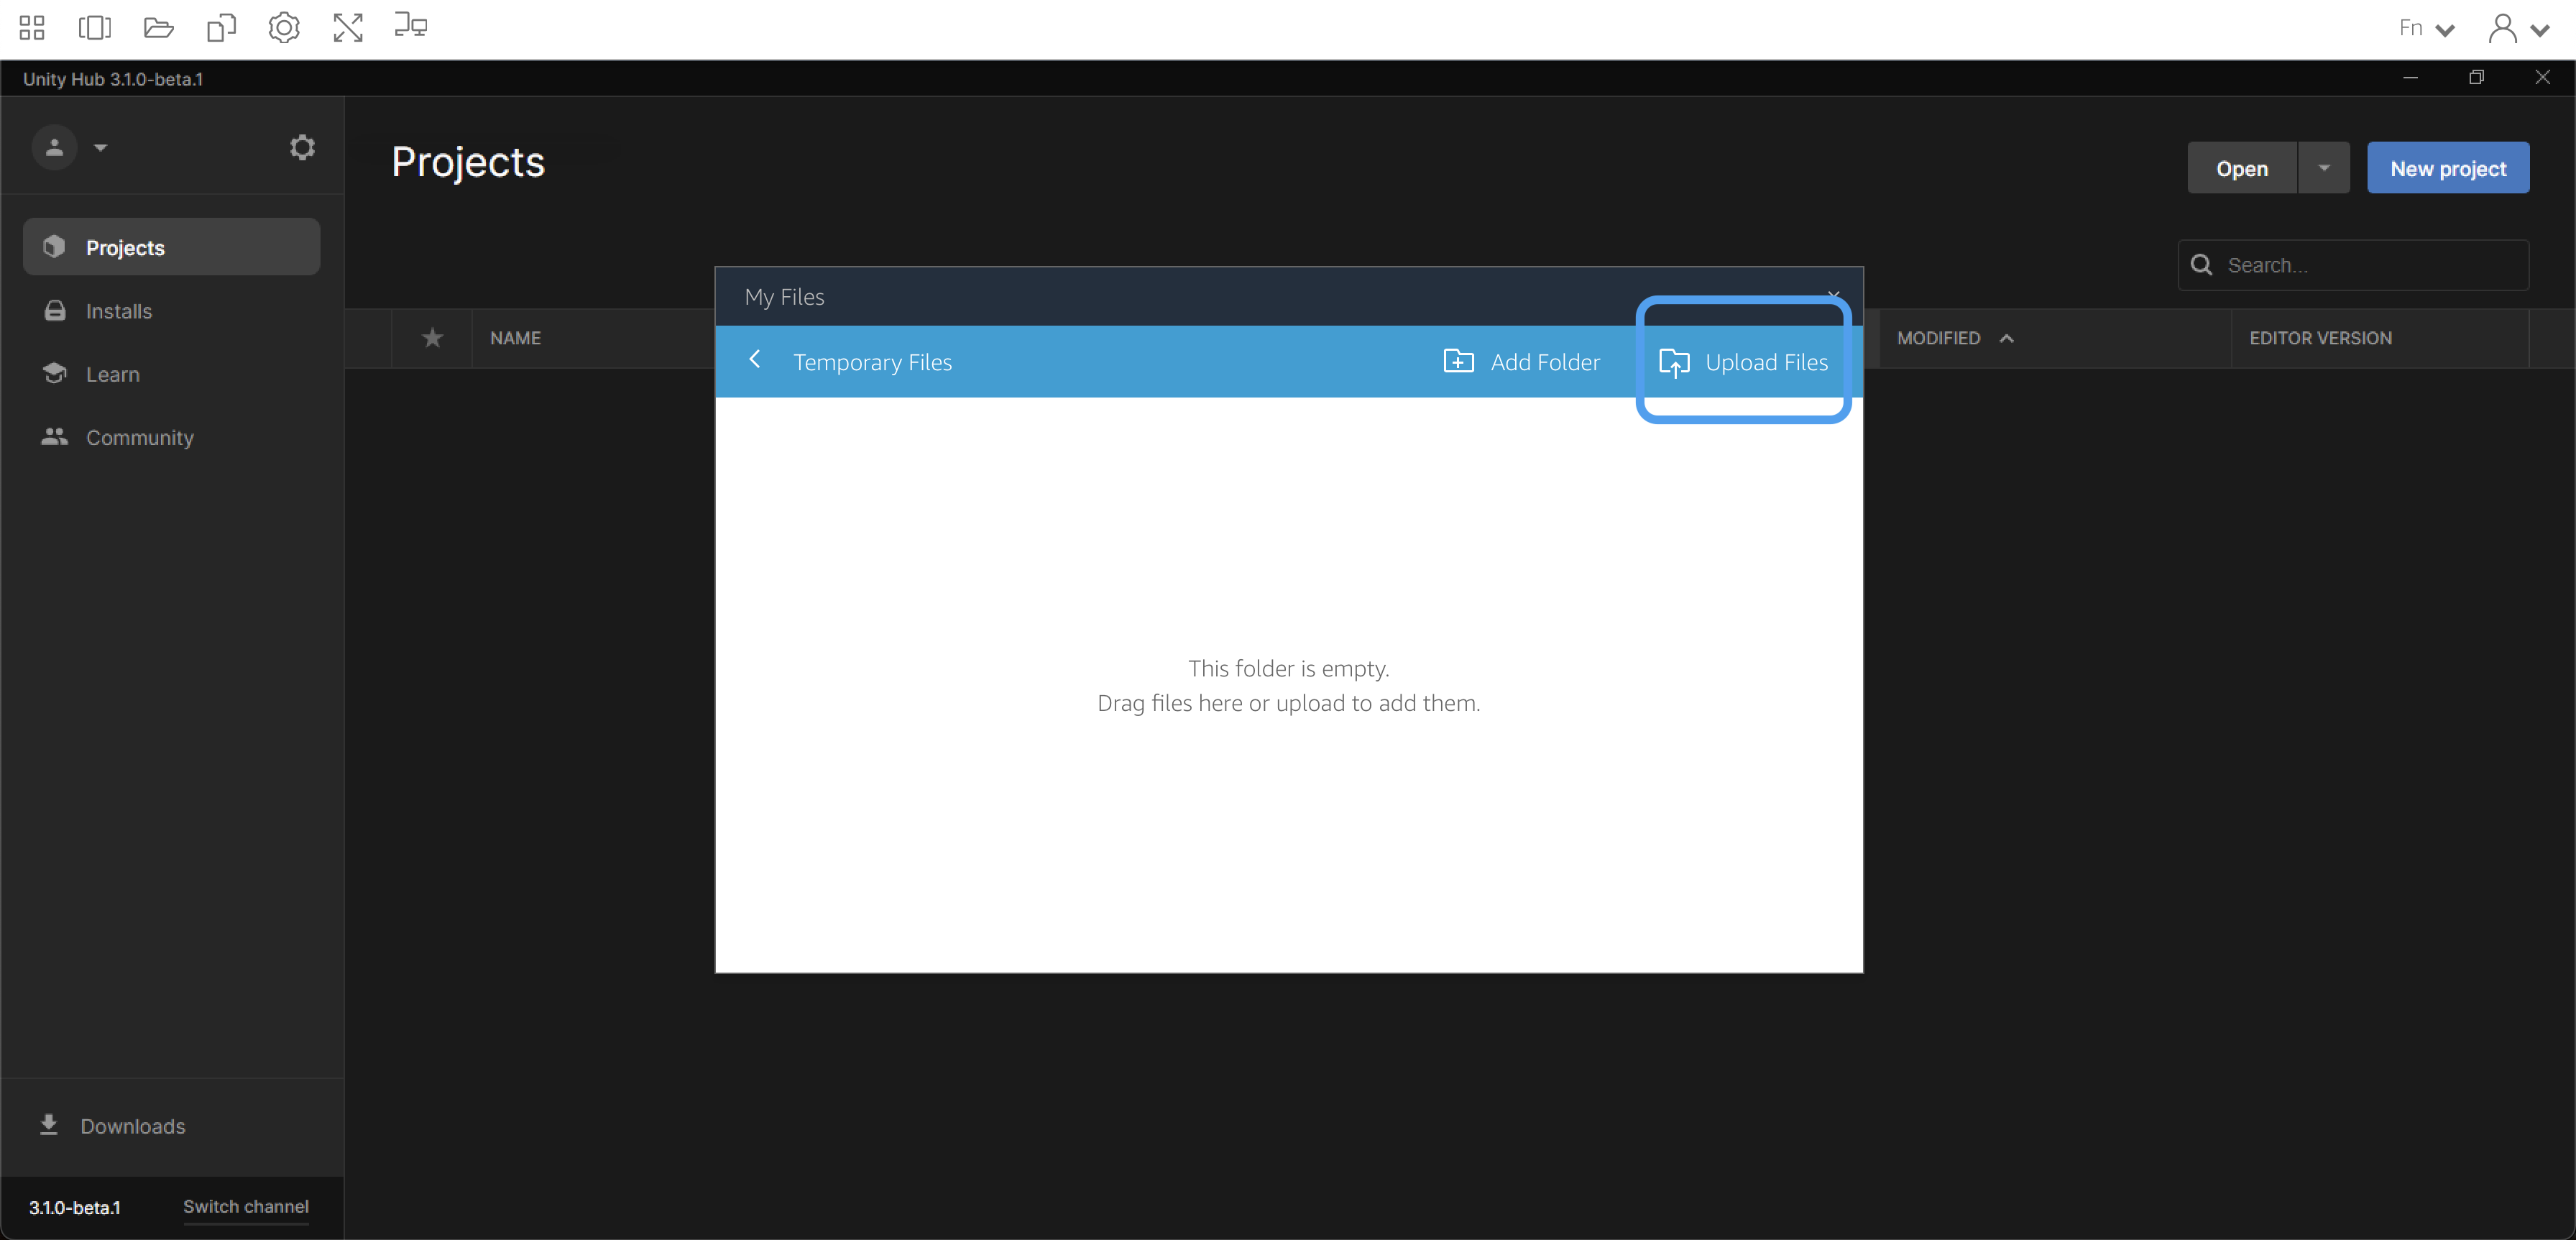
Double-click the ‘Temporary Files’ folder, then click the ‘Upload Files’ button.
Find and select your zipped folder, then click ‘Open’.
3. Move the zipped folder
Since the ‘Temporary Files’ folder is meant to temporarily store files within a single session, anything stored there will be lost the next time you log in. To keep your files in a more permanent location, you’ll need to move them to the ‘My Projects’ folder.
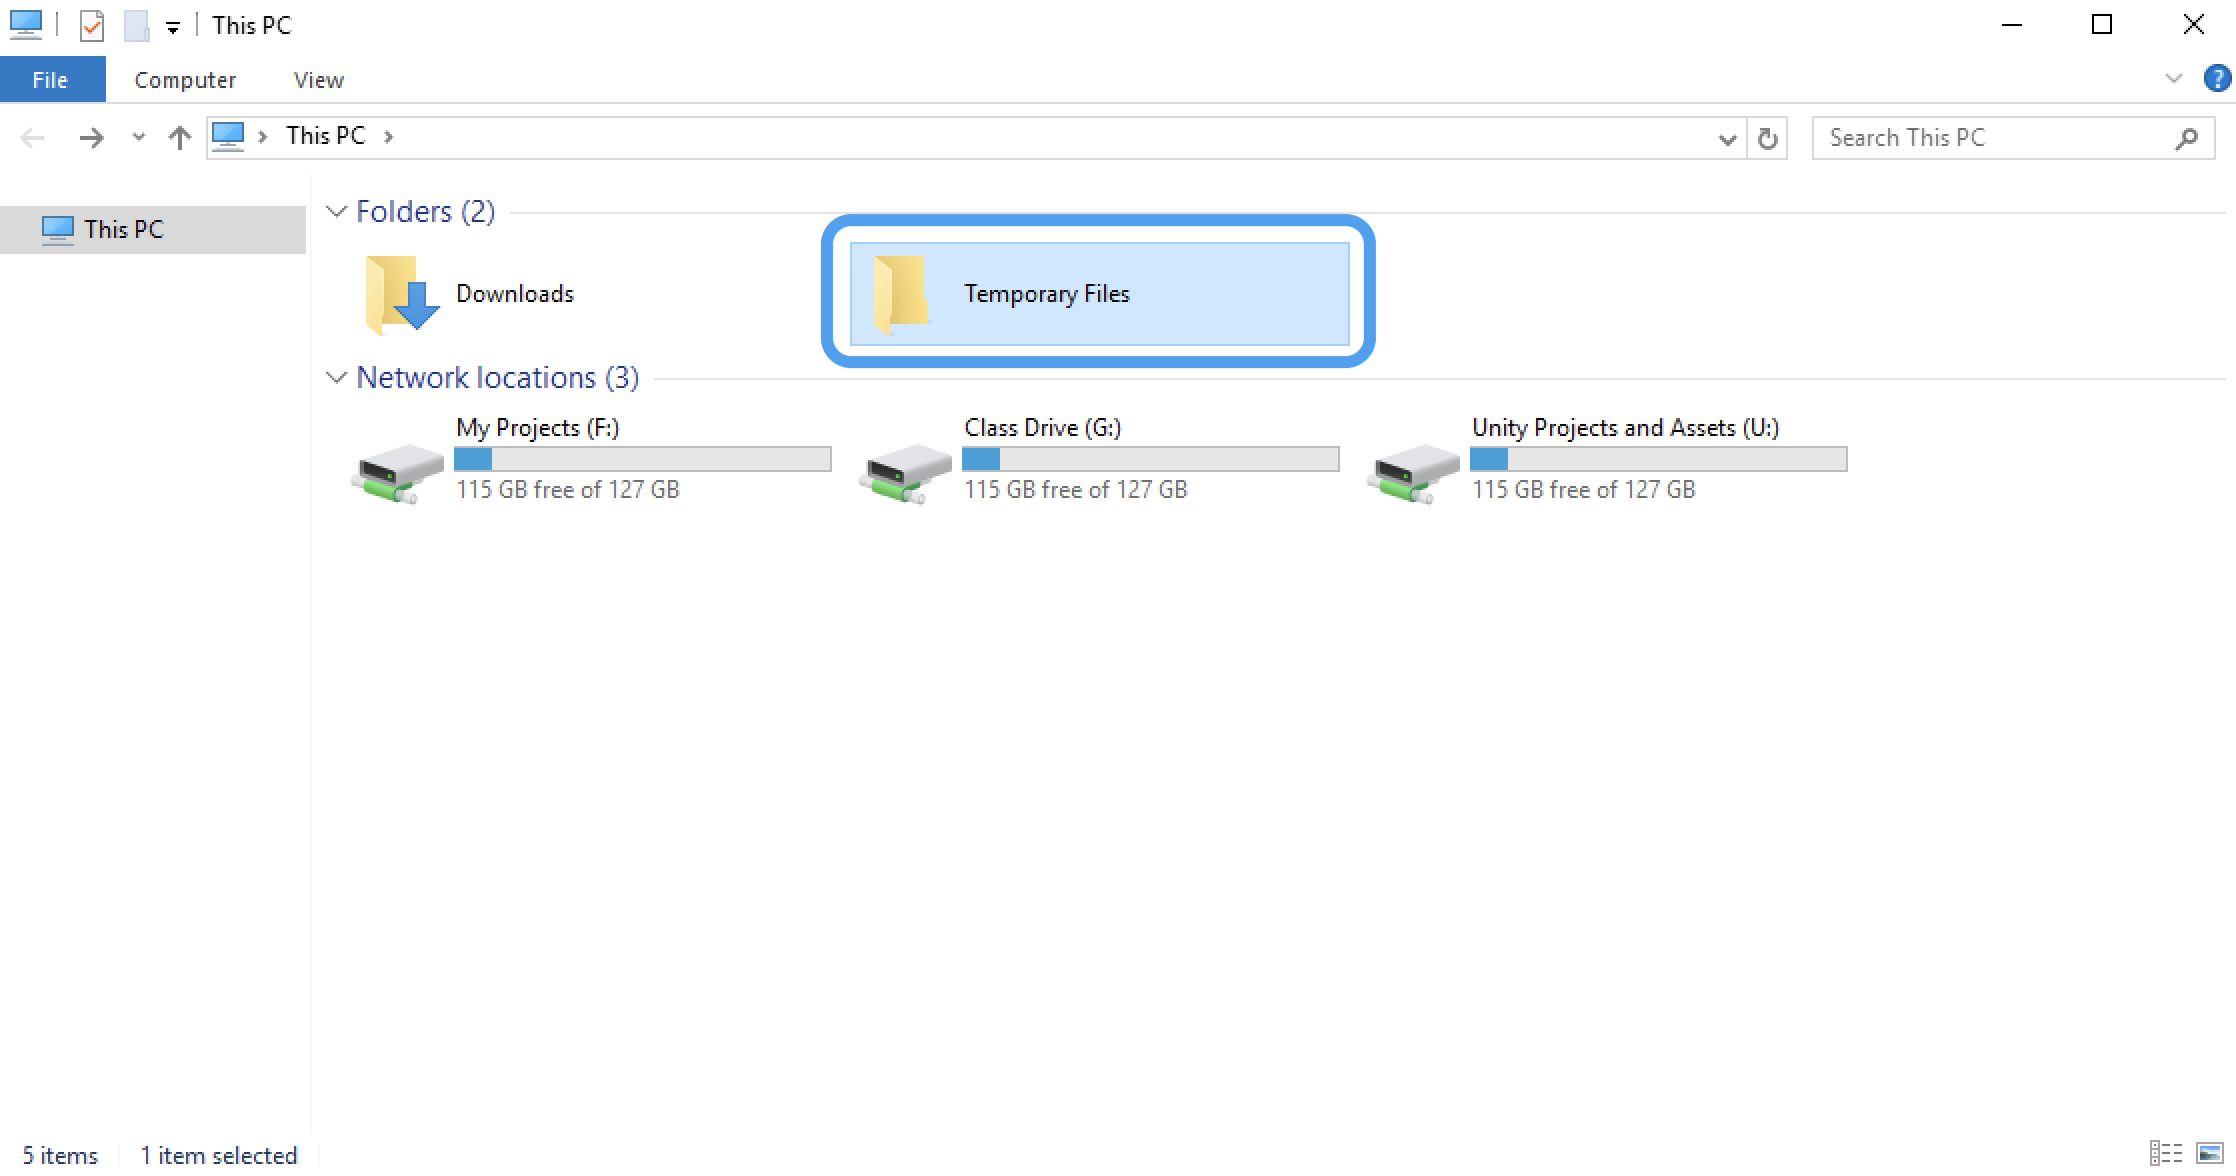
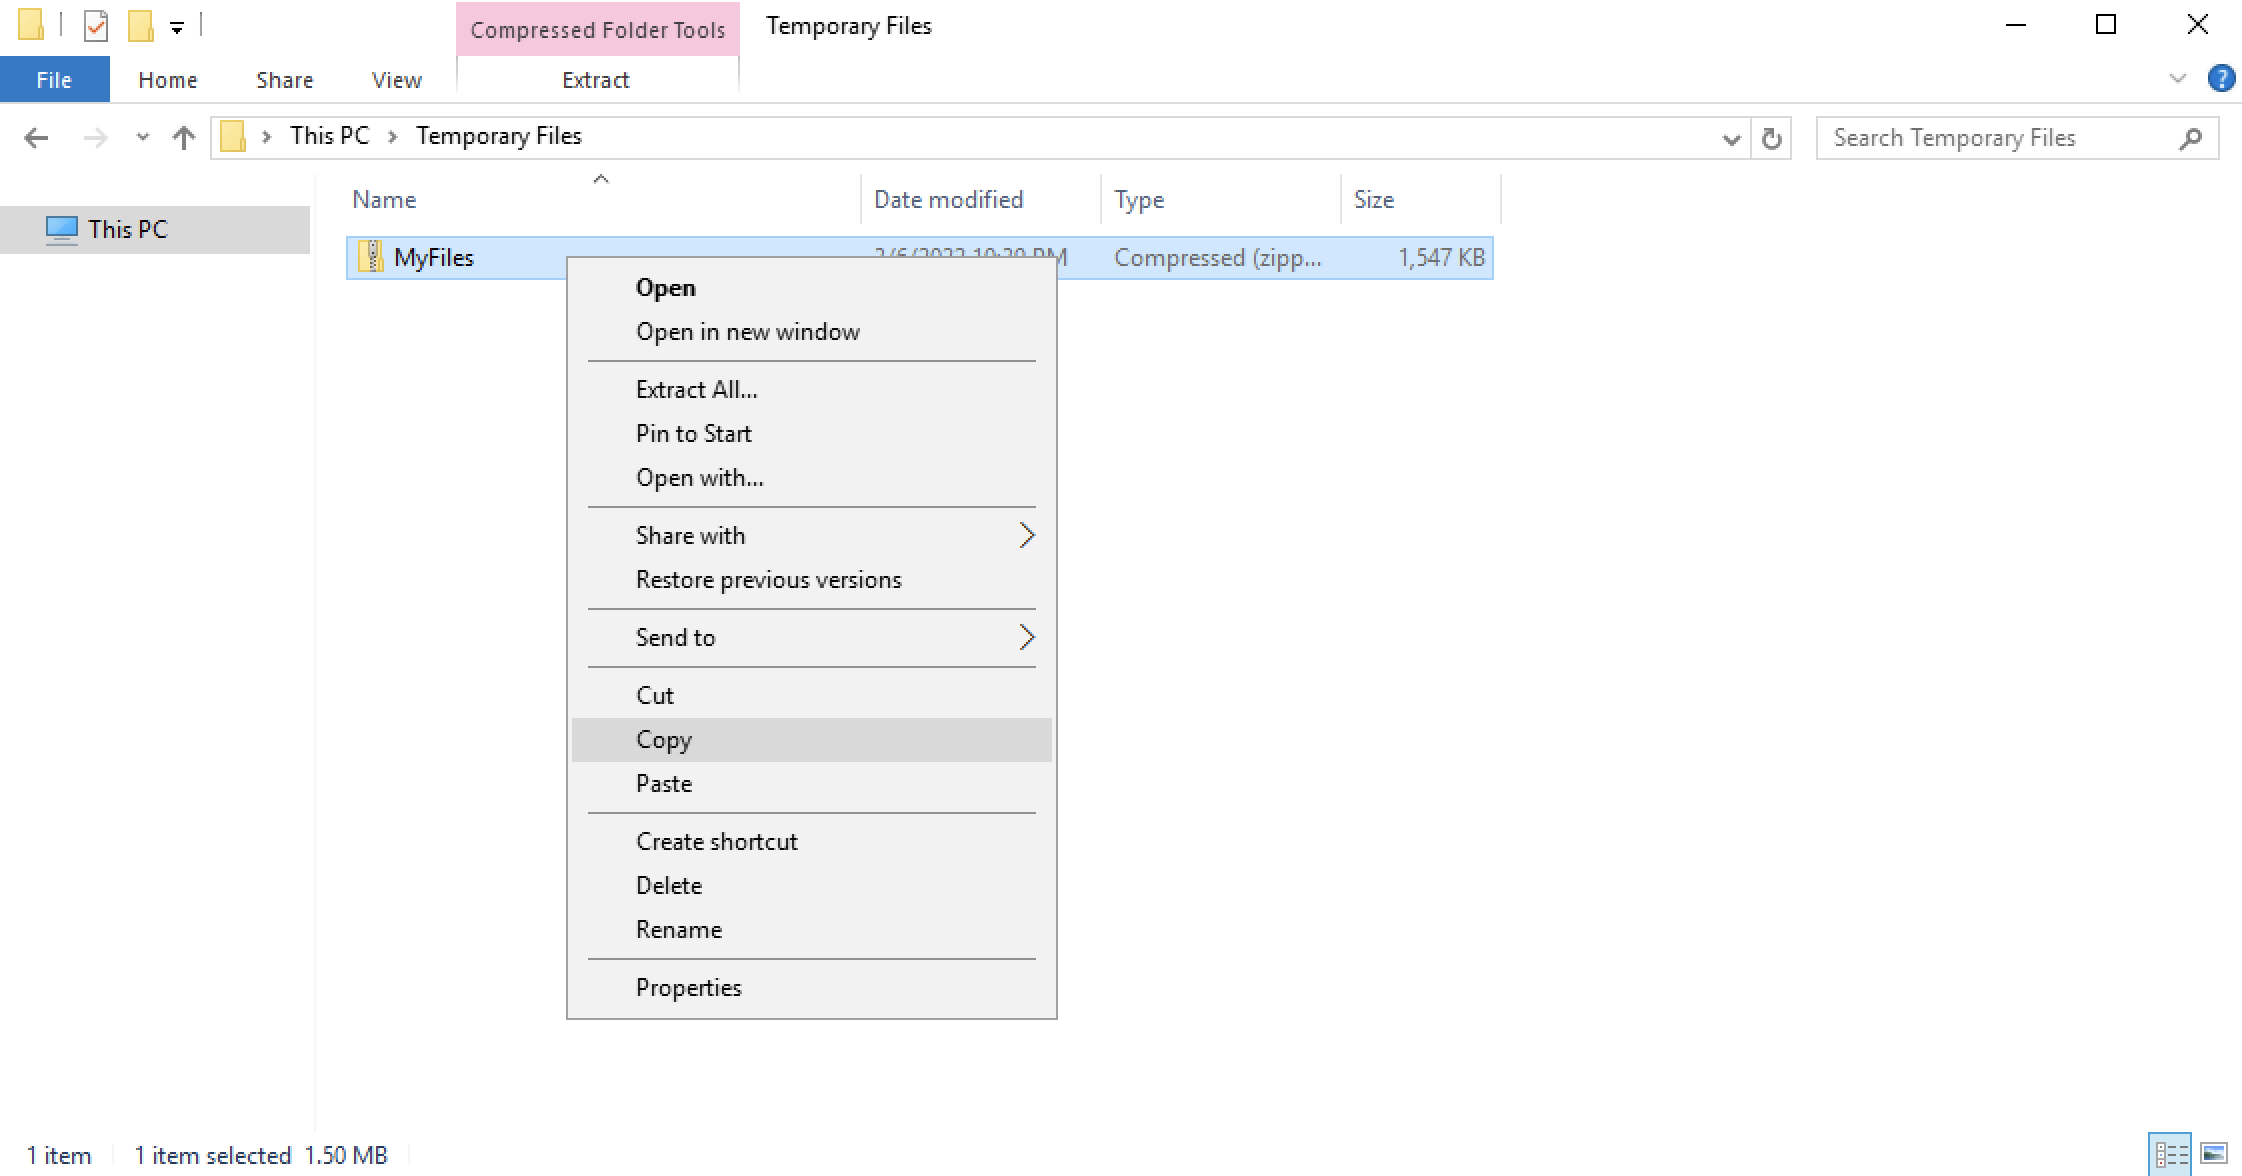
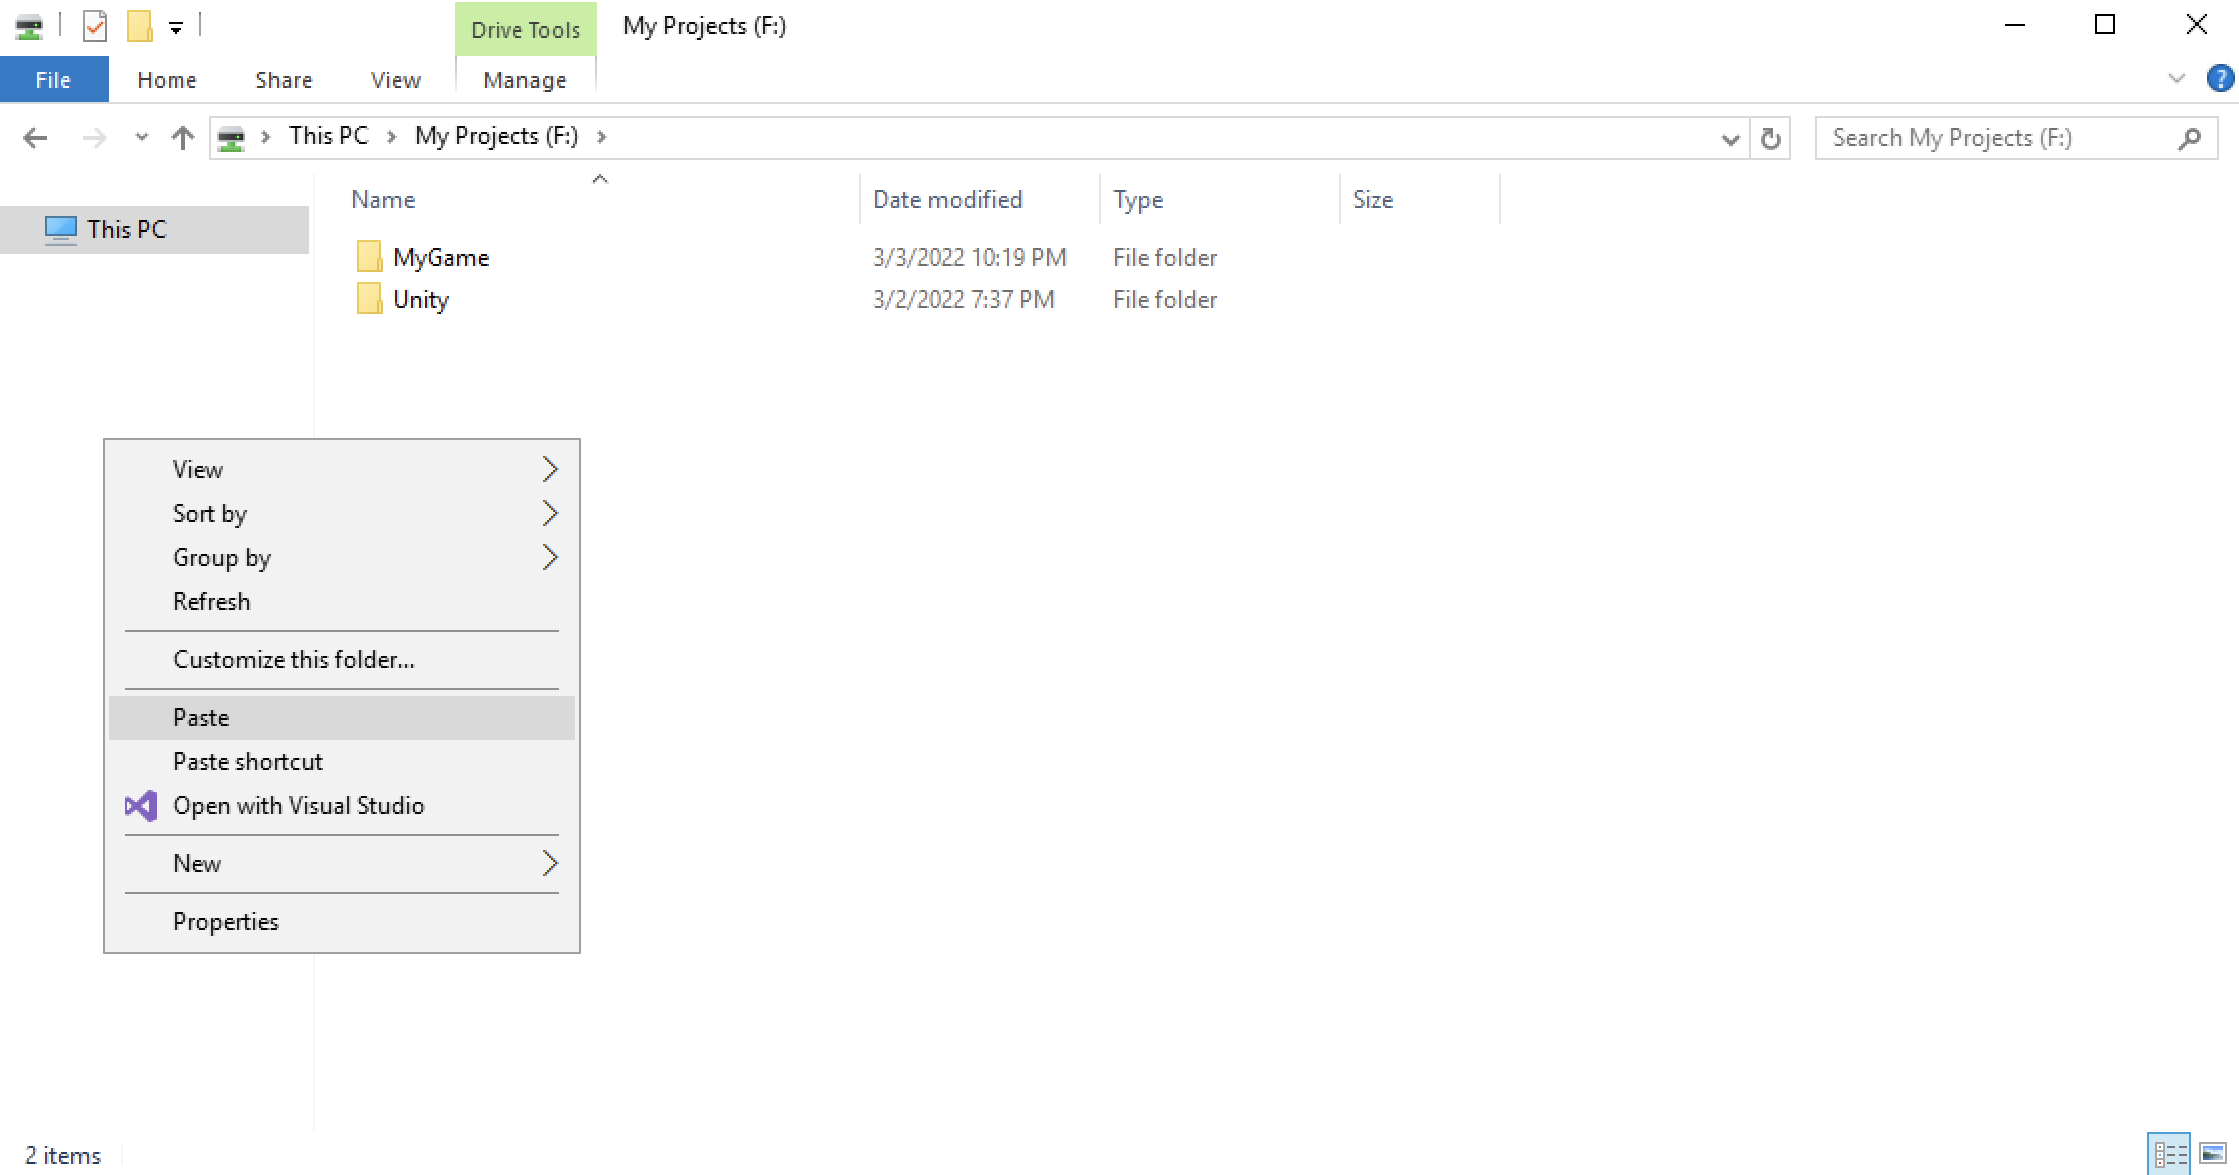
Open the File Explorer and find your uploaded zipped folder in the ‘Temporary Files’ folder. Once you’ve found it, right-click the zipped folder and click ‘Copy’.Navigate back to the ‘My Projects’ folder, right-click and press ‘Paste’.
Navigate back to the ‘My Projects’ folder, right-click and press ‘Paste.’
4. Unzip the zipped folder
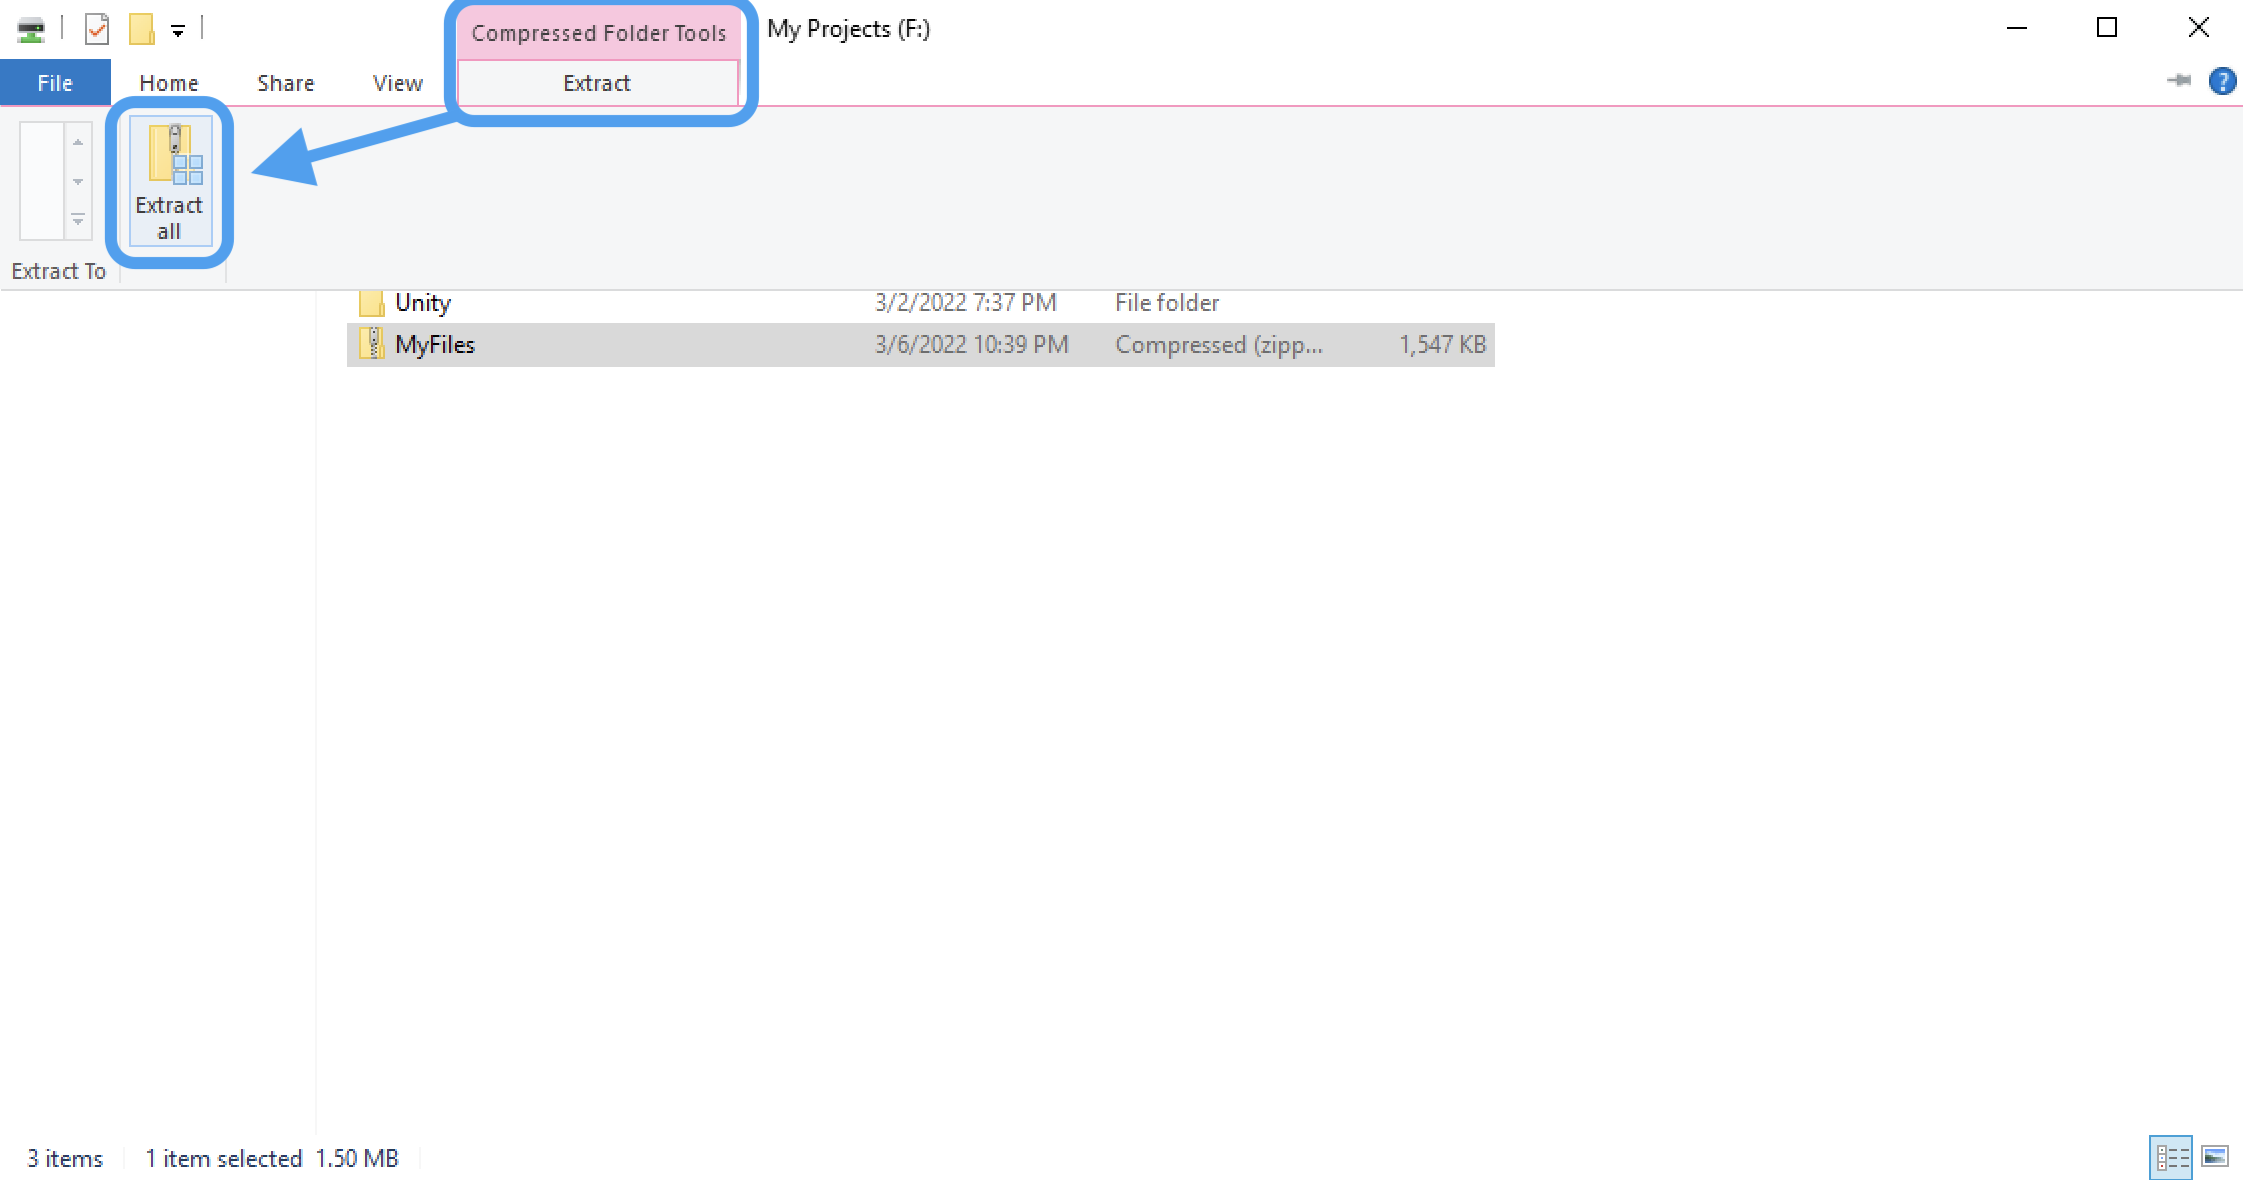
Once the zipped folder is in the ‘My Projects’ folder for permanent storage, click it to select it. Click the ‘Extract’ tab, then click ‘Extract all’.
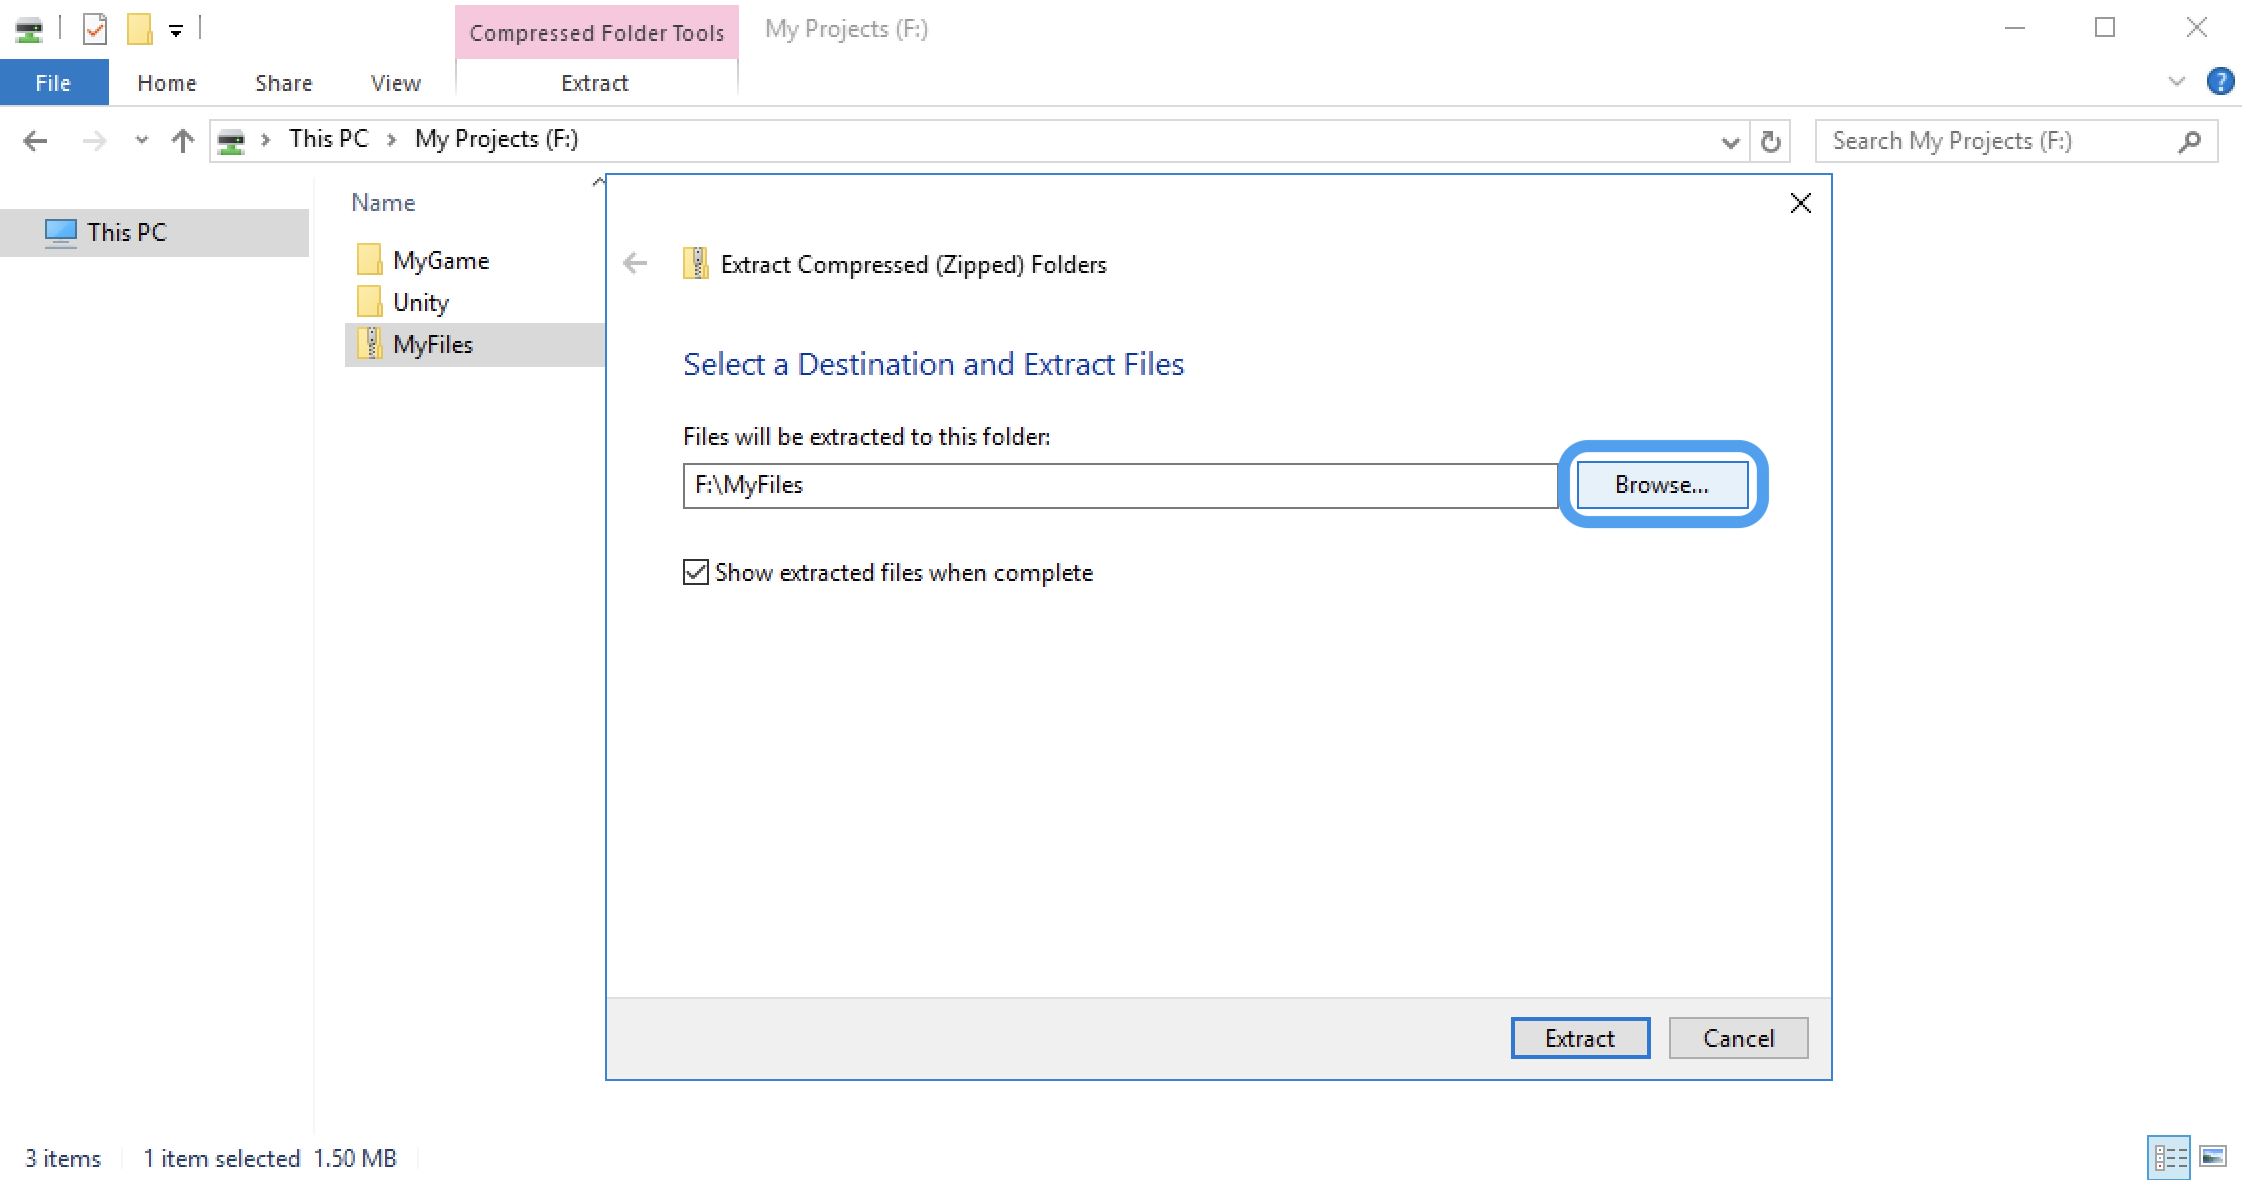
You must then select a destination for the extracted files. Click the ‘Browse…’ button.
Navigate from ‘This PC’ to the ‘My Projects’ folder and click the ‘Select Folder’ button at the bottom right.
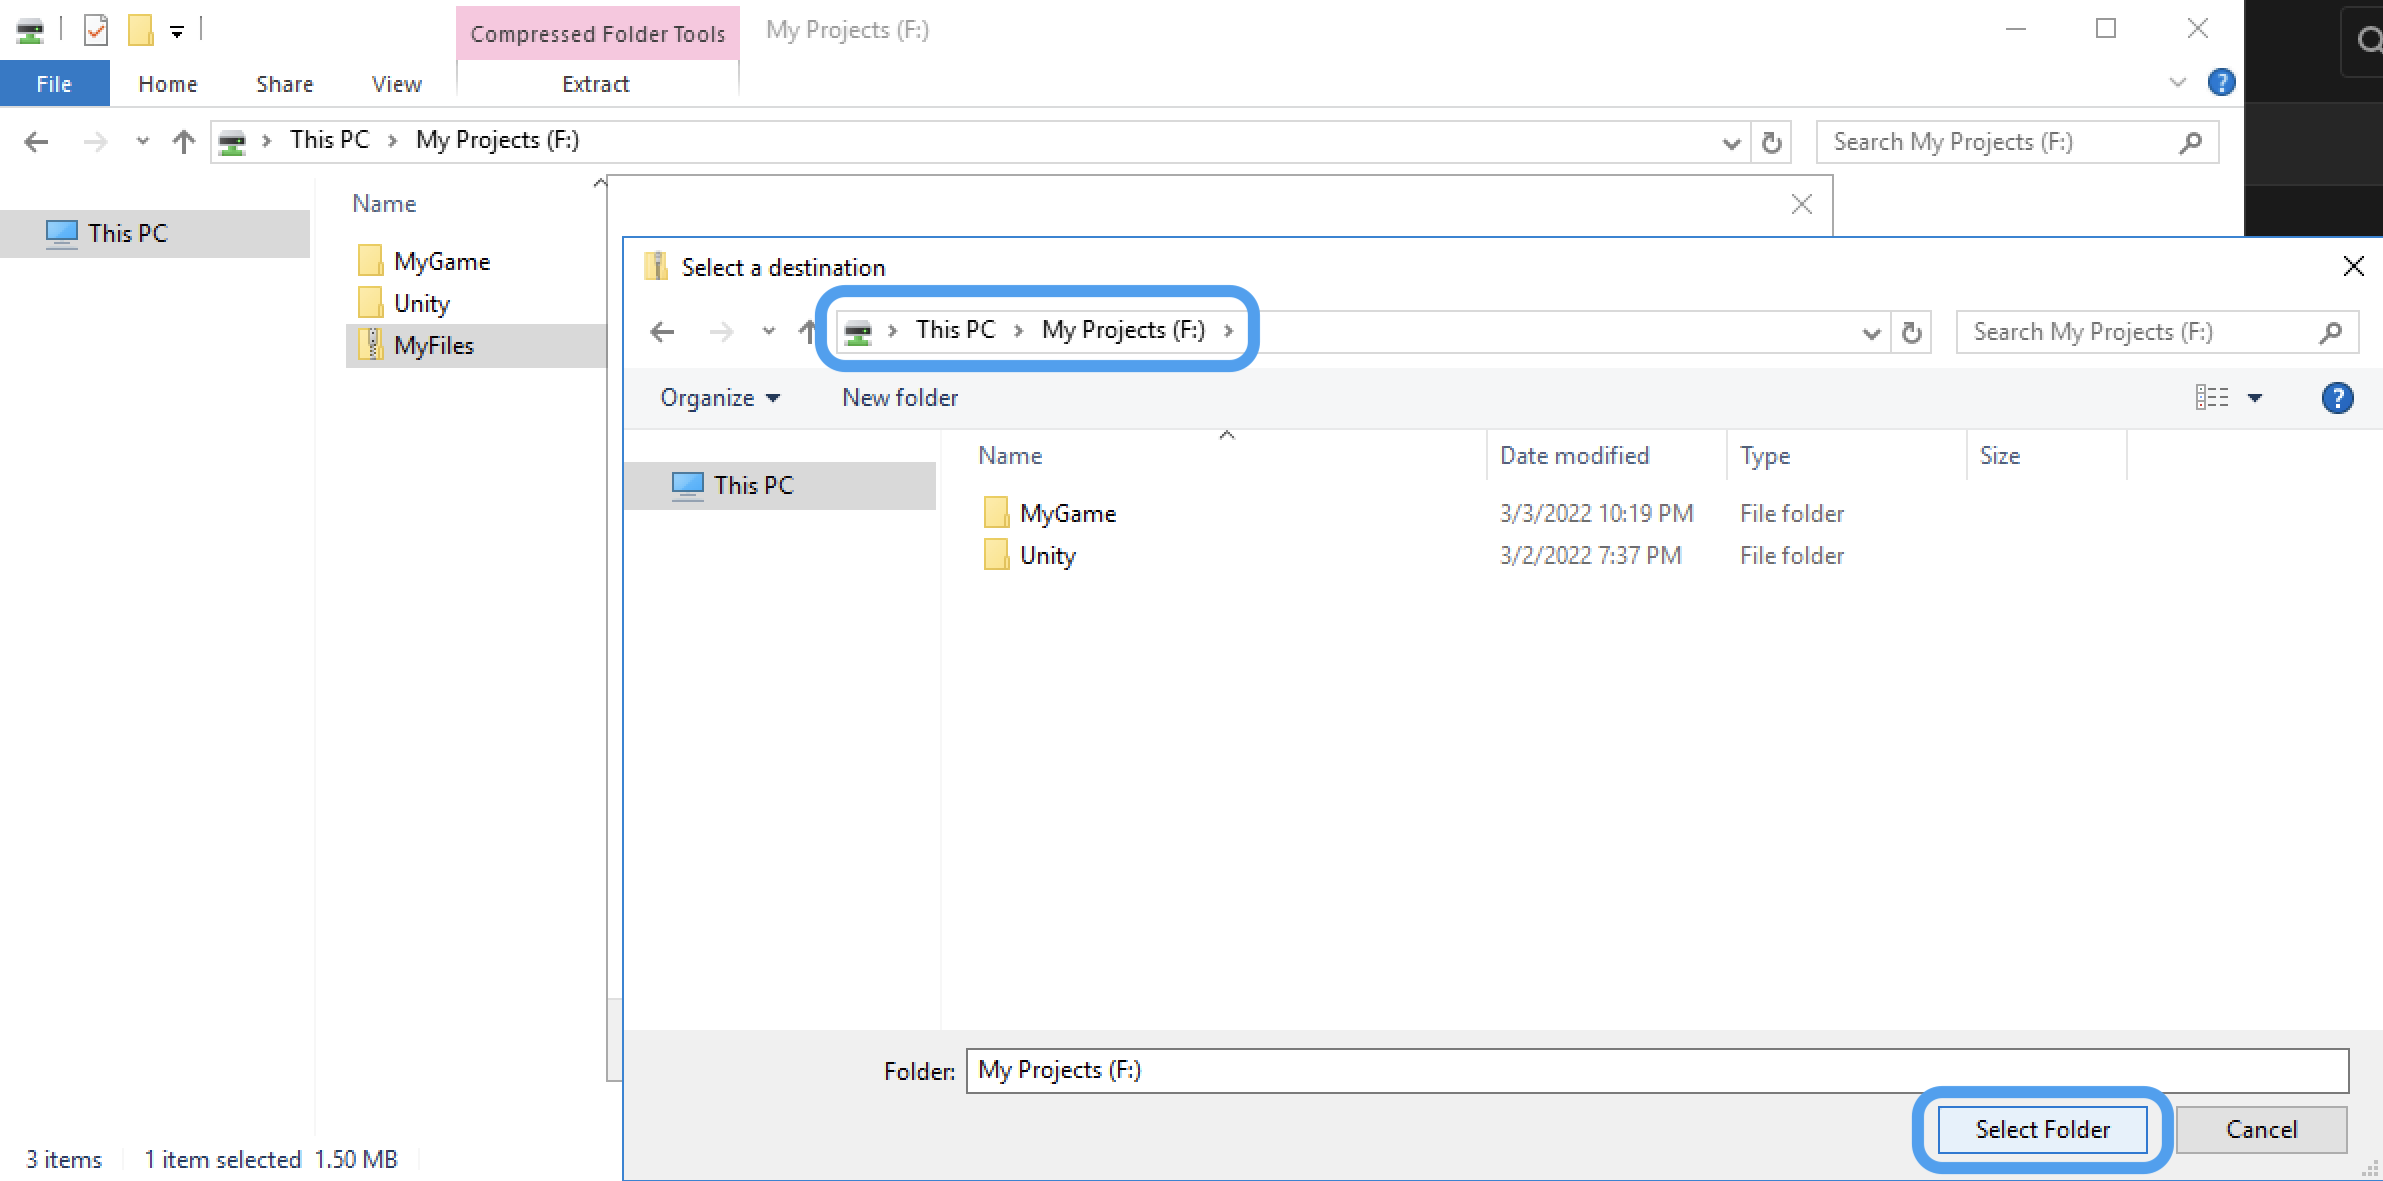
The extracted files will now appear in an unzipped folder in your ‘My Projects’ folder.
5. Bringing assets into the EdLab Editor
Once you’ve unzipped your folder, it’s time to bring your assets into the Editor. You can do this by dragging and dropping them from the File Explorer to an open project’s Asset tab.
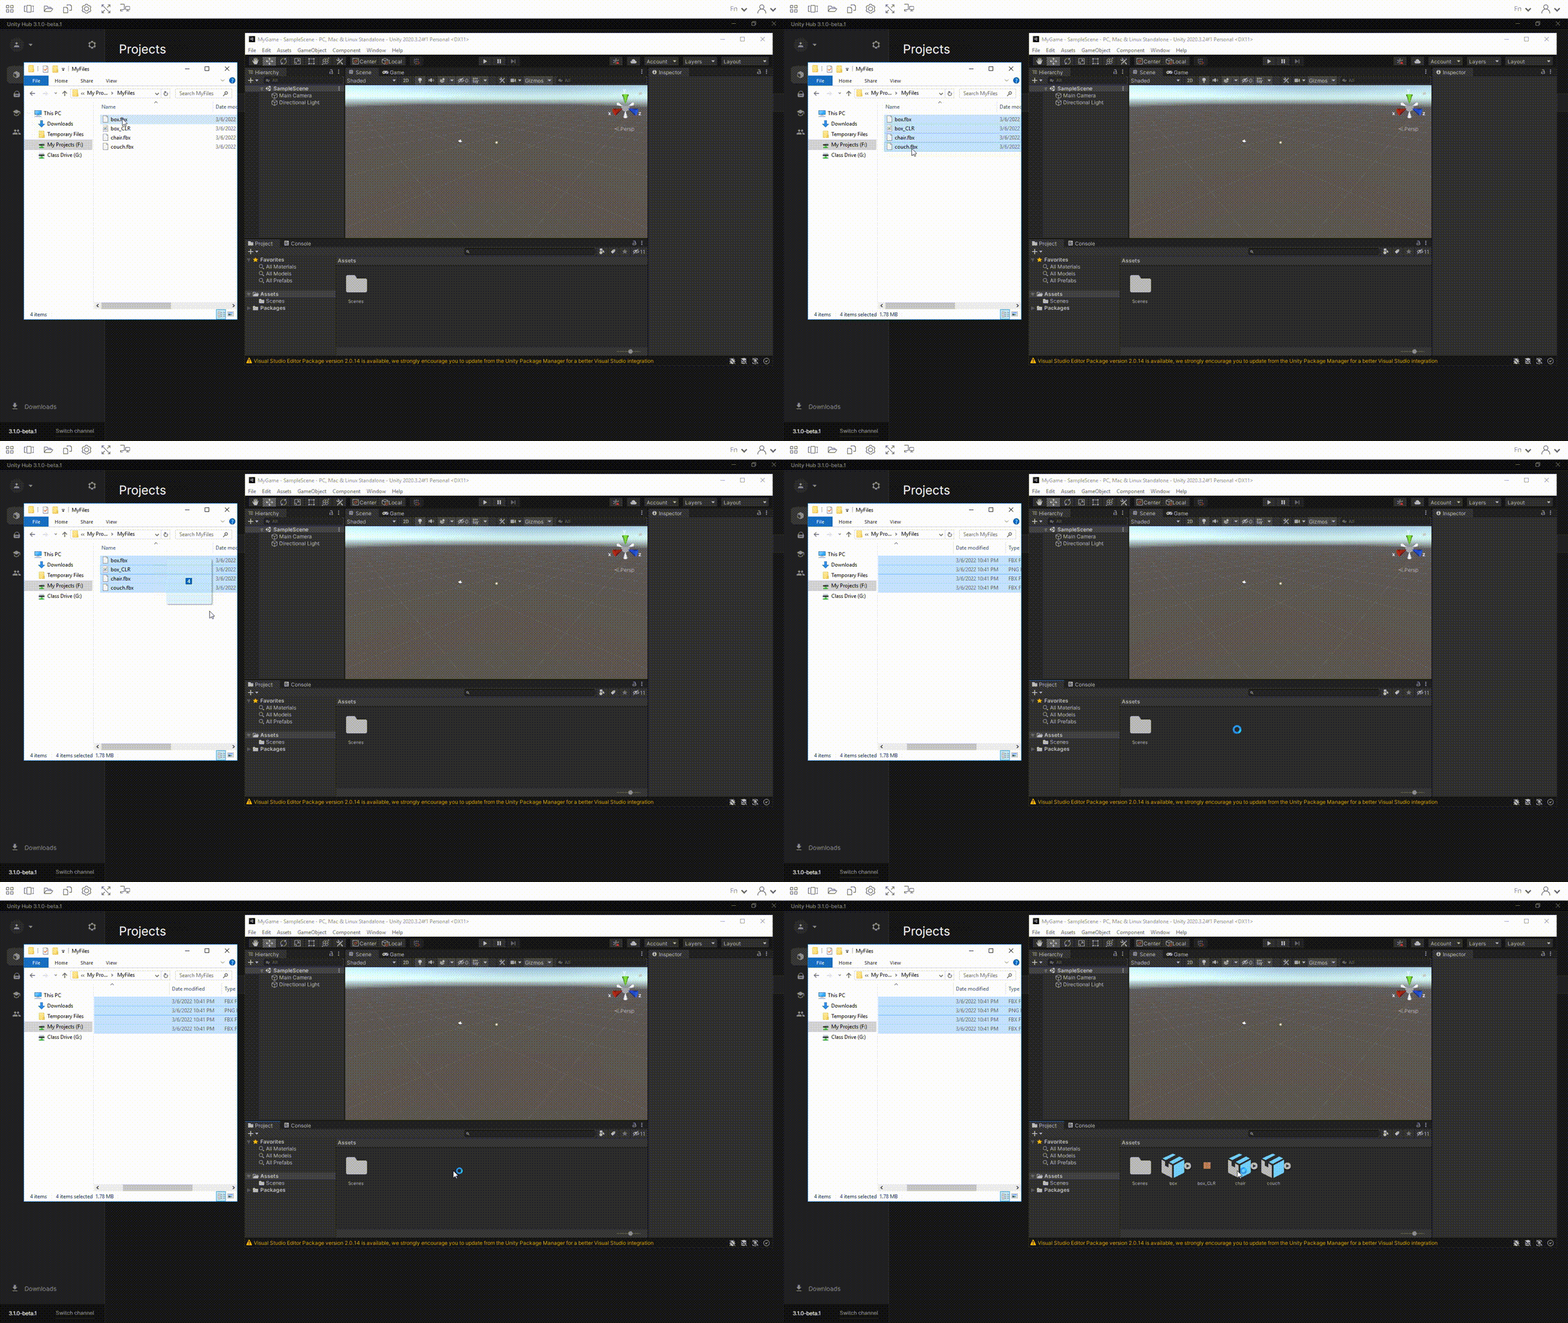
You can also bring them in manually by clicking Assets > Import New Asset > This PC > My Projects and selecting one or more files to import.
Lastly, if you are importing a .unity package file, you can double-click it while you have an existing project open, and an import prompt will pop up automatically.