
Working with Audio Components
Tutorial
Beginner
+10XP
20 mins
(622)
Unity Technologies
Unity’s audio system imports most standard audio file formats. It allows you to mix and master in real time, and it can replicate 3D spatial sound effects like echo, object movement (like the sound of a fast-moving car), and reverb. In this tutorial, you'll prepare in import audio files, and add Audio Source and Audio Listener components to your project.
Languages available:
1. Working with Audio Components
This tutorial has been verified using Unity 2019 LTS
Unity’s audio system imports most standard audio file formats, allows you to mix and master in real time, and can be used to replicate 3D spatial sound effects like echo, object movement (like the sound of a fast-moving car), and reverb.
Unity imports audio files as Audio Clips. To use an Audio Clip in a Scene, you must first attach it to a GameObject. A GameObject with sound attached to it is an Audio Source — think of it like a speaker. An Audio Source’s sound is picked up by an Audio Listener (the microphone), which is usually attached to the main camera, and played through the computer’s speakers. Sounds can be modified with Audio Effects to take into account things like where the Audio Listener is located in relation to the sound or a GameObject’s role in a Scene. (Figure 01)
Unity supports AIFF, WAV, MP3, and Ogg file formats and mono, stereo, and multichannel audio with up to eight channels. Live audio can also be recorded directly during gameplay using a microphone connected to a user’s computer.
2. Prepare an Audio File
In Unity, an audio file can be saved at different sample rates. The lowest you’d want is 11025Hz, with 22050Hz or 48000Hz being ideal. A higher sample rate will result in larger files. For AIFF and WAV audio files, make sure the bit depth is 32-bit and not floating point
3. Preparing and importing audio files
1. Create or save an audio file using the settings necessary for Unity.
2. Import your audio files into your Unity Project. Audio files can be imported into a project much like other files: either drag the audio file into the Project panel, or place the audio file in the Assets directory of the Unity Project directory.
Note: Importing an audio file creates a container for the audio data called an Audio Clip.
3. In the Project panel, select the imported Audio asset.
4. In the Inspector panel, change import settings if necessary. For example, if your audio file has two tracks for stereo, you can select Force to Mono if stereo separation isn’t needed. There are also platform-specific settings for each type of build. (Figure 02)
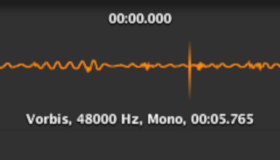
5. At the bottom of the Inspector panel is a waveform preview of the imported audio file. You can preview the audio by pressing play. (Figure 03)
4. Adding an Audio Source Component
An Audio Source GameObject component plays back an audio clip in a Scene. To play, the component needs an assigned audio clip. The audio clip is the actual sound file that will be played back. The Source is a controller for starting and stopping playback of the audio file and modifying other audio properties. (Figure 04)
To add an Audio Source Component:
1. Select GameObject menu > Audio > Audio Source. This will create a GameObject in the Scene, with an Audio Source component attached.
2. Assign the previously imported audio file to the Audio Clip property of the Audio Source Component in the Inspector. You can do this by dragging the audio clip from the Project panel into the Audio Clip property field, or click the radio button next to the property field and selecting the audio clip from the Assets window. (Figure 05)
3. Adjust any settings for the audio clip for the GameObject.
Adjust the Audio Source parameters to change how and when the audio is played. The Play On Awake option is on by default, and will play the audio clip as soon as the Scene begins. If the audio clip needs to play during a specific action, such as footsteps as a character is walking, click the Play On Awake option. The loop option will play the audio clip over and over until the action stops. This is helpful with actions like walking, because the footsteps will continue as long as the action happens.
5. Adding an Audio Listener Component
In real life, sounds are transmitted by an object’s vibrations. Those vibrations are received by a listener. A listener can tell roughly which direction a sound is coming from and may also get some sense of its distance based on loudness and quality. A fast-moving sound source (like a falling bomb or a passing police car) will change in pitch as it moves. Also, surroundings will affect the way sound is reflected, so a voice inside a cave will have an echo but the same voice in the open air will not.
To add an Audio Listener Component:
1. Create a GameObject, such as a camera or a character controller, and click Add Component in the Inspector panel.
2. Select Audio > Audio Listener. This will add an Audio Listener component to the GameObject. (Figure 06)
The Audio Listener GameObject component has no properties (Figure 07). It’s included on the Main Camera by default, and included with any new cameras. The Audio Listener can also be attached to a GameObject that represents the player so the audio will play based on the position of the player, rather than the camera. However, a Scene can have only one Audio Listener component attached to an object.
6. Conclusion
With a few basic steps, you can add audio clips to a project, set up sources to transmit sound in a Scene, and select objects, character controllers, or cameras as listeners to receive the sound and play it back. Using audio components adds realism and provides interactive feedback for the player.