
Working with Unity and GitHub
Tutorial
Beginner
+5XP
15m
(325)
Unity Technologies
1. Getting Set up with GitHub
There are many options for working with Git, ranging from working entirely within the command-line, to using desktop clients such as Sourcetree or GitKraken. Additionally, there are many cloud-hosting platform options that incorporate Git, including Bitbucket, Digital Ocean, and Visual Studio Codespaces. Unity developers and teams can also seamlessly incorporate GitHub into their workflows using a Unity Asset.
For this tutorial, we will use the Sourcetree application, the GitHub cloud service, and the GitHub Unity Asset.
1. Install Git on your computer.
2. Register an account with GitHub, and login.
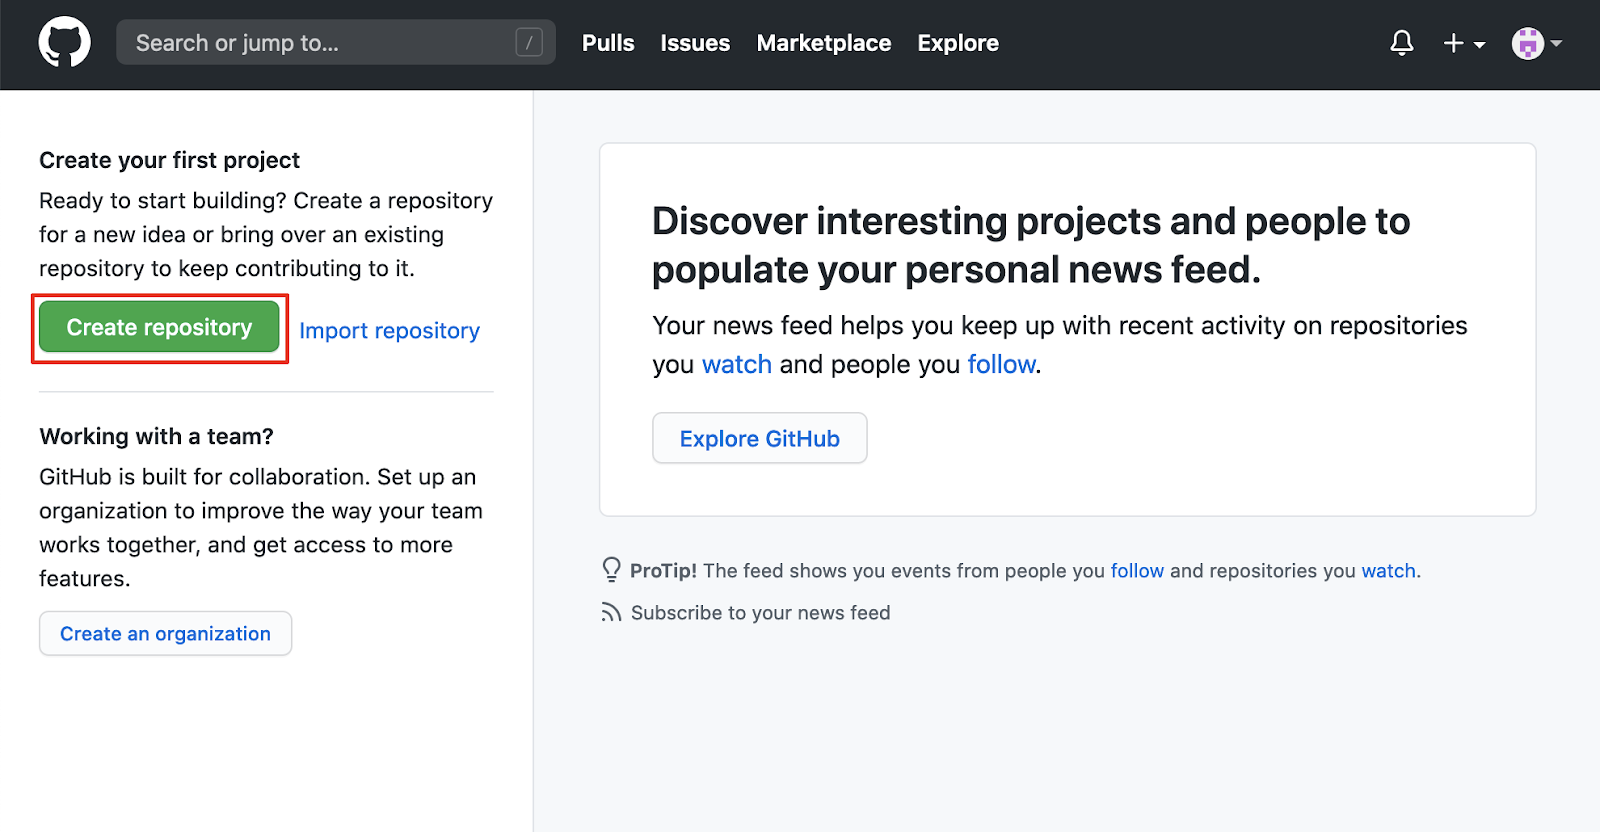
3. Create a repository by selecting the Create repository button.
4. Enter a Repository name, and write a short description. Set the repository settings to either Public or Private. Select the checkbox next to the Add .gitignore option, and then select Unity from the .gitignore template dropdown menu. Optionally, select to add a README file, and to choose a license for your code. Then, select the Create repository button.
5. Your GitHub repository is now created.
2. Download Sourcetree and access your repository
You will later have to add team members to your repository using their GitHub account name, so that they can upload content. But for now, let’s access the publicly available URL address of your repository. First select the Code button, and then copy your repository address by selecting the clipboard icon to the right of the address field. We will paste this URL address in an upcoming step.
1. Download and install Sourcetree, and then open up the Sourcetree application.
2. Connect to your GitHub cloud repository with Sourcetree. First select the Remote tab, and then select the Connect button. Alternatively, Select from the top menu dropdown: Sourcetree > Preferences, and then select the Accounts tab to open up the account options.
3. Select the Add button to add an account
4. Select GitHub from the Host dropdown menu, and then select the Connect Account button.
5. The Github authorize page will open in a web browser. Sign into GitHub using your registered username and password, and then select the Authorize atlassian button.
6. For our example, ensure that the HTTPS Protocol is selected from the dropdown menu. If your project requires the SSH protocol, you will need to additionally link a key. Select the Save button to complete your account setup.
7. Close out of the settings window. Select the Local Tab, and then select the New button. Then, select Clone from URL from the dropdown menu.
8. Paste the GitHub repository URL copied from step 5 in the Source URL field. Establish the Destination Path, and set the Name of your repository’s file folder. In the Advanced Options, select the Checkout branch option to master. (Note that you may see the master branch referred to as the Main branch.) Select the Clone button to store this repository locally.
The Sourcetree application’s workspace window will open. The newly created local repository folder doesn’t yet contain any files.
9. From the Unity Hub, either create a new Unity project to the local repository folder, or copy an existing project to its location, and then open up your project.
10. After your project has been fully loaded, switch back to the Sourcetree application’s workspace view. You will now see the Unity project files listed.
We have now successfully set up our GitHub repository. We have established our Unity project to exist in our local repository, now visible in the Sourcetree application. Finally, there is a GitHub asset for Unity that can help with version control management within the Unity Editor.
3. Install the GitHub asset for Unity
1. Open the GitHub for Unity Asset page in a web browser, select to add the asset, and then select to open the asset in the Unity Editor. With the Unity Editor now open, the Package Manager window will appear, showing the GitHub for Unity asset. Select the Download button to download the asset, and then the Import button to add it to your Unity project.
2. The Import Unity Package pop window will open. Again, select the Import button to install the GitHub for Unity asset.
3. The GitHub Unity Asset is now installed. To open up the GitHub window, select from the top menu dropdown: Window > GitHub. Select the button to: Initialize a git repository for this project.
4. Select the Sign in button at the top-right of the GitHub window. Sign in using your GitHub credentials in the Authenticate window, and then again select the Sign in button.
5. Confirm your GitHub Unity Asset settings by selecting the Settings tab in the GitHub window.
You have now successfully set up the GitHub asset for Unity, and have logged in with your GitHub account credentials.
4. Save and track changes with GitHub and Sourcetree
We will now explore the procedures for saving and tracking any Unity project changes. Let’s take a look at our Sourcetree workspace.
In this example workspace, note that an entire Unity project has been added inside the local repository, containing a large number of files. There will be some files which are unnecessary or redundant to include in a version control system, such as library items or other files within the project settings. To address this, a .gitignore file has been placed in the root repository folder. GitHub helpfully provided this .gitignore template for Unity when we originally created our repository.
Additionally, since GitHub wasn’t originally designed to handle large-sized files such as videos or 3D models, it is a good practice to also keep them out of version control. When large files are included, repository sizes can quickly grow quite large for each participant, and push / pull speeds can become slower.
Fortunately, GitHub now offers capabilities for LFS (Large File Support.) To enable LFS on your machine, refer to the Git LFS page, download the package, and install.
Aside from large file sizes, you will likely encounter a need to exclude certain files in your repository. You can accomplish this by editing the .gitignore text file itself, or by using Sourcetree. We will practice both techniques to work with .gitignore, starting with Sourcetree. Let’s first practice using Sourcetree to ignore files, by excluding the Standard Assets folder within our repository.
1. Select any Standard Assets file in the Sourcetree workspace by right-clicking on the file, and then selecting Ignore from the dropdown menu. Alternately select from the top menu dropdown: Actions > Ignore.
2. You are able to ignore an individual file, all file types with a certain extension, or an entire folder. To exclude everything within the Standard Assets folder, select the option to Ignore everything beneath Standard Assets, and then select OK.
It is a good file-management practice to ensure that unnecessary files and folders have been carefully excluded. Let’s go ahead and further utilize the .gitignore file by editing the text file itself. Because the .gitignore file is a hidden file within your repository folder, you will first need to enable your file browser to show hidden files.
3. Navigate to your local repository folder on your file browser, and open up the .gitignore file in a text editor. The GitHub Unity template .gitignore file appears as:
# This .gitignore file should be placed at the root of your Unity project directory
#
# Get latest from https://github.com/github/gitignore/blob/master/Unity.gitignore
4. Scroll down, and you will see that entire folders or file types can be excluded. In the example below, the entire contents within the Library and Temp folders are excluded, as well as any file with a .tmp or .userprefs file extension.
/[Ll]ibrary/
/[Tt]emp/
*.tmp
*.userprefs
We can prepare our custom .gitignore file by specifying which folders to exclude. To see custom examples of .gitignore files shared from GitHub community members, refer to this example, or this example as well. Additionally, refer to the official GitHub Unity.gitignore page.
5. Make any custom changes to your .gitignore file, and then save your file.
6. To update your existing repository to the new changes that are now in your .gitignore file, run the following git commands in your command line interface. Make sure you enter the command from within your local repository folder location. The following command removes any of the changed files from our local repository cache. Enter this command into the Terminal as:
git rm -r --cached .Next, commit the change, by entering:
git add .Lastly, commit with the comment, by entering:
git commit -m ".gitignore file is now working"You will be able to continue with Unity and Sourcetree, with the repository updated to reflect the .gitignore changes.
We will now proceed to save our project into both our local and hosted repositories, by performing the sequence to Commit, and then Push our files.
7. To add our files to our local repository, first ensure that the files are selected in the Sourcetree workspace. Next, select the Commit button at the top-left of the workspace. Type in a comment in the description field, and then again select the Commit button.
8. To upload to our GitHub cloud hosted repository, select the Push button. Press OK on the popup that appears to complete the Push.
You have now successfully saved your project files to both your local and cloud repositories.
Let’s next add some changes to our Unity Scene.
5. Save and track changes with GitHub and Unity
In the example project, recent changes have been made, and a series of pushes have been made as well. With the Scenes folder selected in the Project window, you can see a newly saved Scene named “v14” with a green + icon next to it. Any newly added or changed file will have this marker visible next to it. In the Unity Editor’s GitHub window, you are able to track the sequence of changes in the History tab.
1. In order to continue synchronizing changes to our repository from within the Unity Editor, select the Push button at the top of the GitHub window, and then again select Push from the popup window.
2. Confirm the Push confirmation by selecting the OK button.
Let’s now switch to the perspective of another team member’s view. In order to collaborate with other team members, they must also have Git installed. Additionally, they must clone the specific GitHub repository using the same public (or private) URL address. Finally, the teammate’s GitHub user name must be added as a contributor to the owner’s repository. They will receive an email invite to join the repository, and must select the GitHub link to accept the invitation.
Here is the view of our team member’s Unity Editor. Their GitHub asset is successfully installed, and everything is set up and synced.
3. To update our recent changes, select the Pull button at the top of the GitHub asset window, and confirm by again selecting the Pull button.
Our team member’s Unity project folder has successfully updated the recent Scene “v14” file addition.
6. Next steps
Now that you have successfully set up the GitHub version control system, you and your teammates will have the freedom to work both collaboratively and autonomously with your Unity projects. You will have the flexibility and control over managing complex projects, as well as having the additional tools to collaborate with your team.