
Working with Unity Cameras - 2019.3
Tutorial
Beginner
+10XP
15 mins
(102)
Unity Technologies
In addition to the Cinemachine add-on, Unity offers a few stock camera options: orthographic cameras, great for retro games; perspective cameras, the classic 3D game and walkthrough standby; and physical cameras that work like film cameras, great for matching live-action footage as well as giving your project a cinematic feel, whether indie or big-budget blockbuster.
In this tutorial, we’ll explore these, creating one of each Camera type for a specified purpose.
Languages available:
1. Introduction
If you are using Unity 2019.2 or below, click here.
In addition to the Cinemachine add-on, Unity offers a few stock camera options: orthographic cameras, great for retro games; perspective cameras, the classic 3D game and walkthrough standby; and physical cameras that work like film cameras, great for matching live-action footage as well as giving your project a cinematic feel, whether indie or big-budget blockbuster.
2. Creating a Camera
To create a Camera, select Camera from the GameObject drop-down. The camera type and options are then set using the Camera’s Inspector.
3. Moving the Camera
The Camera can be moved via the normal Inspector tools. More intuitively, the Camera can be moved (useful for 2D) or aligned (useful for 3D) to match the Scene view. To navigate the Scene view, click and drag the middle mouse button to move the Scene view Camera without rotating it. Hold ALT and Right Mouse Button to dolly in/out of the Scene. Hold ALT and Left Mouse Button to pan/tilt the Scene view Camera without moving it
To move or align the Camera to/with the Scene view, select the Camera in the Hierarchy view and select "Align With View" from the GameObject drop down menu.
To move the Camera to the Scene view, select Move to View from the GameObject drop-down.
To align the Camera to the Scene view, select it in the hierarchy and choose Align with View from the GameObject drop-down.
All cameras are centered within the frame, just as the lens of a camera is typically centered with respect to the film/sensor plane. All cameras also have near and far clipping planes. Objects closer than the near or farther than the far clipping plane are not rendered.
4. Orthographic Cameras
Orthographic cameras (Figures 01 and 02) do not use perspective or foreshortening. An object viewed in an Orthographic Camera will always appear the same size. A two-unit-high object will appear twice as tall as a one-unit-high object, regardless of where the are in relation to each other and to the Camera. Parallel lines and edges remain parallel.
The size of an Orthographic Camera specifies how many Unity units fit vertically between the Camera and either the top or bottom edge of the screen. In 2D projects, this is directly related to the Pixels Per Unit setting for Sprites. For example, let’s say we have a 2D project where the Sprites are 16 pixels per unit tall and we want to fit 12 Sprites vertically on screen. The Camera’s orthographic size would be set to six. Orthographic cameras are most often used in 2D projects, but may also be used in 3D to avoid perspective distortion.
5. Creating an Orthographic Camera
In this scenario, we’ll create a Camera that scales cleanly to any HD/4K+ resolution. We’ll assume the user has set the game’s art to 16 pixels per unit.
- Create a Camera by selecting Camera from the GameObject drop-down.
- In the Camera’s Inspector, set the Projection to Orthographic.
- Set the size to 11.25. We arrived at this number by taking half of the screen height (360/2 = 180) and dividing it by the Pixels Per Unit setting to get 11.25. We chose 640x360 because it scales cleanly into 1280x720, 1920x1080, 3840x2160, etc.
6. Perspective Cameras
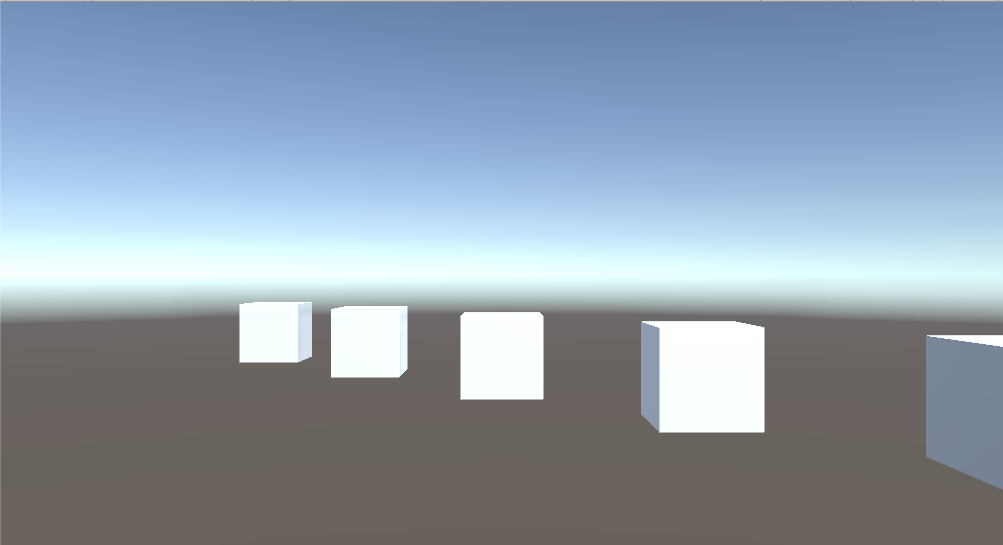
Perspective cameras (Figures 03 and 04) work similarly to cameras in the real world. Objects farther away from the Camera appear smaller, and lines and edges converge at some vanishing point(s). Where the Orthographic Camera’s coverage is specified by a size, the Perspective Camera has a field of view. Perspective cameras are most often used in 3D projects, such as games or walkthroughs, or anywhere the view needs to resemble that of a real camera. Perspective cameras are also sometimes used in 2D projects for the automatic parallax effect they offer.
7. Creating a Perspective Camera
In this exercise, we’ll create the equivalent of a 50mm lens shooting on 35mm film. This is a common, all-purpose lens in photography that simulates the way the human eye sees.
- Create a Camera. By default, a newly created Camera is set to Perspective mode with the Field of View Axis set to Vertical.
- Set the FOV to 27.
- Try building a Scene that matches your physical surroundings and place the camera at five virtual feet off the ground, or about eye level for the average person. How does the Camera view match or differ from your own view?
8. Physical Cameras
A third option, the Physical Camera (Figures 05 and 06), enables behavior matching that of a film-based camera. This is great for simulating live-action footage, as well as giving your project a cinematic feel. To create a Physical Camera, set the camera’s projection to Perspective and check the box marked Physical Camera.
In addition to Field of View, the Physical Camera’s coverage can be specified by two related settings: Sensor Size, matching the sensor size of a real or imaginary film camera, as well as Focal Length. The Sensor Size is the physical size of the area onto which the image is rendered (or “filmed”), and the Focal Length is the distance between the lens and the film/sensor.
9. Creating a Physical Camera
In this exercise, we’ll pretend that we’re about to shoot a movie and we’d like to try out different lenses and film formats to decide which best matches the look we’re after.
- Create a Camera and check the box labeled Physical.
- Try various settings for the Sensor Size. How does 70mm IMAX compare to Super 8 in your Scene? Try creating your own custom film format.
- Try experimenting with the focal length of the lens.
- Notice how Focal Length and Sensor Size (equivalent to film size for analog media) are related. A lens of a certain focal length takes in a corresponding amount of the Scene, but only the parts of the Scene that fall on the film/sensor are viewed/recorded.
- Try getting the same image with different Focal Length/Sensor Size settings. .
- Try making a Medium Shot, Long Shot, Master Shot, Close Up, etc.
10. Conclusion
Experiment with Unity’s various built-in cameras to set the mood and enhance the visual effects of your projects.