
Baking Texture Maps in 3dsMax for Unity
Tutorial
intermediate
+10XP
30 mins
23
Unity Technologies
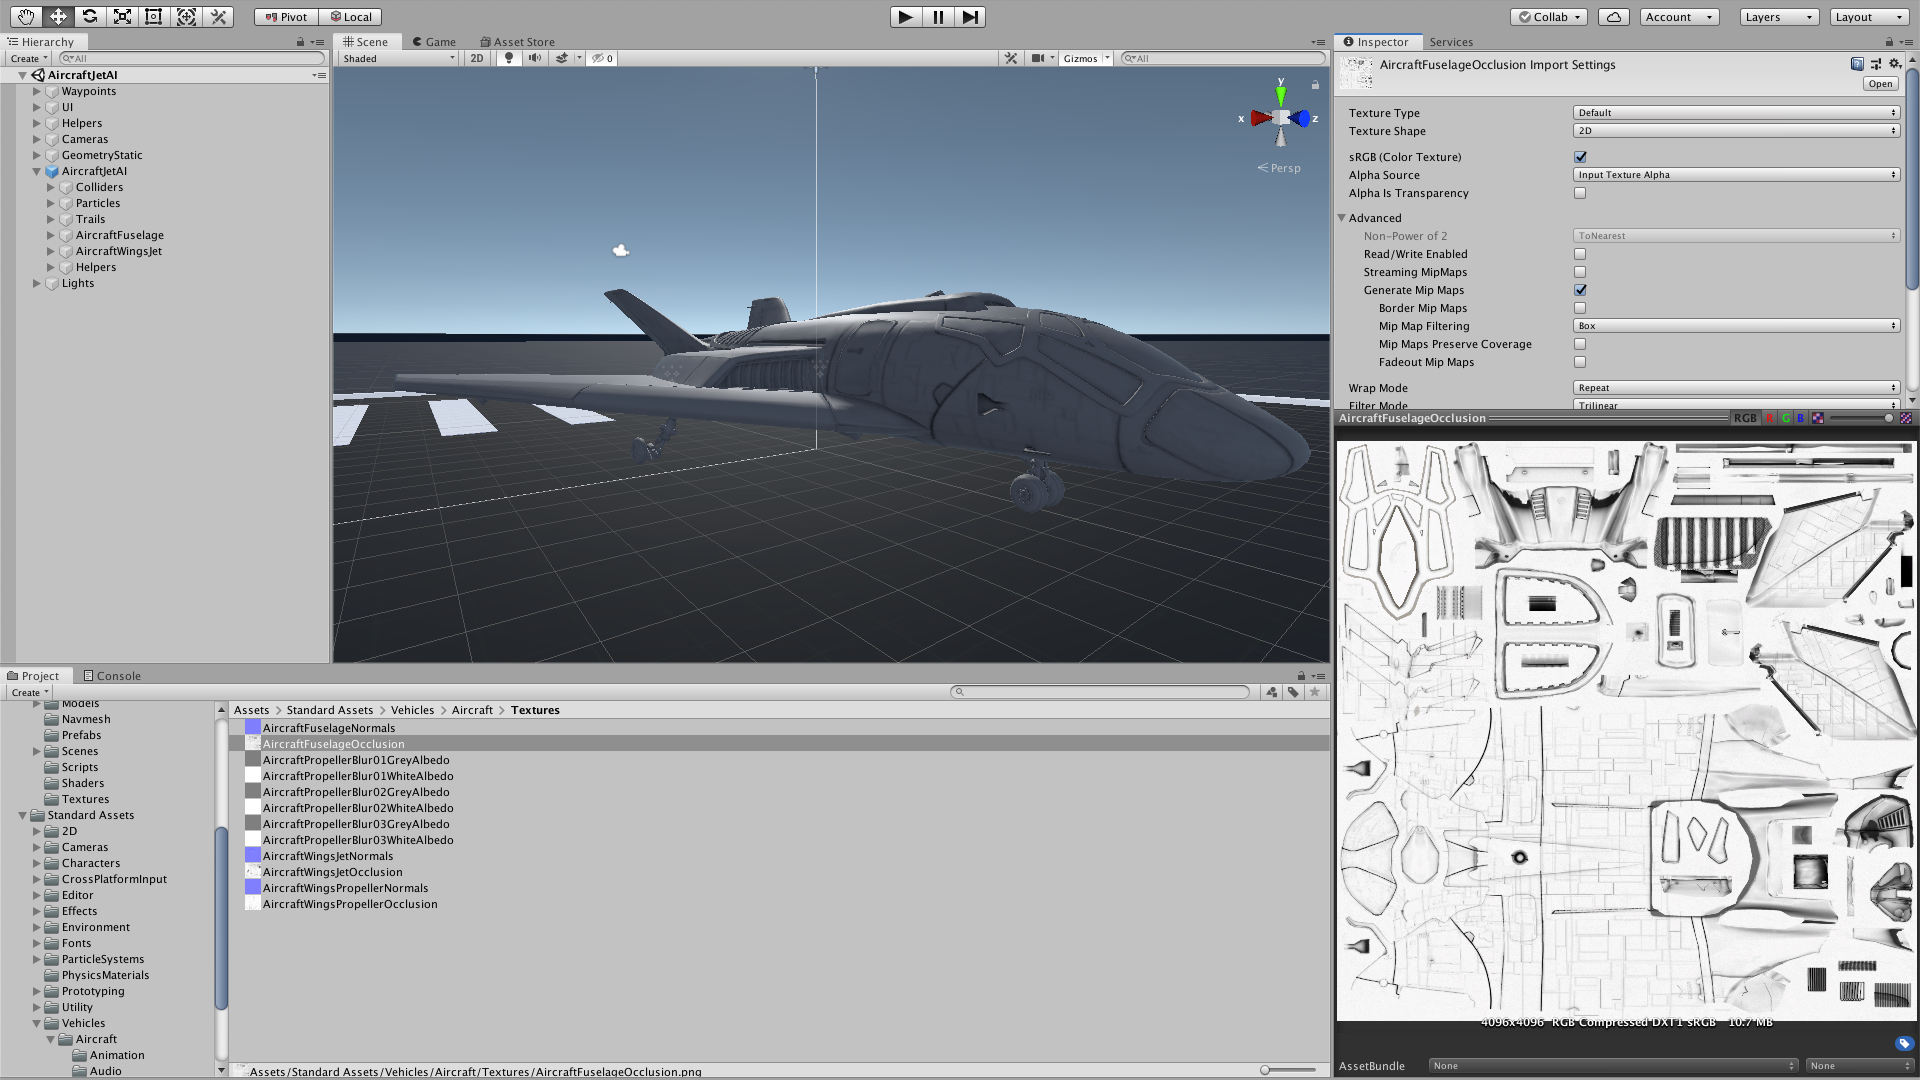
You can bring a lot of detail to your GameObjects by using precomputed textures to provide normal mapping and ambient occlusion. These maps help make a scene more realistic. With 3dsMax, the process of creating normal and Ambient Occlusion (AO) maps is quite straightforward.
1. Introduction
Before we begin, create a new scene in your 3dsMax project and add the object for which you’ll be creating AO and normal maps. This object will already have Level of Detail (LOD) created.
2. Baking the Normal Map
Once you have High Poly and Low Poly models in the scene, select the Low Poly model.
Choose Rendering > Render to Texture. This opens the Render to Texture window. (Figure 01)
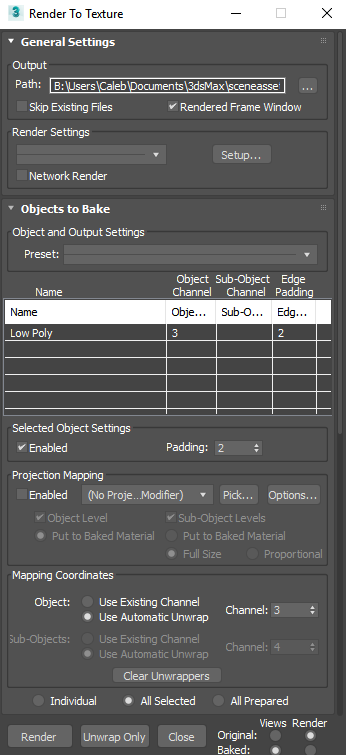
3. Choose Objects to Bake
On the Objects to Bake rollout, under Projection Mapping, click Pick.
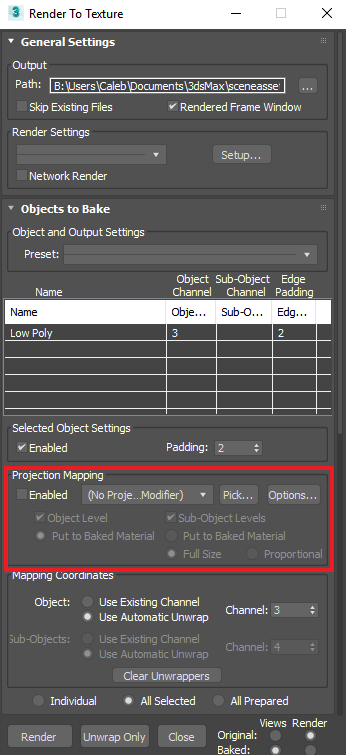
4. Select the Model
Choose the High Poly model and click Add.
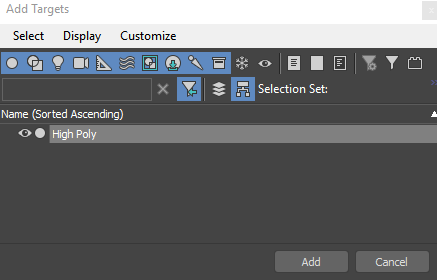
5. Enable Projection Mapping
Under Projection Mapping, click Enabled.

6. Adjust Output Settings
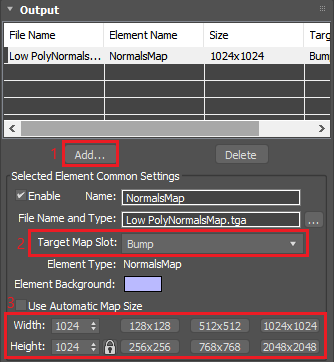
On the Output rollout, add a NormalsMap element and assign Bump as the Target Map Slot. Once it’s added, you can change the name and image size.
7. Select Option
In the Selected Elements Unique Settings group, turn on Output into Normal Bump.

8. Render
Finally, click Render at the bottom of the window.
Clicking the Render button will open a new window where you can watch the rendering process. When it’s complete, you can save the render from this window. 3dsMax also automatically saves the render in the pre-designated folder you specified earlier.
9. Baking the Ambient Occlusion (AO) Map
To bake the AO Map, begin with a new scene that includes the object you want to use. This workflow again uses the teapot model with the LOD already set up.
10. Select Renderer
First, make sure you have the latest Arnold Renderer by downloading and installing it from Arnold Renderer. This will make the AO Map creation efficient, quick, and high-quality
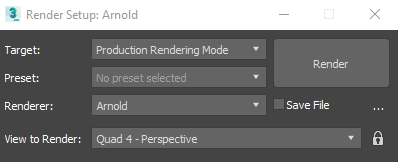
Once the install is finished, set up the renderer. Open Render Setup by pressing F10 and set the Renderer to Arnold.
11. Select Object and Assign Target Map
Select the object you wish to bake.
Choose Rendering > Render to Texture to open the Render to Texture window.
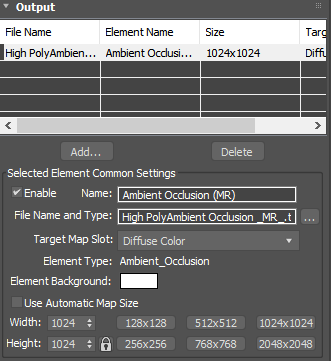
On the Output rollout, add an Ambient Occlusion element and assign Diffuse Color as the Target Map Slot. Once it’s added, you can change the name and image size.
12. Adjust Samples
If needed, you can adjust the number of samples for the Ambient Occlusion render. More samples means higher quality but a longer render time.

13. Render Map
Finally, click Render at the bottom of the window.
Clicking Render will open a new window where you can watch the rendering process. When it’s complete, you’ll be able to save the render by clicking the floppy disc icon in the top left of the window. This will also save a copy of the render in the file path you provide at the top of the window.
14. Conclusion
Baking is one way to generate normal and AO texture maps to add polish and detail to objects within a scene.