
Getting started with Android XR in Unity
Tutorial
Beginner
+10XP
20 mins
(22)
Unity Technologies
Want to bring your Unity projects to Android XR? In this tutorial, you’ll learn how Android XR fits into Unity’s XR ecosystem, set up the tools you need, and run your very first scene on a device.
By the end of this tutorial, you’ll have accomplished the following:
- Learned how Android XR fits into Unity’s OpenXR-based workflow.
- Created a new Unity VR project using the VR template.
- Configured Unity for Android XR using build profiles.
- Deployed and run the BasicScene on your headset.
1. Overview
In this tutorial, you’ll learn how Android XR fits within Unity’s XR ecosystem, set up a new VR project using the VR template, configure Android XR with build profiles, and deploy the BasicScene to an Android XR headset. By the end, you’ll have a working scene running on your device.
2. What is Android XR?
Android XR is an operating system from Google that powers XR devices. It’s built on top of OpenXR, an open standard that ensures compatibility across different platforms.
Through OpenXR, Unity supports XR development across multiple platforms including Android XR.
In this tutorial, you’ll create a Unity project targeting the Android XR platform and get it running on your device with the minimum setup.
3. Install your tools
Before you can build for Android XR, make sure you have installed the following:
- The Unity Hub – to manage Unity versions and projects.
- Unity 6.2 or newer (LTS recommended) – required for Android XR build profiles.
- Android Build Support (SDK & NDK) module – so you can build to Android devices.
Instructions:
To make sure your development environment is configured for Android XR, follow these instructions:
1. Install the Unity Hub if you don’t already have it.
2. In the Unity Hub, install Unity 6.2 or newer (LTS recommended).
3. When installing your Unity version, enable Android Build Support (SDK & NDK).
For a more in depth guide on these installations, check out the Explore the Unity Hub tutorial.
At this point, your development environment is ready to build for Android XR.
4. Create a VR template project
Unity’s VR Template is a quick way to get started — it comes with a prebuilt scene (BasicScene), starter assets, and common XR settings.
Instructions:
To create a new Unity project using the VR template, follow these instructions:
1. Open the Unity Hub.
2. Select Projects > New Project > VR Template (Download the template if not already downloaded).
3. Ensure Unity 6.2 (or later) is selected from the Editor version dropdown.
4. Give your project a name.
5. Choose a save location.
6. Select Create Project.
For a more in depth guide on these installations, check out the Explore the Unity Hub tutorial.
Once the project opens, a welcome window introducing the VR Template Project will appear.
7. Select Close.
Your Unity project is now created and ready for Android XR setup.
5. Create and switch to an Android XR build profile
Unity 6.2 introduced build profiles, which let you manage builds for different platforms. Unity leverages build profiles to automatically configure project settings for running optimally on the Android XR platform.
Instructions:
To create an use a build profile for Android XR, follow these instructions:
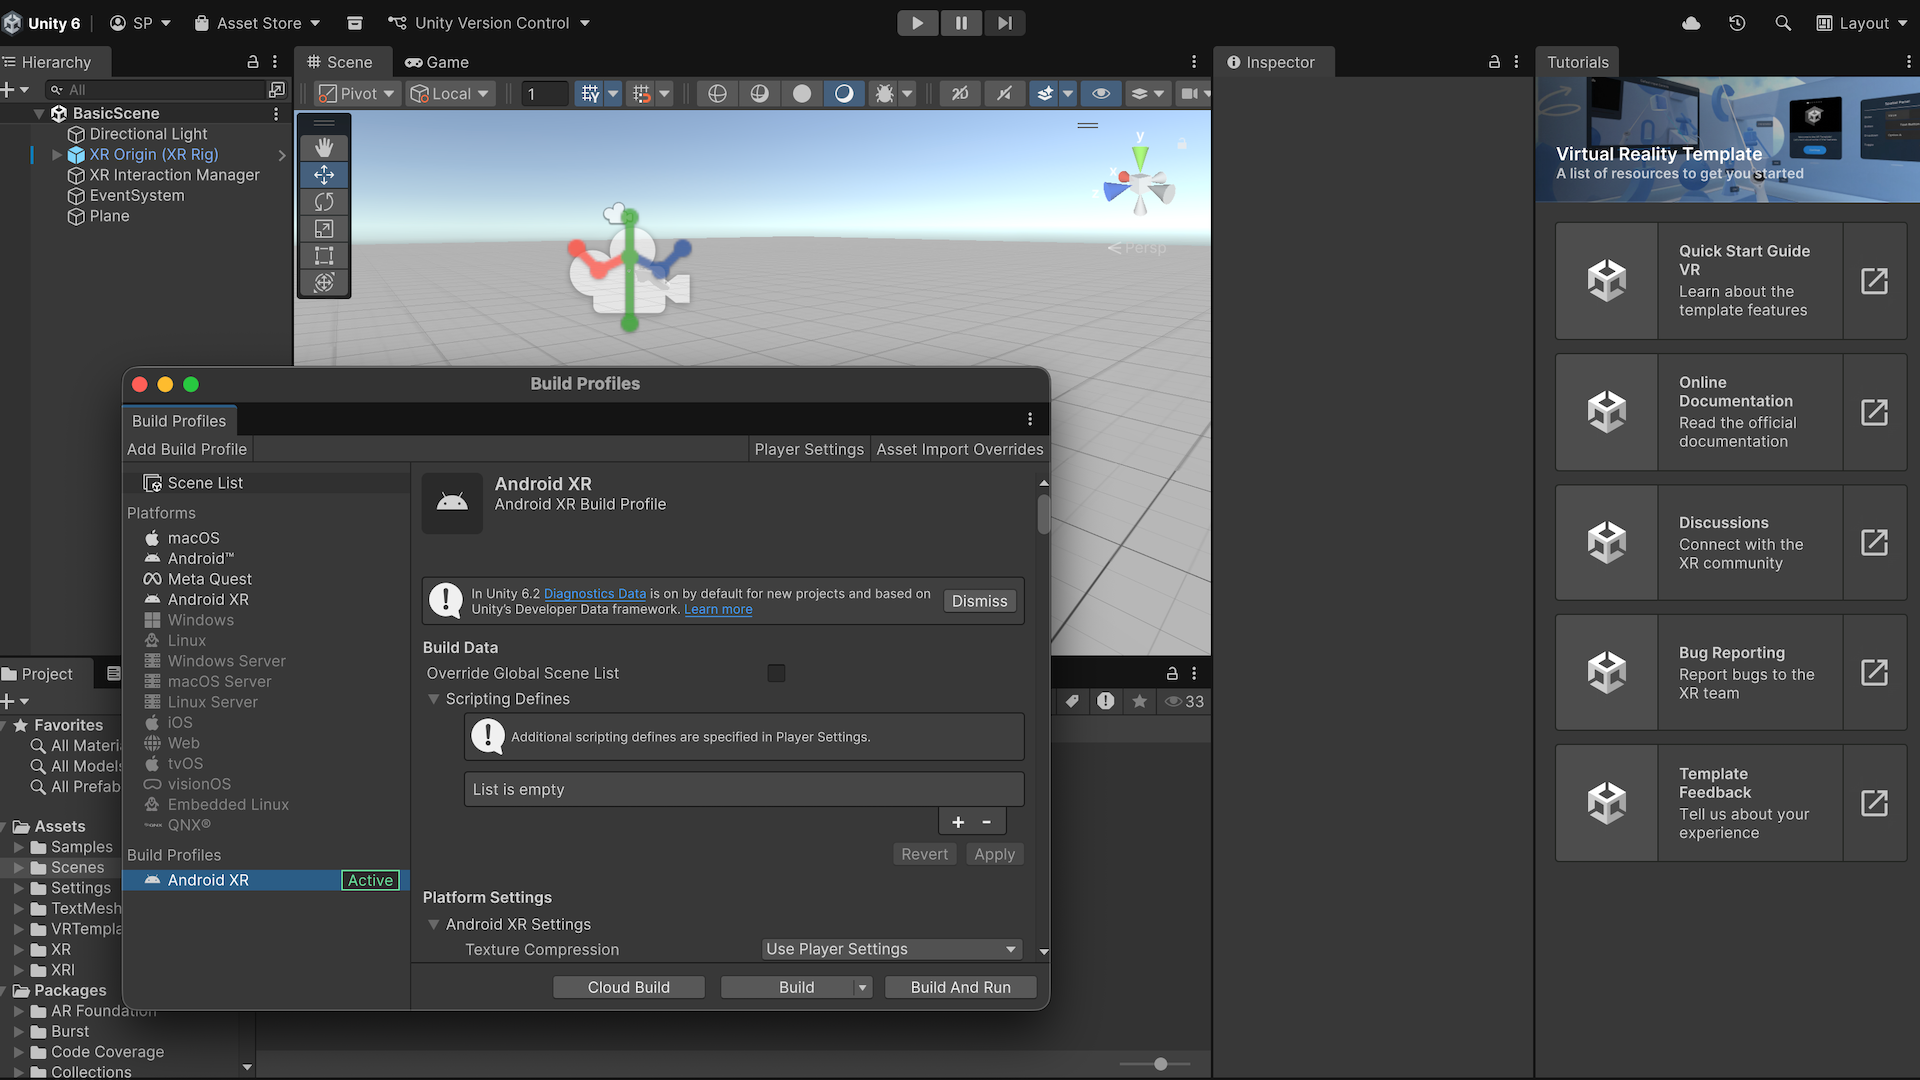
1. In the Unity Editor, from the main menu, go to File > Build Profiles, then select the Add Build Profile button in the Build Profiles window.
2. Select Android XR from the list of platforms, then select Add Build Profile.
Note: If needed, select Enable Platform to be able to switch profiles.
3. Select the new Android XR build profile from the list of build profiles and select Switch Profile.
You now have an active Android XR build profile.
6. Configure Unity for Android XR
When you created the build profile, Unity automatically installed the Unity OpenXR: Android XR package and the OpenXR plugin. Before you continue, you need to verify the package’s installation and that the project’s XR settings are ready for building on AndroidXR.
Instructions:
To verify the package and configure its settings, follow these instructions:
1. From the main menu, select Window > Package Management > Package Manager.
2. In the Package Manager window, select the In Project tab, enter “OpenXR” in the Search in Project box, and confirm the Unity OpenXR: Android XR package is installed.
3. From the main menu, select Edit > Project Settings > XR Plug-in Management.
4. Under the Android XR settings tab, ensure OpenXR is enabled.
This configuration initializes XR on Android devices using the OpenXR plugin and allows your app to be compatible with OpenXR platforms such as Android XR.
5. In OpenXR settings, ensure at least one Android XR feature is enabled — for example, Android XR Support.
Having at least one Android XR feature ensures your app will be configured at build time to run on the Android XR platform, but you can also use this window to add additional OpenXR features based on the functional requirements of your app.
For more information on the available OpenXR features for the Android XR platform, check out the Unity OpenXR: Android XR package documentation.
Your project is now configured for Android XR.
7. Build and run the BasicScene
Now that you’ve configured the OpenXR plugin, it’s time to test everything by deploying the included BasicScene to your headset.
Instructions:
To run the BasicScene in your VR headset, follow these instructions:
1. In the Project window, open the Scenes folder, then double-click the BasicScene to open it.
2. From the main menu, select File > Build Profiles.
3. Navigate to the Android XR platform and ensure BasicScene is enabled in the Scene List. Use the Open Scene List option to modify the list of enabled scenes if needed.
- The Scene List is shared between Android and Android XR targets, so you only need to add the scene once.
- Make sure BasicScene is the only enabled scene to avoid building extra content.
4. Navigate back to the Android XR build profile.
5. Connect your Android XR headset to your computer via USB.
6. If Developer Mode and USB debugging are not already enabled on your device, turn them on.
Check out the Android documentation on enabling developer options for more information.
7. Select Build and Run.
This will open the Build Android dialog.
8. Name the Build “Android XR” and select a save location on your local disk.
Success! Your headset should launch the BasicScene — proof that your Android XR development setup is ready to go.
8. Next steps
Now that you’ve successfully run your first scene on an Android XR headset, you can do the following:
- Explore interactions: add simple controllers or hand-tracking input.
- Explore Mixed Reality support: Try enabling additional OpenXR features for Android XR in the Project Settings to begin experimenting with passthrough, anchors, or other mixed reality capabilities.
Where you go next depends on your project goals, but now you have a working Android XR development setup as your foundation.