
Week 2 - Basic Gameplay: Jul 20 - Jul 24
Exercise
Beginner
+60XP
3h
Unity Technologies
Join us Mondays Wednesdays and Fridays at 9:00am PT by registering here.
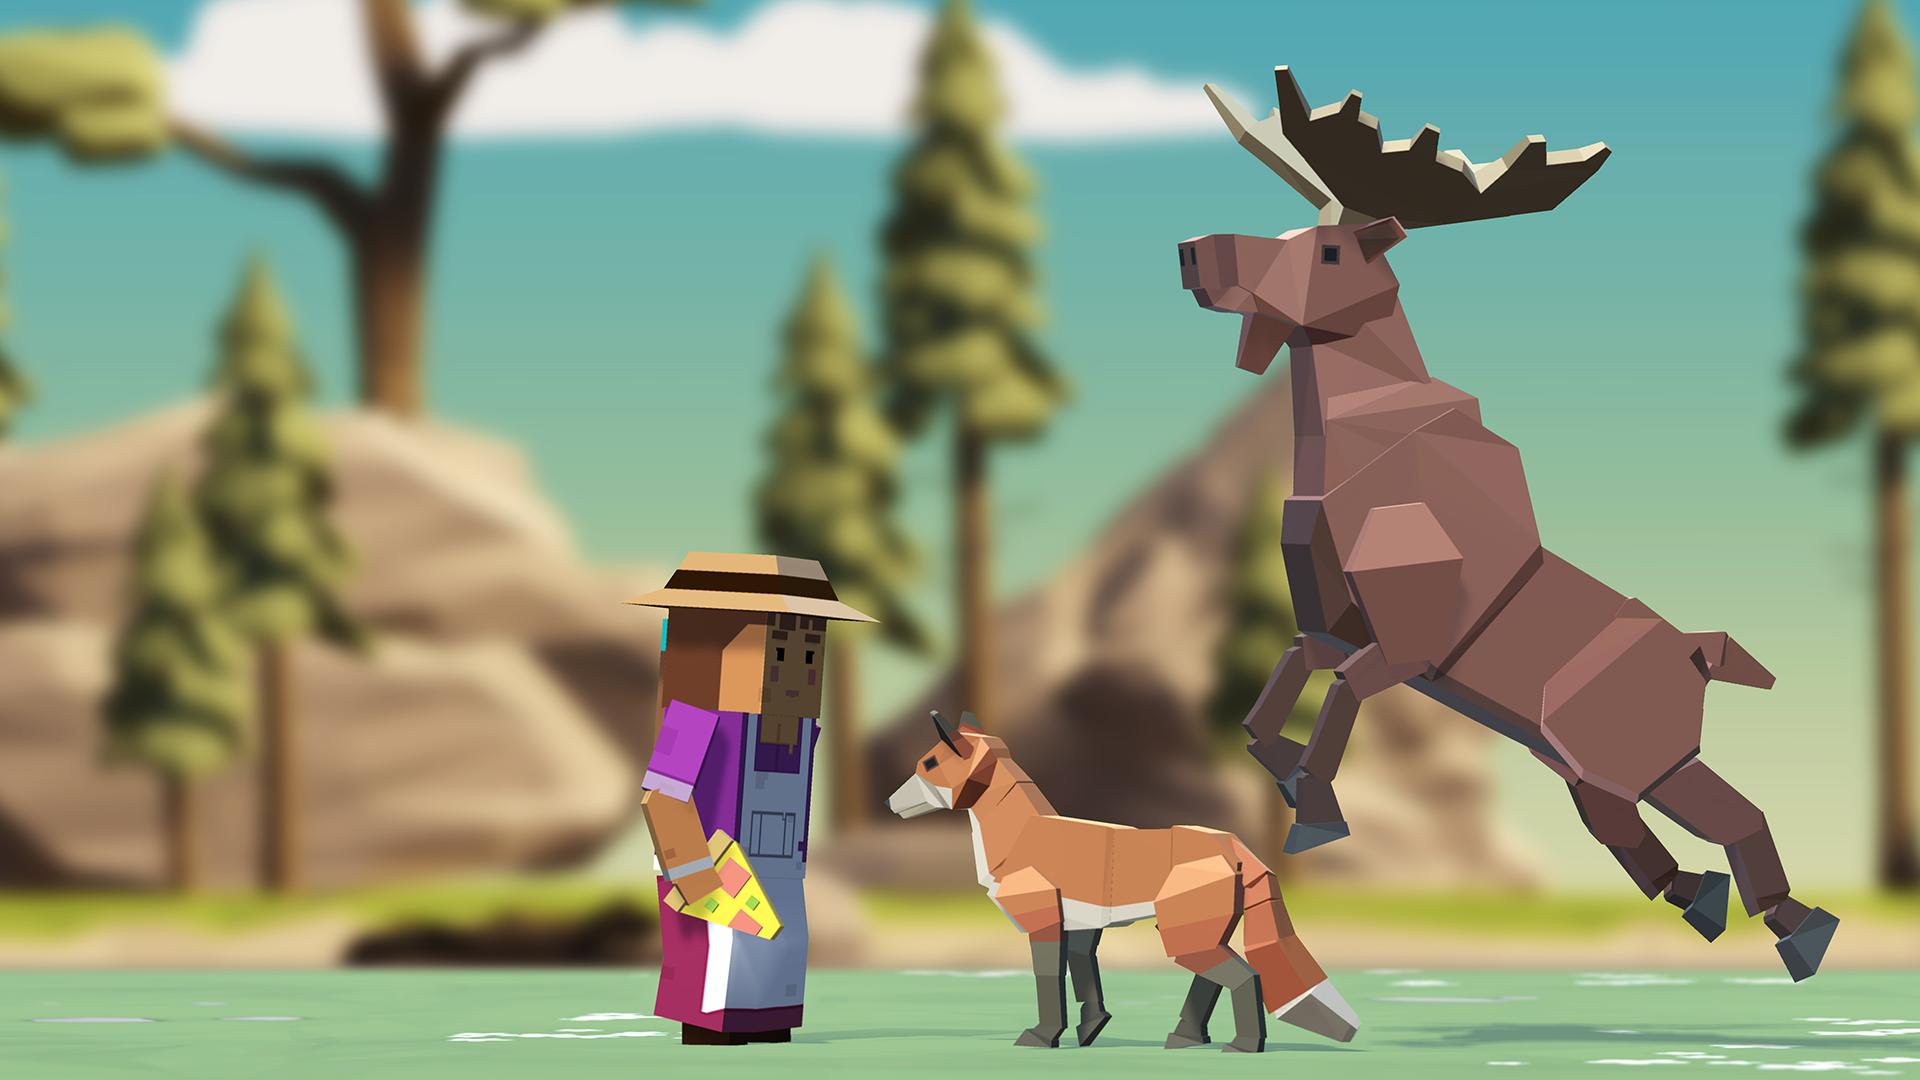
This week, you will program a top-down game with the objective of throwing food to hungry animals - who are stampeding towards you - before they can run past you. In order to do this, you will become much more familiar with some of the most important programming and Unity concepts, including if-then statements, random value generation, arrays, collision detection, prefabs, and instantiation. In completing this week's sessions, you will learn how to program a basic game with the ability to launch projectiles and maneuver the player to keep the game alive.
1. Overview
This week, you will complete Unit 2 from Create with Code, where you will learn the fundamentals of implementing Basic Gameplay as you create a top-down arcade-style game.
After the live session on Monday when we kick off the project together, use the links below to continue working through the Unit independently.
If you get stuck or have a question, send us your question or your broken project so that we can help you during Wednesday's live troubleshooting session.
For the best experience, you should aim to complete the essential content below before the live session on Friday, when we will show you how to take your finished projects to the next level.
Click on the links below to access the course content, but come back to this page to join in on our live sessions!
Essential content
- 2.1 - Player Positioning
- The player will be able to move left and right on the screen based on the user’s left and right key presses, but will not be able to leave the play area on either side.
- 2.2 - Food Flight
- The player will be able to press the Spacebar and launch a projectile prefab into the scene, which destroys itself when it leaves the game’s boundaries. The animals will also be removed from the scene when they leave the game boundaries.
- 2.3 - Random Animal Stampede
- When the user presses the S key, a randomly selected animal will spawn at a random position at the top of the screen, walking towards the player.
- 2.4 - Collision Decisions
- The animals will spawn on a timed interval and walk down the screen, triggering a “Game Over” message if they make it past the player. If the player hits them with a projectile to feed them, they will be destroyed.
Optional content
- Unit 2 Challenge - Play Fetch
- Use your array and random number generation skills to program this challenge where balls are randomly falling from the sky and you have to send your dog out to catch them before they hit the ground.
- Unit 2 Quiz
- Assess your knowledge of the skills and concepts learned in Unit 2.
2. Before you begin
To participate in this session and follow along, you need:
- Unity 2018.4 installed through the Unity Hub
If this is your first Create with Code live learning session, you can catch up by:
- Completing the required content from previous weeks
*Note - it is not necessary for you to catch up, but it is recommended for an ideal learning experience.
3. Live Session - Monday, July 20 - Prototype Preview
Recorded Live Session - 20th July - 9am PST
If you missed this session, you can catch up with the video below:
Bonus Features
Below are challenges at varying levels of difficulty for you to try and take your skills to the next level. Note that you may have to do a bit of Googling to figure out the Hard and Expert challenges.
- Easy
- Allow the player to move forward and backwards within a certain range.
- Medium
- Have animals that also spawn from the left and right side of the screen. If one of them hits you, “Game Over” should be logged to the console.
- Hard
- At the start of the game, display in the console that the player’s Lives = 3 and Score = 0. If the player feeds an animal, increase and display the Score. If the player misses an animal or is hit by one, decrease and display the Lives. When the number of Lives reaches 0, log “Game Over” in the console.
- Expert
- Display a “hunger bar” on top of each of the animals. Then, each time you feed one of them, the hunger bar fills up a little. Each animal should require different amounts of food to successfully “feed” them. They should only disappear after their hunger bars are full.
4. Live Session - Wednesday July 22 - Troubleshooting & FAQ
Recorded Live Session - 22th July - 9am PST
If you missed this session, you can catch up with the video below:
Want help with your broken project during the live session?
- Export your unity package:
- In the Project window, right-click on the "Assets" folder and click Export Package
- In the "Exporting package" window that pops up, click Export
- Save your package as "[Your-First-Name] - Prototype #" (e.g. "Aaron - Prototype 2")
- Send us your unity package
- Go to share.unity.com/u/createwithcode
- Verify your email address
- Upload your .unitypackage and write a detailed message describing the problem you are having with your project
Note: Please make sure to submit your project in advance of Wednesday's session if you want us to help you troubleshoot your issues live.
5. Live Session - Friday, July 24 - Bonus Feature walkthrough
Recorded Live Session - 24th July - 9am PST
If you missed this session, you can catch up with the video below:
Download links
WARNING - downloading and importing the assets below into your existing Prototype 2 project will OVERWRITE your project. To view these projects, create a new project from the Unity Hub and import them into that new empty project.
6. Share your Modified Challenge or Prototype
If you went above and beyond and modified the challenge or prototype from this week, take a screenshot or screen-recording and post it here to share what you made!
To upload your project online as a WebGL build so others can play it, you can:
- Follow the instructions to build your project for WebGL
- Go to Unity Connect and click the Post Project button in the top-right corner
- Follow the instructions to upload your WebGL project
- Share a link in your submission description below so other people know where to find it
Please also share any "behind-the-scenes" info about how you made your project!
Please login to submit
Complete this Tutorial
Submission Gallery

2 lvl
2lvl

Give A Dog A Bone (Prototype) & Dog Ball (Challenge)
Give a dog a bone is the prototype and was a cool coding experience. Dog ball was a lot harder but with the help the solutions I was able to get it done thanks!!

Farm animals
The farmer feeds the animals with bananas. Everyone has their own hunger scale. Once full, the animal disappears. To move use WASD or ←↑→↓, to shoot bananas use spacebar. https://play.unity.com/mg/other/farm-animals https://play.unity.com/mg/other/feed-dogs

My game "Between cars"
My own project parallel to training in the form of my game "Between Cars"

AETHERIC v1.1
First Prototype https://2fingers.itch.io/aetheric-prototype

Prototype 2
Create with code assignment