
Code in the default script
Tutorial
foundational
+10XP
30 mins
6712
Unity Technologies
In this tutorial, you’ll:
- Identify the default script components of a new script
- Edit a script component in your IDE (Integrated Development Environment).
- Display a message from a script in the Unity Editor’s Console window.
1. Overview
Every time you create a new script, Unity gets you started with a default script that contains the basic lines of code you will need. In this tutorial, we’ll give you a tour of the default script, write some code to use the functions provided, and link you to some resources where you can learn more.
2. The default script
When you create a new script, you also create a new public class that derives from the built-in class called MonoBehaviour. When you named the component, the same name was applied to this class and the filename of your script. It is important that these names match.
In the code, you will see a public class already set up. It is called “HelloWorld”, the same as the name of the script. These names should always be the same — if you change the name of the script, you must also change the name of this class.
The script also contains two functions, Start() and Update().
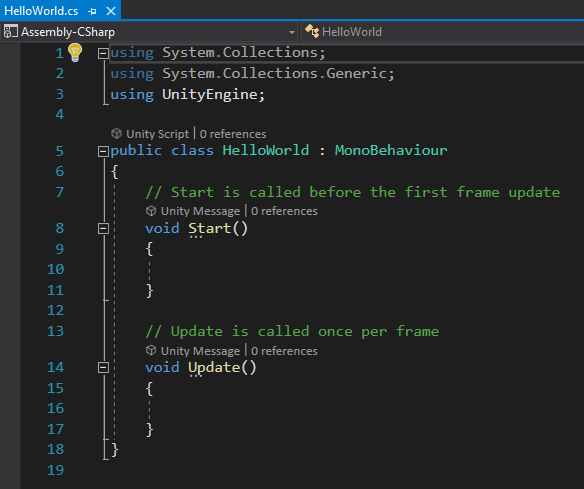
The Start function runs once at the beginning of the game, and the Update function runs at every frame of the game (more about frames later).
3. Edit the Start function
1. Add the following code to the Start function, between the two {} brackets:
Debug.Log("Hello World");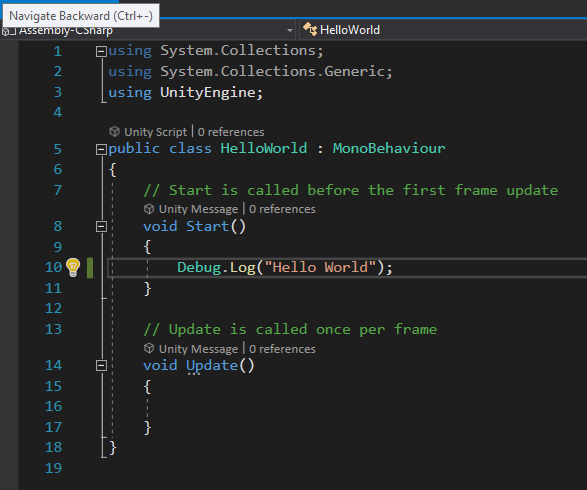
2. Save the script using Ctrl+S (Windows) or Cmd+S (Mac).
3. If the Console window is not showing in the Unity Editor, open it with Ctrl+Shift+C (Windows) or Cmd+Shift+C (Mac). The Console window is where you can read messages from scripts, including errors and warnings, as the scripts run.
4. Play the game and look at the Console window. The message “Hello World” appears there.

4. Edit the Update function
1. Open the script again and move the Debug.Log line to the Update function.
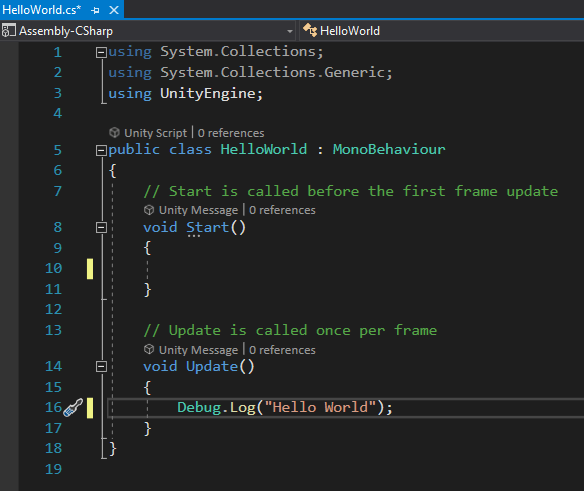
2. Save the script using Ctrl+S (Windows) or Cmd+S (Mac).
3. Select the Collapse option on the Console window, if it is not selected already. This option will simplify the display during the next step.
4. Play the game and look at the Console window. This time, a counter appears next to the “Hello World” message. This counter shows how many times the script has run and displayed the message.
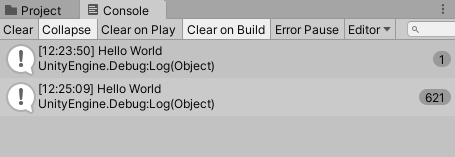
Since the script is now inside the Update function, it is running once for every frame of the game. A frame is one single image in a series, like a frame of motion picture film, that creates motion on the screen. When you press the Play button and watch your game in the Game view, the Update function is running many times continuously.
5. Add a property with a variable
To demonstrate the concept of scriptable components, you’ll add a variable to your script and change its value in the Inspector window. A variable holds a value that can vary. The value types you are most likely to encounter are int (integers), float (floating point numbers, i.e., numbers that can have decimals), string (text), and Boolean (true or false values). In the Transform Components you have used, the float values for Scale X, Y, and Z are variables. In your script, you will replace the “Hello, World!” message with a string variable that you can change in the Inspector window through the HelloWorld Component. Through this variable, your GameObject will have a property that you can manipulate from the Unity Editor.
1. Open the script in Visual Studio again.
2. Add a new variable as shown below:
public string myMessage; 3. Change the Debug.Log command as follows:
Debug.Log(myMessage);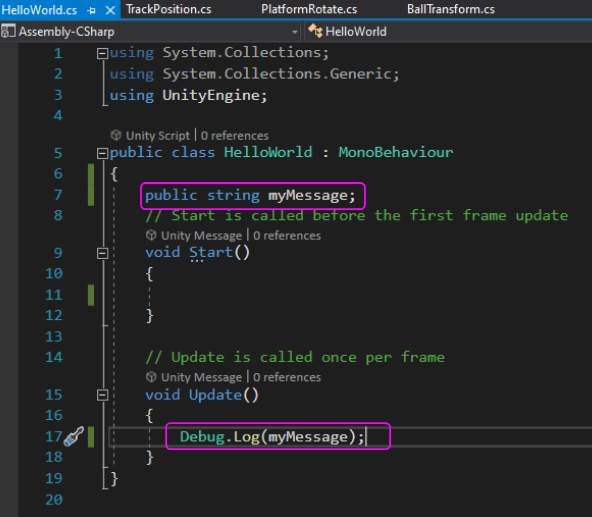
4. Save the script (Ctrl+S/Cmd+S).
5. In the Unity Editor, select the ScriptObject GameObject and look at the HelloWorld Component in the Inspector. A new property appears where you can type a custom message.

Enter the message of your choice.
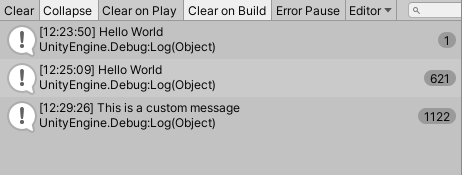
6. Run the game and check the Console window. Your custom message now appears!
6. Next Steps
You can see that scripting in Unity can be very powerful: you can make things happen during the user’s experience, and you can make variables available in the Inspector window of the Unity Editor so that you can adjust values later without editing your script. Next, let’s use a script to make something happen in the Scene.