Change a GameObject with script
Tutorial
foundational
+10XP
0 mins
6355
Unity Technologies

In this tutorial, you will apply what you’ve learned about scripting to a GameObject and make a visible change in the Scene.
In this tutorial you will:
- Edit the default code generated within a newly created C# script
- Use scripting to change the transform properties of a GameObject
- Write code that utilizes the Unity APIs
1. Overview
This tutorial will introduce you to the Unity Scripting API, which defines the classes, along with their methods and properties, that you can use in your scripts. (If you are unfamiliar with these concepts, don’t worry — we will walk you through them.)
The Unity Scripting API is vast, but Unity provides plenty of comprehensive documentation, and your IDE will guide you along the way. If you are interested in programming in Unity, you’ll learn your way around the API as you try to solve new problems with scripting.
Here, you will use scripting to change the size of the ball in your “The floor is lava!” project. The ball will get bigger as it rolls downhill. We’ll also show you how to change the position and rotation in case you want to experiment more on your own.
2. Create your script
1. Select the GameObject for your rolling ball.
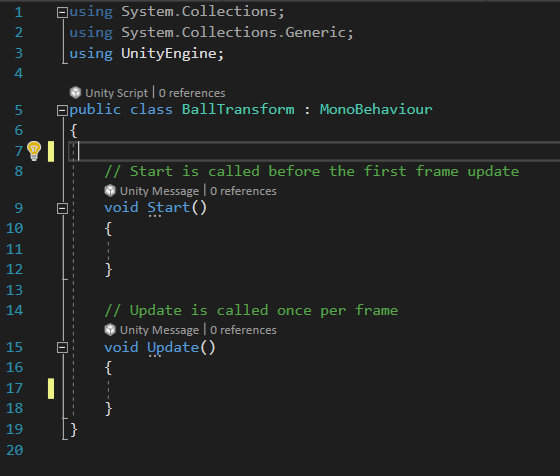
2. In the same way you did in the previous tutorial, add a new script to your GameObject. Name the new script BallTransform, and double-click it in your Assets folder (Project window) to open it in Visual Studio.
Tip: You can close the windows on the right side of your IDE window.

3. Increment the scale
To make the ball grow, we will add to its Scale property in every frame. You can experiment with how much to make it grow in each frame by adjusting the component properties in the Inspector window.
To do this, we’ll initialize a public variable to hold the increments of the Scale property in the X, Y, and Z dimensions. Then, we will add those increments to the Scale property of the ball in every frame.
1. Between the opening bracket of the class statement and the comment for the Start() method, add this line to initialize a variable named scaleChange:
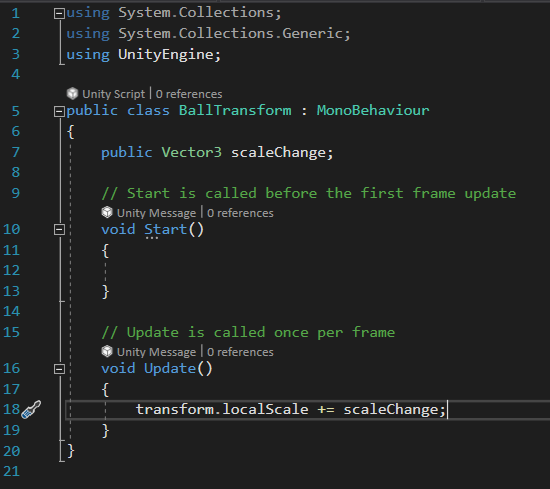
public Vector3 scaleChange;This variable is public so that it will appear in the Inspector. The type of variable, Vector3, is a data type for holding three values.
2. In the Update() method, start a new line and type:
transform.This refers to the Transform Component of your GameObject. When you type the dot, you’ll see a pop-up of all the properties and methods of the Transform Component.
4. Type or select localScale, then complete this line of code as follows:
transform.localScale += scaleChange;Note: if localScale is not an option in the pop-up menu, be sure to check that Visual Studio is set to be your IDE.
The operator += will add the values in scaleChange to the current scale values of the GameObject, so that the ball grows.
5. Save your script with Ctrl+S/Cmd+S.
The final result will look like this:

4. Experiment with scale
1. Return to the Unity Editor and select the ball. In the Inspector, you will see the BallTransform component.

Notice how Unity automatically converts the variable name scaleChange in the script to Scale Change in the Inspector. You can take advantage of this feature by always using camelCase for your public variables.
2. Given the current Scale properties of your ball, as shown in the Transform Component, consider how much to change the scale in each frame. There are roughly 24 frames per second; therefore, if your ball has a Scale of 1,1,1, then Scale Change values of 1, 1, 1 would multiply the ball’s size by 24 in each second! Experiment with some very small numbers (such as 0.01), and select the Play button to test them.
3. Here are more things to try:
- When does the ball get too big for your course? Try adjusting the surfaces it rolls on to accommodate its larger size.
- Use different numbers for the three Scale Change values and watch your ball turn into an oblong spheroid that tumbles instead of rolls.
- Are there other GameObjects you can make grow?
5. Try more transforms
Here are some lines of code you can use to change the rotation and position of GameObjects in the same way we changed the scale. Try these on GameObjects in your own project to make your obstacle course more interesting.
Increment position
using System.Collections;
using System.Collections.Generic;
using UnityEngine;

public class TrackPosition : MonoBehaviour
{
    public Vector3 positionChange;

    // Start is called before the first frame update
    void Start()
    {

    }

    // Update is called once per frame
    void Update()
    {
        transform.position += positionChange;
    }
}
Increment rotation
using System.Collections;
using System.Collections.Generic;
using UnityEngine;

public class PlatformRotate : MonoBehaviour {

    public Vector3 rotateChange;

    // Start is called before the first frame update
    void Start()
    {

    }

    // Update is called once per frame
    void Update()
    {
        transform.Rotate (rotateChange);
    }
}
Note: The script to increment rotation is a little different. The Rotate() method adds to the rotation of the GameObject, whereas the other scripts change properties that are calculated in the script with the += operator.
Watch the video below for one example of ways to use these transform scripts in the challenge project.
6. Other resources for programming
You’ve only just begun discovering the power of scripting in Unity. If you are new to coding and want to learn more, consider the Junior Programmer Pathway after you have completed Unity Essentials. There, you will learn more of the programming terms and concepts behind what you’ve experienced here.
Although programming is a helpful skill to have when developing projects with complex interactivity in Unity, it is not necessary to be a coder to create with Unity. For example:
- Certain types of projects, such as 3D visualizations and animations, don’t require code at all.
- Resources like Bolt for “visual scripting” allow developers to implement logic in their projects using intuitive drag-and-drop graphical connectors without any knowledge of code or IDEs.
- The Unity Asset Store provides pre-made scripts and tools for the development of common features, such as a first-person controller or an inventory system.
- Using Google, combined with sites like Unity Answers, Unity Forums, and Stack Overflow, developers can copy, paste, and modify the coding solutions provided by other developers. (It is surprising how far you can get with a little Googling and a lot of perseverance!)
7. Summary
This learning project has given you just a brief introduction to scripting with Unity. You have enhanced your challenge project with scripting: you learned about the default script and its Start() and Update() methods, and you got a glimpse of the Unity Scripting API by using code to change the Transform Component of GameObjects. Scripting gives Unity endless possibilities. Even if you aren’t a coder, you can now see the breadth of what can be accomplished in Unity.