
Lesson 4.4 - Creating Dailies
Tutorial
Beginner
+10XP
10 mins
283
Unity Technologies
Now that we’ve created animations, we’ll want to be able to share them. In this lesson, we’ll show you how to create quick dailies in .mp4 format. “Dailies” is a term from the film industry that refers to quick recordings that can be viewed right away by a creative team. Once you’ve created a daily of your work, you’ll be able to share it with your fellow students, your instructor, or your creative team to get feedback.
1. Lesson Overview
2. Installing the Unity Recorder Package
Unity has a handy and powerful tool for exporting animations called the Unity Recorder. Let’s begin by installing the Unity Recorder Package.
1. From the Editor’s menu drop-down, select Window > Package Manager.
2. In the Package Manager window, select Advanced > Show Preview Packages (Figure 01).

3. Search for and select Unity Recorder. Then select Install.
3. Using the Recorder from the Timeline
Now that we’ve got the Unity Recorder installed in our project, we’ll be able to create a Recorder Track in our Timeline. This track will allow us to capture all or part of our animation in a .mp4.
1. With the Master Timeline selected in the Hierarchy, we’ll use the Recorder Track to control the output of our project. To add a Recorder track, click the + sign in the Timeline window and select: UnityEditor.Recorder.Timeline > Recorder Track (Figure 02).
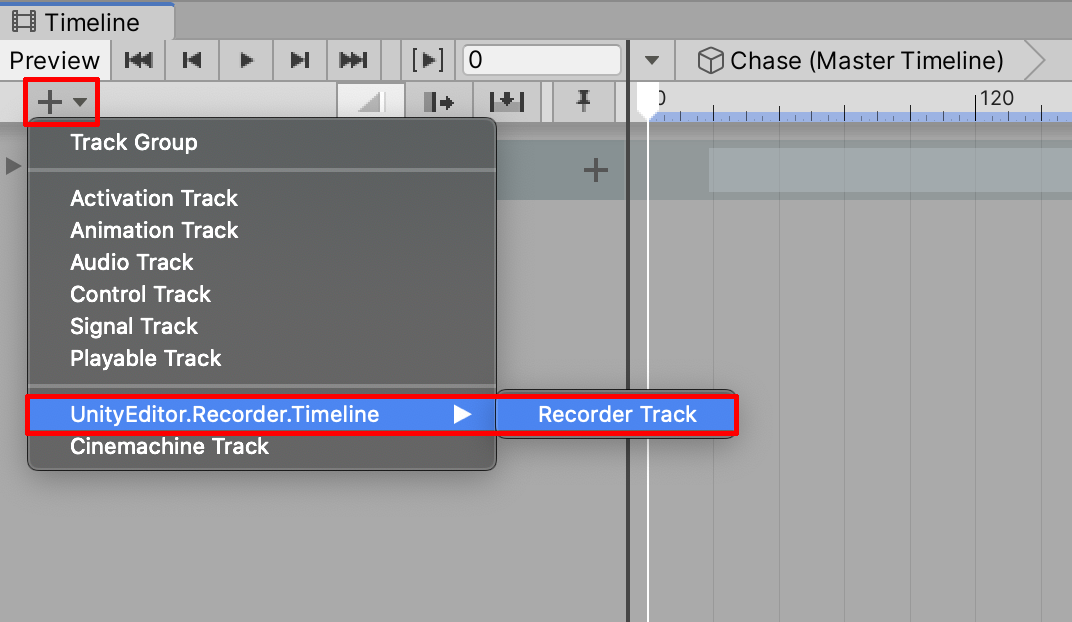
This will create a new Recorder Track for your Timeline sequence. We recommended that you position this at the top of your Timeline so it is easy to disable when you are not trying to output dailies. Recorder Track at the top level of your Master Timeline’s Hierarchy by clicking and holding the left side of the track, then dragging it to the top position (Figure 03).

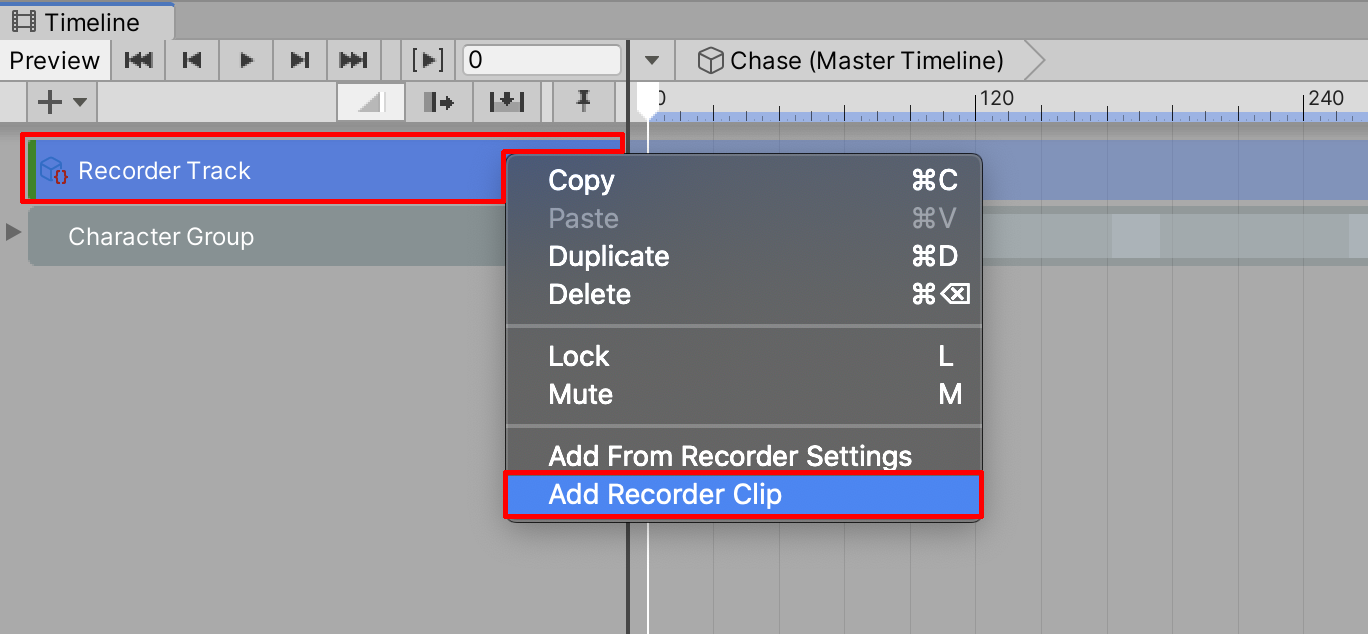
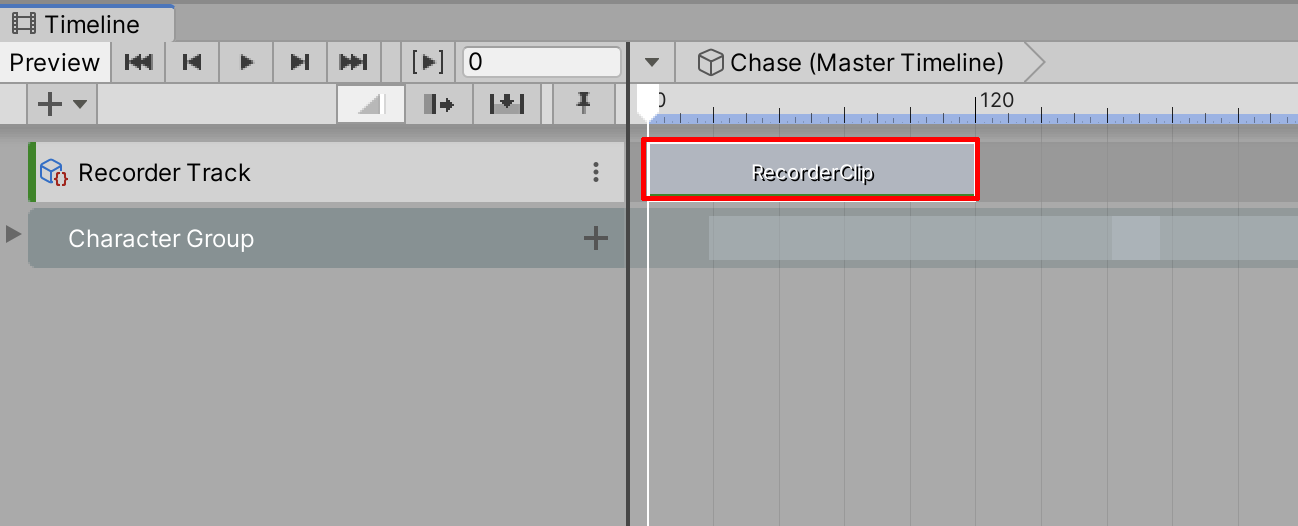
2. Once you’ve added the Recorder Track, you must select it by right-clicking and selecting Add Recorder Clip, which will add the clip to the Timeline (Figure 04).
The Recorder Clip behaves like most other clips on Timeline — you can move and adjust the length of the clip as desired. It may not be necessary to output a Timeline sequence in its entirety. You can configure the Recorder track so it outputs only a designated section, for example, and not the remainder of the sequence (Figure 05).
3. Select the Recorder Clip to customize the rendered output type properties in the Inspector. In the Selected Recorder field, choose the output option. There are two main options for rendering an animated movie: Movie and Image Sequence (Figure 06).
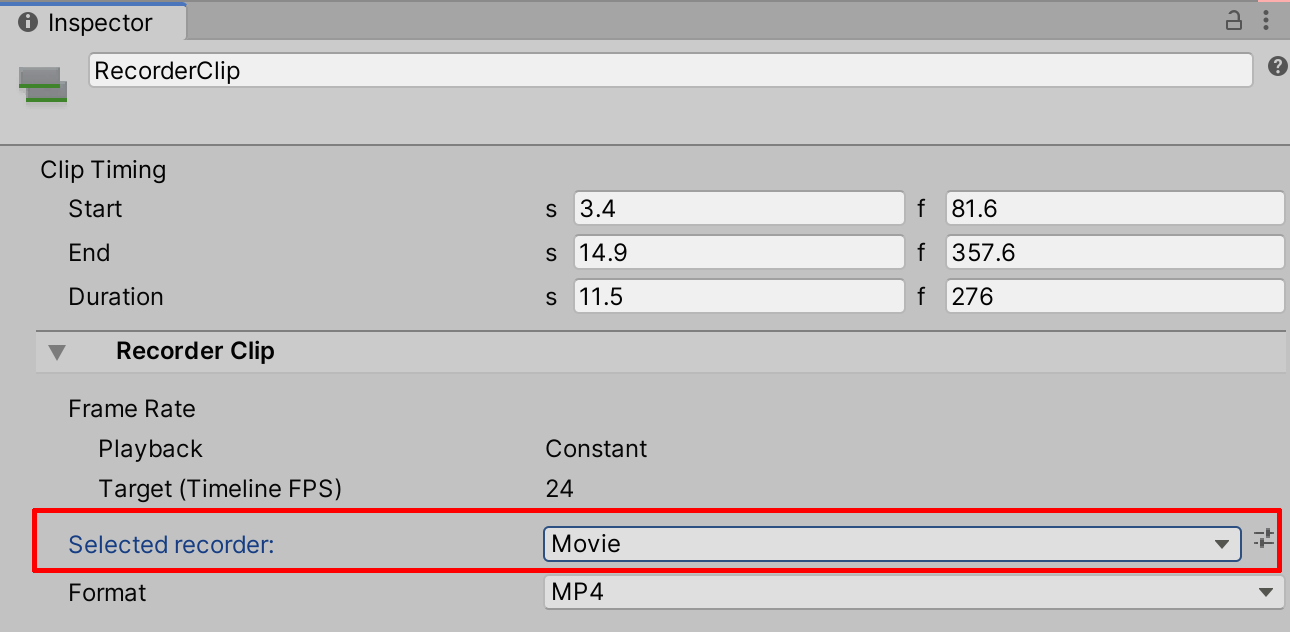
4. We will render our final animation as a .mp4 file. When rendering a movie file as a .mp4, the Recorder Clip will match the frame rate designated in the Timeline. To change the frame rate, select the Options gear icon to the right of the Timeline window, then select Frame Rate. Select from the designated frame-rate options. We will keep our project’s frame rate consistent to a film animation of 24 frames per second (Figure 07).

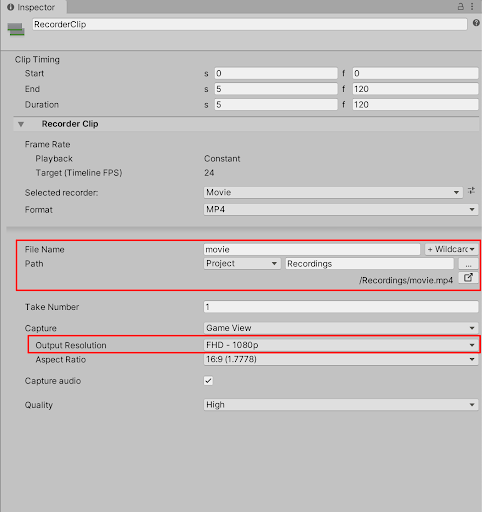
5. Specify a file name for your rendered movie. Ensure the Path drop-down menu is set to Project. A folder already exists in your project, named “Recordings.” Make sure the Path is already set to the Recordings folder by selecting the button with the three small dots and then selecting the Recordings folder in your project. Set the Output Resolution to either HD - 720p for a lower resolution video, or FHD - 1080p or even 4K for a higher resolution. Look over your Recorder Clip’s settings to make sure they match the following specifications (Figure 08).
6. Select the Play at the top center of the Editor. When Play Mode begins in the Game window, the Recorder renders the exported .mp4 file. (Please note: Recorder will begin the rendering process when you press Play in the Game view. Pressing Play in the Timeline will not activate the recording process.)
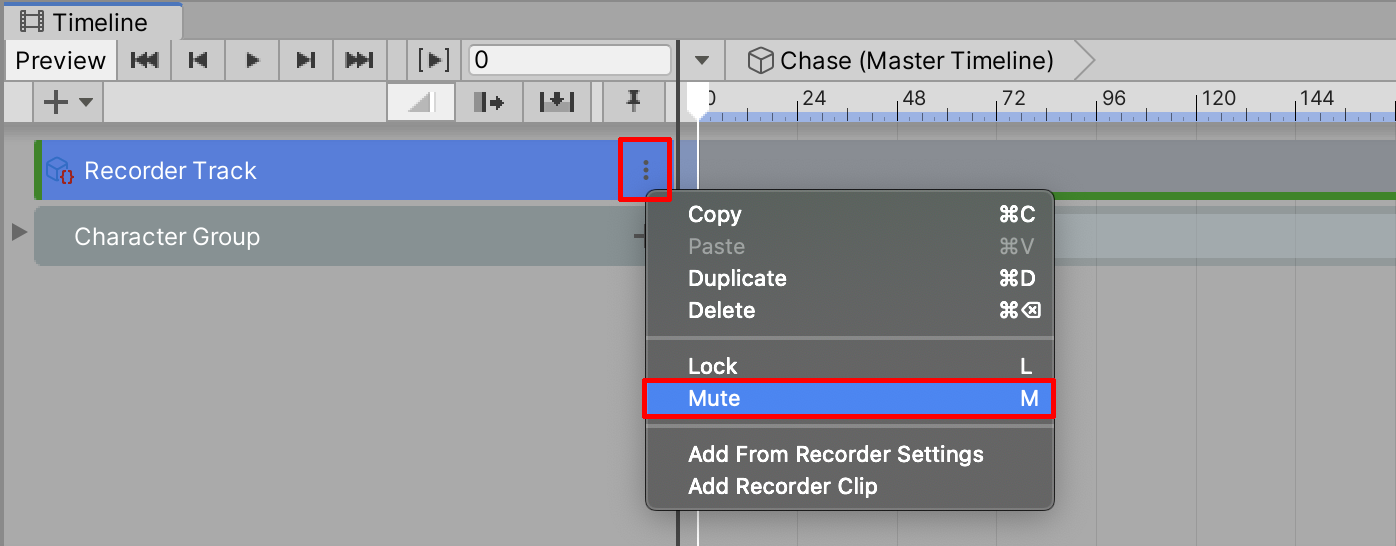
7. When you no longer need to use your Recorder Track, be sure to temporarily mute it by selecting the Recorder Track’s option button, then selecting mute. Now you won’t accidentally record a new track every time you enter Play mode (Figure 09).
Congratulations! Now you can create daily .mp4 recordings of your animation’s progress when you need to.
4. Recap
In this lesson we showed you how to install the Unity Recorder package, create a Recorder Track, and render your project.