
Unity pro tips
Tutorial
Beginner
+10XP
20 mins
13
Unity Technologies

In this tutorial, you'll uncover advanced techniques to refine your workflow across the Unity environment. You'll explore pro tips for the Hierarchy window, the Inspector, Project, Scene, and Game views. You’ll also learn about leveraging visibility toggles, optimizing asset navigation, and perfecting object positioning.
1. Overview
By now, you've surely picked up a lot of efficient workflows for creating in Unity. But there are probably a few tips and tricks you may have missed. These little techniques can add up to help you level up your skills as a Unity developer.

In this tutorial, we will take a deeper dive into the Unity environment, one window at a time. We will explore some useful tips and tricks that can streamline your workflow and make your development process even more efficient.
2. Pro tips: the Hierarchy window
As your game projects grow more complex and the list of GameObjects in the Hierarchy window becomes longer, efficient navigation becomes crucial. Let's take a look at some features that you might not have discovered yet.
Set Scene visibility and pickability
In the Hierarchy window in Unity, the scene visibility and pickability options can be found to the left of each GameObject's name. The eye icon represents the visibility toggle, while the hand icon represents the pickability toggle.
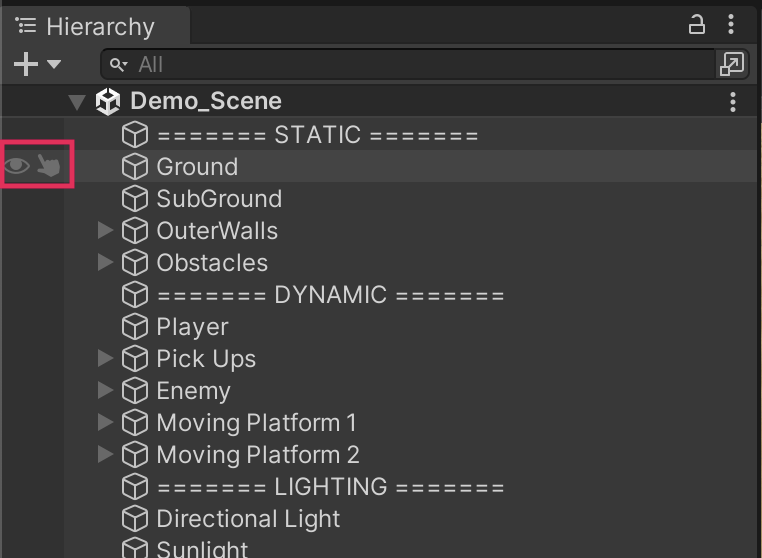
The scene visibility toggle (eye icon) allows you to quickly show or hide a GameObject in the Scene view without affecting its active state in the actual game. This is useful for decluttering the Scene view during development and editing. For example, you might want to toggle your UI canvas as invisible — look at the difference in the image below.

The pickability toggle (hand icon) allows you to enable or disable the selection of a GameObject in the Scene view. When pickability is disabled (hand icon crossed out), you won't be able to select the GameObject by selecting it in the Scene view. This is helpful for preventing accidental selection and modification of certain GameObjects while working on a scene. You might consider making your ground GameObject not pickable, for example.
Advanced search
In the Hierarchy window, you can search for GameObjects by their name or by the type of components attached to them. To search by name, simply enter the name into the search box at the top of the Hierarchy window. To search by component type, use the "t:" prefix followed by the component name in the search box.
For instance, if you want to find all GameObjects with a Light component in your scene, enter "t:light” into the search box. To locate GameObjects with an AudioSource component, type "t:audiosource”.
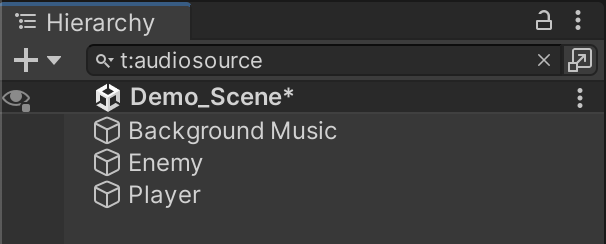
Using this search method can be more reliable than searching by name because GameObject names might not always be consistent, while component types provide a precise way to filter the results.
Using empty GameObjects as headers and folders
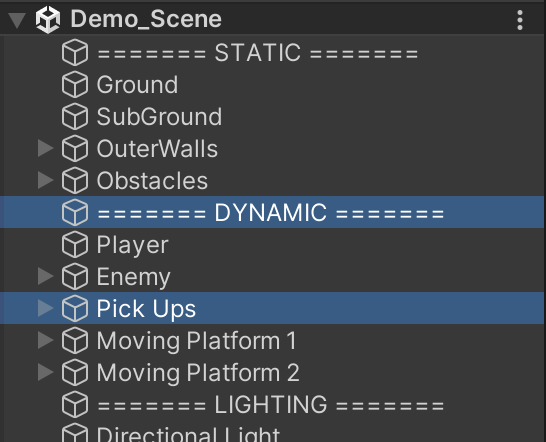
Empty GameObjects can serve as useful organizational tools in the Hierarchy window. By creating empty GameObjects, you can effectively divide the list of GameObjects, thereby making the Hierarchy window easier to navigate. Additionally, using empty parent GameObjects allows you to expand or collapse lists of GameObjects, adding another layer of organization to your Hierarchy window. You can see examples of both of these techniques in the screenshot below.
3. Pro tips: the Inspector window
The Inspector window is more than just a place to adjust the properties of GameObjects; it can also be a powerful organizational tool. Let's look at a few features that can help you stay organized.
Icons
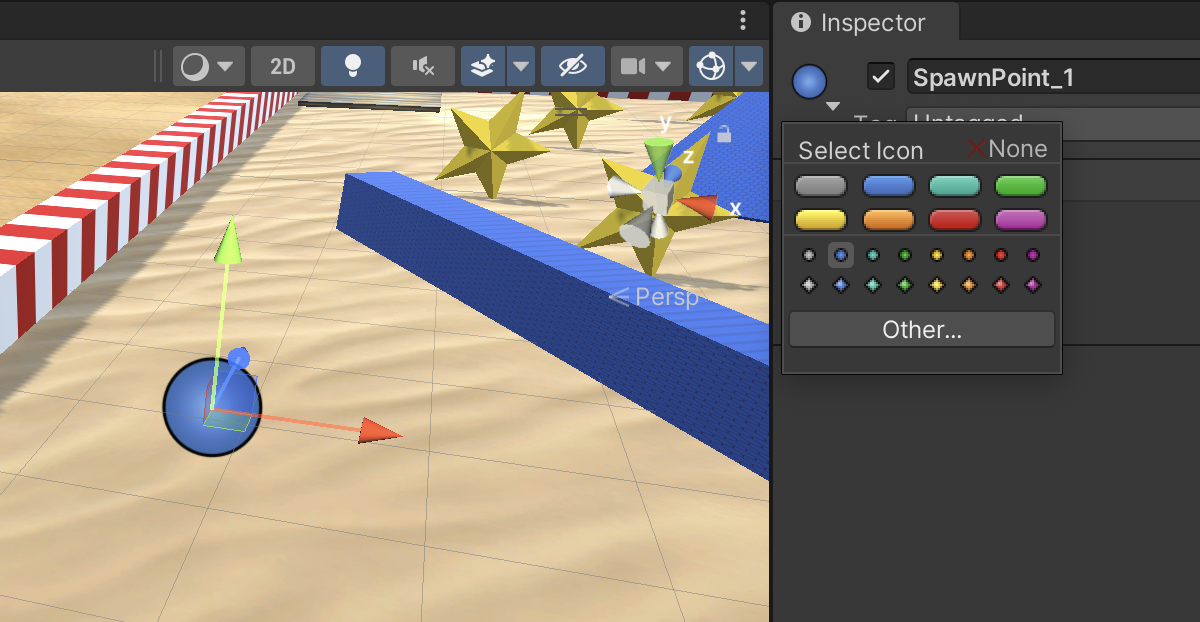
Icons can be assigned to GameObjects in the Inspector window. This feature is particularly useful for empty GameObjects that you want to visualize in the Scene view but that would otherwise be invisible, like a spawn point.
To add an icon, select the GameObject and then open the Icon dropdown next to its name in the Inspector window. You can choose from Unity's built-in icons or even use your own custom icons.
Asset labels
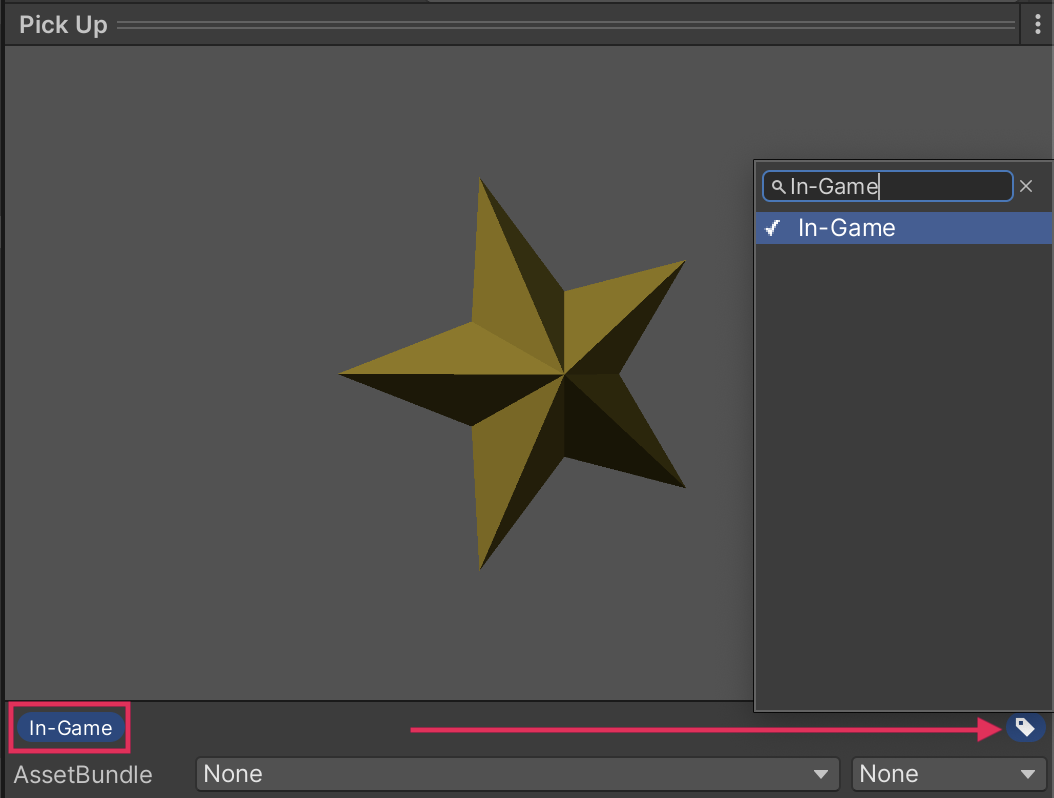
Asset labels help you categorize and organize your assets according to your workflow. By using these labels, you can filter assets in the Project window, making it easier to find specific items. Adding labels such as "In-game" for prefabs used in your game project can improve organization and asset management. To add a new label, select an asset in the Project window, and in the Inspector window, select the Add Label button, then enter or select the desired label. It will then appear as a label at the bottom of the Inspector window.
4. Pro tips: Project window
The Project window is where all your assets are stored. As your project grows, you'll accumulate a large number of assets, so navigating them efficiently becomes essential.
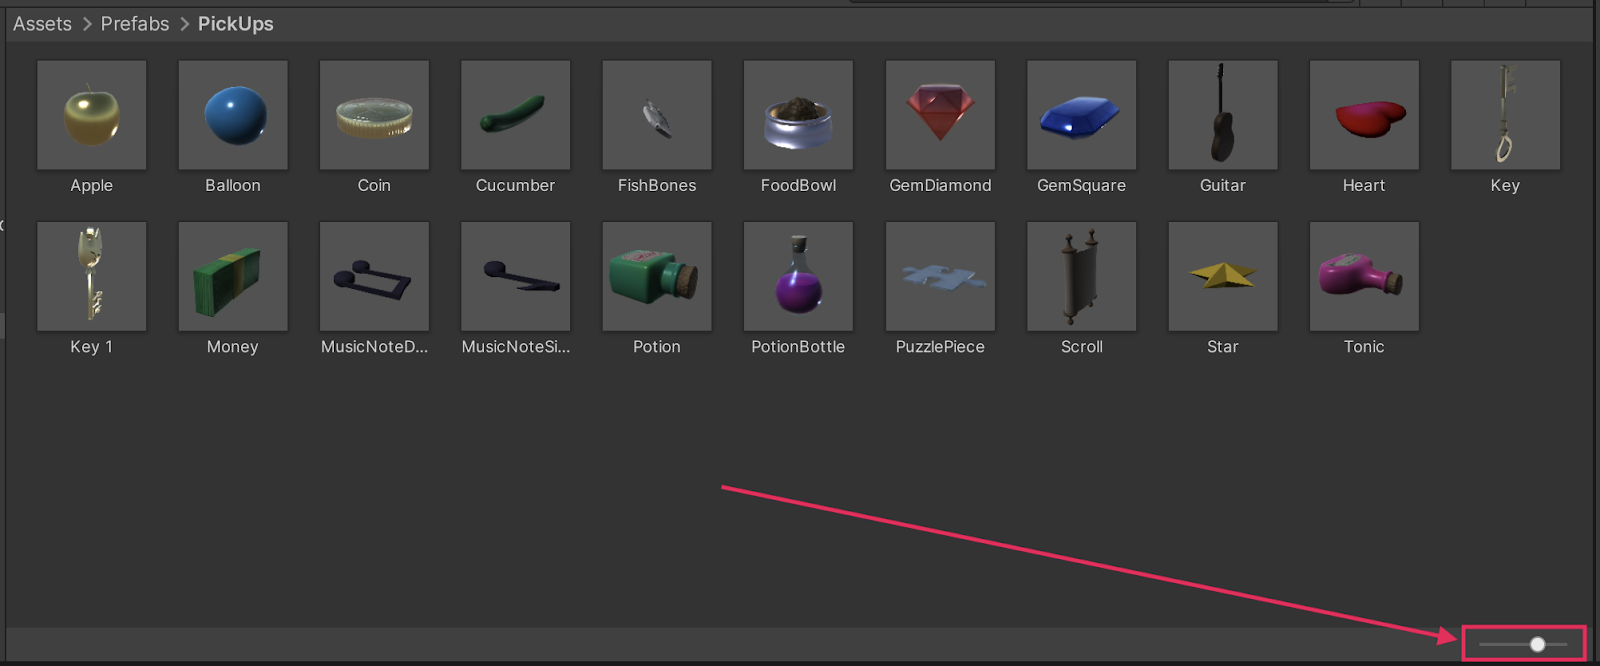
Icon size slider
The Icon size slider at the bottom right of the Project window allows you to adjust the size of your asset icons. Larger icons are helpful for quickly previewing models or materials, while the list view is more beneficial for scanning, sorting, and organizing assets.
Search by type or label and save searches
Similar to the Hierarchy window, you can search multiple ways in the Project window. You can search by name, of course, but you can also use the toolbar to search for asset type or even custom labels in the Project window. This feature allows you to filter your assets based on specific criteria, making it easier to locate what you need. You can also then save and reference those favorite searches in the Favorites dropdown.

You can also search by type or label in the search box manually. To search by type, use the "t:" prefix followed by the asset type. For a label, use the “l:” prefix instead.
5. Pro tips: Scene view
The Scene view is your main canvas for building your game. There are many useful features and shortcuts here that can speed up your workflow.
The Scene view control bar
The toolbar at the top of the Scene view contains various tools for manipulating GameObjects and navigating the scene.

Each tool also has a tooltip that tells you what it does. Rather than going through each one here, you should spend some time now exploring these tools and familiarizing yourself with their functions. You can also use the manual for more guidance on each tool you’re curious about.
Increment snapping
Increment snapping allows you to move, rotate, or scale GameObjects by specific increments. This is extremely helpful for precisely positioning and aligning your GameObjects. Hold the Ctrl key (macOS: Cmd key) while moving, rotating, or scaling a GameObject to use increment snapping.
You can also fine-tune the amount of each increment in the Increment Snapping dropdown in the Scene view toolbar.
Vertex snapping
Vertex snapping is a feature that allows you to precisely align GameObjects based on their vertices. This can be especially useful when you need to place an object directly on top of another one.
To use this feature, with the move tool enabled, hold the V key. You can then select specific vertices of the selected GameObject. To snap a vertex to a surface on another Mesh, hold Shift+Ctrl (macOS: Shift+Cmd) while you drag the GameObject over another surface. This requires some pretty complex keyboard maneuvers, but with some practice, you’ll get it!
6. Pro tips: Game view
The Game view is where you test your game. There are many features and shortcuts in the control bar that can enhance your testing process. Just like you did with the Scene view, rather than going through each one here, you should take some time to explore the control bar, experiment, and learn what each option does.

7. Next steps
You've just learned some very useful tips and tricks for working efficiently in Unity. The more you practice these techniques during actual game development, the more ingrained they'll become in your workflow, making your development process smoother and more enjoyable.