Create a new project for marker-based AR
Tutorial
·
Beginner
·
+10XP
·
30 mins
·
(168)
Unity Technologies
In this tutorial, you’ll set up your marker-based AR project in Unity and test your app using a 3D model of your choice.
1. Overview
In this tutorial, you’ll create a Unity project in which you’ll develop a marker-based interactive AR app.
Marker-based AR makes it possible for your app to detect an image in the real world and trigger some action, such as displaying AR content, when the image is detected.
An AR marker is an image that your app will search for in the real world. When the app detects the marker, it will project a 3D model on top of the marker in AR. The marker works somewhat like a QR code, except that instead of taking you to a website, it can trigger an entire AR experience.
In this tutorial, you’ll set up your project and select the 3D model that will appear when the marker is detected. This can be a model that we have provided, or one of your own. We’ve also provided you with multiple AR markers to choose from, but you may wish to create a marker of your own, especially if you’re using your own custom model.
Later in this project, you’ll add a series of UI buttons to allow your user to rotate the object, display text, play audio, or to do some other action unique to your chosen model.
By the time you’ve completed this project, you’ll probably have a lot of new ideas on how you can use marker-based AR in your own apps!
2. Use cases for AR markers
Marker-based AR apps are used across a wide variety of industries, including marketing and games, manufacturing, art, and architecture, just to name a few. The reasons that companies use marker-based AR vary, but often it is used to provide additional content about something in the real world. From fun games that make pizza boxes interactive, business cards that come to life, art that comes off the canvas, or tattoo planning apps that let you place and edit what you want tattoos to look like, marker-based AR has a lot of potential.
To get an idea of what this looks like, explore the links for the examples below:
- Marketing and games (Pizza Hut Pac-Man)
- Provide additional information (business cards, medical demos)
- Art (ArtVive demo | iOS | Android)
- Utility (Inkhunter demo | iOS | Android)
3. Before you begin
You should have already completed Get started with AR tutorials. In those tutorials, you complete the following setup tasks:
- Install Unity version 2022.3.1f1.
- Make sure your mobile device and computer are set up for AR development.
- Download and open a new Unity project configured for AR.
- Deploy a simple AR app to your mobile device that displays a spinning cube in your physical environment.
If you have already successfully built and run the spinning cube app on your device, you are ready to continue with this tutorial.
4. Create a new project
Follow these instructions to create your new project:
1. In the Projects tab of the Hub, select the New Project button.
2. Select the AR Mobile Core template from the template list and select the download template button to download the template to your computer.
3. Give your project a meaningful name, like “[your-name]_AR_Project”, and select a suitable location to save it on your computer.
4. Select your desired Unity Cloud Organization from the dropdown, and optionally deselect Connect to Unity Cloud. We will not be using any gaming services in this project.
5. Select Create project and wait for Unity to load.
The AR project should now be open in Unity.
5. Import the project assets
Follow these instructions to import the project assets:
1. Download the AR Marker assets.
2. Unzip the downloaded folder and locate AR_Marker_Assets.unitypackage.
Note: It’s important to fully unzip the folder rather than looking inside it by double-clicking. Attempting to import unzipped files will result in an error.
3. Drag AR_Marker_Assets.unitypackage into the Assets folder in the Project window of the Unity Editor.
4. When prompted by the Import Unity Package dialog window, select Import.
6. Create a new scene and test build
Important: You must have already completed the Get Started with AR project to configure your mobile device and AR development environment before you can continue.
Before you begin production, double-check that Unity and your mobile device are properly configured for AR development.
Follow these instructions to set up your new scene and build a test app:
1. Go to File > New Scene, select the AR scene template from the list, and select Create.
2. Save the new scene as “ARMarker” in the Scenes folder.
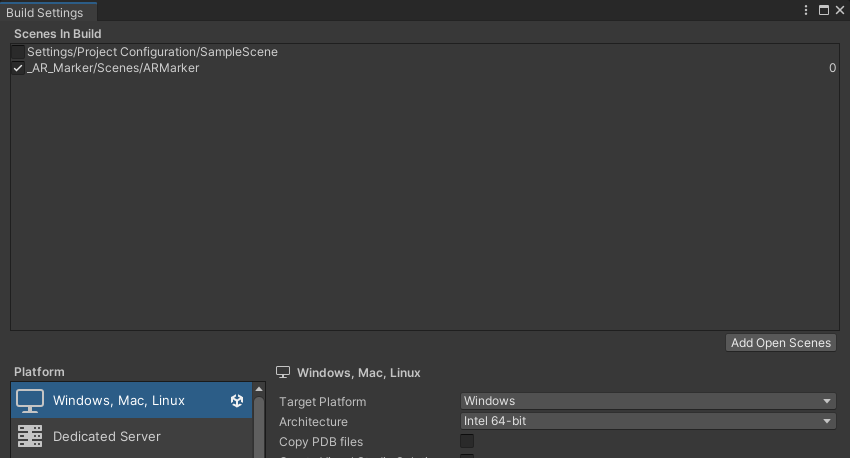
3. Open the build settings (File > Build Settings).
4. Below the Scenes in Build section, select Add Open Scenes to add your new ARMarker scene to the Scenes in Build list.
5. Disable the SampleScene in that same list.
6. Switch the build platform to iOS or Android, depending on your testing device.
7. In the Player Settings, change the Company Name or Product Name to something new and unique. A unique identifier is required to successfully build for iOS devices.
Important: Your identifier cannot include any spaces or special characters. You can only use upper and lower case letters. If you include any special characters, your app will not build.
8. Build and test the app.
The app will load with the rotating cube visible on your device. If the app didn’t build successfully, review the Get Started with AR project to debug.
7. Select the model for your app
You’ll be using a marker to generate a 3D model in your app. The asset pack you imported in the previous step includes multiple markers and 3D models that you can choose from.
If you prefer, you may also use your own marker and model. Take a look at the assets provided for examples.
Follow these instructions to select a 3D model:
1. In the Project window, navigate to the _ARMarker > Prefabs folder.
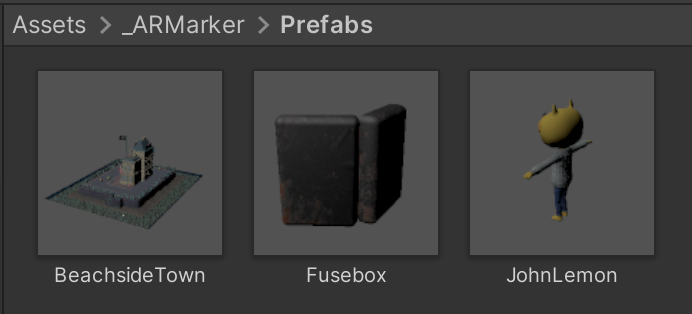
2. Review each of the prefabs, either by dragging them into the Hierarchy window or looking at the Inspector window's preview when you select them.
Note: These tutorials will use the Fusebox prefab as an example.
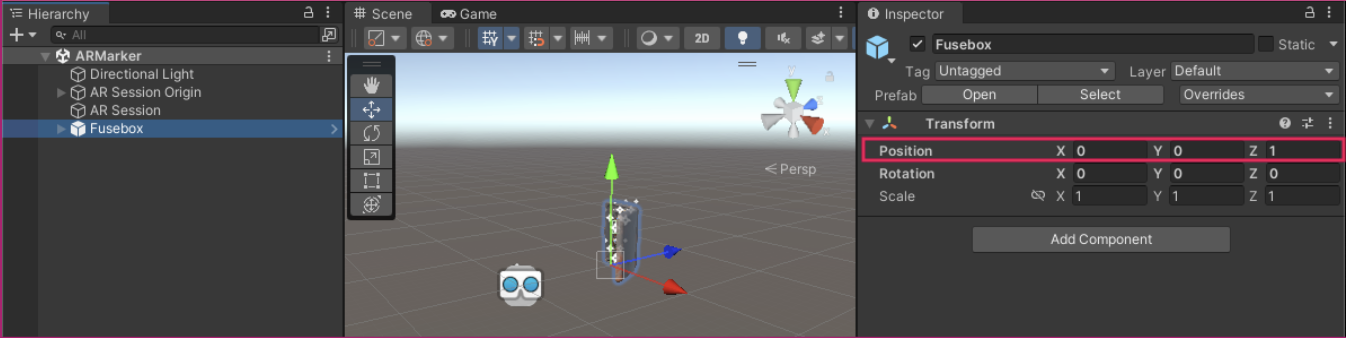
3. Drag your chosen prefab from the Project window to the Hierarchy window.
4. With your prefab selected in the Hierarchy window, set the Transform Position to X=0, Y=0, Z=1.
This will position the model one meter in front of the AR camera, which is approximately the distance a user will typically be from a marker when they scan it with their device’s camera.
5. Delete the cube from the Hierarchy window.
6. Save the scene and build the app again. Take note of the size of the model in your environment. In the next step, you can adjust the size if needed.
8. Adjust the model’s scale
Depending on the experience you’re creating, you may want an AR object to appear in your app at varying scales. For certain applications such as training simulations or shopping apps, you would use the object’s true scale. In other situations, such as the Beachside Town prefab, you will have to scale it down so it can fit comfortably on your desk.
Follow these instructions to adjust the scale of your model:
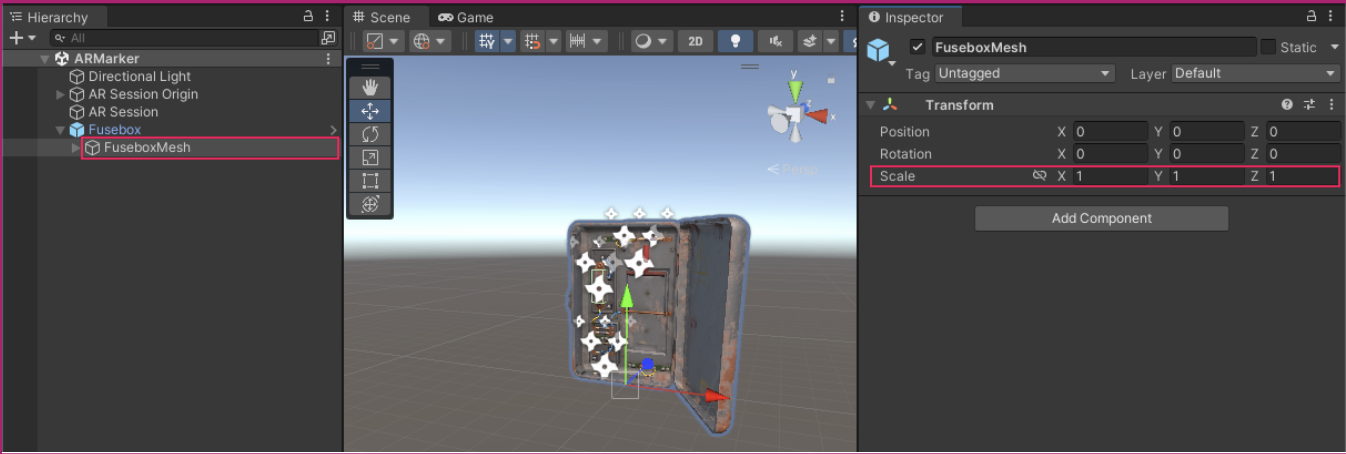
1. Expand your chosen GameObject in the Hierarchy window so that you can see its child GameObjects. Select the child GameObject named [your model]Mesh.
2. Edit the Scale of the mesh so that your model appears as you want it to appear in your app, relative to the real world.
3. To achieve a specific real-world scale, temporarily add a cube to the scene and adjust its Transform Scale X, Y, or Z values to create a kind of primitive measuring stick. Remember that one Unity unit is equal to one meter in the real world. So if you want your chosen GameObject to be 0.5 meters tall, it should be the same height as a cube scaled down to 0.5.
4. Save the scene and rebuild as necessary until you’re satisfied with the scale.
9. Next steps
In this tutorial you created a new Unity project using the AR Template and imported the project assets. Then, you selected the model that will appear in your app when a marker is detected. In the next tutorial you’ll configure the app so your model only appears when a specific AR marker is detected.