
Spawn an object on an AR Marker
Tutorial
·
Beginner
·
+10XP
·
45 mins
·
(131)
Unity Technologies
You have now selected a model in your application. However, it’s always present in the scene. In this tutorial, you’ll create an AR marker and configure your model to appear only when the marker has been detected.
1. Overview
You have now selected a model in your application. However, it’s always present in the scene. In this tutorial, you’ll create an AR marker and configure your model to appear only when the marker has been detected.
2. What makes a good AR marker?
An AR marker must meet the following requirements:
- Size must be at least 300 x 300 pixels. (However, markers do not have to be square!).
- Format must be PNG or JPG.
- Image must have a strong color value contrast.
- Image should avoid repeated patterns.
Note: AR Foundation does not use color information to detect images, only grayscale, which is why it’s important that markers have good contrast. It’s perfectly fine to have color in your marker for design purposes.
3. Create an XR Reference Image Library
The _ARMarker assets folder contains three pre-made markers that match the themes of the provided prefabs. These are just samples to help you get started — your actual markers can be any image you want, as long as it meets the requirements listed in the previous step.
Image recognition in AR Foundation is managed by a special asset called a reference image library. Once you select your marker, you will create a reference image library to store it. The reference image library can store all of the image markers that you want to be able to track in your application. Only images in this library will be detected.
For more information about the reference image library, refer to the documentation in the Unity Manual.
Follow these instructions to select your AR marker and create a reference image library:
1. In the Project window, navigate to the Assets > _ARMarker > Markers folder. Choose which of the provided markers you would like to use for your application, or create and import your own.
2. In the Project window, in the Markers folder, right-click and select Create > XR > Reference Image Library.
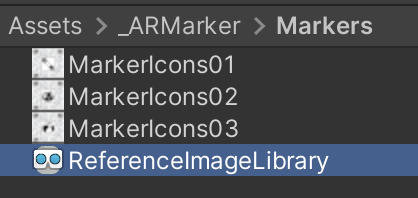
3. In the Markers folder, select the ReferenceImageLibrary asset you’ve created, and in the Inspector, select Add Image.
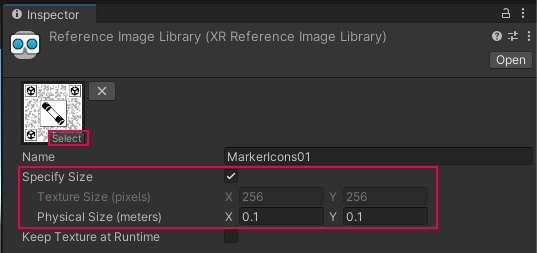
4. In the Inspector window, use the Texture Selector in the Texture 2D slot, search for “Marker”, and select the MarkerIcon image you want to use as the AR marker for your project.
5. For iOS Only: You must specify the size (in meters) of the marker in the real world in order for your iOS project to build successfully. The marker may be recognized even if the size does not match what you specify, but the location of your anchor may be slightly off if there is a discrepancy in the size of the marker and the values you input.
4. Print your marker or open it on your monitor
As you go through this project, you will frequently test the app’s marker recognition functionality on your device. If you have access to a printer, you could print the marker on a piece of paper and put it on your desk for testing.
Using a printed marker on paper will make testing a bit easier, since the marker is always available and can be moved around at your convenience.
Alternatively, you can just test the marker recognition by opening the image on your computer and pointing the device’s camera at it.
Using your computer monitor is more convenient in some ways, since you do not need to print anything and always have access to the image. However, using your monitor requires you to open the image every time you need to test and the marker is tied to your computer’s physical location.
If you want to print your marker, do so now. If you want to use your monitor, locate the marker image in the Project window and double-click it to open it with your computer’s default image viewer.
5. Add a tracked image manager
The AR tracked image manager searches for the images in the reference image library. When it finds one, it spawns an object from a prefab and places it on top of the marker in AR space.
Notice that you’ll specify a prefab here, not just a single GameObject. When your app is triggered by the marker, it will spawn an instance (copy) of this prefab, which generates a new GameObject in your app. This fact will be important later.
For more information about the AR tracked image manager, refer to the documentation in the Unity Manual.
Follow these instructions to add a tracked image manager to your scene:
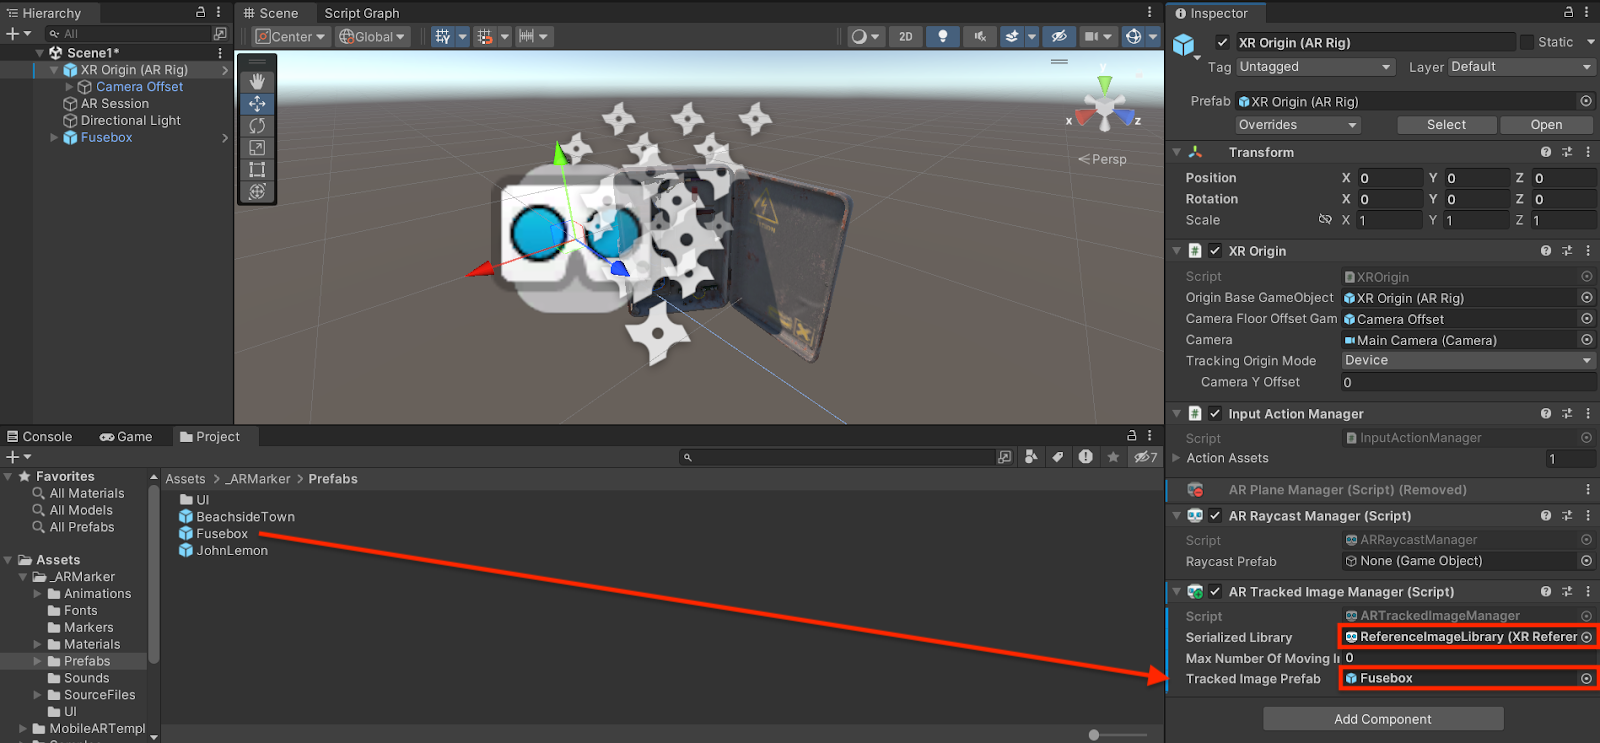
1. In the Hierarchy window, select the XR Origin (AR Rig) GameObject.
2. In the Inspector window, select Add Component and add an AR Tracked Image Manager component.
3. Find the Serialized Library property and use the picker (circle) to select the ReferenceImageLibrary asset you created.
4. In the Project window, find your selected prefab in the Assets > _ARMarker > Prefabs folder and drag the prefab into the Tracked Image Prefab property of the AR Tracked Image Manager component.
6. Test the marker in the Editor
AR Foundation supplies basic testing environments that allow you to simulate some AR features, like AR Markers. While these environments don’t replace testing your app on a device, they can be helpful when making and testing quick changes to prefabs or other application elements.
Note: The XR test environments are enabled by default if you’re using the Mobile AR Template. However, if you’re still using the same project that you created for earlier tutorials in this Pathway, you previously disabled this feature. To re-enable the testing environments, navigate to Edit > Project Settings > XR Plug-in Management, and enable XR Simulation in the Windows, Mac, & Linux settings.
Right now in your scene, you already have an instance of the model. Since your prefab will spawn automatically in the scene when the marker is recognized, you no longer need the model active in your scene.
Follow these instructions to prepare your scene and test your prefab in the Editor:
1. In the Hierarchy window, select your chosen prefab and disable it in the Inspector window.

You’ll need this in-Editor model to quickly iterate and test before you build, but you don’t want it to appear in the app on your device. Before you build each time, you’ll need to disable this in-Editor model in the Inspector window. Otherwise, you’ll have an extra model floating in your scene.
2. Select the Play button to enter Play mode and view the simulated environment.
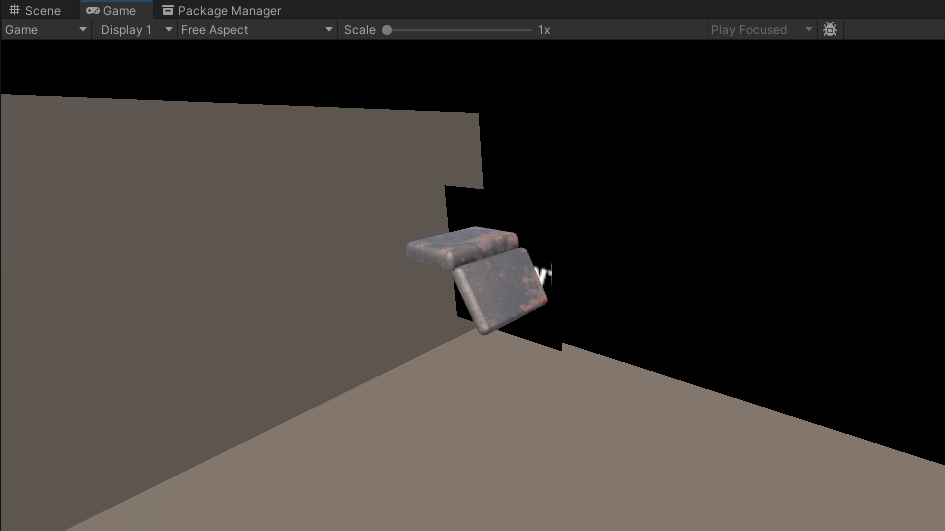
Notice that your prefab will appear on the Unity Logo floating in the scene. This logo simulates an image marker and will load the prefab assigned in the AR Tracked Image Manager.
3. To look around the scene, hold the right mouse button and drag the mouse.
4. To move around in the scene, hold the right mouse button and press the W, A, S, and D keys.
5. To raise and lower the camera height, hold the right mouse button and press the Q and E keys.
6. Press the Play button to exit Play mode.
7. Modify the test environment
Depending on whether you want your image marker to be placed on a horizontal or vertical surface, the orientation of the simulated image marker in the test environment might not suit your needs. If you’d like to modify the test environment so that the simulated image marker appears on a horizontal plane, complete the following instructions. Otherwise, move on to the next step.
To change the orientation of the simulated image marker, follow these instructions:
1. Go to Window > XR > AR Foundation > XR Environment.
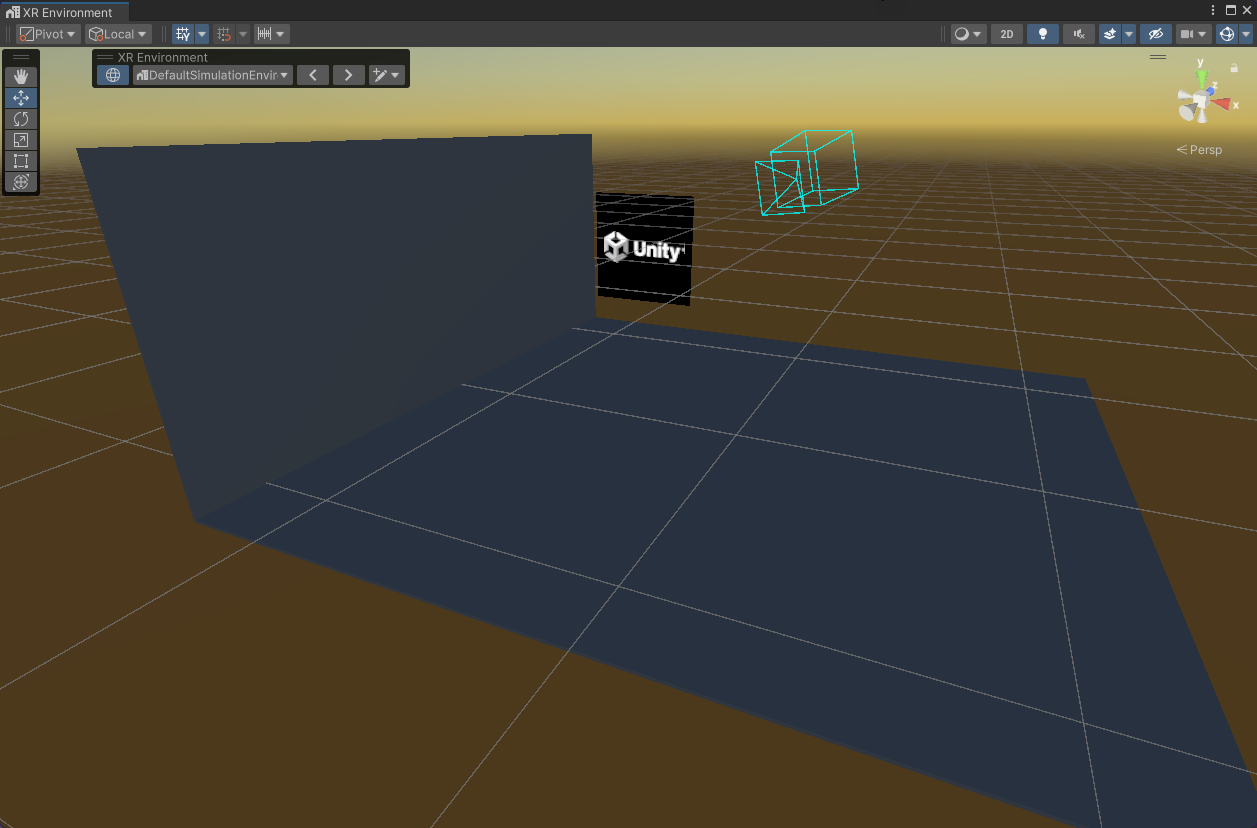
This will launch a special Scene view window that allows you to preview the DefaultSimulationEnvironment, but not edit it. In order to make changes, you’ll need to create a duplicate of the environment.
2. From the XR Environment toolbar, select the environment creation button on the rightmost side, and select Duplicate environment.

3. When prompted, give your duplicated environment a suitable name such as “MyEnvironment” and save it in the _ARMarker > Prefabs folder.
The DefaultSimulationEnvironment (and all simulated XR Environments) are actually prefabs. As soon as you save your own version of the environment, prefab editing mode will automatically open, allowing you to make changes.
4. In the Hierarchy window, select the Simulated Tracked Image GameObject.
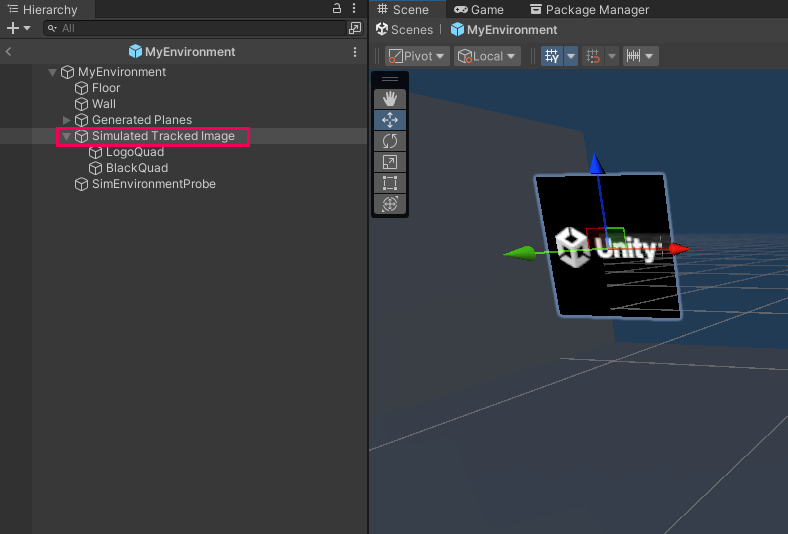
5. Rotate the Simulated Tracked Image GameObject and move it so it’s sitting on the ground plane.
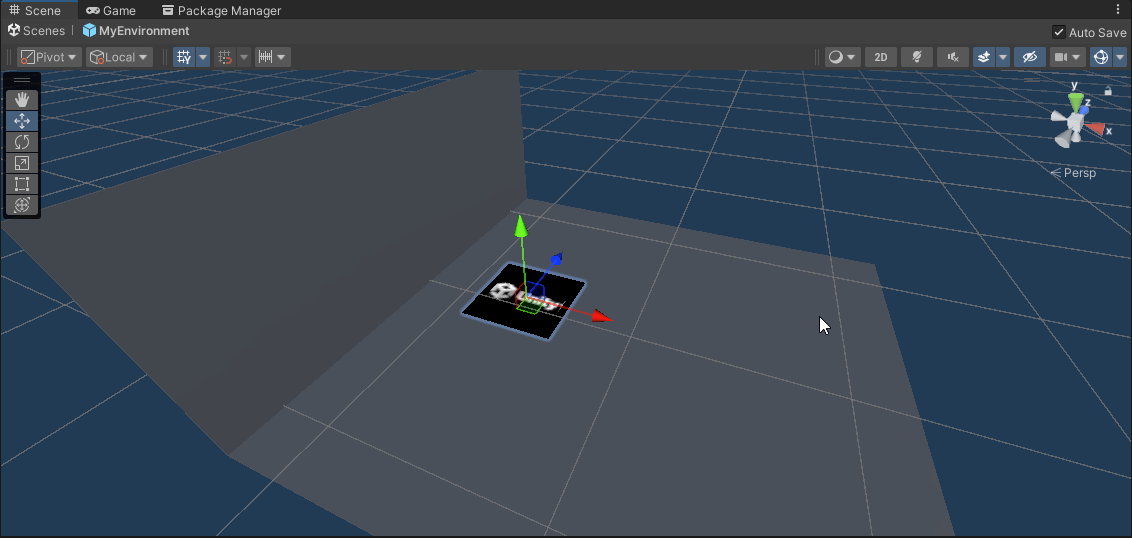
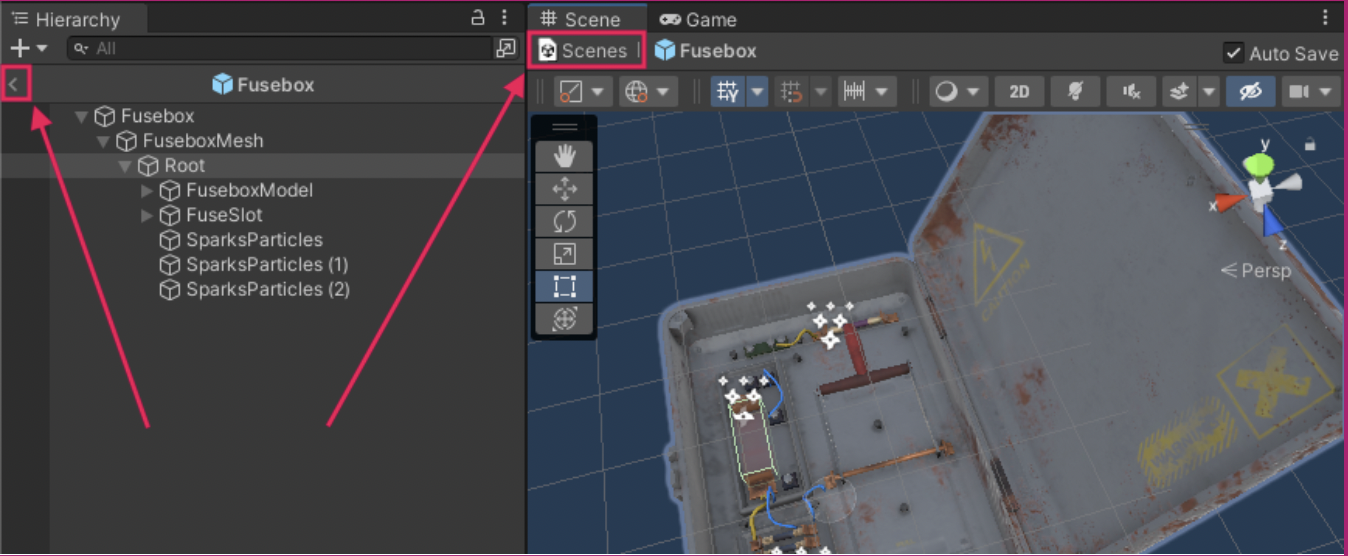
6. Exit prefab editing mode by selecting the back arrow in the header bar of the Hierarchy window or by selecting Scenes in the breadcrumb bar at the top of the Scene view.
You’ll now see your edited environment previewing in the XR Environment window, with your environment name listed in the active environment dropdown.
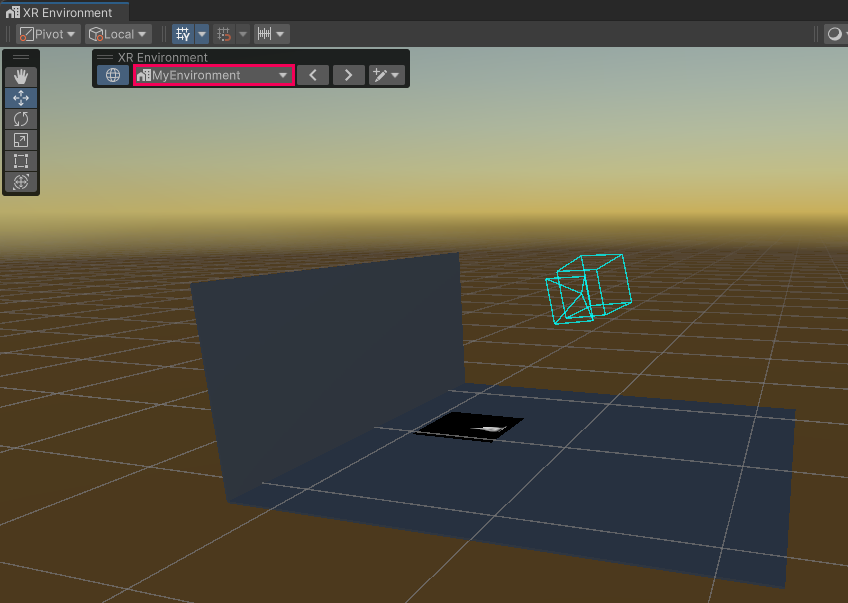
7. Close the XR Environment window.
8. Enter Play mode to view your prefab in the new position.
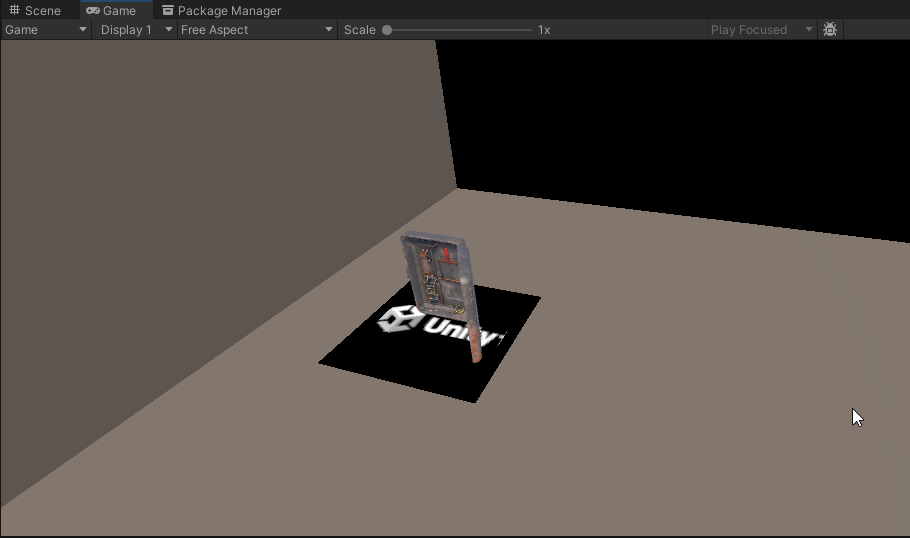
8. Test the marker on your device
While the simulated image tracker is a great way to test your application in the Editor quickly, it doesn’t test whether your real image marker actually works. To verify your actual image marker, you need to test the app functionality on your device. When the image is detected by your device’s camera, your selected prefab will appear and hover over the tracked image of the marker.
To test the app functionality on your device, follow these instructions:
1. Save and build your app.
2. If you printed your marker on paper, place it on a horizontal surface. If you did not print your marker, open the marker image on your monitor by double-clicking it in the Project window so it opens in your computer’s default image viewer.
3. Point your device’s camera at the marker, and you will see the model show up on top of the marker.
If you are using your computer’s monitor to display your marker, you will notice that the model appears rotated downwards — don’t worry, you’ll fix that in the next step!
9. Adjust the prefab
Next, you need to adjust your prefab so that copies of it will appear at an orientation and scale that are appropriate for your app.
If you are testing your marker on your computer monitor (rather than printed on paper), you need to edit the rotation of the model so it’s not rotated downwards. AR Foundation assumes that the marker will be lying flat on a horizontal surface, but your computer monitor is vertical.
To compensate for the monitor’s 90 degree forward rotation, you need to rotate the model backward by 90 degrees.
Follow these instructions to adjust your prefab relation to your marker:
1. Open your model in prefab editing mode.
You can open prefab editing mode by double-clicking the Prefab Asset in the Project window or by selecting it in the Project window or Hierarchy window and selecting the Open button in the Inspector window.
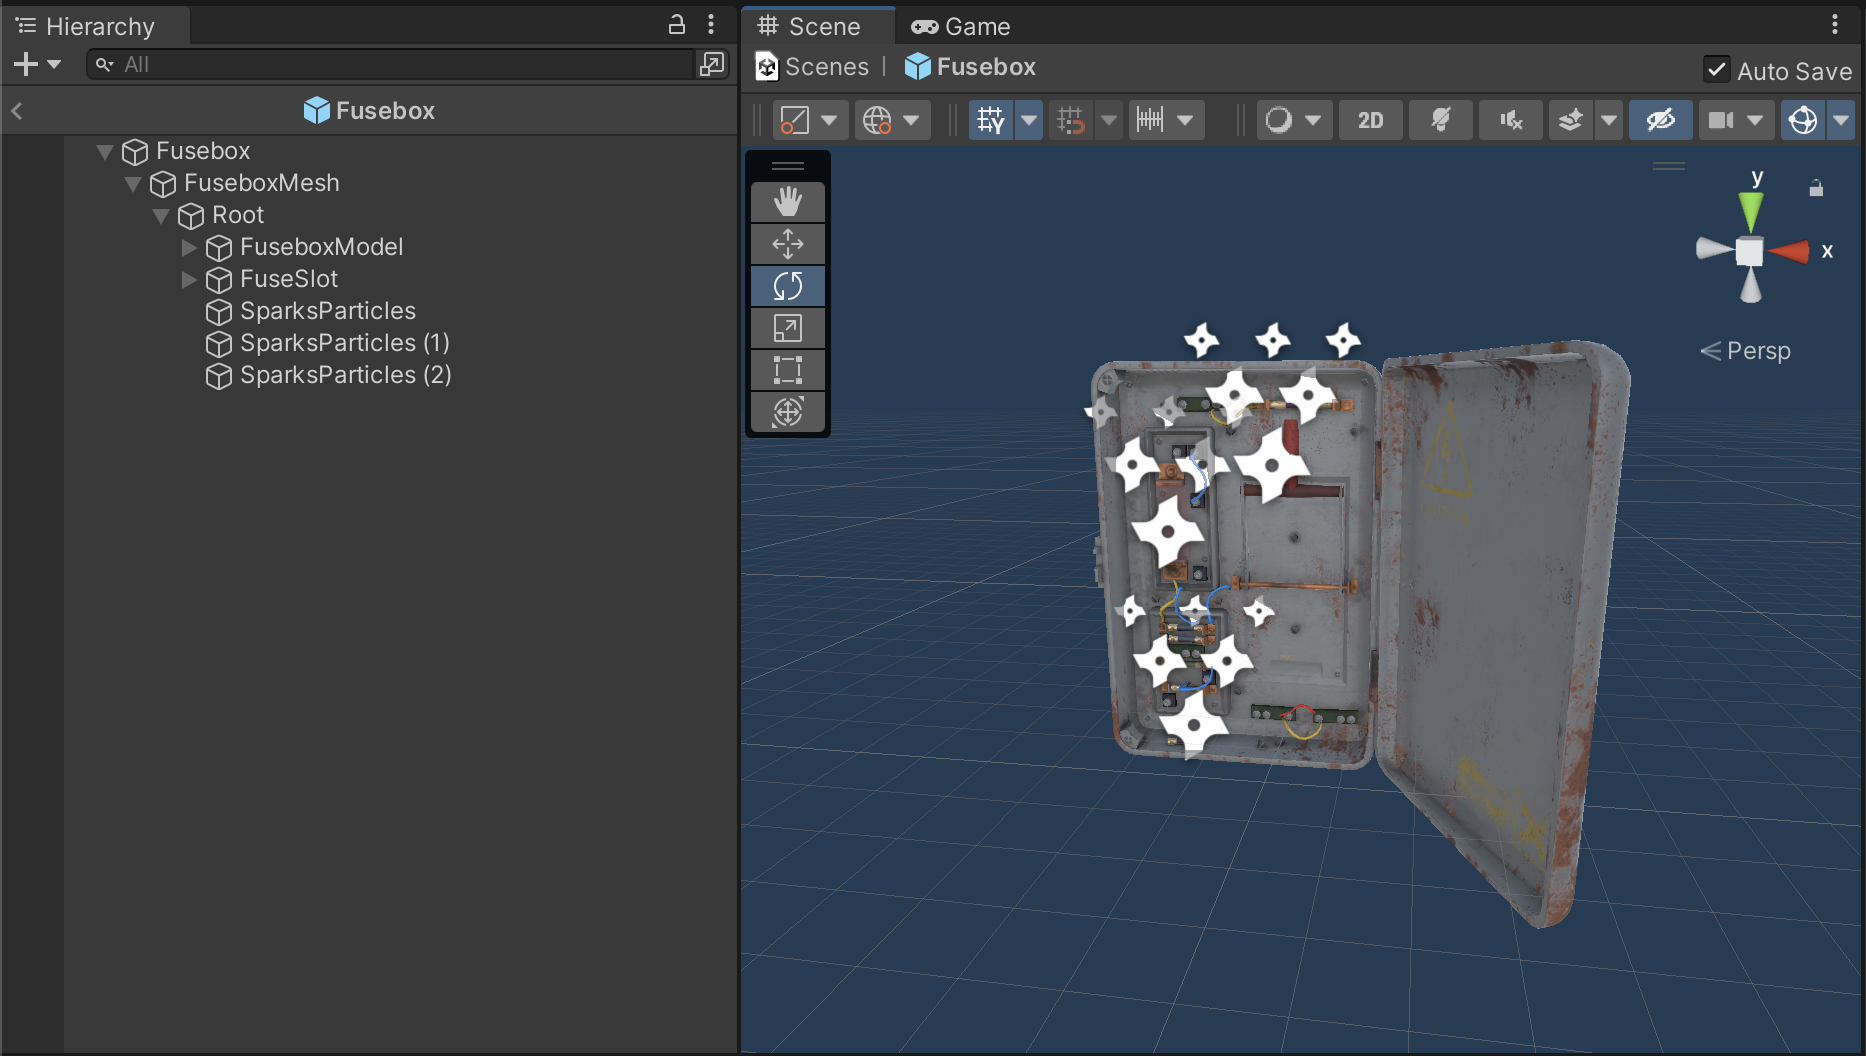
2. Expand the GameObject in the Hierarchy window so that you can see its child GameObjects. Select the child GameObject named [your model]Mesh.
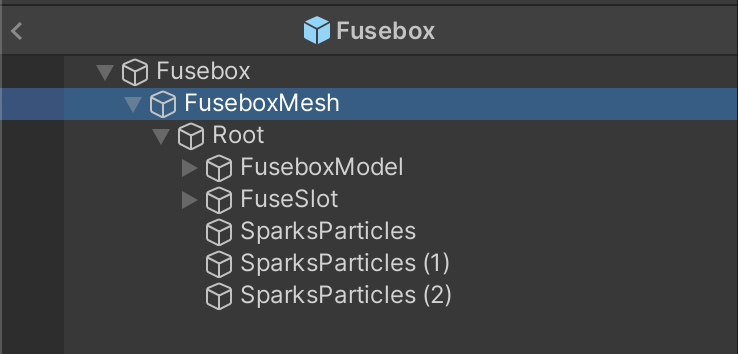
3. Edit the Position, Rotation and Scale of the mesh so that your model appears as you want it to appear in your app, relative to your marker in the real world. If you are testing your app on your vertical device monitor rather than on horizontal paper, rotate the object backward by 90 degrees on the x-axis.
Important: Make sure you have edited the [your model]Mesh child GameObject rather than the parent prefab GameObject. Edits made to the position, rotation, and scale of the parent prefab GameObject will be reset when the prefab spawns in the scene.
4. Exit prefab editing mode when you’re finished editing.
You can exit prefab editing mode by selecting the back arrow in the header bar of the Hierarchy window or by selecting Scenes in the breadcrumb bar at the top of the Scene view.
5. Build and test on your device.
10. More things to try
If you want to further develop your skills, explore new concepts, or improve your project, check out some of the optional activities below. Each activity is identified as being either Easy, Medium, or Difficult, so you know what level of difficulty to expect.
These activities are entirely optional, so if you’re not interested, no problem — just skip this step.
We do recommend attempting at least one of them in order to get the most out of this learning experience. Good luck!
Easy: Use a graphic or marker that someone else has made
There are many different markers that you can find online. Search for markers or images, import them into your project, and test which ones are best for AR Foundation tracking. Refer back to Step 2 for information about what makes a good marker.
Medium: Modify one of the provided AR markers
Duplicate one of the provided markers and edit it to create your own unique marker. For example, you could delete the icon in the middle of the texture and add a different icon or image.
Gimp is an open source alternative to Adobe® Photoshop® that you can use to create, modify, and export graphics. A quick search on a search engine should return a lot of tutorials to help you use your preferred texture editing software.
Difficult: Make your own marker using a graphic editing program
Create your own marker from scratch, and begin designing your own experience! Refer back to Step 2 for information about what makes a good marker.
11. Next steps
Now you have a working application that can track a marker and make a 3D object appear! In the next tutorial, you will expand on this functionality by adding buttons that will allow your user to interact with the 3D model.