
Add world space UI to your marker-based app
Tutorial
·
Beginner
·
+10XP
·
45 mins
·
(67)
Unity Technologies
World space layouts allow you to place user interface and image elements in the real-world AR space instead of attaching them to the screen. Unlike a screen space canvas, you can position a world space canvas anywhere in the scene.
In this tutorial, you’ll make a label that will hover near the model when it appears over the marker. You’ll also make a button to let the user turn the label on and off.
1. Overview
World space layouts allow you to place user interface and sprite elements in the real-world AR space instead of attaching them to the screen. Unlike a screen space canvas, you can position a world space canvas anywhere in the scene.
In this tutorial, you’ll make a label that will hover near the model when the model appears over the marker. You’ll also make a button to let the user turn the label on and off.
2. Add a world space canvas
The first step is to add a world space canvas to your scene. We’ve provided a prefab for this canvas.
Follow these instructions to add the provided assets for the world space UI to your scene:
1. In the Project window, open the prefab of the modelObject in prefab editing mode.
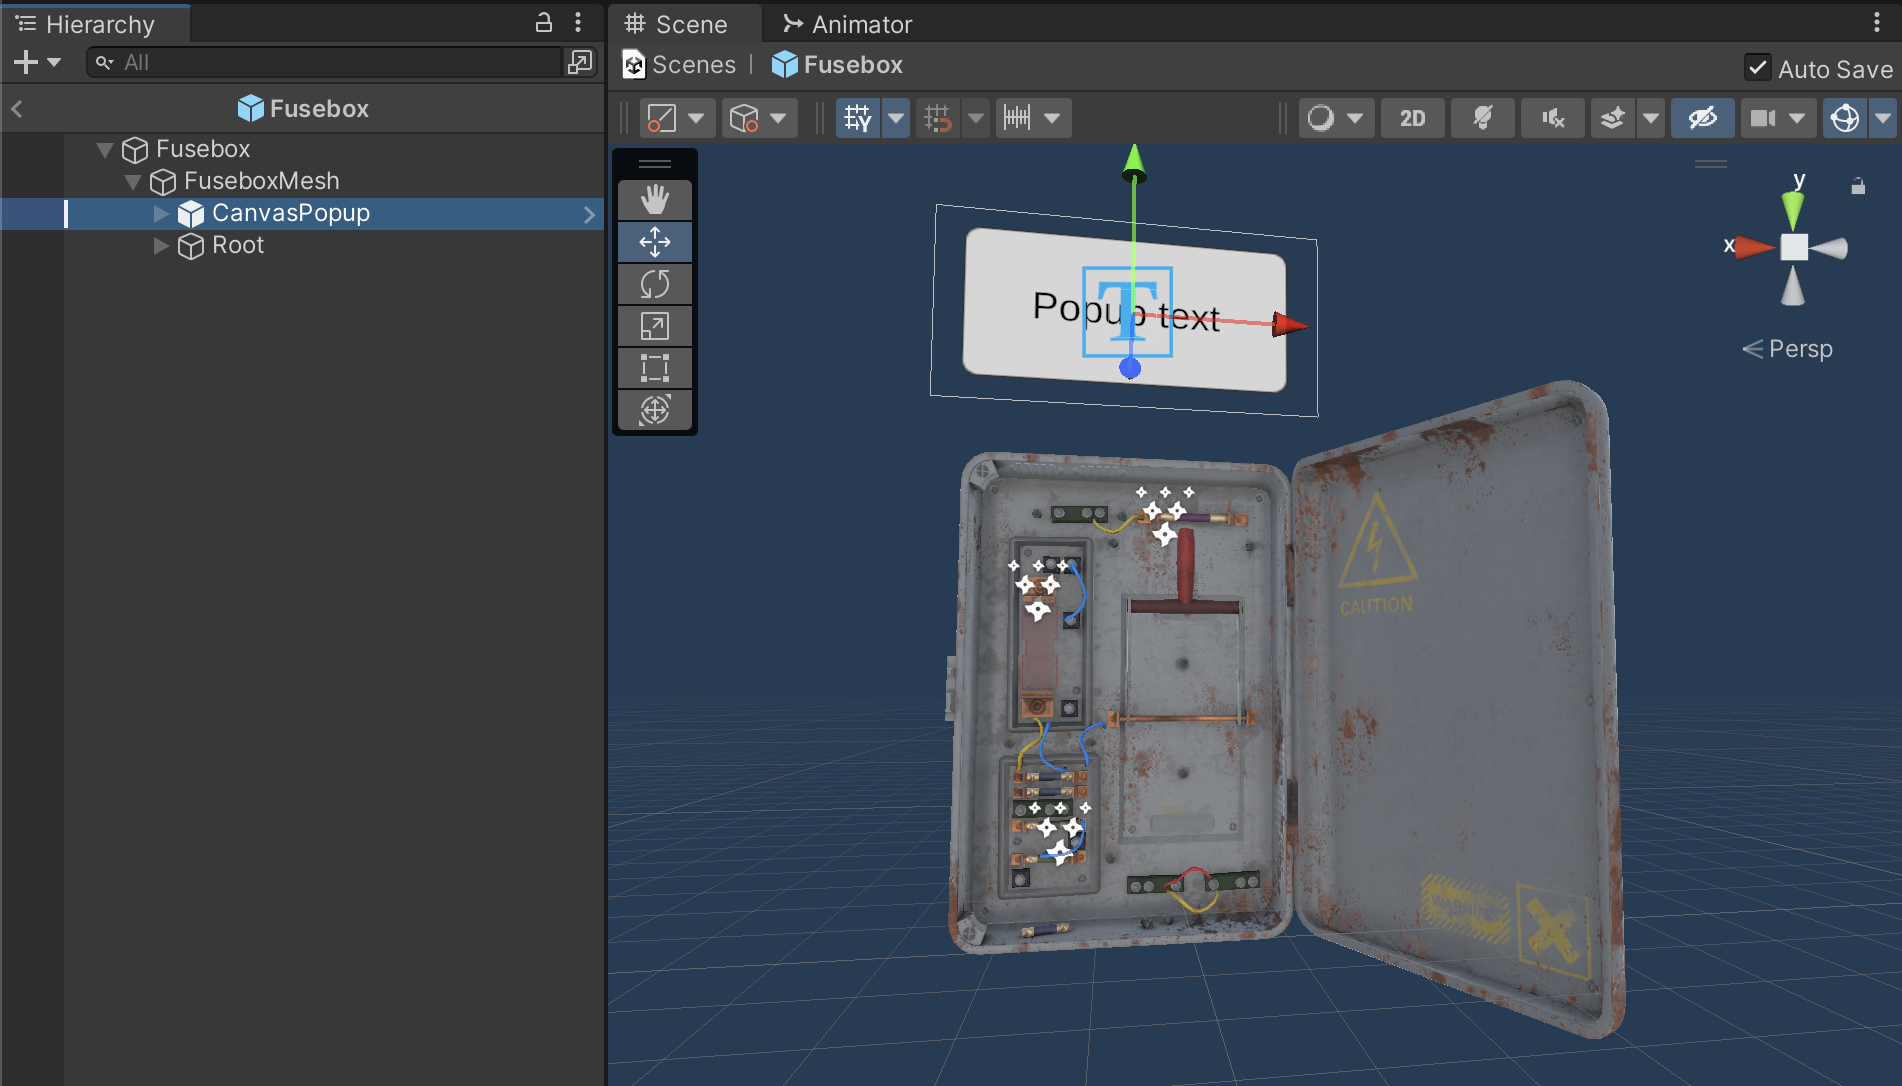
2. In the Project window, navigate to Assets > _ARMarker > Prefabs > UI. Click and drag the CanvasPopup prefab into the Hierarchy window as a child GameObject of the [your model]Mesh GameObject.
3. In the Scene view, change the location, rotation, and scale of the canvas relative to your model.
4. Stay in prefab editing mode for the next step.
Important: The canvas must be a child GameObject of the [your model]Mesh GameObject, otherwise it will not be affected by the rotate buttons.
3. Customize world space UI
Once you have your canvas positioned the way you want it in the world, it’s time to make it look a little more stylish.
Follow these instructions to customize the world space UI:
1. In the Hierarchy window, select the Panel child GameObject under CanvasPopup.
2. In the Inspector window, in the Image component, change the Source Image to a different sprite using the picker (⊙). You could also create or download your own UI image.
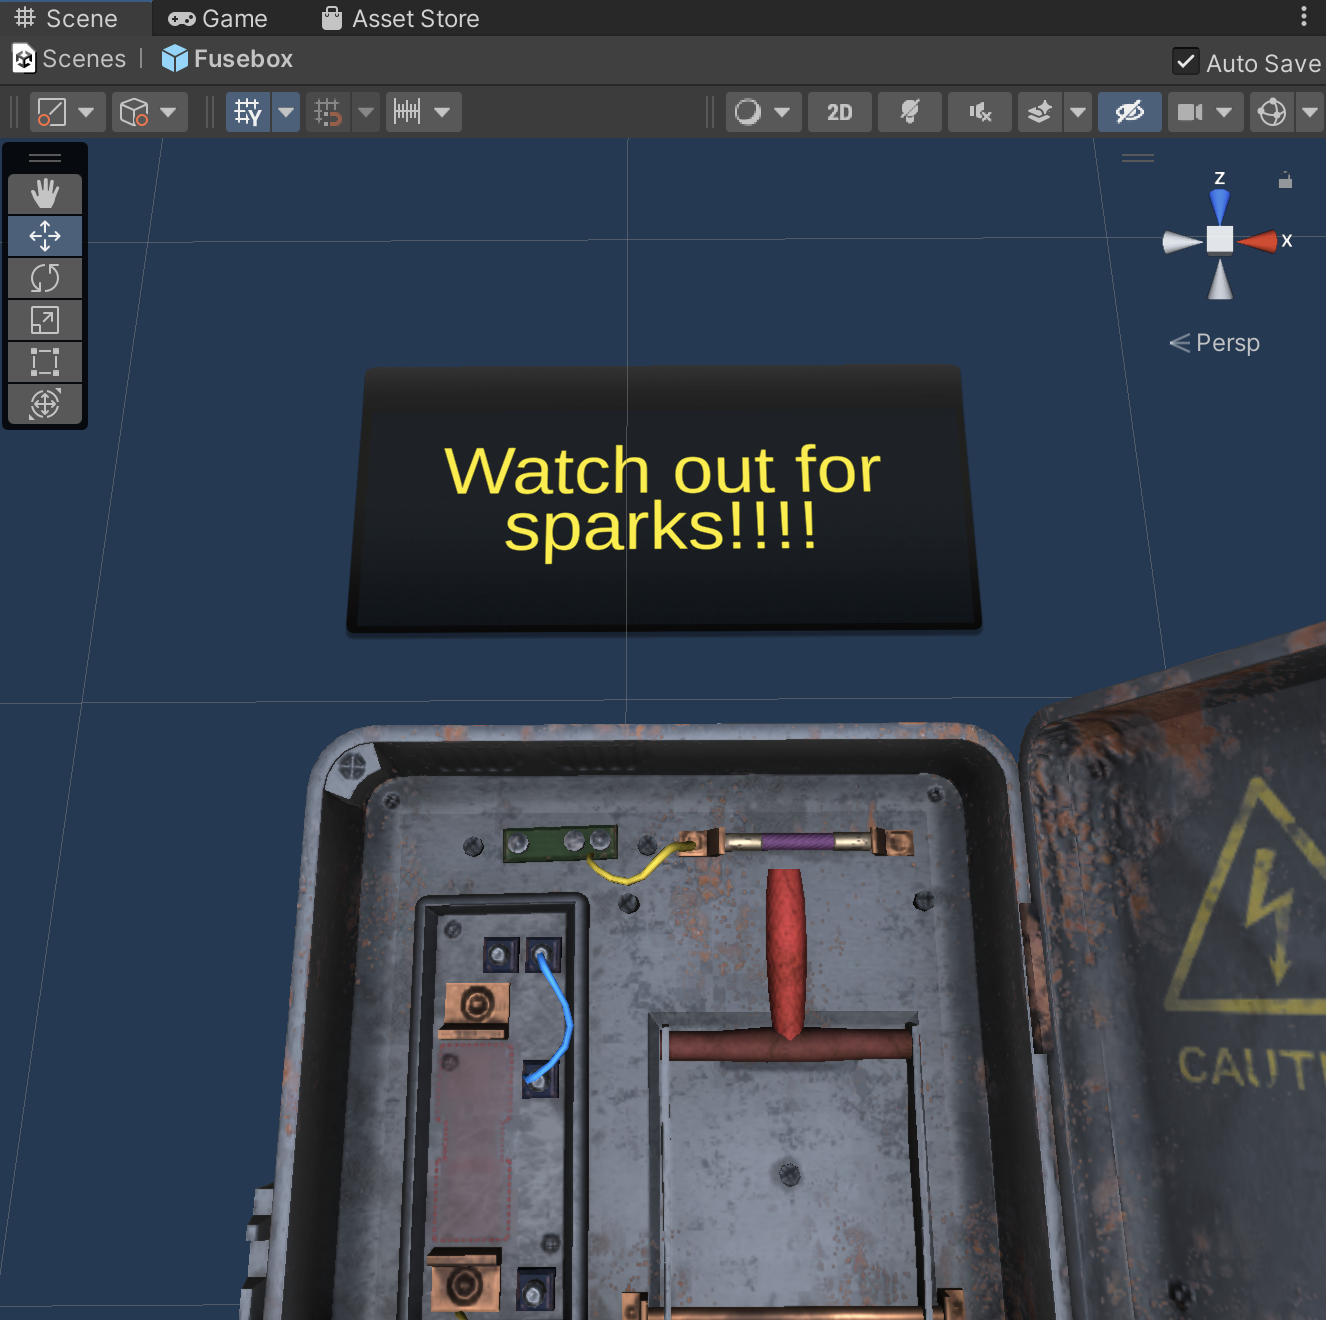
3. In the Hierarchy window, select the Text (TMP) child GameObject of the Panel GameObject, and in the Inspector window change the Text Input text to something you want to say about your GameObject.
4. Customize the font, size, and style of the text in the TextMeshPro component.
5. If you want to adjust the size of the Panel or Text GameObjects, use the Rect tool.
6. When your layout and style are just the way you want them, exit prefab editing mode.
4. Update the UI button
Next, you’ll make one of the buttons turn your world space canvas on and off so that users can view or hide the text next to the model. In this step you’ll also customize the look of your button.
Follow these instructions to customize the UI button for the world space UI:
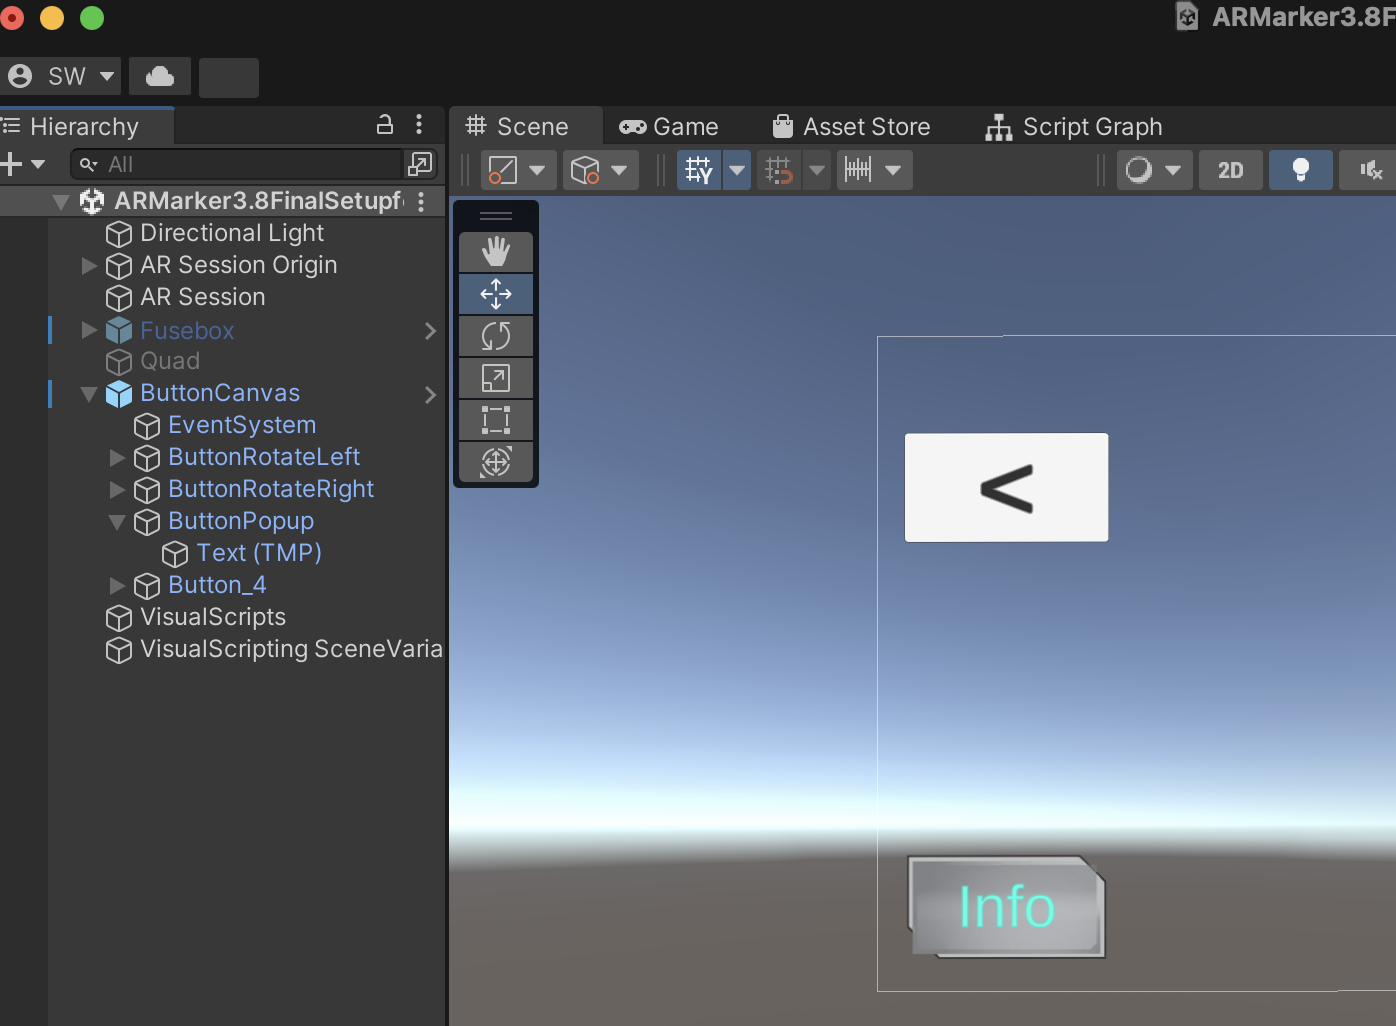
1. In the Hierarchy window, select ButtonCanvas > Button3 and rename it “ButtonPopup”.
2. Customize the sprite for the button, if you prefer.
3. In the Text (TMP) child GameObject, change the text to “Info”, or something else that gives your user an idea of what this button will do.
4. Customize the style, font, and other properties of the text as you like.
5. Create variables in your script graph
Now that your button looks great, it is time to make it functional. Similar to what you did with the mesh itself, you will need to get a reference to the popup canvas by searching for it when it spawns in the scene. To achieve this functionality, you’ll need a variable for the UI button and an unassigned variable for the canvas.
Follow these instructions to create the two new required variables for your script graph:
1. In the Hierarchy window, select your VisualScripts GameObject and open the Setup graph.
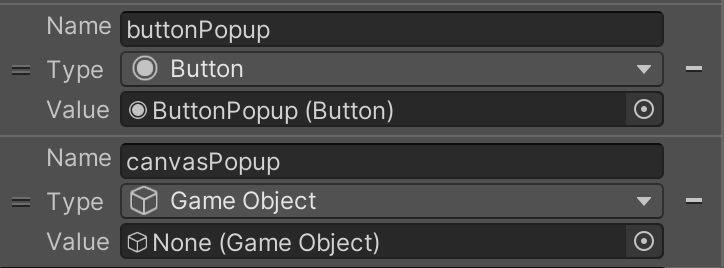
2. In the Blackboard, add a new GameObject variable called “buttonPopup”, select Button from the Type dropdown, and then assign the Value ButtonPopup (Button) using the picker (circle).
3. In the Blackboard, add a new GameObject variable named “canvasPopup” and select GameObject from the Type dropdown. Don’t set a Value.
6. Get a reference to the canvas
With your variables ready, you’re ready to search for the popup canvas child GameObject within your tagged prefab. In your setup script, you already have a reference to the GameObject with the tag modelObject, so you don’t need to look for another tag. Instead, you’ll use the Get Component in Children node to search for a Canvas component in any child GameObject of that tagged Mesh GameObject. Since your popup canvas is the only GameObject with a Canvas component, the Get Component in Children node will successfully locate your popup canvas GameObject.
Watch the video or follow the instructions below to get a reference to the popup canvas and assign it to your variable:
1. In the Graph Editor, at the end of your Setup graph, add a Get Component in Children (Type, Include Inactive) node. Change the Type to Canvas, and enable Include Inactive.
Important: Make sure to select the singular Get Component in Children node and not the plural Get Components in Children node.
2. Connect the output of the Set Variable modelObject node to the GameObject input of the Get Components in Children node. The script will look for a canvas among the child GameObjects of the model’s Mesh GameObject.
3. Add a Set Object Variable node to follow Get Component in Children, and select canvasPopup.
4. Connect the Get Component in Children output nodes to the Set Variable canvasPopup node, using the bottom input that has no label. This node will set the canvas to the canvasPopup variable.

5. Enter Play mode and test your script to ensure that the canvas is added to the variable.
Note: For the moment an error message will appear in the console, but don’t worry we will solve this issue in the following steps.
7. Display popup on click
Next, it’s time to make the button functional by setting the CanvasPopup GameObject to be active in the scene when the user presses the button.
Watch the video or follow the instructions below to create a visual script that will turn on your world space canvas:
1. In the Hierarchy window, select the VisualScripts GameObject, and in the Inspector window select Add Component > Script Machine.
2. Select New in the new component. When prompted, save the new script machine in your Visual Scripts folder, and name it “DisplayPopup”.
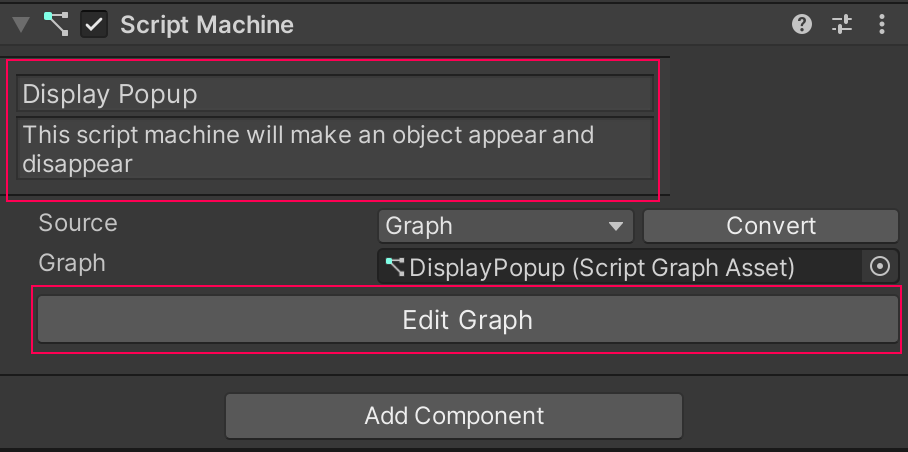
3. In the Inspector window, add a Title (“Display Popup”) and Summary (“Makes an object appear and disappear”). Then select Edit Graph.
4. Delete the OnStart and OnUpdate nodes.
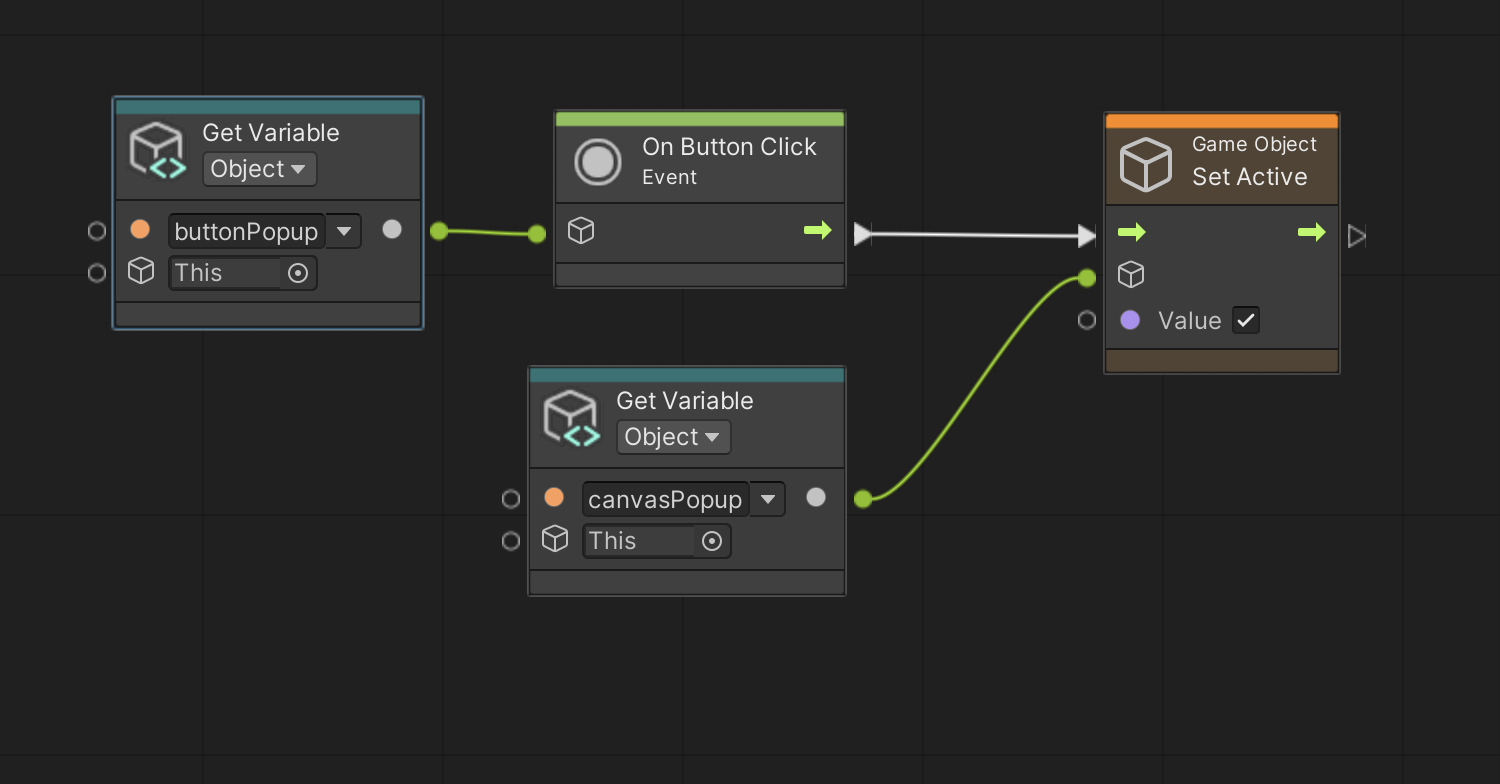
5. In the Graph Editor, add an On Button Click node.
6. Click and drag the buttonPopup variable into the Graph Editor, then connect it to the input of the On Button Click node.
7. In the Graph Editor, add a Game Object Set Active node and connect the flow input to the flow output of the On Button Click node. Set the Value to True (checked) to specify that the GameObject will become active.
8. Drag the canvasPopup variable into the Graph Editor, then connect it to the GameObject input of the Game Object Set Active node.
9. Open your model object in prefab editing mode. Select the CanvasPopup child GameObject and disable it in the Inspector window. From now on, this GameObject won’t be active by default — your scripts will activate the canvas when the user presses a button.

10. Test the new button functionality in Play mode.
8. Make button toggle info on and off
Now that you can turn the popup on, you can make it turn off again when your user presses the button again. You’ll use a Negate node to switch the canvas from inactive to active and back again, so that the button works like a toggle.
Watch the video or follow the instructions below to adjust your visual script so that it toggles the world space canvas on and off:
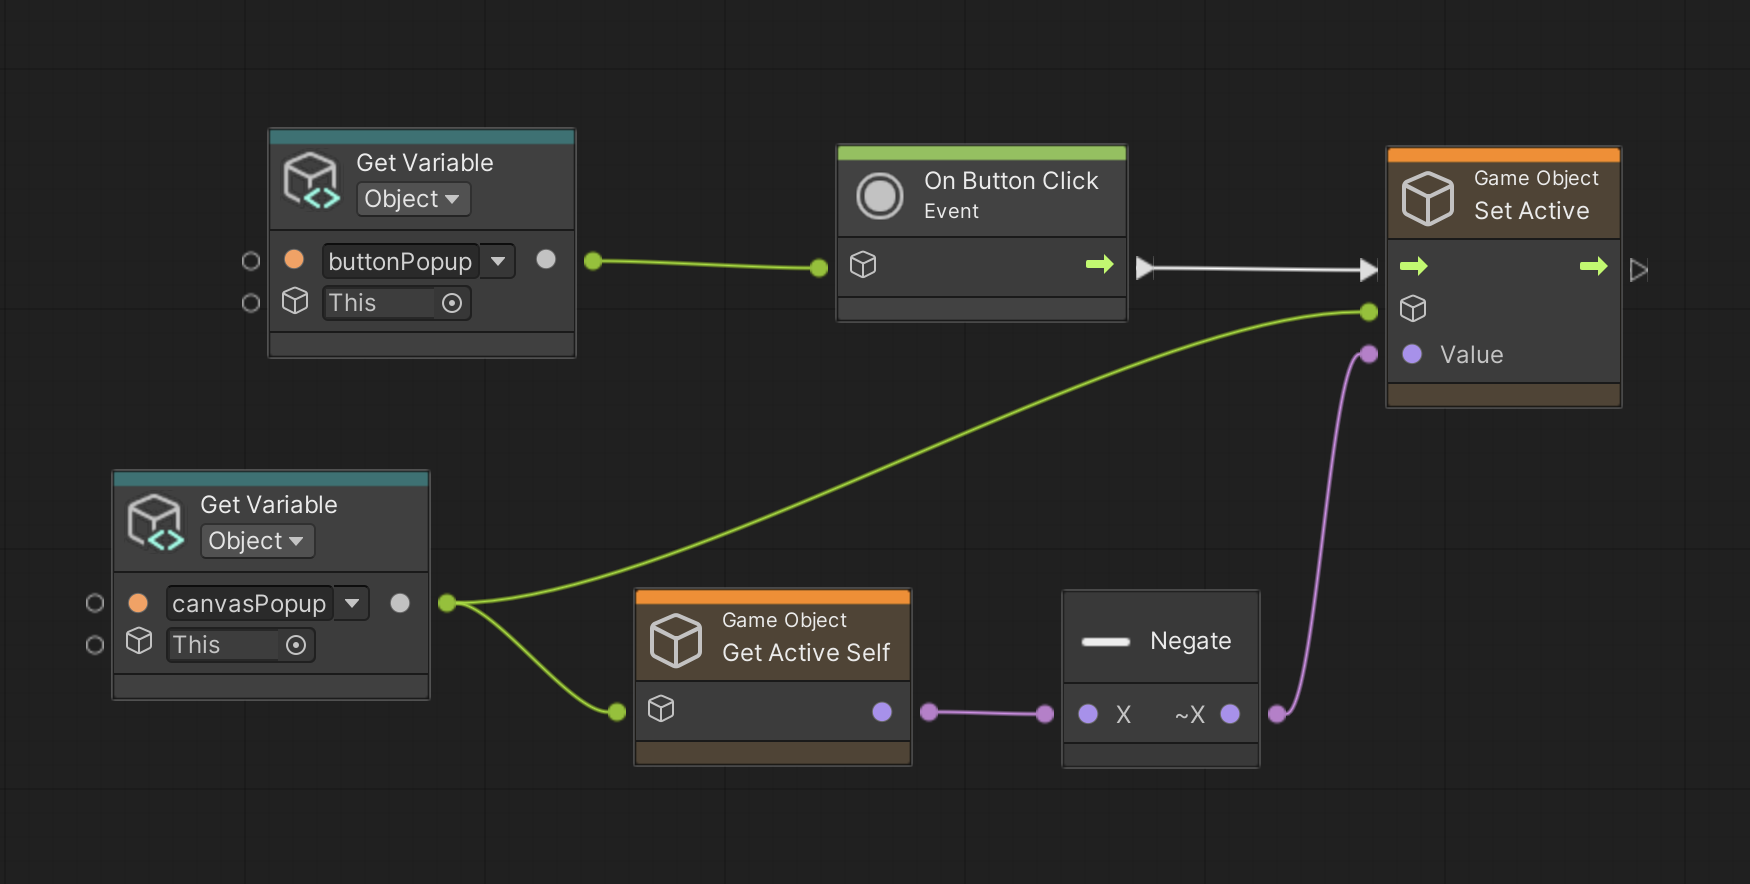
1. In your DisplayPopup script, move the Get Object Variable node with the canvasPopup value to the left so you have some space for additional nodes.
Important: Keep the Get Object Variable node connected to the Set Active node.
2. In the Graph Editor, add a GameObject: Get Active Self node. This node detects whether canvasPopup is active, and outputs a Boolean value. Connect the Get Object Variable canvasPopup node output to the input of your new node.
3. In the Graph Editor, add a Negate node and connect it to the output of the Get Active Self node. This node will set the Boolean value to the opposite of the output from the Get Active Self node.
4. Connect the Negate node flow output to the Value input of the Set Active node.
Now, if the canvas is currently active, it will be set as inactive. If the canvas is currently inactive, it will be set as active.
5. Test the toggle functionality in Play mode by pressing your ButtonPopup button a few times.
6. Build to your device and test the buttons to make sure that the canvasPopup turns on and off when you press the button.
9. More things to try
If you want to further develop your skills, explore new concepts, or improve your project, check out the optional activity below. Each activity is identified as being either Easy, Medium, or Difficult, so you know what level of difficulty to expect.
This activity is entirely optional, so if you’re not interested, no problem – just skip this step.
We do recommend attempting this kind of challenge to get the most out of this learning experience. Good luck!
Medium: Make canvas look at camera
It can be helpful to have world space canvases look towards the camera since they aren’t attached to the screen. This requires having the object rotate on its own to look at a defined camera. Sometimes, when you do that you need to test what you have made to make sure that your text is facing the correct way, and if it isn’t you might need to rotate it in the prefab.
To do this particular challenge you might need some new nodes:
- Transform Look At World Up.
- Get Main Camera.
10. Next steps
In this tutorial, you made the third of four buttons functional, which toggles a world space canvas on and off. In the next tutorial, you will add functionality to the final button in the UI, which will make spatial sound emanate from your AR model.