Setting up the game
Tutorial
Beginner
+10XP
20 mins
13991
Unity Technologies
Welcome to Roll-a-ball! In this learning project, you’ll:
- Use Unity Editor and its built-in capabilities to set up a simple game environment
- Write your own custom scripts to create the game functionality
- Create a basic user interface to improve the game experience
- Build your game, so other people can play it!
Materials
Languages available:
1. Overview
In this first Roll-a-ball tutorial, you’ll:
- Create a new Unity Project
- Set up your workspace
- Create and position some basic objects for your game
- Configure the lighting and game background
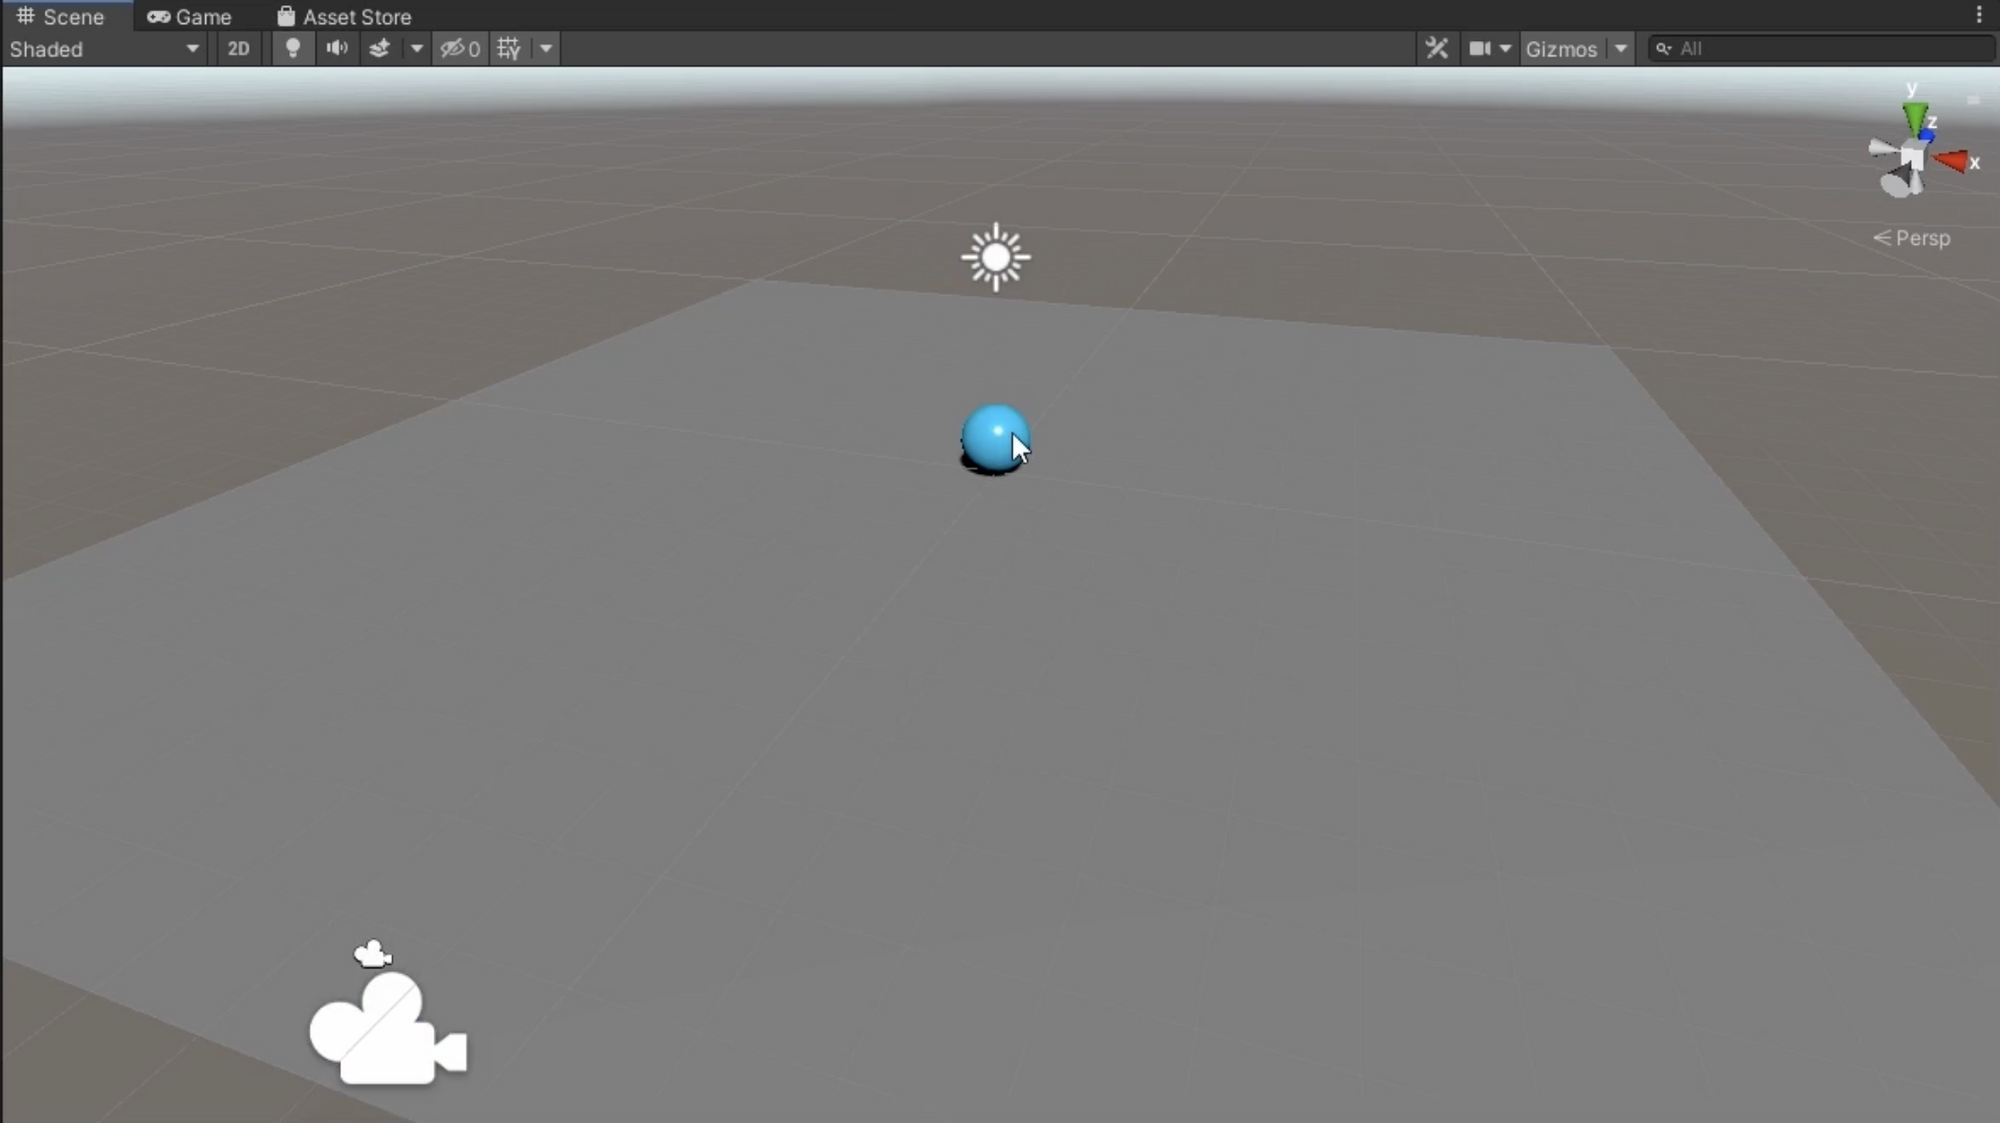
By the end of this tutorial, your game will look something like this:
2. Before you begin
Before you begin
Before you get started, you do need to install the latest version of Unity. This is currently Unity 6.
New to Unity?
This learning experience assumes that you are already familiar with how to navigate the Scene view in the Unity Editor. If you’re completely new to Unity, this tutorial on getting started with the Unity Editor has been designed to help you get comfortable and ready to create in the Unity Editor.
3. Create a new Unity project
Follow the video or text instructions below to select a project template and create a new project:
1. Select a project template.
- Open Unity Hub and log in using your Unity account.
- Select New Project.
- Select the Universal 3D template and then select Download template if it is not already downloaded.
2. Create the new project.
- In the Project Settings, enter “Rollaball” in the Project Name box, select the Location box, and select a local folder of your choice.
- Select Create Project and wait for the Unity Editor to open.
4. Create a new Scene
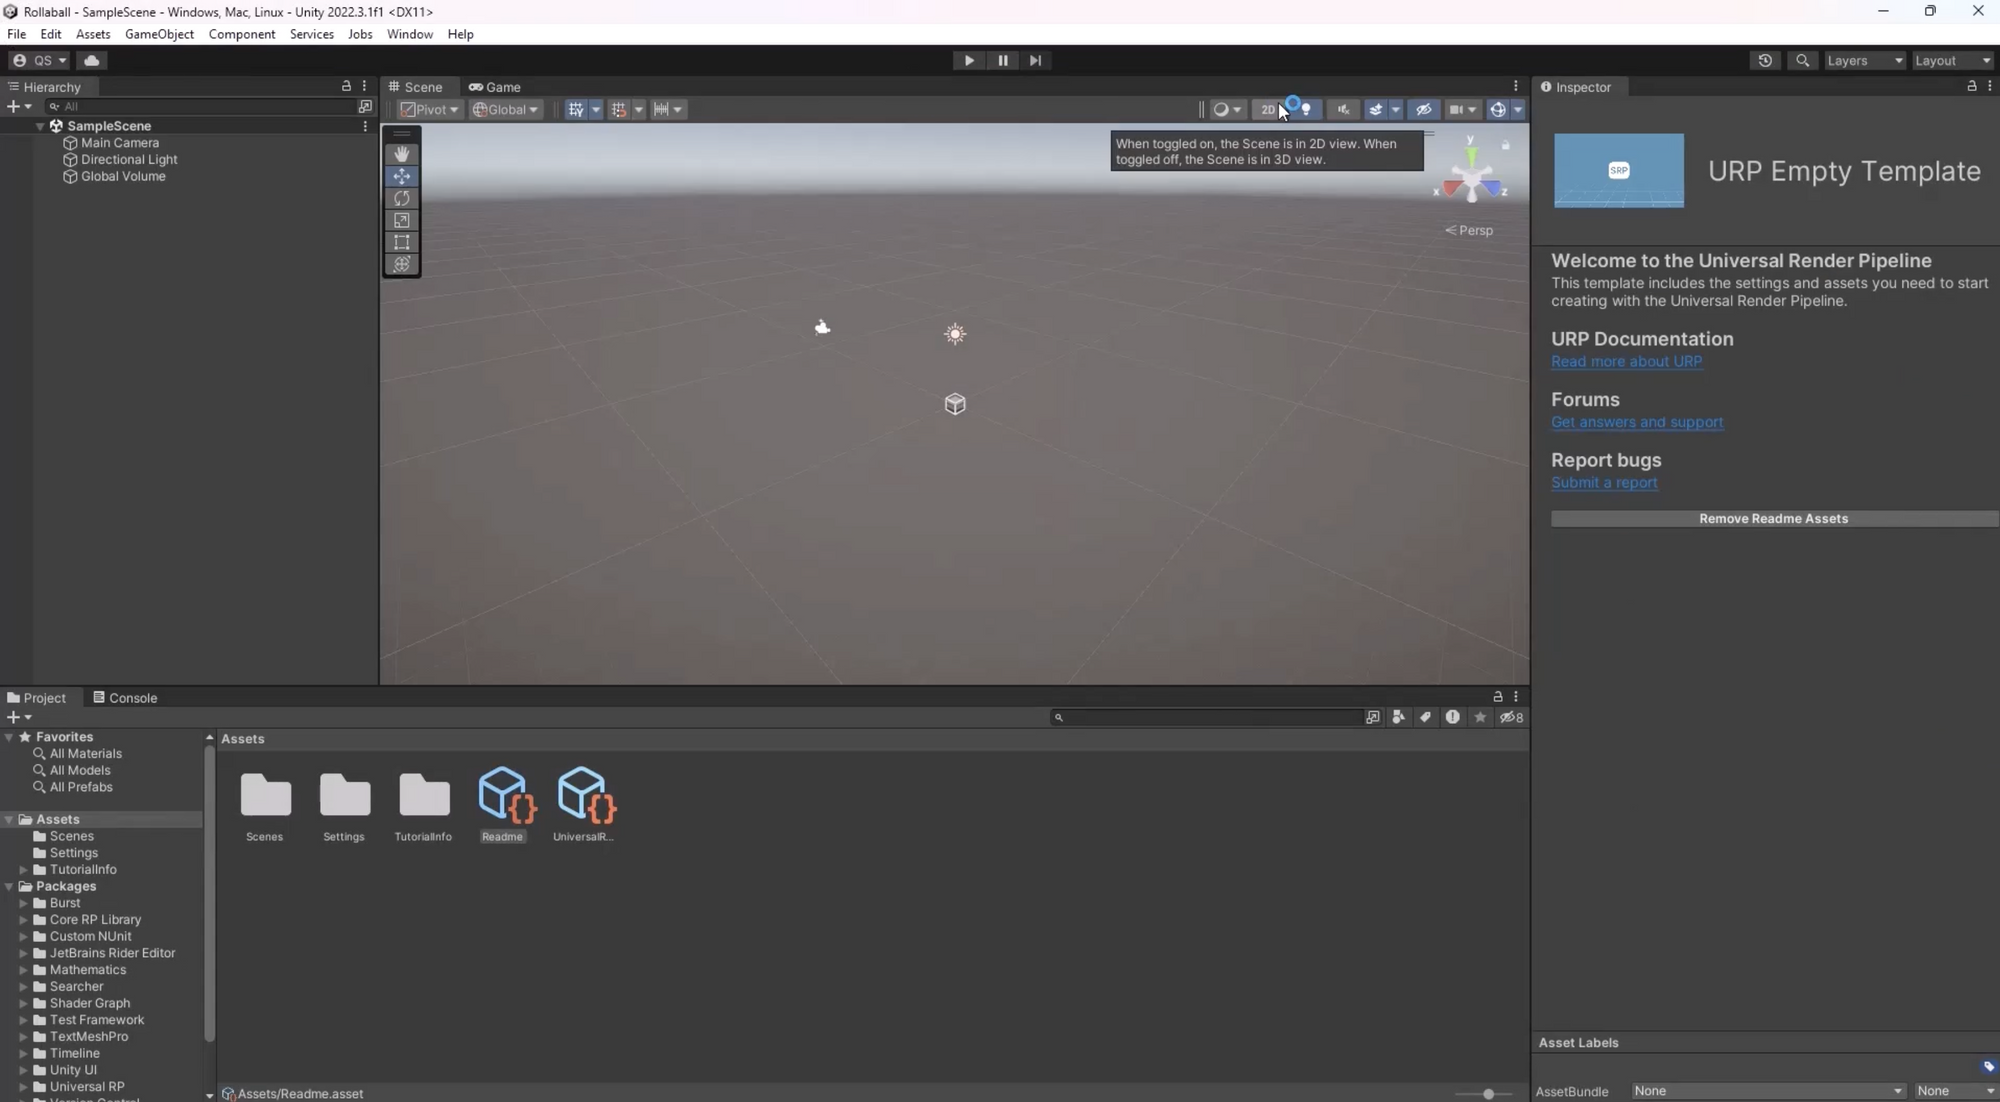
Follow the video or text instructions below to set up your workspace, create a new scene from a template, and save your scene:
1. Set up your workspace.
- Make sure the Default Layout is selected from the Layout dropdown for tutorial consistency.
2. Create a new scene from a template.
- To create a new scene, select File > New Scene.
- Select the Basic URP template, then select Create.
3. Save the scene.
- Select File > Save As.
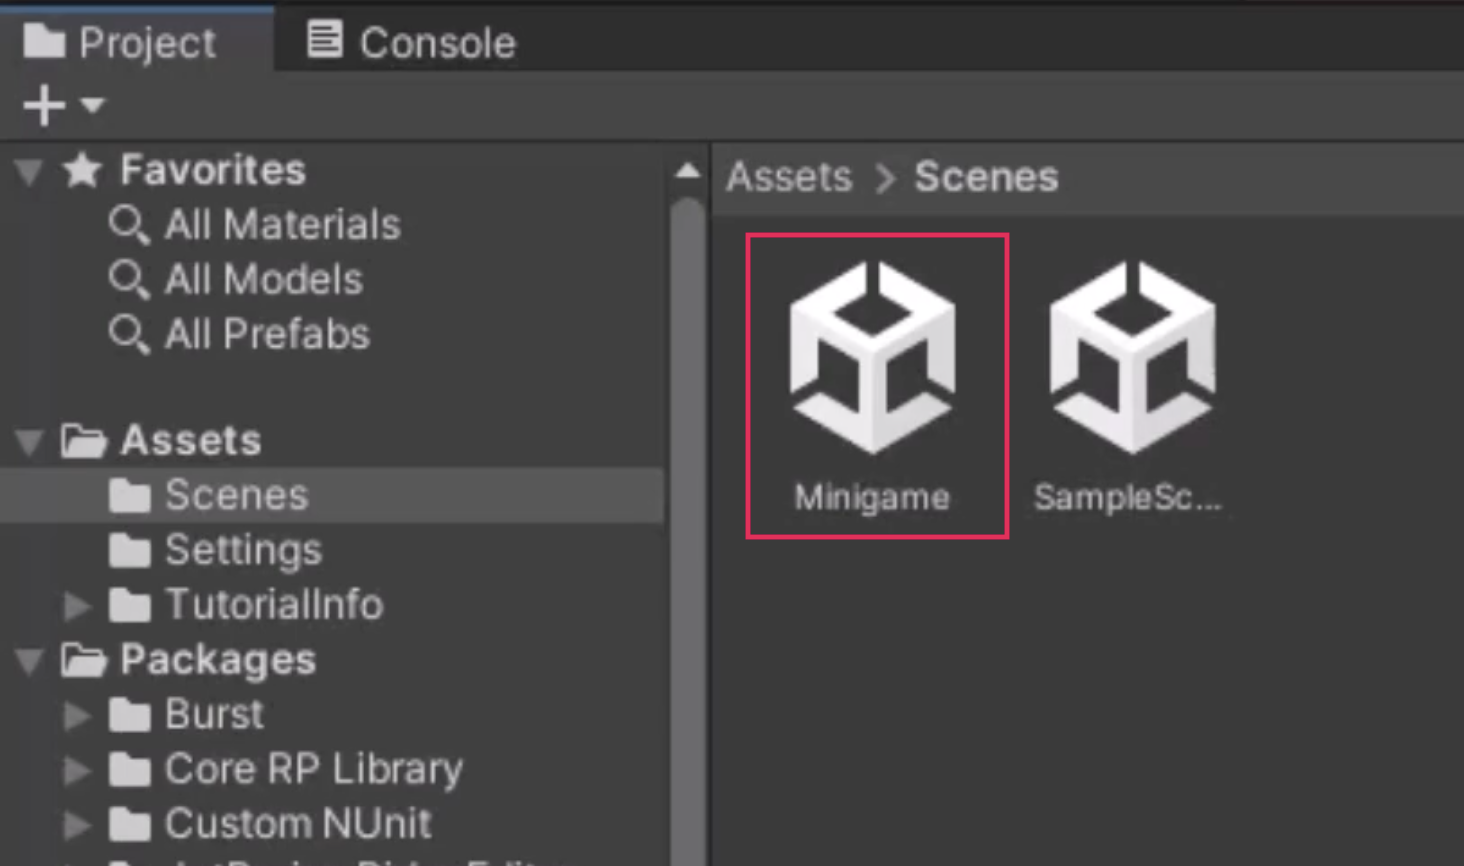
- Name the scene "MiniGame".
- Save the scene in the folder named “Scenes”.
5. Create a primitive plane
Follow the video or text instructions below to create and a Plane GameObject, reset its position, and then frame the plane in the Scene view:
1. Create a Plane GameObject.
- From the main menu, select GameObject > 3D Object > Plane.
- Alternatively, in the Hierarchy window, select the Add menu (+) > 3D Object > Plane.
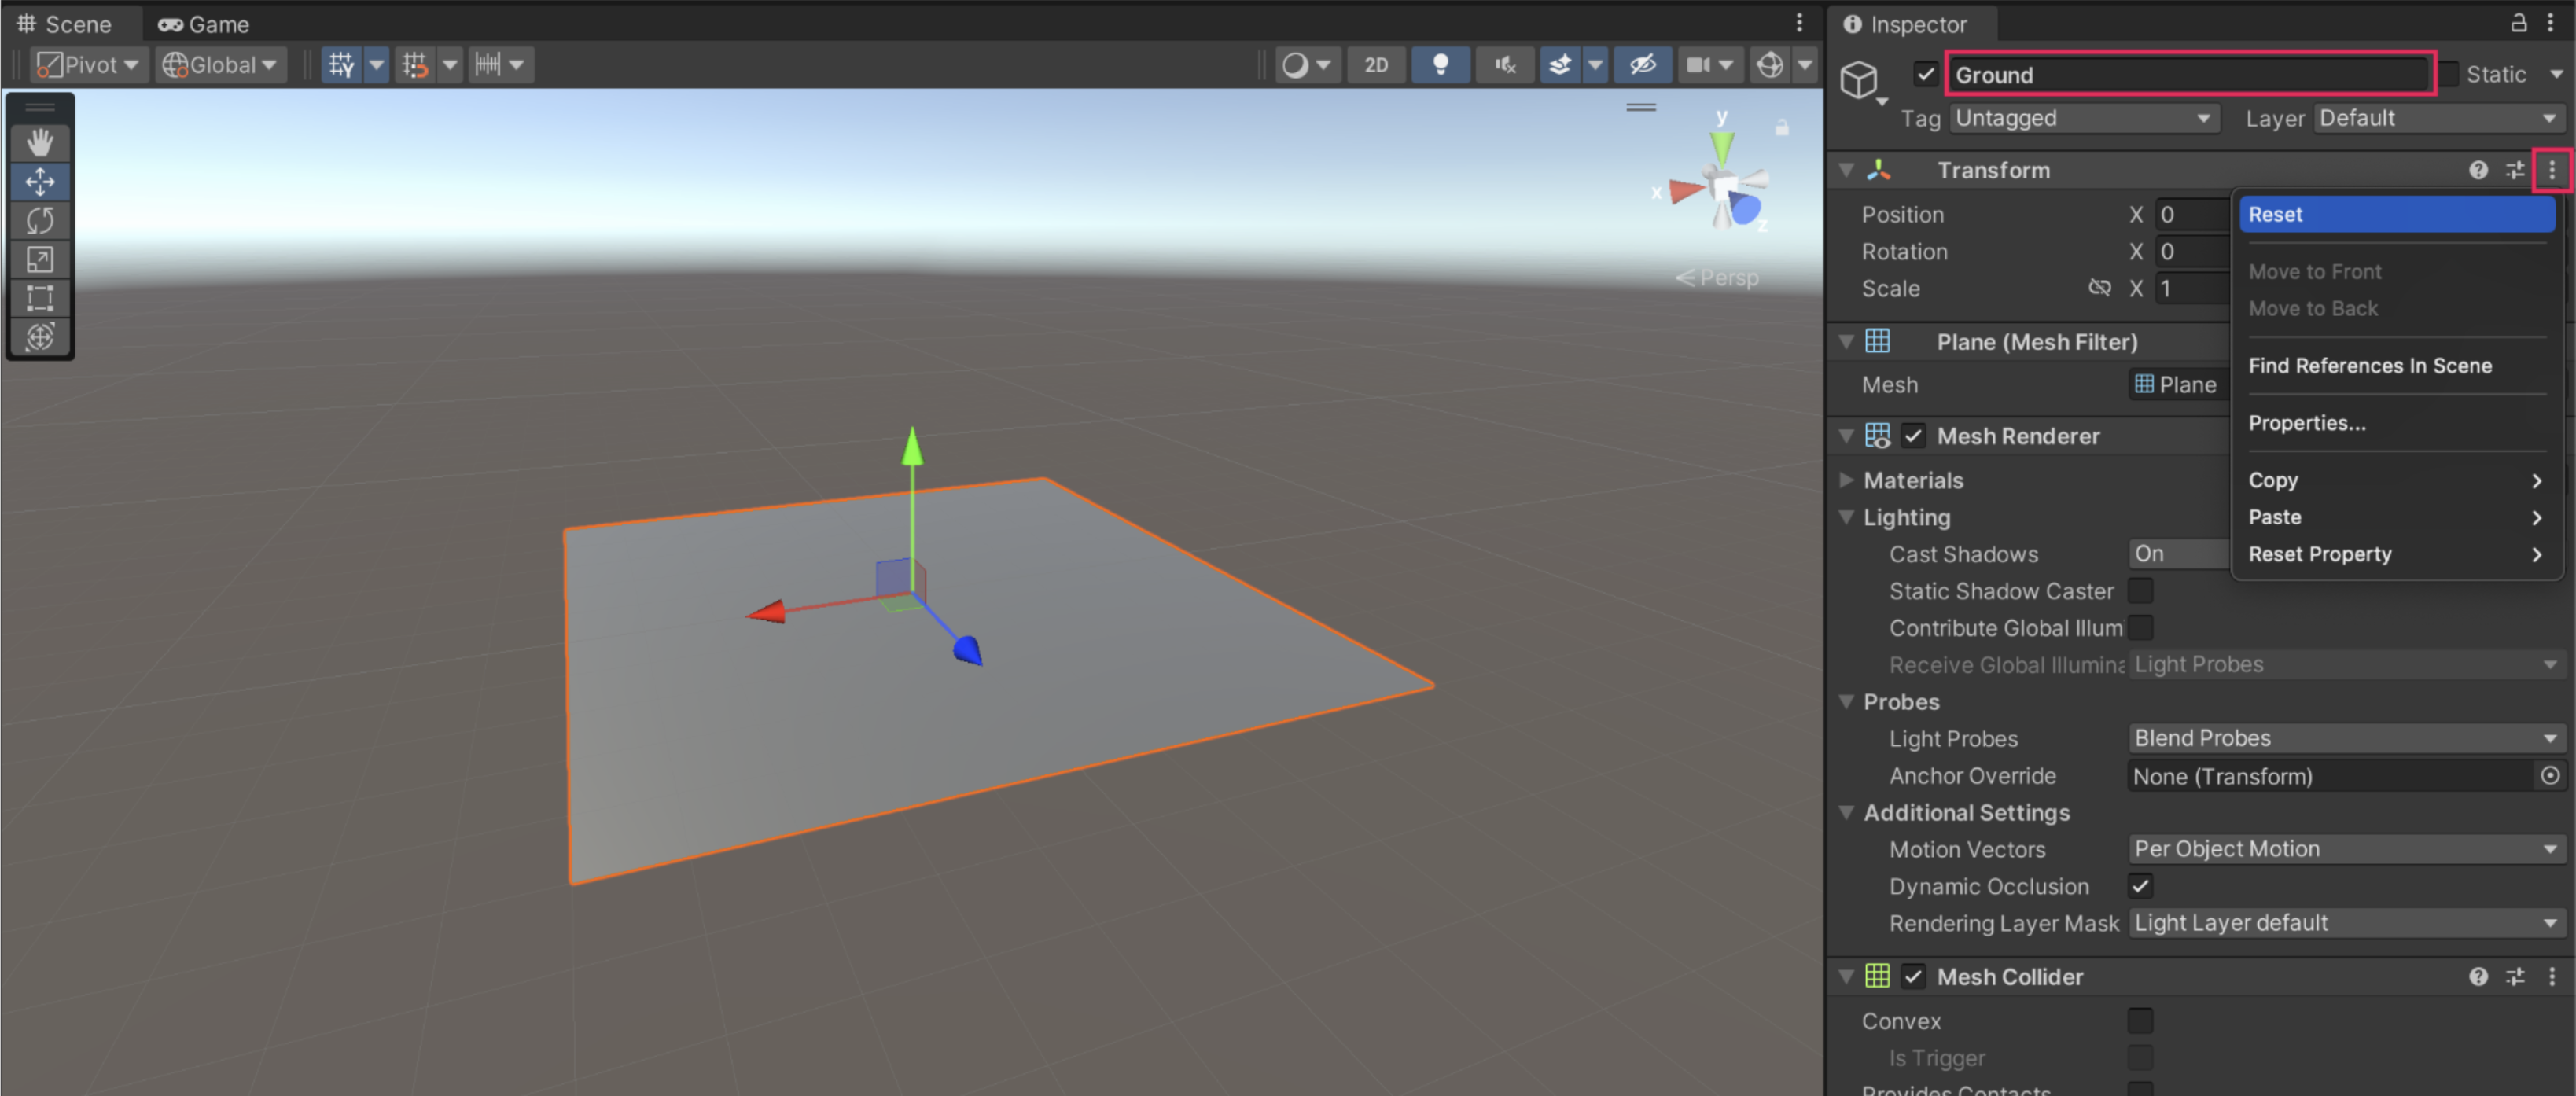
- At the top of the Inspector window, rename the newly created Plane GameObject "Ground".
2. Reset the position of the Plane.
- With the Ground GameObject selected, in the upper-right corner of the Transform component, select the vertical More (⋮) menu .
- Select Reset for the Transform component of the Ground GameObject. This action places the GameObject at the origin point (0, 0, 0) in the scene.
3. Frame the Plane in the Scene view.
- Ensure the Ground GameObject is selected and position the cursor in the Scene view.
- Press the F key to frame the entire GameObject nicely within the Scene view.
6. Scale the Ground Plane
Follow the video or text instructions below to increase the scale of the Ground Plane and set precise scale values:
1. Increase the scale of the Ground Plane.
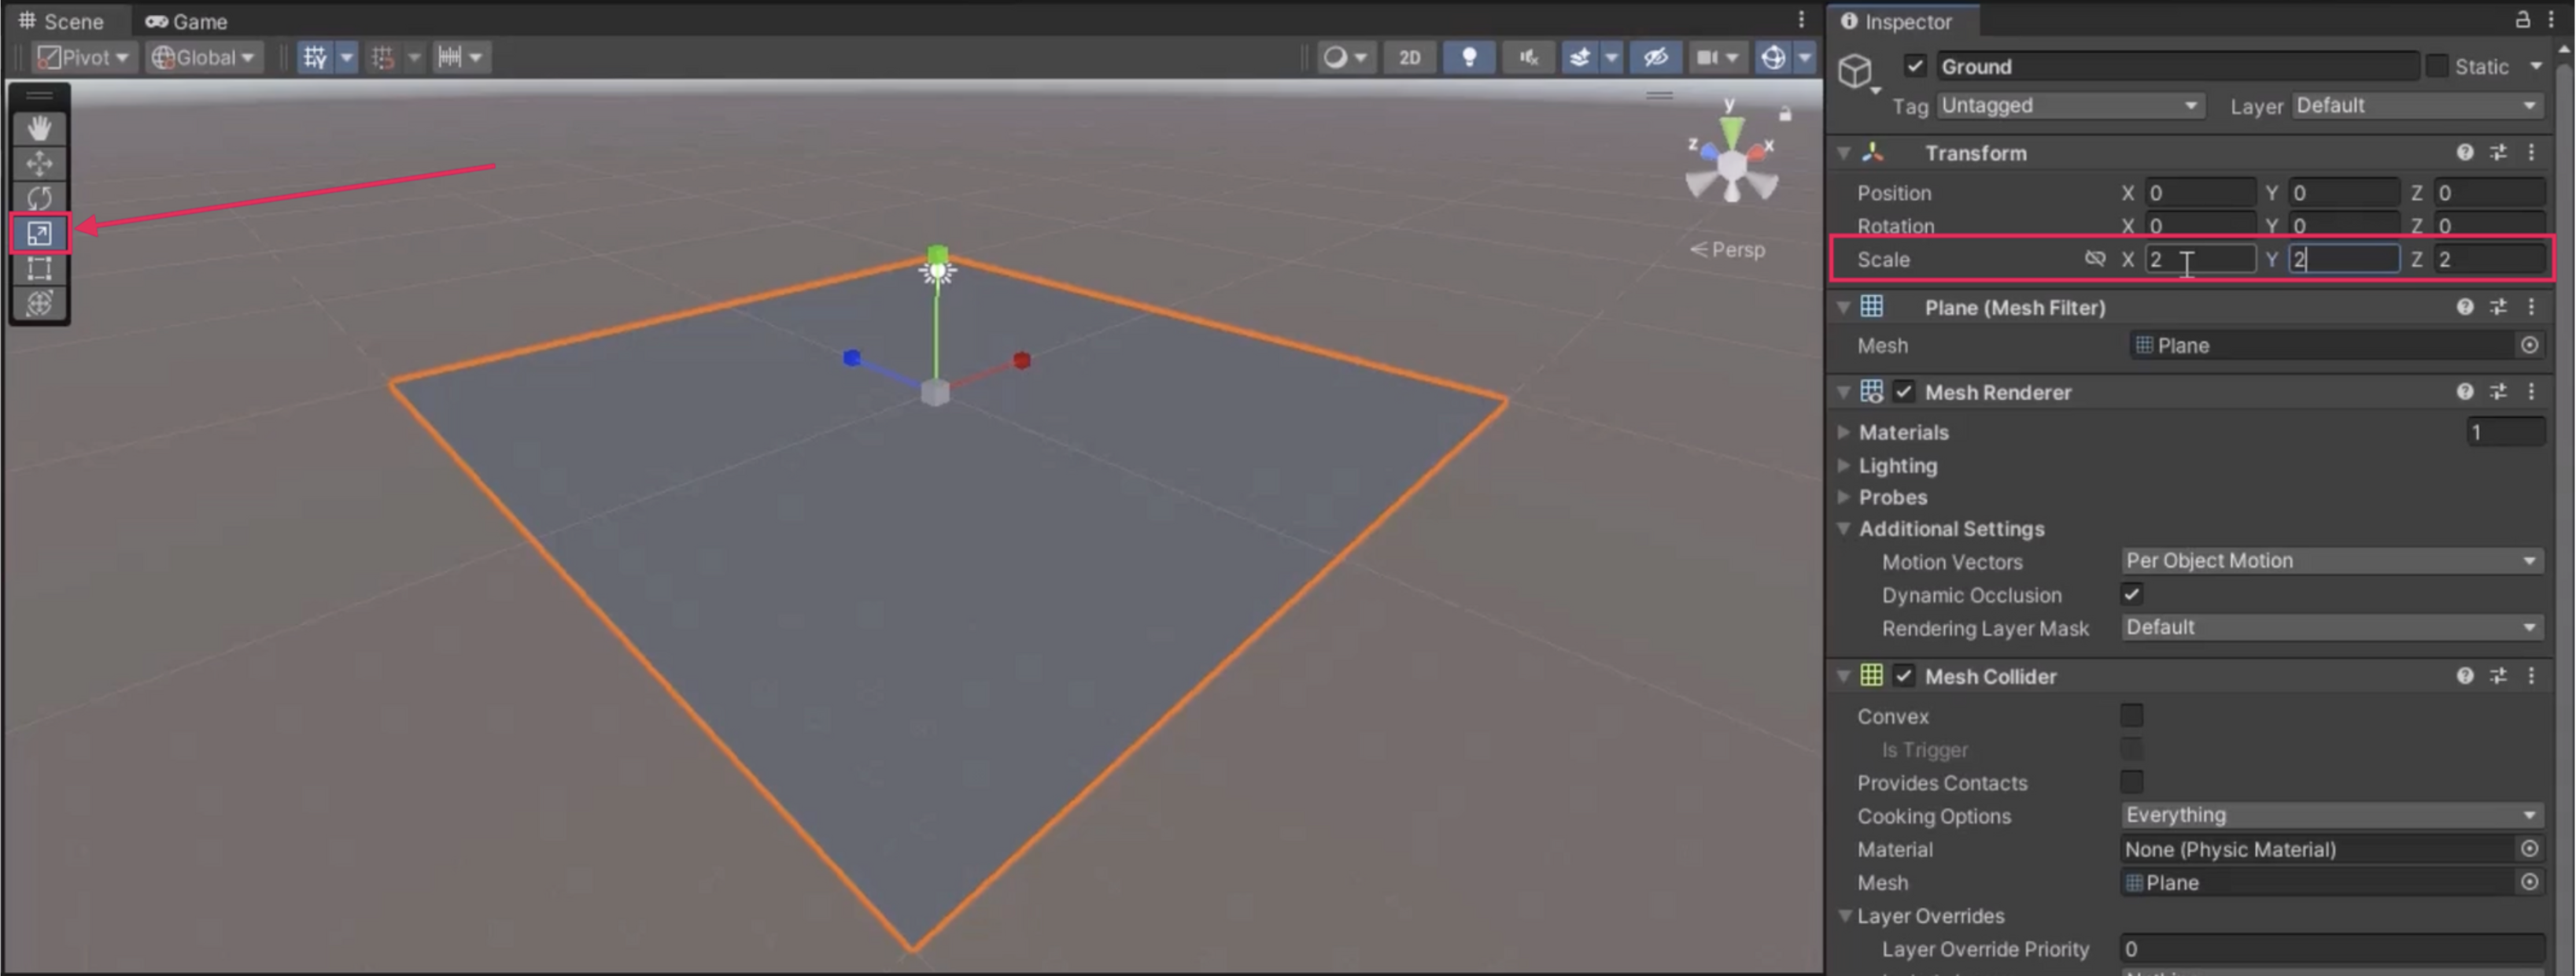
- With the Ground GameObject selected, activate the Scale tool by pressing the R hotkey.
- Drag the X (red) and Z (blue) handles to increase the size of the Plane.
2. Set precise scale values
- In the Transform component, set the X and Z Scale values to 2.0.
7. Create a Player GameObject
Follow the video or text instructions below to create a sphere for the player and then position it at the center of the Ground Plane:
1. Create a Player sphere.
- In the Hierarchy window, right-click > 3D Object > Sphere.
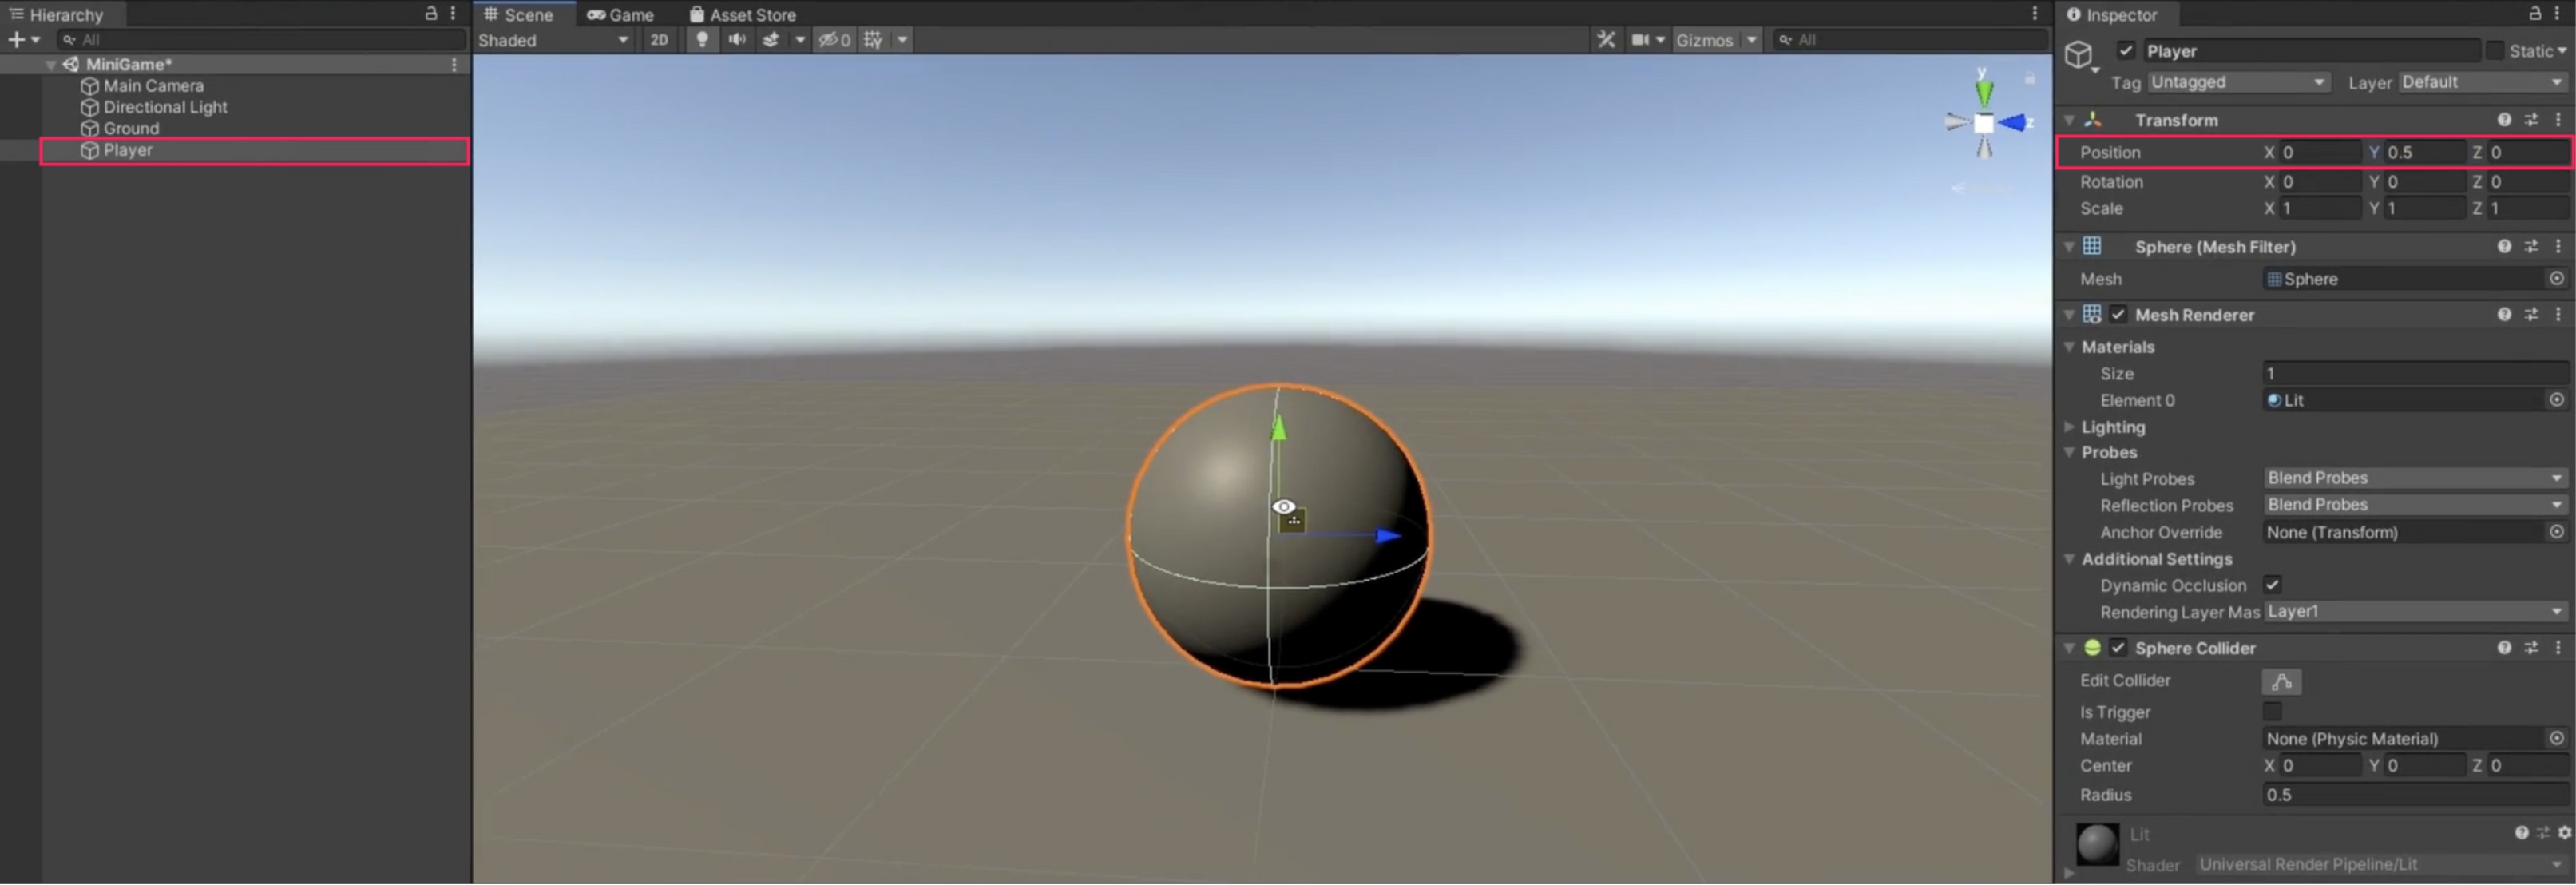
- Rename the newly created Sphere GameObject "Player".
2. Position the Player Sphere at the origin.
- In the Inspector window, reset the Transform component of the Player GameObject to position it at the origin point (0, 0, 0) of the scene.
- Press the F key in the Scene view to frame the Player GameObject in the Scene view.
3. Move the Player GameObject up to sit on the Plane.
- In the Transform component for the Player GameObject, set the Y Position value to 0.5.
8. Adjust the default lighting
Follow the video or text instructions below to assess the Directional Light, then change its color to white:
1. Assess the Directional Light.
- Navigate from the Scene view to the Game view to observe the lighting and shadows on the Player GameObject.
- In the Hierarchy window, select the Directional Light.
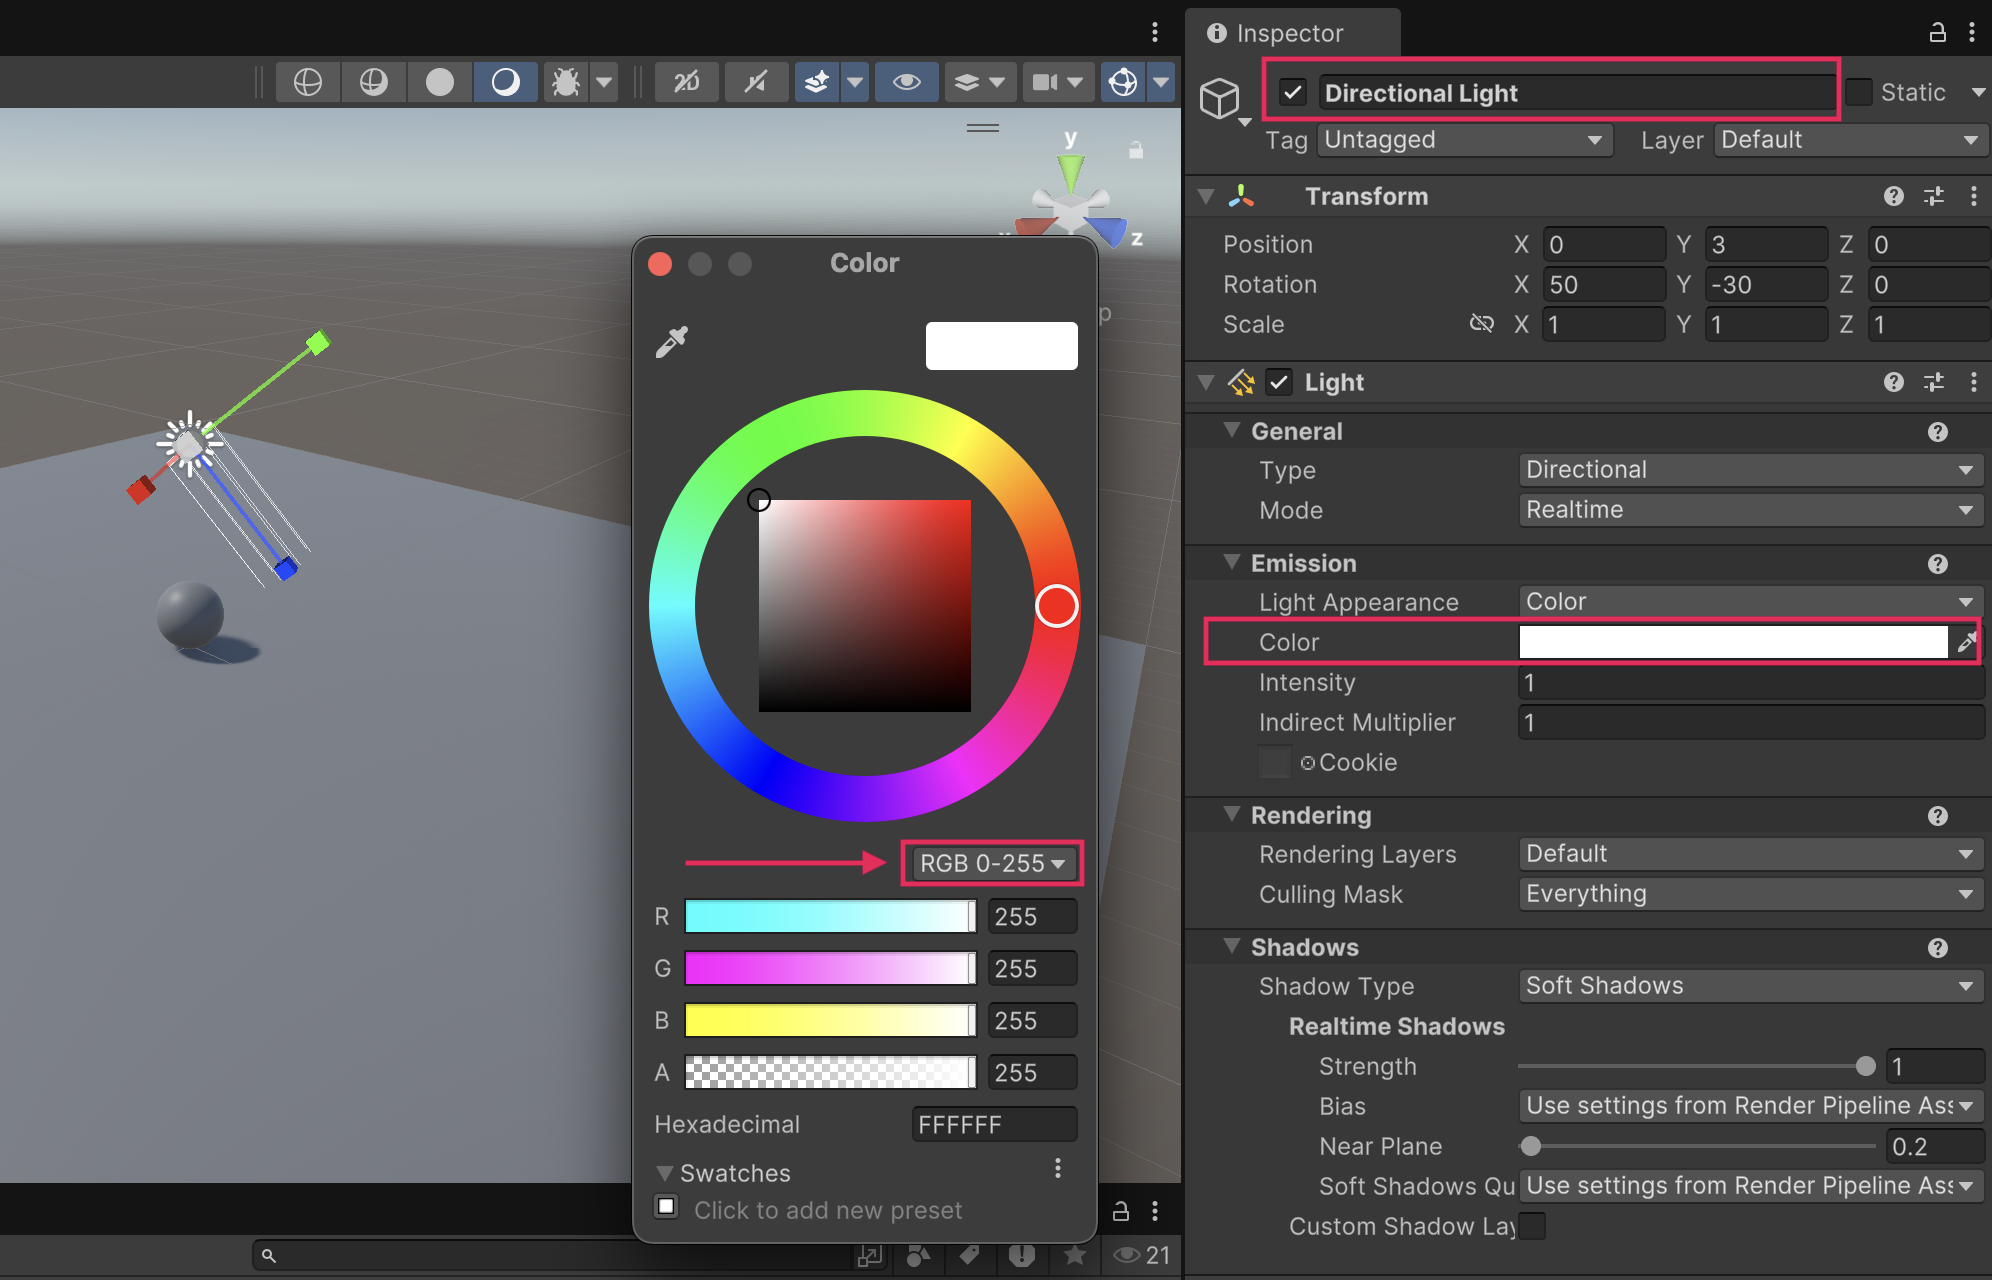
2. Change the light color to white.
- In the Light component, use the foldout (triangle) to expand the Emission module, and use the color picker to modify the light's tint from yellow to pure white for better scene balance.
- In the Color dialog, you can also manually set the RGB values to 255, 255, and 255.
- Note: To edit the RGB values from the Color window, use the dropdown to change the color mode from HSV to RGB 0–255.
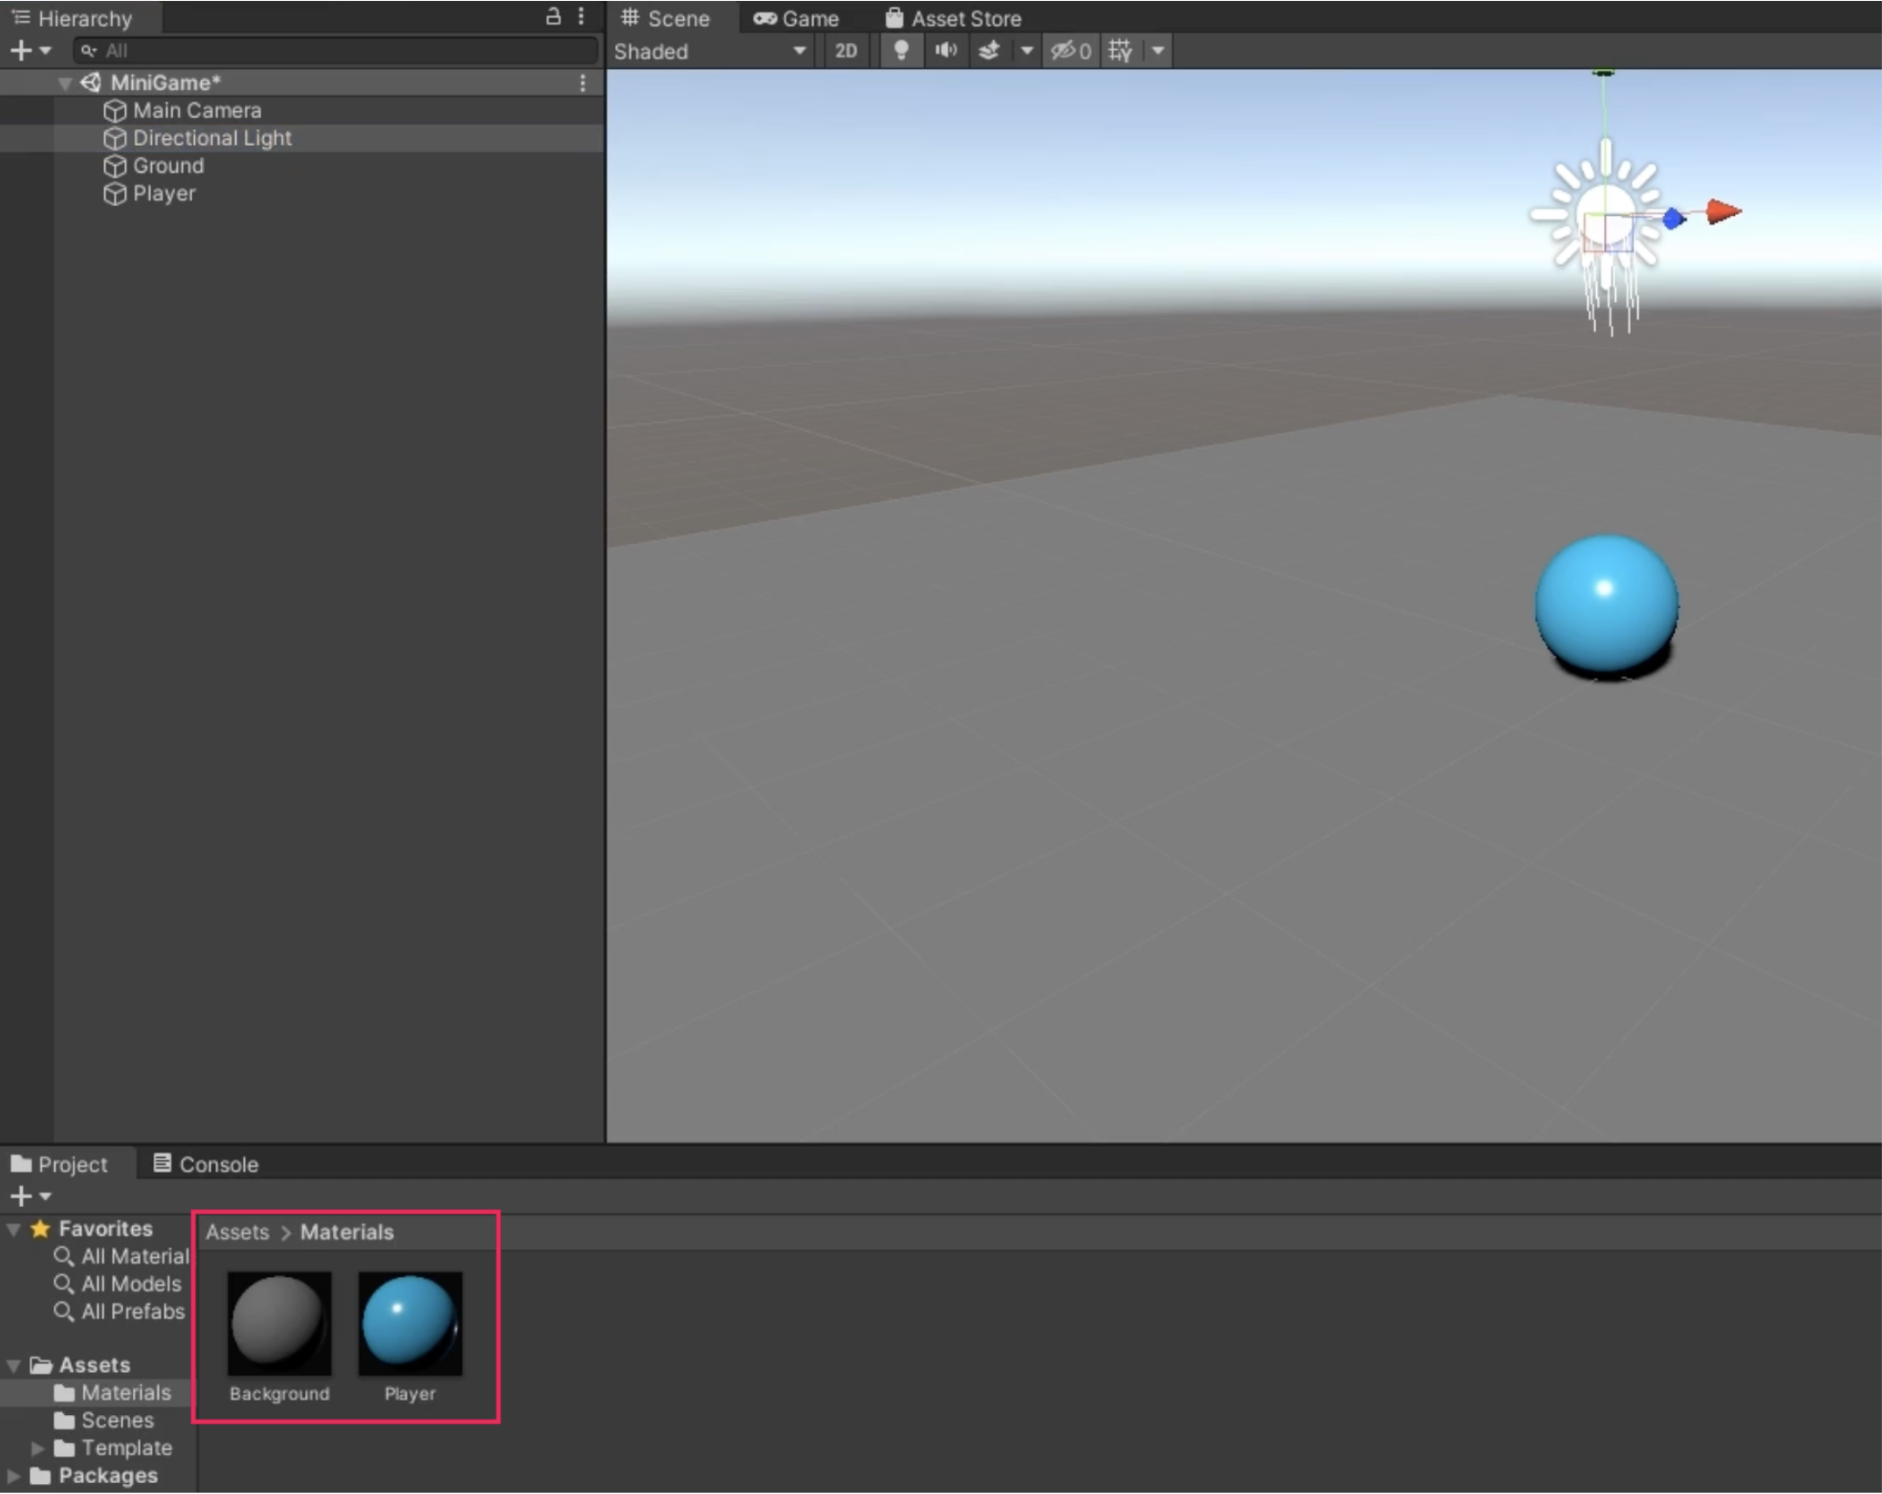
9. Add colors with Materials
Follow the video or text instructions below to create a new Materials folder, a new Background material, a new Player material, and then finally adjust the Directional Light’s rotation:
1. Create a new Materials folder.
- In the Project window, navigate to the highest level Assets folder.
- Inside the Assets folder, right-click > Create > Folder to make a new folder.
- Rename the new folder "Materials".
2. Create a new Background material.
- In the newly created Materials folder, right-click > Create > Material to make a new material, then name it "Background".
- In the Inspector window, use the foldout (triangle) to expand the Surface Inputs module, and select the Base Map color picker.
- Change the color to a pale gray with RGB values of 130, 130, and 130.
- Make sure the Metallic Map is set to 0 and the Smoothness is set to around 0.25 for a matte finish.
- Apply the Background material to the Ground GameObject by dragging it from the Project window onto the Ground GameObject in the Scene view.
3. Creating a new Player Material.
- In the Materials folder, create a new material and name it "Player".
- In the Inspector window, adjust the Base Map color for the Player material — set the RGB values to 0, 220, and 255 for a light blue.
- Set the Metallic Map to 0 and change the Smoothness to 0.75 for a shiny finish.
- Apply the Player material to the Player GameObject by dragging it onto the sphere in the Scene view.
4. Change the Directional Light’s rotation.
- In the Hierarchy window, select the Directional Light.
- In the Transform component, change the Rotation values to X=50, Y=50, and Z=0 for a more dramatic silhouette.
