Explore the Unity project
Tutorial
Beginner
+10XP
60 mins
21
Unity Technologies

Now that you’ve familiarized yourself with the game’s concept, you can move on to exploring the Unity project itself.
In this tutorial you'll do the following:
- Review the game’s technical design document
- Explore all of the scenes in the game
- Examine the game’s major script machines and script graphs
Materials
Languages available:
1. Overview
Before you begin making any design decisions or major changes to the project, you should understand exactly how the project is currently built. Then, when it comes time to actually port the project, you’ll know exactly where to look for any given piece of functionality.

In this tutorial, you'll thoroughly explore all the scenes, scripts, and components of the desktop UFO game, taking note of relevant discoveries along the way.
2. Review the reference documentation
Although this game appears relatively simple, you may be surprised by the complexity of some of its visual scripts. Look at the visual script that manages the UFO movement, for example.
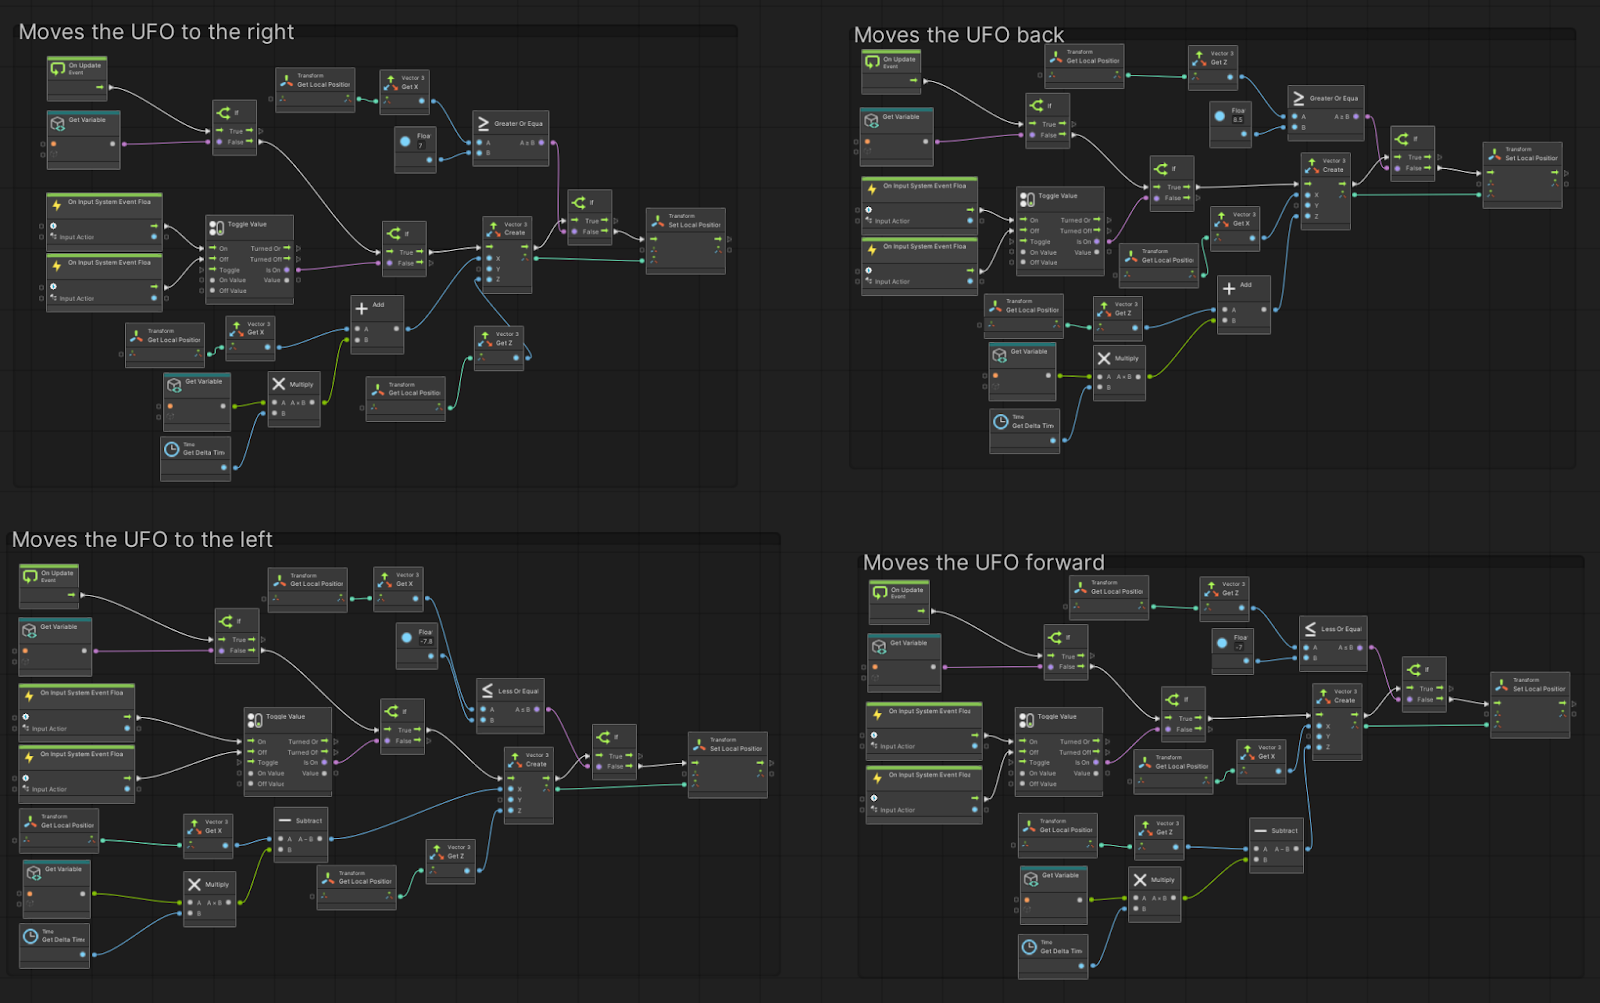
If you've completed Create with AR: Face Filters and Create with AR: Markers and Planes, many of the Visual Scripting concepts in this tutorial will be familiar to you, but many nodes will still be new. Luckily, many of the more complex scripts should not need to be modified for the AR port.
To help you make sense of these scripts, there are a number of resources available, which are each outlined below.
The technical design document
We've provided a technical design document (TDD) that accompanies the UFO game Unity project. This TDD outlines the technical details of all of the State Machines and Script Machines in the game. Open that document now.
You don’t need to read the TDD from start to finish; instead, you should use it as a reference point as you work on your port.
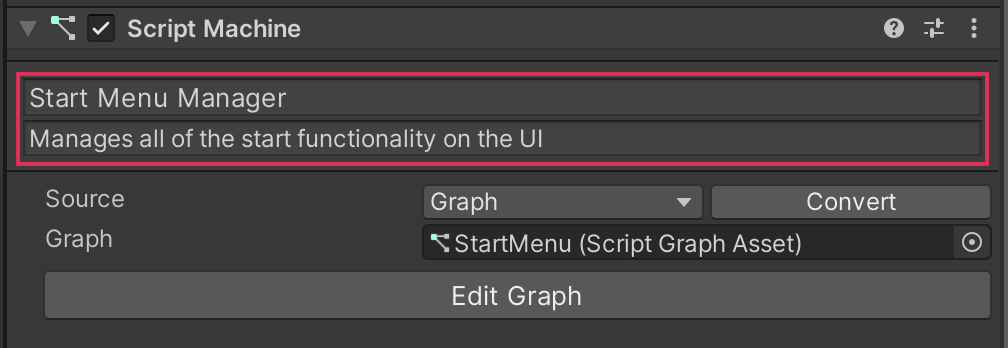
Script Machine summaries
Each of the Script Machines in the project includes a descriptive summary, which will help remind you what the primary function of each graph is. You can find these summaries in the Script Machine components.
Script Graph groups and comments
Each of the Script Graphs is organized into groups to help organize and explain the node sequences.

Groups are used in visual scripts the way that comments are used in traditional programming: to make scripts easier to understand, maintain, and share between developers. Read the documentation on groups in the Visual Scripting manual to learn how to create, edit, and delete groups.
You haven't used groups up to this point, but they can be very useful, and you may wish to use them going forward.
Visual Scripting documentation
If you encounter a node that you want to learn more about, you can select that node and view information about it in the Graph Inspector. However, there is often more detailed information about the nodes in Unity’s Scripting Reference, since the nodes are based on functions within Unity’s main API.
For example, you can see the information about the Application: Is Editor node in the Graph Inspector window.
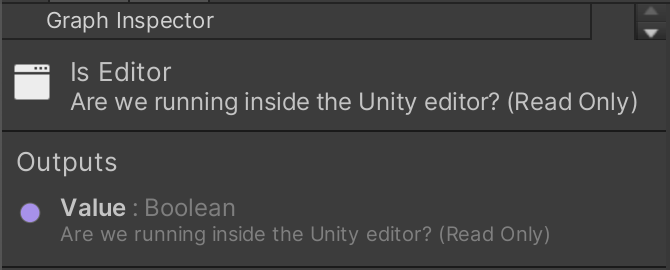
But if you locate that same Application.IsEditor page in the online documentation, you’ll see there is even more information available.
How to use the available documentation
As you explore this Unity project, use the combination of the available resources that is most helpful to you. The steps below will guide you through the project to make sure you have explored the most important parts, but it will be up to you to use the combination of documentation above to ensure you fully understand the functionality.
3. Review the Start scene
The Start scene is the first scene that the user experiences when they launch the game. If you don’t already have the Start scene open, navigate to the Assets > Scenes folder and open StartScene.
Project comprehension challenge
Explore the scene and use the available documentation to attempt the following challenge. Completing the challenge will confirm that you are comfortable enough working with StartScene.
When the user selects START the UFO flies away, then the scene fades to black over a period of about one second. Try to change the fade color, the fade duration, or the fade start time. The example below has the screen fade to green over a longer period of time, starting right after the Start button is pressed.
4. Review WinScene and LoseScene
WinScene and LoseScene are the simplest scenes and include almost identical functionality.

The following two buttons exist in both scenes:
- Restart: This button loads MainScene again.
- Quit: This button will quit the application, or if it is running inside the Unity Editor, will log a message to the console.
Note: The Quit button works with the Application.Quit() node that quits the application when built but is ignored in Play mode.
Project comprehension challenge
Explore the scenes and use the available documentation to attempt the following challenge. Completing the challenge will confirm that you are comfortable enough working with these scenes.
In LoseScene, a sheep sound plays at random intervals. Try to change the minimum and maximum amount of time between sheep sounds.
5. Review the game flow in the MainScene
MainScene contains all of the gameplay, including unique behaviors for the UFO, the farmer, and the sheep.
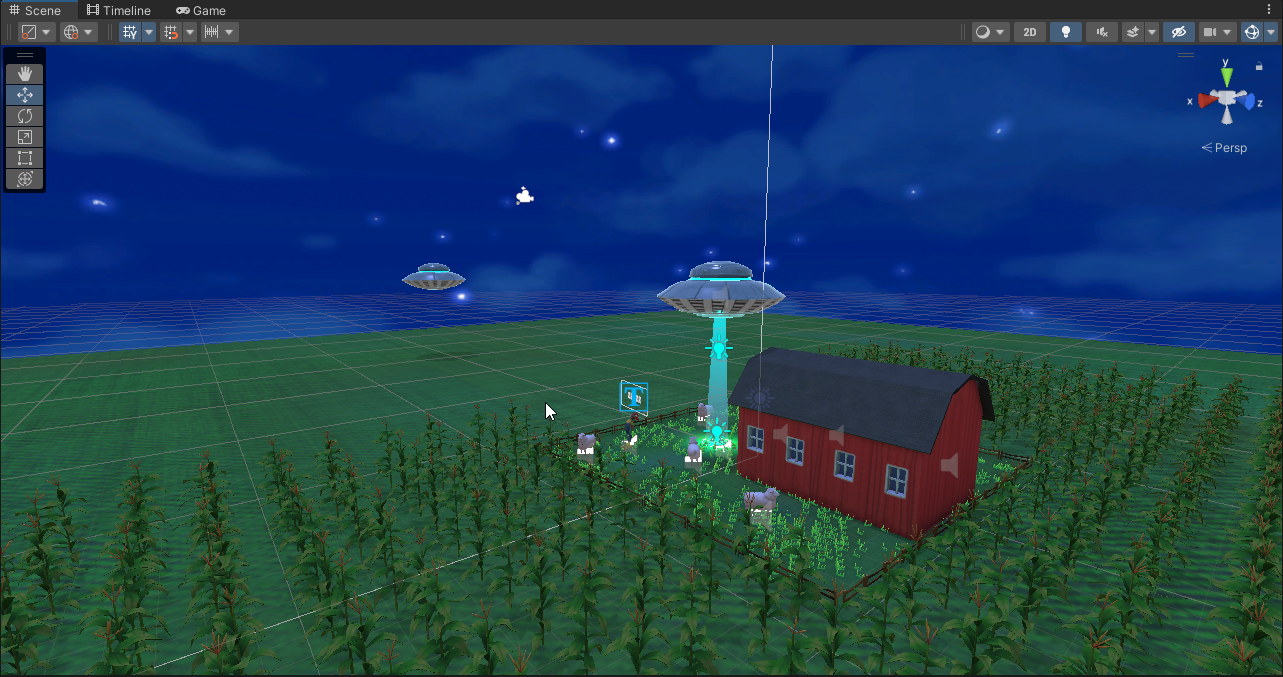
The Technical Design Document includes sections on the overall game flow, each of the key GameObjects in the Hierarchy window, and the game Canvas.
You might find some of the details in these sections confusing at this point, but it will be helpful to read through them at this stage as an initial orientation.
6. Review the UFO game element
The UFO contains four Script Machines that manage the tractor beam, the UFO’s movement, its visibility, and its audio effects.
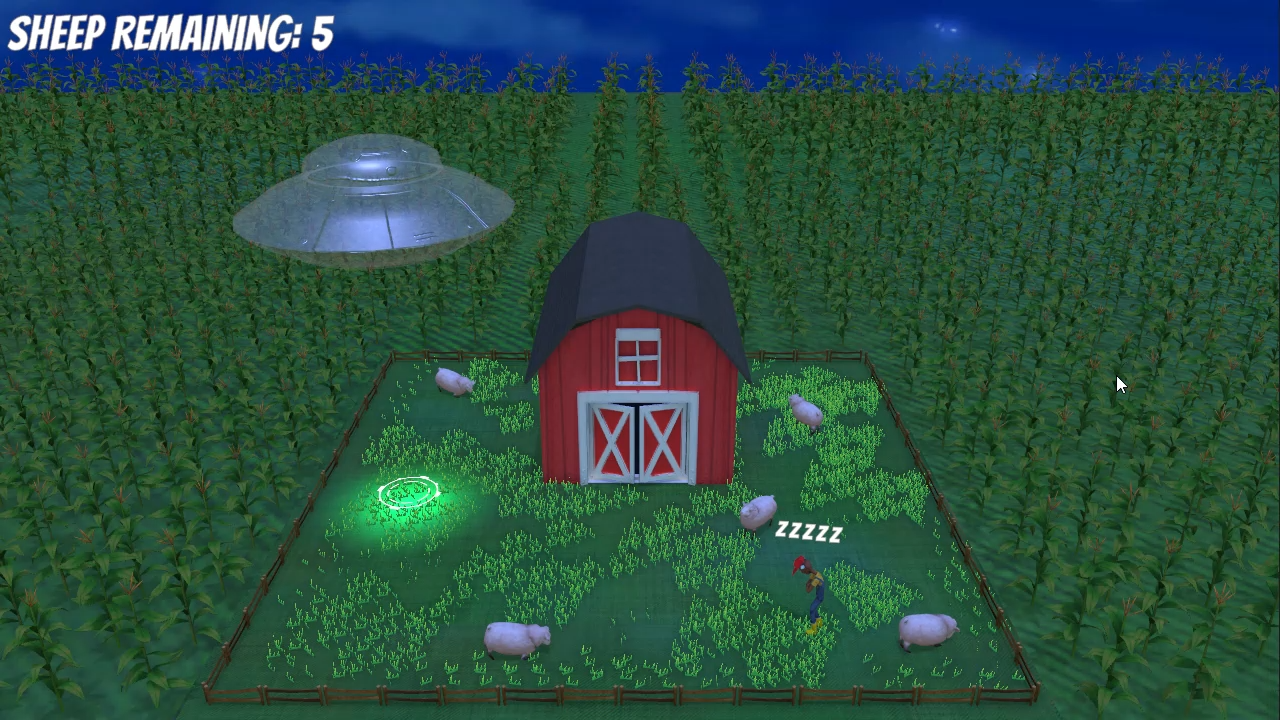
The UFO movement is the most obvious design challenge for your AR port, since the WASD keys won't work on mobile devices. It's critical that you understand how the movement functionality is achieved in the project.
Project comprehension check
The player currently uses the WASD keys as input to move the UFO and the spacebar as input to make the UFO beam up a sheep. Try to replace the WASD controls with the arrow keys and then replace the spacebar control with a different key.
7. What are State Graphs?
Throughout this learning experience, you have built several script machines to add interactivity to your AR applications. Script machines are ideal for smaller self-contained bits of functionality, such as activating and deactivating GameObjects, triggering animation, or playing sound.

In some circumstances, you may need to create several script graphs on the same object to perform a series of interrelated tasks. For situations like these, a state graph may be a better option than several script machines. State graphs allow you to create multiple functionalities within the same graph, and organize them into individual states. These states can then be switched on based on what is occurring in the application.
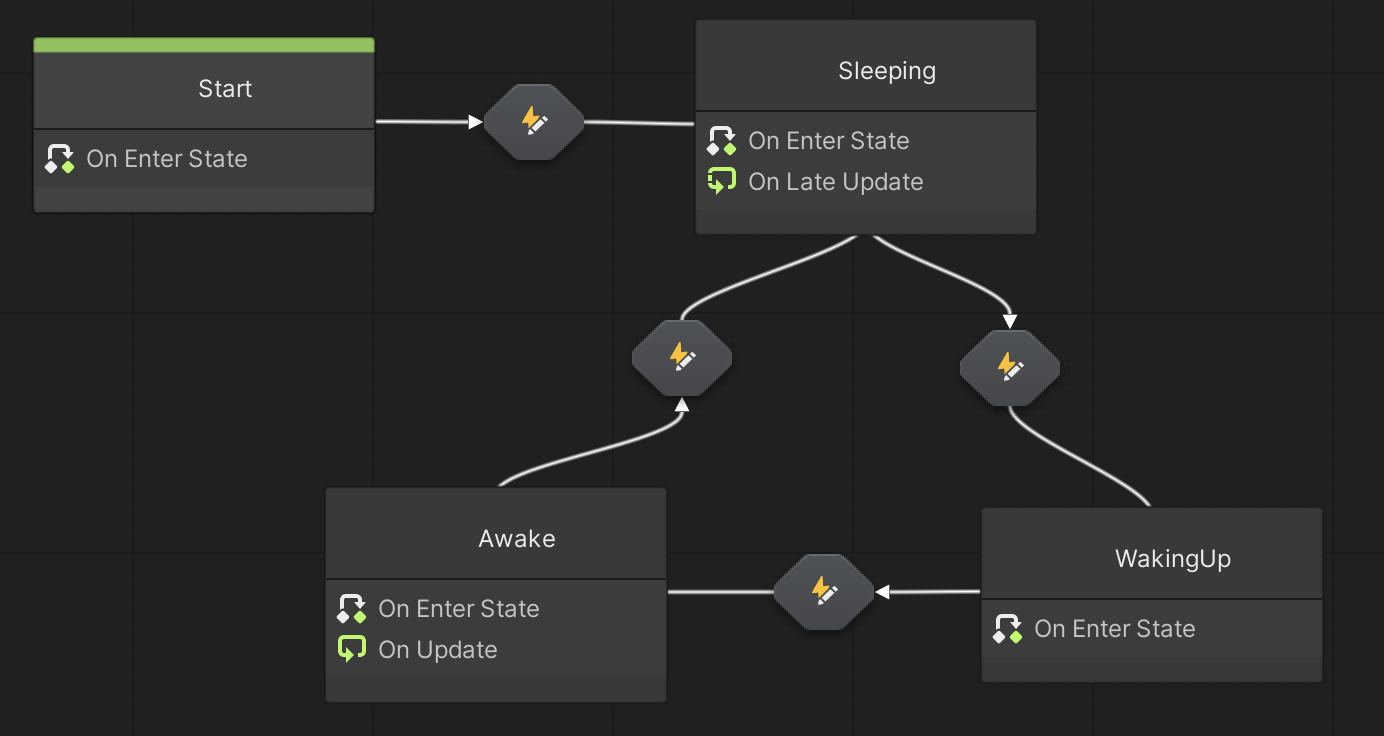
We've included two State Graphs as examples in this application: one for the sheep, and one for the farmer. Both the sheep and the farmer have distinct states that they enter and exit based on the events that are occurring in the game.
The sheep, for example, transitions between idling, being beamed up by the UFO, and being released.
There’s no need to worry about creating state machines yourself if you aren’t comfortable doing so. For any additional functionality or modification of this game, script machines will work perfectly.
To learn more about the difference between state machines and script machines, refer to the Visual Scripting documentation. State machines are also used in the Clive the Cat’s Visual Crypting project.
8. Review the sheep’s State Graph
Follow these instructions to open and navigate through the sheep’s State Graph:
1. In the Hierarchy window for the MainScene, expand the SheepGroup GameObject and select one of the Sheep.
2. In the Inspector window, locate the State Machine component and select Edit Graph to open the Sheep State Graph asset.
3. Follow the arrows in the State Graph to find out about the logic of the sheep’s behavior:
- On Start, the sheep enters the Idle state.
- If the BeamedUp transition occurs, the sheep enters the BeamedUp state.
- From the BeamedUp state, the sheep can either be Abducted or Released.
- If the sheep is released, the sheep returns to the Idle state.
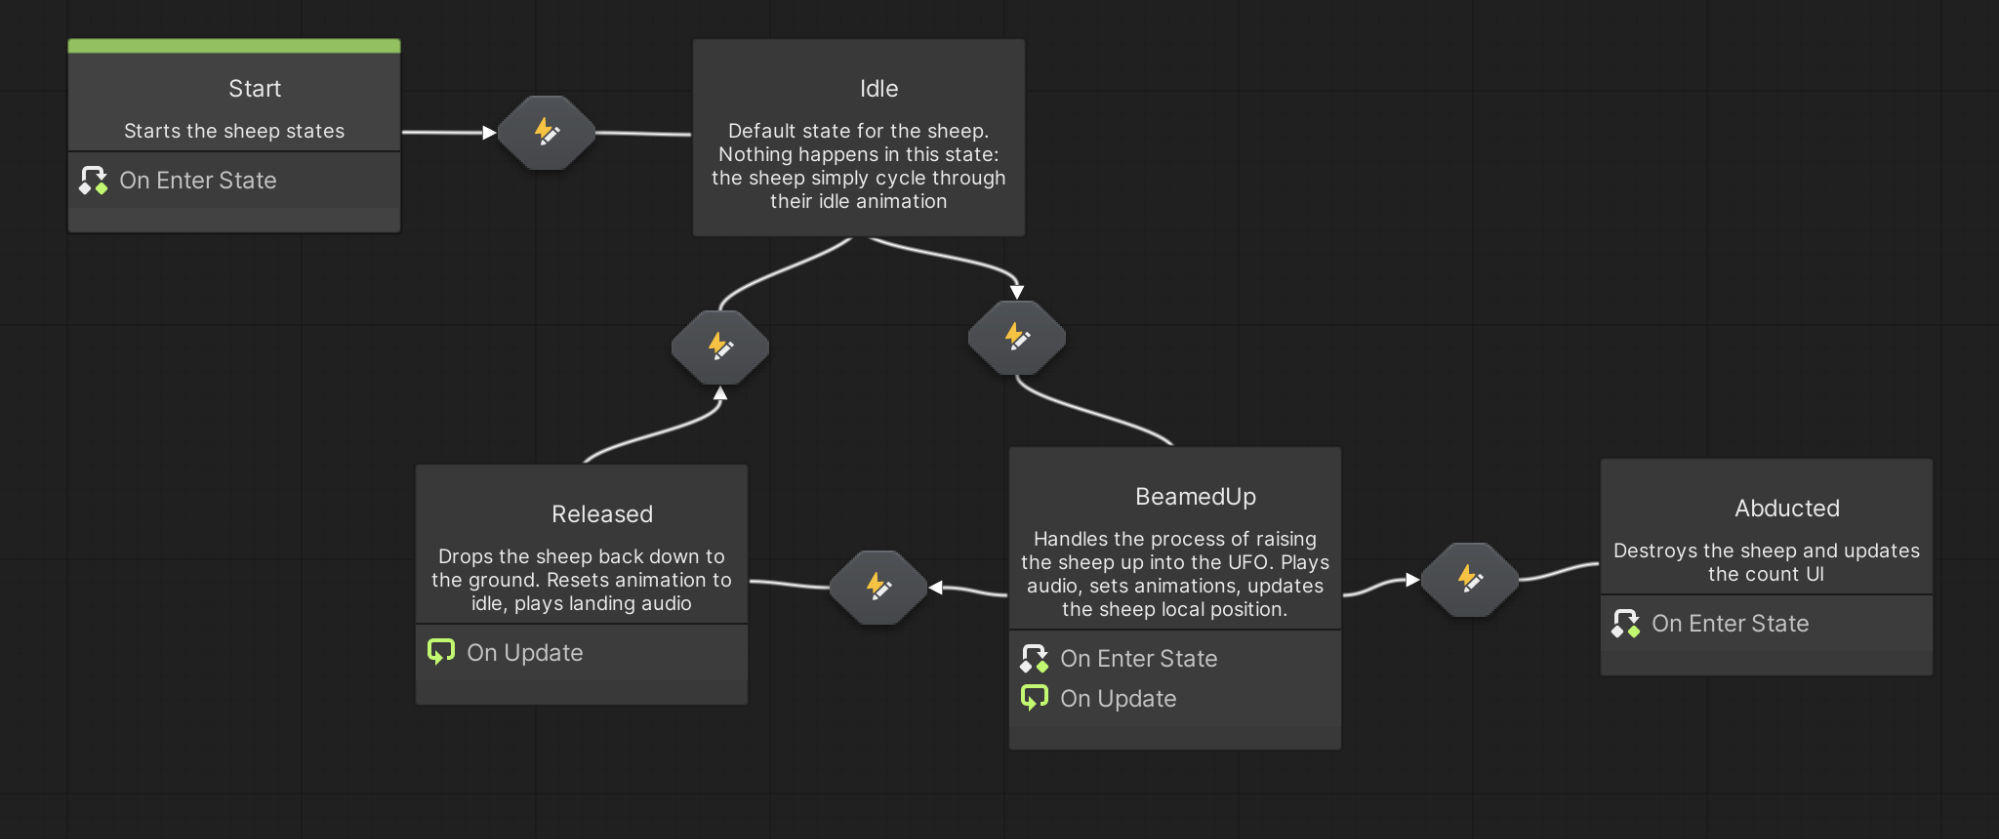
4. Double-click one of the states or transitions to examine or edit its state unit. You can navigate back to the parent graph using the breadcrumbs in the graph toolbar.

5. Review through the Sheep section of the technical design document. This documentation will give you an overview of each of the sheep’s states.
6. In each state unit or state transition, read the comments for any node groups. To learn more about any specific nodes you don’t recognize, use the Graph Inspector and Unity’s Scripting Reference.
Project comprehension check
The speed that the sheep moves towards the UFO is directly related to the difficulty of the game. The faster the abduction, the easier the game. You can probably imagine a power-up that would increase the UFO’s abduction speed. Try to make the game easier by increasing the abduction speed. For an added challenge, make this into a variable that can be easily edited in the Inspector window.
9. Review the farmer’s State Graph
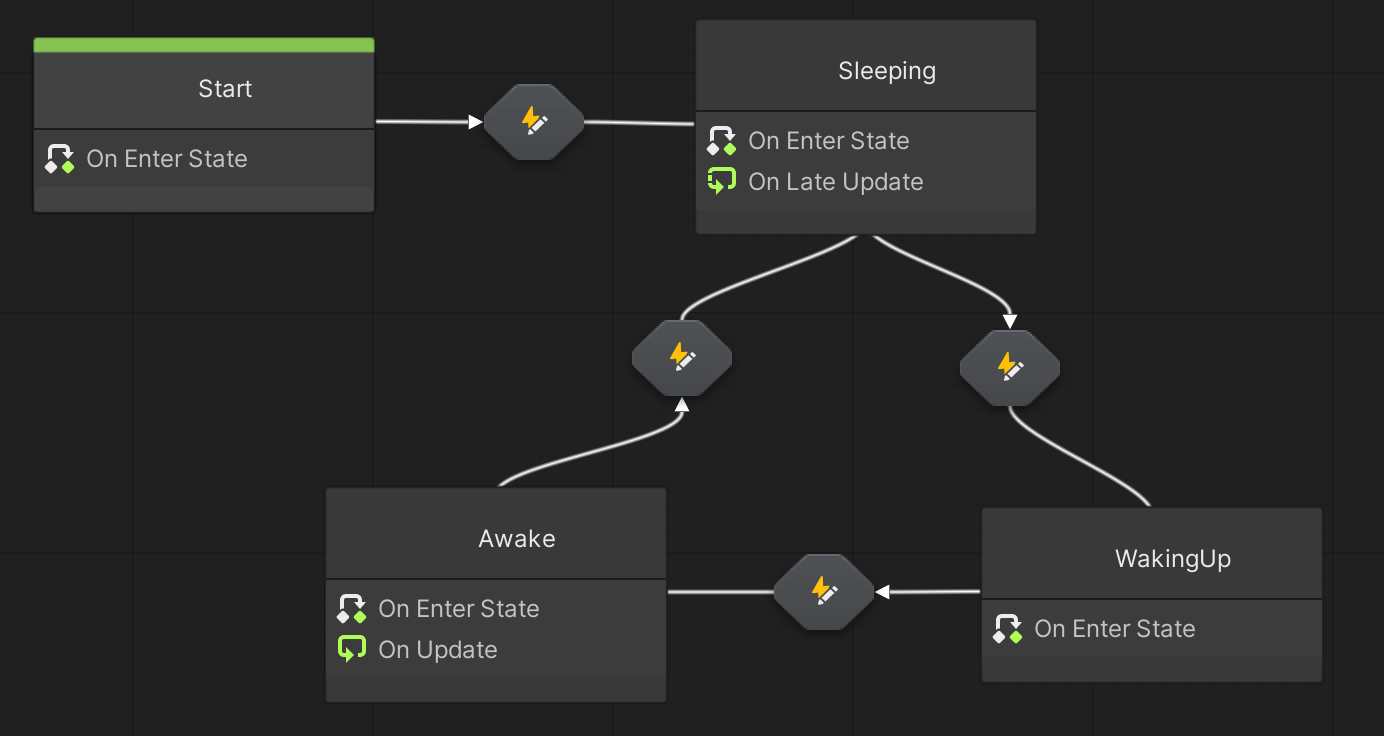
The farmer transitions back and forth between a few states: sleeping, waking up, and awake. Just as with the sheep, a State Graph was an appropriate solution to manage the farmer’s behavior.
Project comprehension check
By default, the farmer sleeps between 8 and 16 seconds, will take 1 second to wake up, and then stay awake between 4 and 8 seconds. Try to make the game more difficult by decreasing his sleeping and waking up times, but increasing his awake time.
10. Review the Game Manager
The Game Manager GameObject is responsible for the startup and management of the major game states. The Game Manager has four script machines: Scene Setup, Cutscene Manager, Game Over, and Sheep Counter.
Project comprehension check
After you've successfully abducted all the sheep and won the game, the scene fades to black the same way it does when you lose the game. Add a more clear indicator like a sound effect after the last sheep has been abducted to let the user know that they have won the game.
11. More things to try
If you want to develop your skills further or explore new concepts, check out some of the optional activities below. Each activity is identified as being either Easy, Medium, or Difficult, so you know what level of difficulty to expect.
These activities are entirely optional, so if you’re not interested, no problem — just skip this step.
We do recommend attempting at least one of them in order to get the most out of this learning experience. Good luck!
Easy: Make minor adjustments to the game
There may be some aesthetic elements of the application that you think could be improved. Take some time now to make the game look, sound, and play its best. You could change the font, the sound effects, the speed of the UFO, the color of the post-processing during the abduction process, or anything else.
In the example below, the farmer wakes up more often, but the sheep are beamed up much faster. The post-processing effects during the abduction are also more intense.
Medium: Randomize the number or position of the sheep
When you play the game multiple times, it's a bit disappointing to see that the sheep are in the exact same position. It would make the game a bit more replayable if the game board was different every time, with a random number of sheep in random positions on the farm.
In the example below, the first round of the game has 4 sheep in random locations, while the second round of the game has 13.
Difficult: Make the game a timed experience
This game is casual and relaxing, but it could be made more exciting with a bit of time pressure. If you can capture all of the sheep before the time runs out, you win. If the time runs out or if the farmer catches you in the act of abduction, you lose.
Notice the 60 second timer that only begins counting down after the gameplay begins in the video below.
Hint: To get the timer working, the Cooldown node is helpful. You may also need to import the TextMeshPro visual script node library in the Project Settings in order to make new visual scripts that control the UI text.
Note: Time constraints can have an impact on the accessibility of an experience, where some users may find the time pressure restrictive. To improve the accessibility of a timed experience, you can make the time constraint bypassable.
12. Next steps
You’ve completed the important work of thoroughly exploring the project to understand how it’s put together. When it comes time to make adjustments to the script graphs or state graphs, you’ll now know exactly where to go and what to look for. In the next tutorial, you’ll begin the actual porting process by creating a new AR-compatible project, moving the assets into that project, and creating an initial build on your mobile device to see how it runs.