
Get started with lighting
Tutorial
Beginner
+10XP
20m
(96)
Unity Technologies
Whether you’re exploring the architectural design of your new house, sneaking through a haunted castle in a stealth game, or immersing yourself in the world of a cinematic animation, good lighting takes a real-time experience to the next level. From the basics of illuminating a space to telling evocative stories through your design: lighting will help you get there.
By the end of this tutorial, you'll be able to:
- Describe the fundamentals of the behavior of light.
- Identify light sources in an image.
Resources
Languages available:
1. Overview
Whether you’re exploring the architectural design of your new house, sneaking through a haunted castle in a stealth game, or immersing yourself in the world of a cinematic animation, good lighting takes a real-time experience to the next level. From the basics of illuminating a space to telling evocative stories through your design: lighting will help you get there.
In this tutorial, you’ll learn about the Creative Core: Lighting learning experience and the role of a lighting artist in real-time experience creation. You’ll also review scientific fundamentals about the behavior of light.
2. Before you begin
New to Unity?
This learning experience assumes that you are already familiar with the Unity Editor. If you’re new to Unity, the Unity Essentials learning pathway has been designed to help you get set up and ready to create in the Unity Editor.
Update the Unity Hub
Before you begin to set up your Unity project, consider updating your Unity Hub to the latest release. If you are using an older version of the Hub, there may be differences between the guidance provided and your experience.
Review the Unity Editor basics
If you need to refresh your memory of the Unity Editor basics, you can take a moment to review Explore the Unity Editor at any time.
Set up your Unity project
To set up your Unity project:
1. Install Unity 6.000, if you haven’t already done so.
2. Download the project for this learning experience from Tutorial Materials.
3. Identify a suitable location on your computer and unzip the project folder there. Remove the Unity project folder from its empty parent folder.
3. Welcome to Creative Core: Lighting
What is the goal of Creative Core: Lighting?
The goal of this learning experience is to guide you through lighting Unity experiences to a good basic standard. You can use this to light your own projects, whether you’re a hobbyist or aspiring professional creator in any discipline.
You’ll also learn more about the specialized role of a lighting designer, and be able to identify the next steps on your learning journey if you are interested in pursuing lighting as a technical art career or hobbyist speciality.
What will I do in this learning experience?
As you progress through a sequence of tutorials, you’ll light an indoor and outdoor space in the Unity Editor and learn about the fundamental principles of lighting for Unity experiences along the way. You’ll finish by applying what you’ve learned to complete your own lighting study.
What will my learning outcomes be?
When you’re done, you’ll have the skills to implement functional lighting in your projects with an awareness of how lighting intersects with other creative domains in Unity.
You’ll be able to apply these skills to light your chosen guided project, your independent project (if you are completing the Creative Core pathway), and any other prototype real-time experience created with Unity.
Expert creator insights
As you work through this learning experience, you’ll hear from two expert creators sharing their expertise and perspectives on the role of a lighting artist in real-time industries:
- Nora Shramek, Senior Lighting and Rendering Artist at Unity
- Ben Radcliffe, Media and Entertainment Senior Advocate at Unity
4. Identify the light sources
Here’s a warm up for you:
Look at the following image and note down all the sources of light that you can identify. If you have any additional thoughts about the lighting, you can add those to your notes too.
When you’ve finished, check your notes against the example below.
Check your work
In the example image, you should be able to identify the following light sources:
- The four streetlamps on the amphitheater.
- The three colored strips providing feature lighting on the amphitheater.
- Light coming from the sky at the top edge of the amphitheater (it looks like the later stages of sunset).
5. How does light work?
Light in Unity (and many other game engines) is a simulation of light in the real world. Even if you’re working on a fantastical project that doesn’t follow the laws of physics, that simulation of light as we know and experience it can help ground your game or other real-time experience and make it feel more real.
We’ll give you more information about this where it’s most relevant in this learning experience, but let’s take a few minutes now to do a quick recap of the basics.
The properties of light
All light needs a source — something that emits it, like the sun or a light bulb. Light is energy that travels from that source in straight lines in the form of waves.
There are three key properties of that source that impact the light:
- Its shape will determine the direction in which the light waves are emitted.
- Its size will determine the area that the light impacts.
- Its strength (or intensity) will determine how far those light waves can travel and how bright it is.
Consider these three properties for a flashlight. The light bulb that emits light is small (size) and circular (shape), but it is strong enough to light that small area brightly (intensity).
6. How do you perceive light?
For someone or something to perceive light, two things are required:
- A light source, which emits light, like a light bulb or the sun.
- A light sensor to receive it, like the retina in your eye or the image sensor in a digital camera.
When you see an object, the information that you are receiving is light waves bouncing off that object and hitting your light sensor — your eye’s retina.
This is the process called reflection. There are two kinds of reflection:
- When light waves hit a very smooth surface and create a mirror image.
- When light waves hit a non-smooth surface, some energy is absorbed and the rest is reflected back in all sorts of different directions.
7. What changes the direction of light?
Although light waves travel in a straight line, there are two ways that the direction of that travel can change:
- Reflection: When a light wave impacts a surface and is redirected, as you learned in the previous step.
- Refraction: When a light wave passes through something other than air (like water or glass) and its path is changed by that.
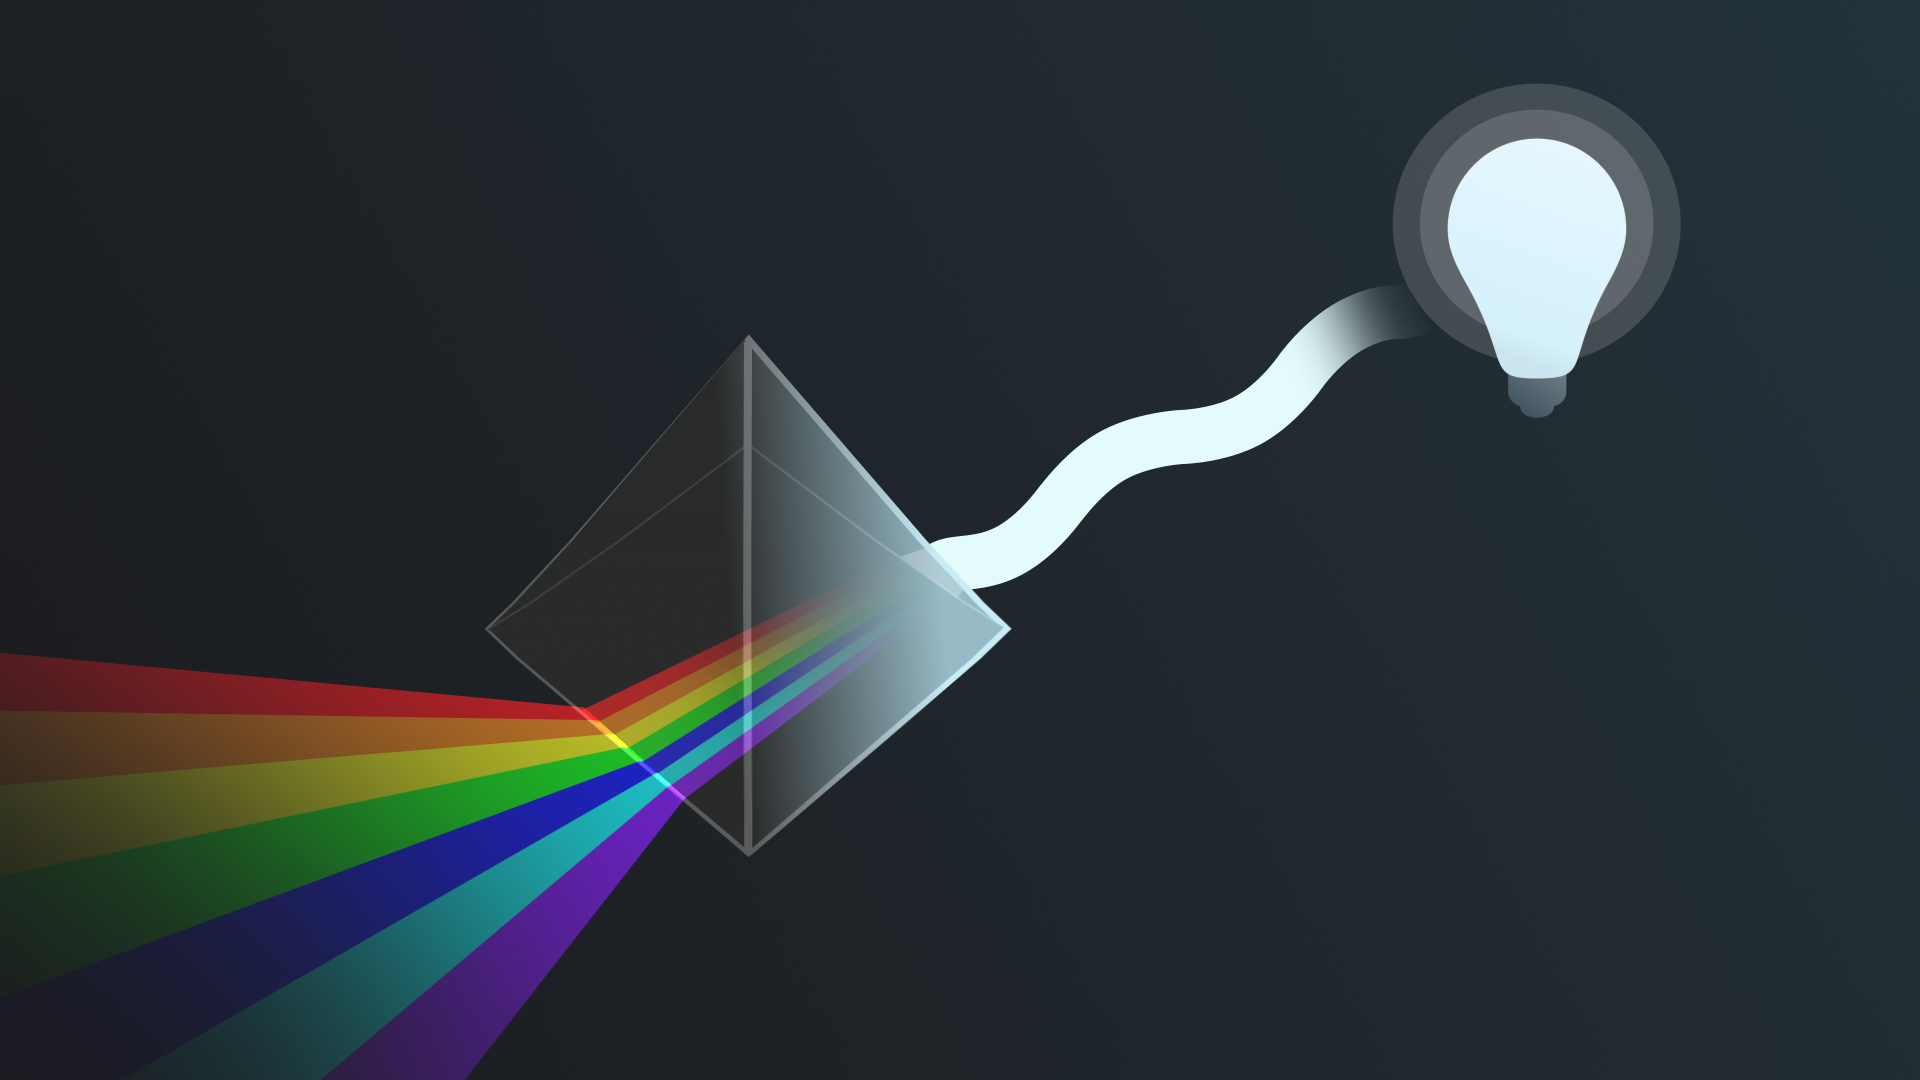
White light, like the light emitted by the sun, is actually a spectrum of colors that humans perceive as white when they are combined. When you refract white light through a prism, you can disperse it into the spectrum of colors — you might notice a rainbow effect created by light hitting pieces of glass sometimes.
You’ll mostly work with reflection in this learning experience, but it’s helpful to have a very basic understanding of both when you’re working in rendering-related domains.
8. What is the artistic impact of lighting?
Now you’ve reviewed the basic properties and behavior of light, but that’s not all you need to know. Let’s hear from our expert creators about the artistic impact of lighting in a real-time project:
Although this learning experience focuses on the technical implementation of lighting in Unity, we’ll provide some guidance on topics that you can independently research to develop your skills and understanding of the artistic side of lighting design. As you progress, you’ll also hear more guidance from our expert creators on how to further develop your skills — both technical and artistic!
9. What does a lighting artist do?
Background
As with many disciplines, lighting artists operate at the intersection of technical skill and creative expression. They literally illuminate the real-time experience by painting with light, but lighting artists also have to bring a creative vision to life within the practical constraints of a particular project. It’s important for lighting artists to develop a nuanced cross-domain understanding of the roles and responsibilities of everyone else on their team. Beyond improving communication and collaboration, this helps them achieve better results that meet everyone’s requirements.
Responsibilities
The exact responsibilities of a lighting artist will depend on the team that they’re working on. They may be working as part of a wider team, they may be the only person working on the lighting for the experience, or they may even be a more generalist technical artist working on lighting as part of a wider set of responsibilities.
Expert perspectives
If your goal is to become a lighting artist or to further explore technical art roles in real-time industries, completing the whole Creative Core pathway is a great way to build a solid foundation for this.
Let’s hear a little more from our two expert creators, in their own words. What do they like best about the role?
10. Extend: Examine the light sources
Before you finish this tutorial, let’s take what you’ve reviewed and apply it to the image you evaluated.
You previously identified the lighting sources. Now try to identify how light is behaving in different parts of the image. Can you identify:
- Its direction of travel?
- How the light impacts the environment and other objects in the image?
- How the lighting makes you feel? What sort of atmosphere does it evoke?
To help you do this, review the example in Unity too:
1. Open the Creative Core: Lighting project in the Unity Editor.
2. In the Project window, go to Assets > CreativeCore_Lighting > Scenes and open FinalScene_Lighting_Outdoor.
3. Review the lighting in the example scene and see if you can add anything to your previous notes. When you’ve finished your evaluation, check your notes against the example below.
Tip: Don’t worry if you are unsure of how things work. That’s to be expected! You’ll develop your understanding of the lighting in this example scene as you work through this learning experience.
Check your work
There are no fixed correct answers for this extension of your previous image review, but you may have identified:
- The brighter, focused illumination from the streetlamps travels downwards in a cone shape, as opposed to the lower intensity lighting that emits more widely from the colored strip lights.
- The way that the color from the strip lights can be seen reflected from the amphitheater itself.
- The shadows cast from the different blocks of the amphitheater, which are similar to those that would be cast outside in the real world when the sun is setting.
- Your personal interpretation of the mood or emotions evoked by this lighting.
11. Next steps
Now that you’ve learned about this learning experience and reviewed some of the basics of lighting, you’re ready to get started configuring lighting in a Unity project yourself.