Adding resources to the Class Drive
Tutorial
foundational
+0XP
10 mins
Unity Technologies

Overview:
As an instructor using Unity EdLab, you have the flexibility to bring in pre-existing Unity projects, 3D models, and whatever else you might need for your lesson plan.
Project outcome:
Learn how to upload files to the session and make them accessible to all students.
Languages available:
1. Zip your files
Organize all your files into one folder on your computer. The files must then be converted to a .zip file format to be uploaded to the session.
On Windows: Right-click a file or folder > Send to > Compressed (zipped) folder
On Mac: Right-click a file or folder > Compress “[File Name]”
Give the zipped folder a memorable name and store it somewhere convenient so you can easily find it in the next step.
2. Upload the zipped folder
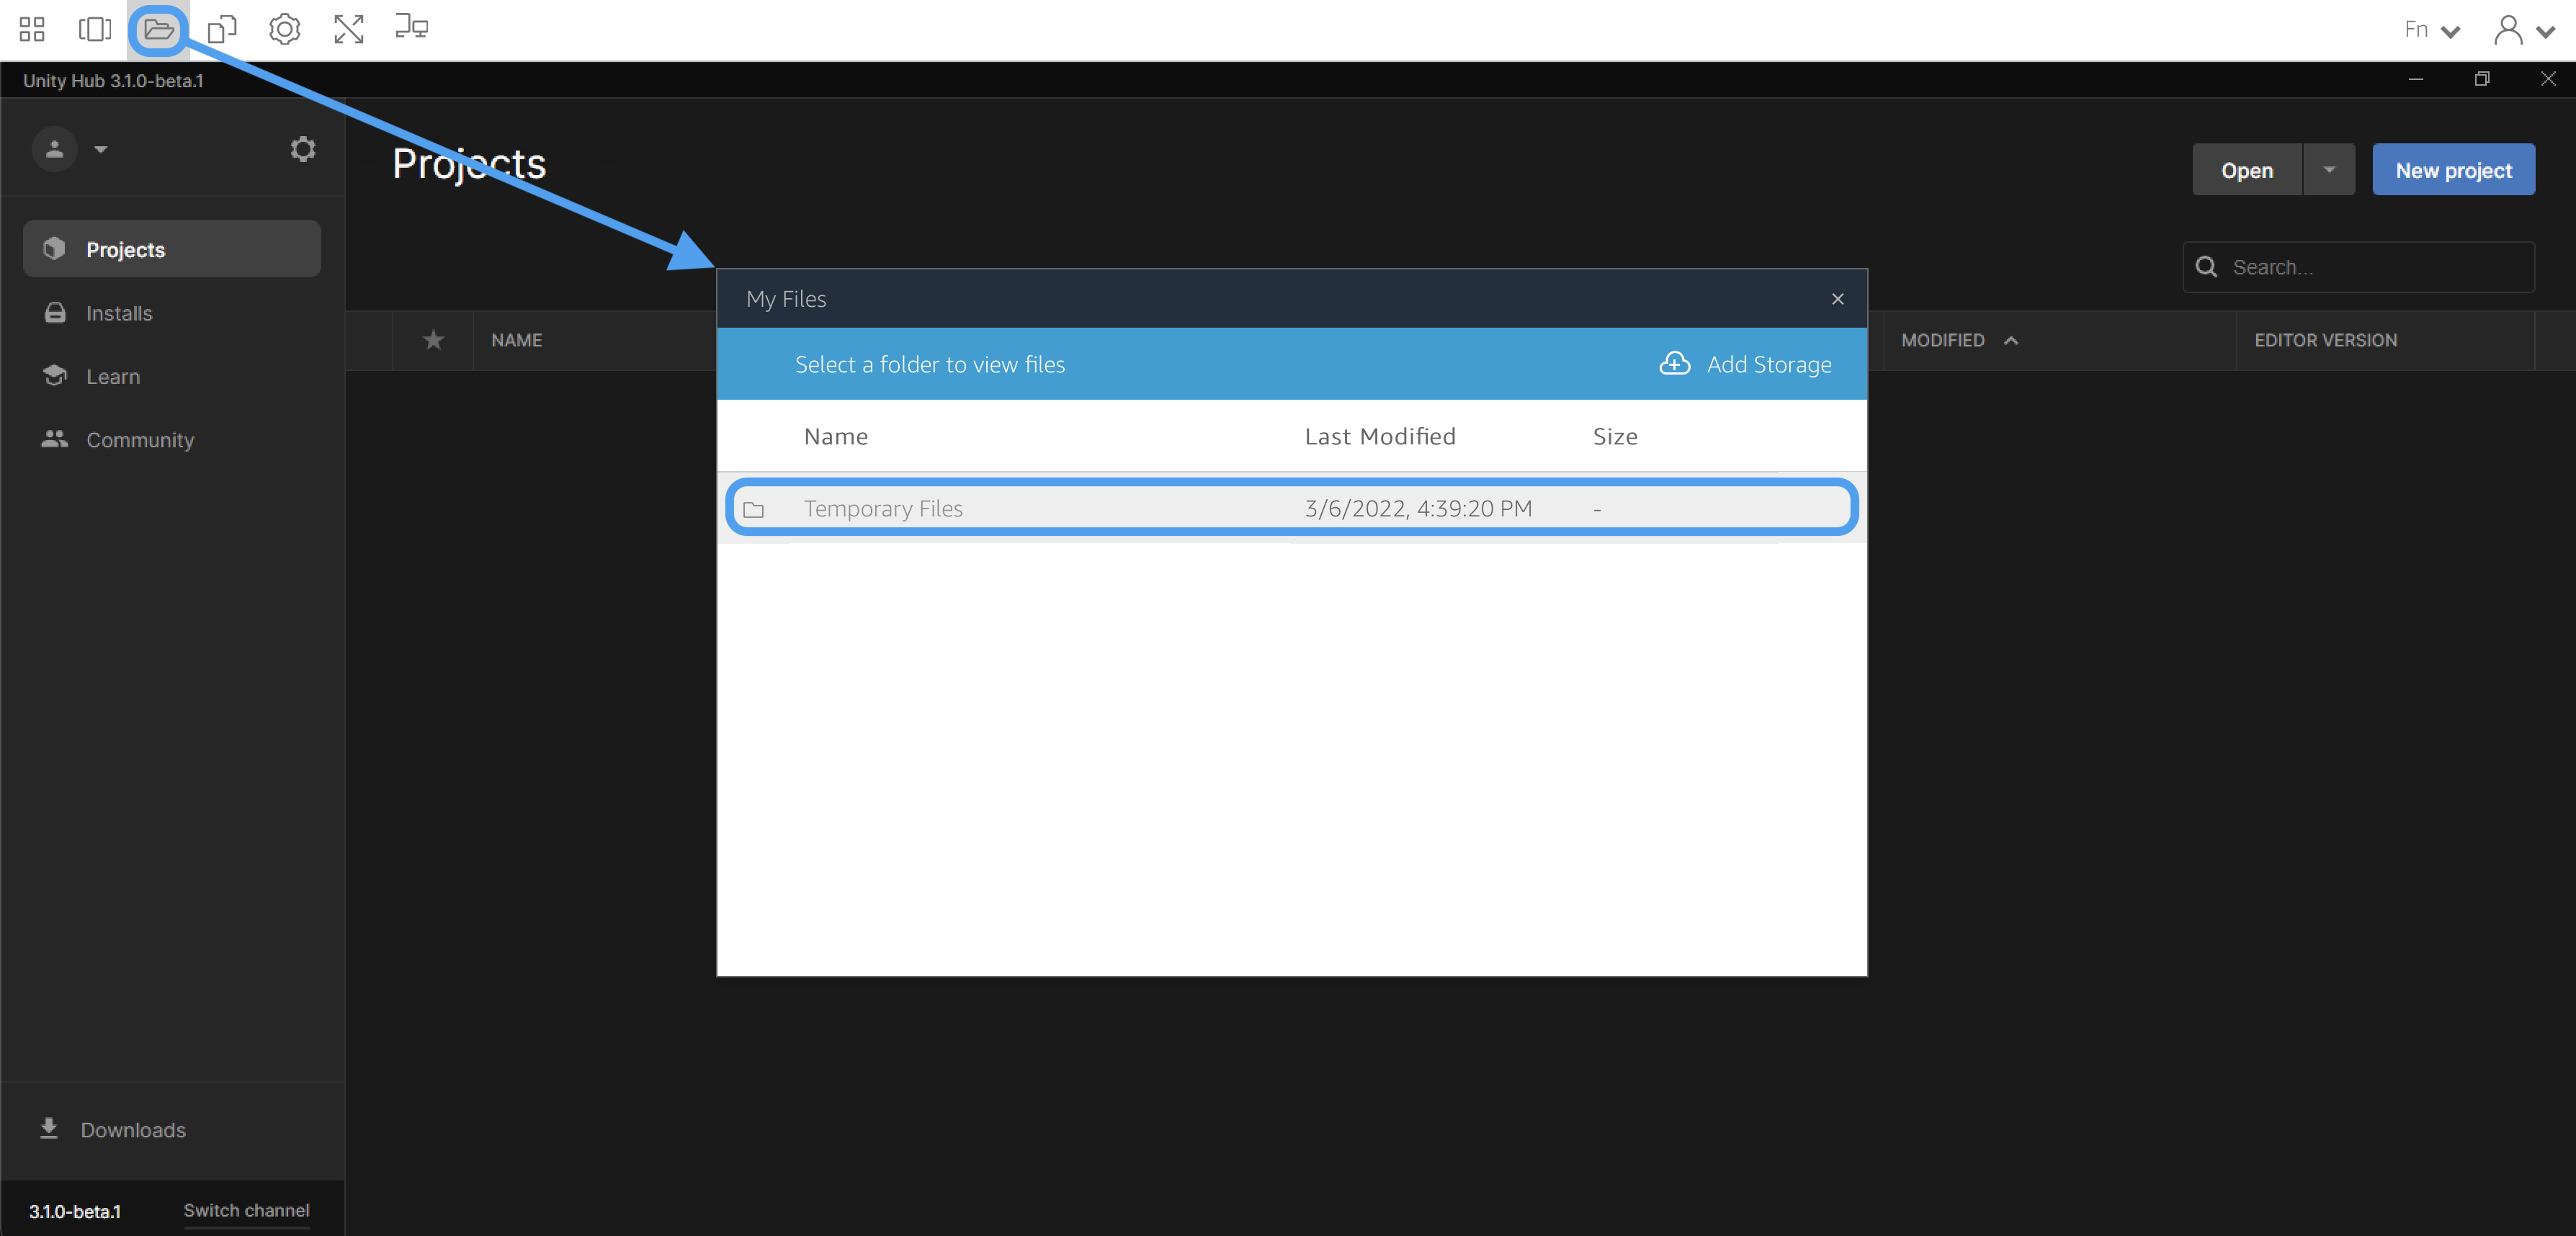
Upload the zipped folder into the session by clicking the folder icon from the menu.

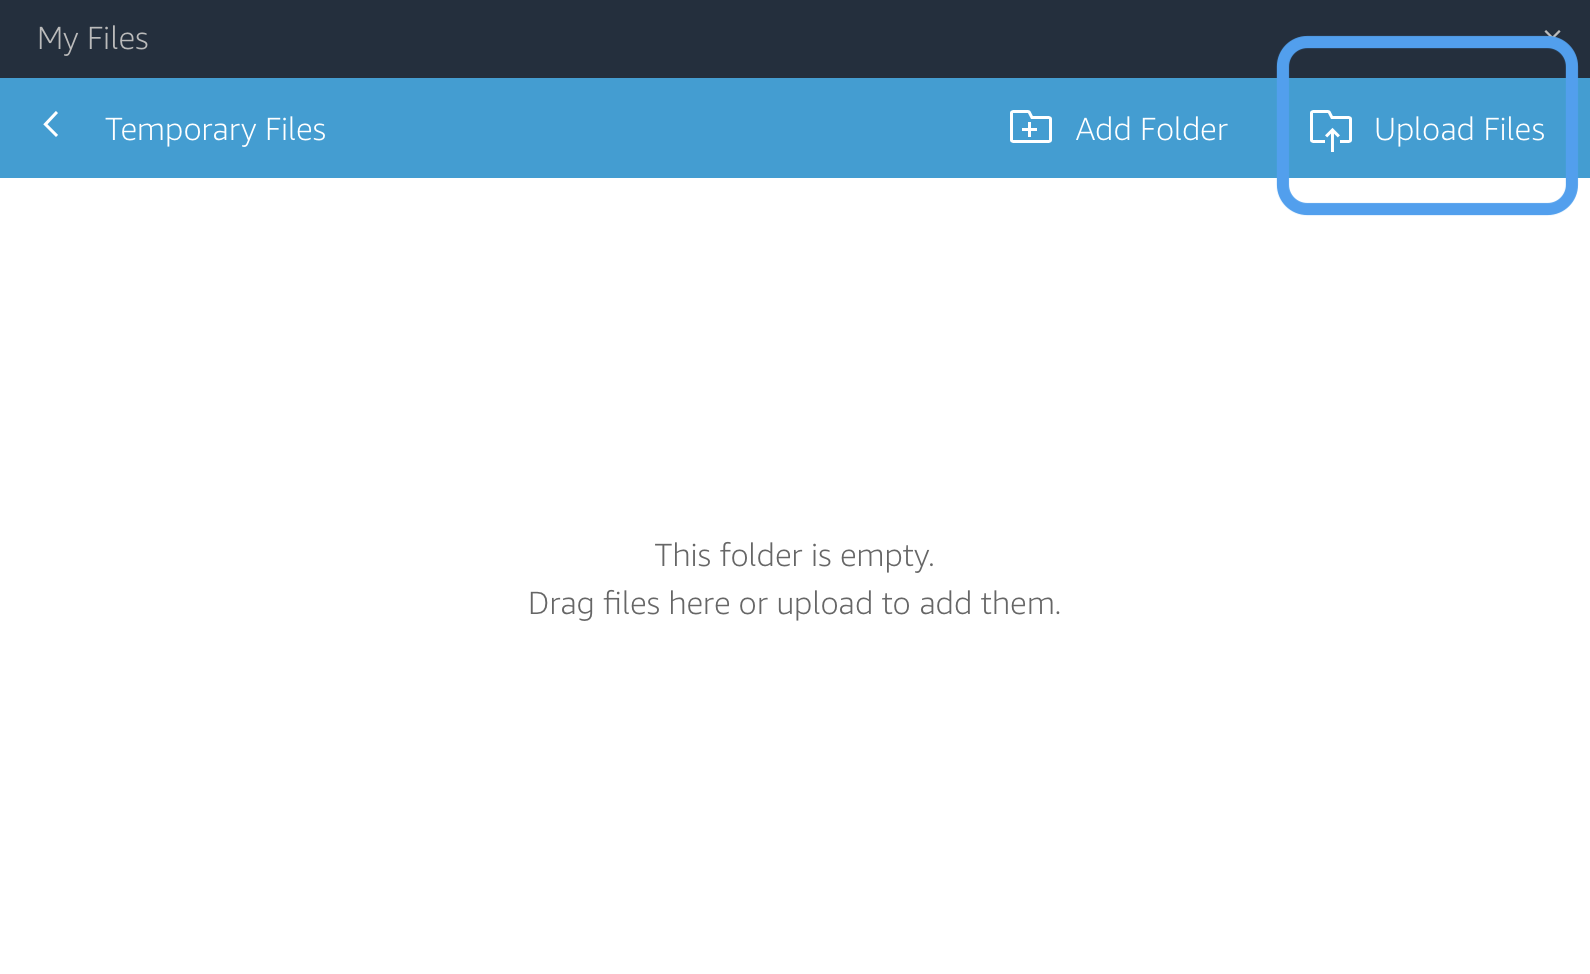
Double-click the ‘Temporary Files’ folder, then click the ‘Upload Files’ button.

Find and select your zipped folder, then click ‘Open’.
3. Move the zipped folder
The ‘Temporary Files’ folder is meant to temporarily store files within a single session, so for permanent, class-wide access you will need to move your uploaded file to the ‘Class Drive’ folder.
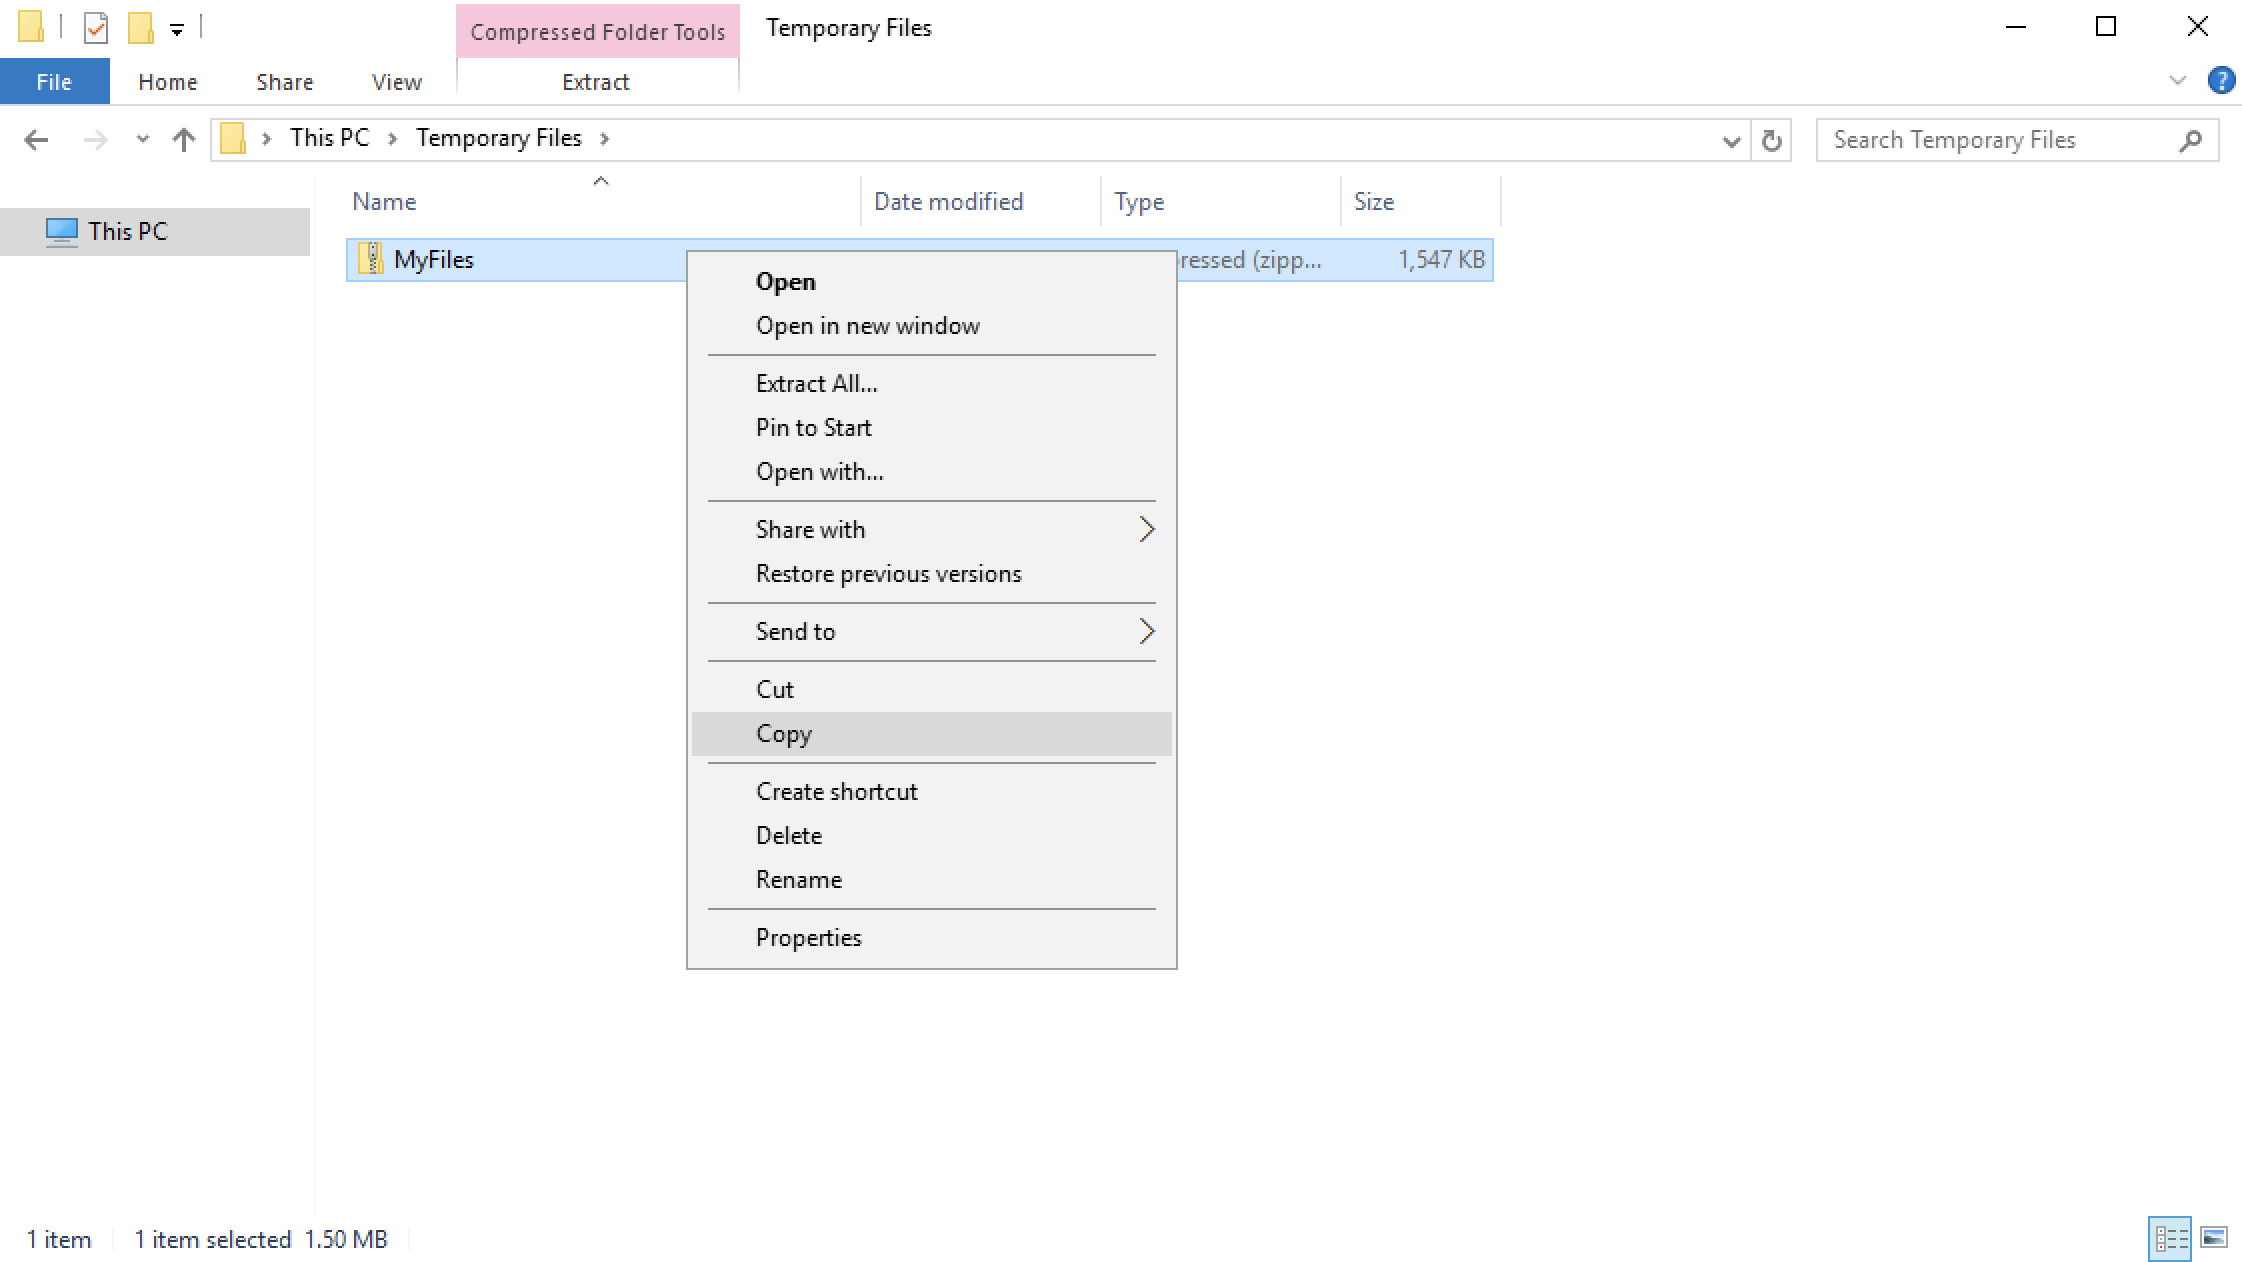
Open the File Explorer and find your uploaded zipped folder in the ‘Temporary Files’ folder. Once you’ve found it, right-click the zipped folder and click ‘Copy’.

Navigate back to the ‘Class Drive’’ folder, right-click and press ‘Paste’.
Once the files have successfully copied over, you can instruct students to use the File Explorer to navigate to the ‘Class Drive’ so they can copy the files to their ‘My Projects’ folder. More in-depth instructions on how to do so can be found in this link.