Bake a lightmap for your scene
Tutorial
Beginner
+10XP
35 mins
216
Unity Technologies

Now that you’ve set up real-time lighting in your outdoor scene, you’re ready to set up the second type of lighting for your project: baked lighting. When you’ve implemented this and made some adjustments to the lighting configuration throughout your scene, you’ll have covered the basics of lighting an outside space!
By the end of this tutorial, you'll be able to:
- Configure light sources appropriately so that they can be baked.
- Create a new Lighting Settings asset.
- Explain why any changes to the baked lighting require an update to the lightmap.
- Customize lightmap properties for your scene.
Languages available:
1. Overview
Now that you’ve set up real-time lighting in your outdoor scene, you’re ready to set up the second type of lighting for your project: baked lighting. When you’ve implemented this and made some adjustments to the lighting configuration throughout your scene, you’ll have covered the basics of lighting an outside space!
By the end of this tutorial, you'll be able to:
- Configure light sources appropriately so that they can be baked.
- Create a new Lighting Settings asset.
- Explain why any changes to the baked lighting require an update to the lightmap.
- Customize lightmap properties for your scene.
2. What is baked lighting?
As you learned previously, there are two different approaches to lighting in Unity: real-time lighting and baked lighting. Let’s take a moment to recap both approaches.
Real-time lighting
Unity calculates real-time lighting at runtime (when your game or other real-time experience is running). The Directional Light and other light sources that you created in the previous tutorials are all currently real-time lights.
These lights are calculated once per frame, which means that they can be very responsive to moving characters and other elements in your scene. However, when scenes get more complex these lights can require a lot of memory, which can result in reduced performance — particularly for players or users with lower specification hardware.
Baked lighting
Unity pre-calculates baked lighting in advance of runtime (before users interact with your experience). This means that all Unity needs to do at runtime is apply the lighting data to the scene. You can’t change the properties of lights that have been baked at runtime and they won’t respond to dynamic GameObjects (such as a character walking through your scene).
The process of calculating the lighting involves generating UV coordinates for the entire scene, just like the UV coordinates used to map a texture in a material. This texture map is called a lightmap, and the process of creating it is called lightmapping or baking.
Baked lighting can be a lot more efficient but it can also be used to implement lighting that’s a lot more realistic and engaging for users.
3. Change the Light Mode
The Light Mode setting enables you to select the approach to lighting that you want to take in your Unity project:
- Baked
- Real-time
- Mixed
At the moment, all the lights in the working scene are real-time. Before you can create a bake, you need to change their Light Mode:
1. Open the Creative Core: Lighting project in Unity Editor, if you haven’t already done so.
2. In the Project window, go to Assets > CreativeCore_Lighting > Scenes and open TutorialScene_Lighting_Outdoor.
3. In the Hierarchy, expand the Lighting GameObject and select the Directional Light.
4. In the Inspector, find the Mode property in the Light component.
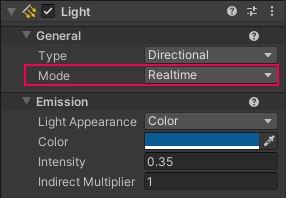
5. Set the Mode to Baked.
6. Select the GameObjects of the other light sources you have added to the scene and set their Mode properties to Baked in the same way.
Tip: You can use the Light Explorer window (top menu: Windows > Rendering > Light Explorer) to change these quickly.
4. Set your light sources as static
If a GameObject does not move at runtime, it’s considered static. You can flag these GameObjects as static by using the Static property. Unity will then be able to precalculate data about it before runtime, including the data stored in a lightmap for global illumination.
Before you bake the lightmap, you need to flag the light sources in your scene as static:
1. In the Hierarchy, select the Environment GameObject. In the Inspector, enable its Static property.
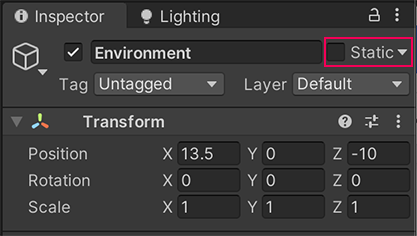
2. In the Change Static Flags dialog window that appears, select Yes, change children.
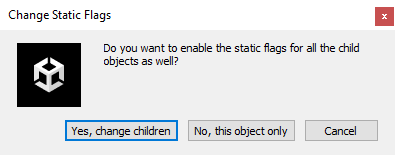
This will set the plane and the amphitheater environment as static.
3. Select any other lighting props GameObjects that you’ve added to your scene and enable the Static property.
4. Add two additional StreetLamp Prefabs to the center of the amphitheater space for testing. Set only one of them as Static, so that you can observe the difference between them after you’ve baked a lightmap. Select the GameObjects of the light sources you have added to the scene and set their Mode properties to Baked.
Now you’re ready to bake a lightmap!
5. Bake a lightmap
So far you won’t have seen any visible impact of your changes in this tutorial because you haven’t generated a lightmap to store the lighting data. Now you’re ready to do so.
Important: In this learning project, all of the meshes have lightmap UVs. If you were to import a new mesh without a lightmap UV, you’d need to create one or get Unity to automatically generate one before baking a lightmap.
Before you begin to bake
You can choose between two backends for the Progressive Lightmapper. The default Progressive CPU Lightmapper backend is a backend for the Progressive Lightmapper that uses your computer’s CPU and system RAM. The Progressive GPU Lightmapper is a backend for the Progressive Lightmapper that uses your computer’s GPU and VRAM.
The Progressive GPU Lightmapper (preview) can have a significant positive impact on the speed of lightmapping. However, this will only work well if your computer meets the lightmapper’s hardware and software requirements. Check this now before you continue with this step.
Bake your lightmap
To bake your lightmap:
1. In the Lighting window (top menu: Window > Rendering > Lighting), go to the Scene tab. Select New Lighting Settings.

2. Set the Lighting Mode property to Baked Indirect. If you meet the hardware and software requirements, you can also set the Lightmapper property to Progressive GPU (Preview) now.
3. In the Project window, name your new asset “Baked Lighting” and move it to Assets > CreativeCore_Lighting > Settings > Lighting.
4. Back in the Lighting window, select Generate Lighting at the bottom of the window to bake a lightmap. You’ll see the baking progress on the right side of the Unity Editor window footer.

Note: This can take some time to process and your computer will slow down, especially the first time you bake the lightmap. This is expected behavior.
5. Pay attention to the two street lamps in the center of the amphitheater. You should notice that the lamp that you didn’t set as static does not cast light as you might expect.
6. Try moving the street lamps in the center of the amphitheater that you baked. Just as you observed in Get started with Unity’s lighting systems, you should notice that when you move the static StreetLamp GameObject the light and shadows are fixed in place.
Next, you’ll enhance your scene further with additional lights.
6. Add an Area Light
Area Lights are rectangles that emit light from one side of the rectangle uniformly across that side’s surface area. You can get subtle effects with these lights because they can light objects from multiple directions at once.
In the previous tutorial, you didn’t have the option to add an Area Light because they only work when lighting is baked. They can be particularly useful for things like small light sources such as interior house lights — Area Lights can be more effective than Point Lights when using that sort of prop if you want to make a scene feel realistic.
Use Area Lights to add some outdoor feature lighting to the amphitheater:
1. In the Project window, go to Assets > CreativeCore_Lighting > Prefabs. Select the LongLight Prefab and instantiate it in the scene.
2. Position the LongLight on the amphitheater — directly on the environment on one of the high levels is a good place to start, just as they were arranged in the example scene.
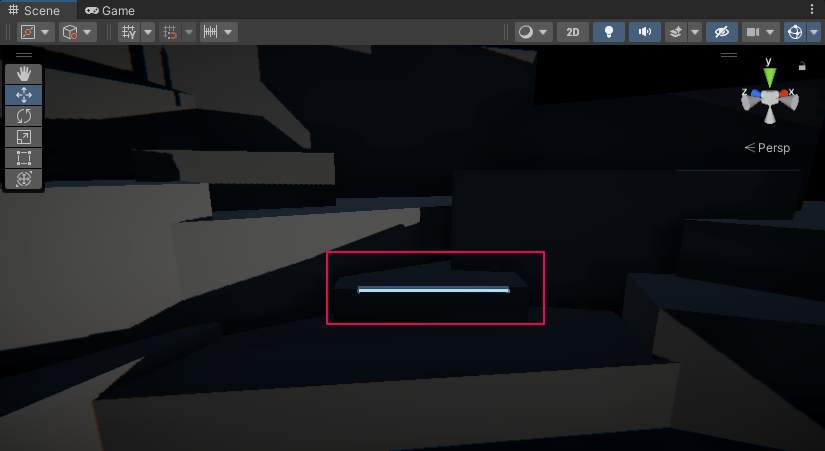
3. In the Inspector, change the Area Light’s Color property to something that will be easy for you to identify in the scene. A saturated bright color may be helpful for that.
4. Set the Range, Intensity, and Indirect Multiplier properties. For now, try making your Area Light a bright light with a large range so you can evaluate the impact that it makes on the scene. You can use the guidance gizmo in the Scene view to help you observe the impact as you adjust these properties.
Note: If you need to recap these properties, review the previous tutorial.
5. In the Lighting window, select Generate Lighting to update your bake and see the light.
6. If you want to make any further adjustments or add more Area Lights, make sure to update your bake so that you can see their impact on the scene.
7. Set the Light Mode to Mixed
At the moment, the street lamps in the scene are baked. You can set the Light Mode to Mixed to create Mixed Lights. These combine dynamic (real-time) shadows with baked lighting from the same light source. This requires more processing when users explore your experience, but it can improve the quality of your shadows. For a relatively small and lightweight project like this, it is often worth the performance cost.
In general, you would use a combination of mixed, realtime and baked lighting if you were creating a game or application for desktop platforms. However, it can be easier to demonstrate perceivable results with just baked lighting, which is helpful for a learning experience.
If you are working on a relatively small and lightweight project like this, it is often worth the performance cost to use mixed lighting.
To switch your street lamps to Mixed Lights, you need to adjust the Light Mode:
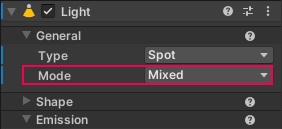
1. In the Hierarchy, expand a StreetLamp GameObject and select its child Spot Light GameObject.
2. In the Inspector, find the Mode property in the Light component.
3. Set the Mode to Mixed.
4. Repeat this process for the other lights you’ve added to the scene.
5. In the Lighting window, select Generate Lighting to update your bake.
6. Review the shadows in your scene — does your change make a noticeable impact? It may not in this particular situation, but Mixed Lights are a useful tool to have at your disposal.
7. Set the lights that you have changed back to Baked Mode and rebake the lighting.
8. Save your changes.
8. Next steps
Now that you’ve set up real-time and baked lighting, you’re ready to complete the last stages of lighting work on the outdoor scene. Next, you’ll use Light Probes to improve your baked lighting and spend some time adjusting the overall look and feel of the scene.