Complete a code review on Unity DevOps dashboard
Tutorial
Beginner
+10XP
20 mins
108
Unity Technologies
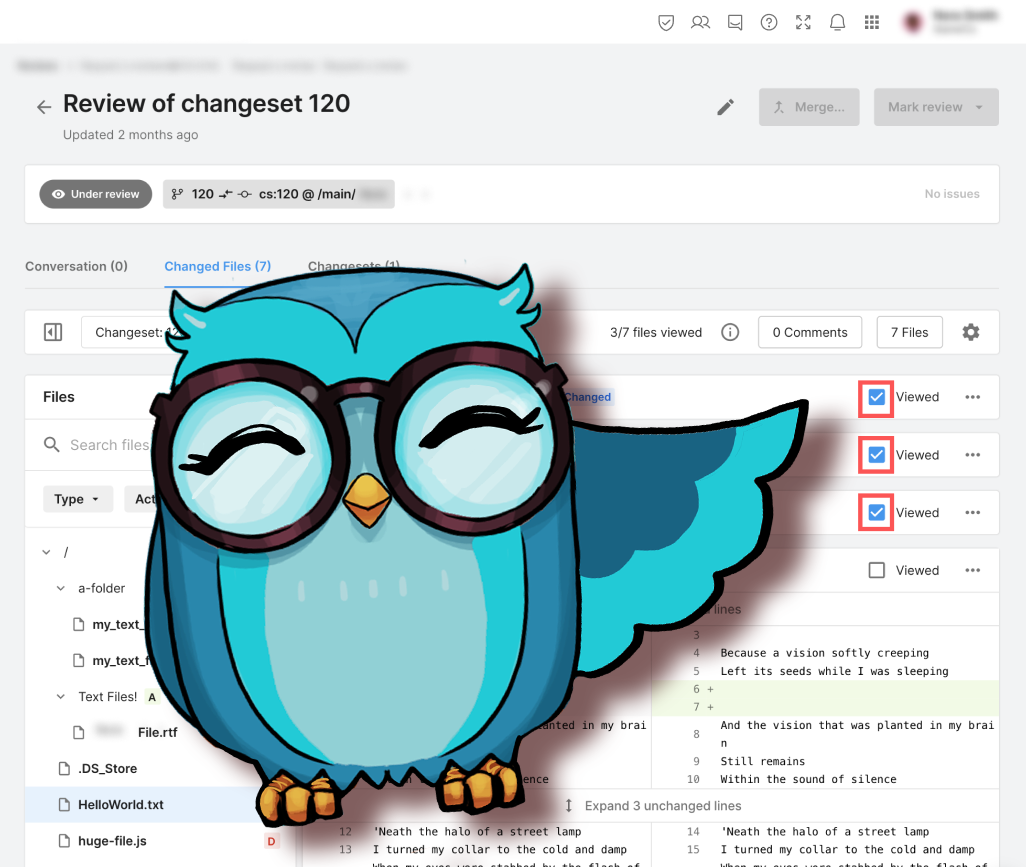
DevOps tools and workflows make collaborating with other creators easier. In this tutorial you’ll learn how to request and complete an online code review from the Unity DevOps Dashboard.
Note: This tutorial is part of Get started with Unity DevOps. Explore the rest of the course to learn more about how DevOps can support your work as a creator.
Languages available:
1. Overview
In this tutorial, you will learn how to start and complete a code review. This is a useful process when you are working with other developers and you would like to get your code reviewed and approved by others before it gets added to your project’s main branch.
Code reviews also allow for continuous learning for your project staff, as well as the sharing of best practices for coding and general transparency between your team members. Code reviews also allow you to be aware of all the changes inside your project, such as what your team members have added.
2. Before you begin
New to Unity?
If you’re new to Unity, welcome! The Unity Essentials learning pathway has been designed to help you get set up and ready to create in the Unity Editor. We recommend you complete this initial pathway before continuing with this DevOps tutorial.
Confirm access to the Unity Dashboard
To review the Unity DevOps tools and workflows on the Unity Dashboard as you work through this tutorial, you’ll need to activate a subscription for Unity DevOps and access your account on the Unity Dashboard.
Important: Unity DevOps is free to use and doesn't require a credit card. The paid version will only be required if you add more than three users to or use more than 5 GB data on the DevOps account.
Sign in to Unity DevOps
Follow these instructions to sign in to your Unity DevOps Dashboard if you have an active DevOps subscription:
1. In your browser, navigate to the Unity DevOps page.
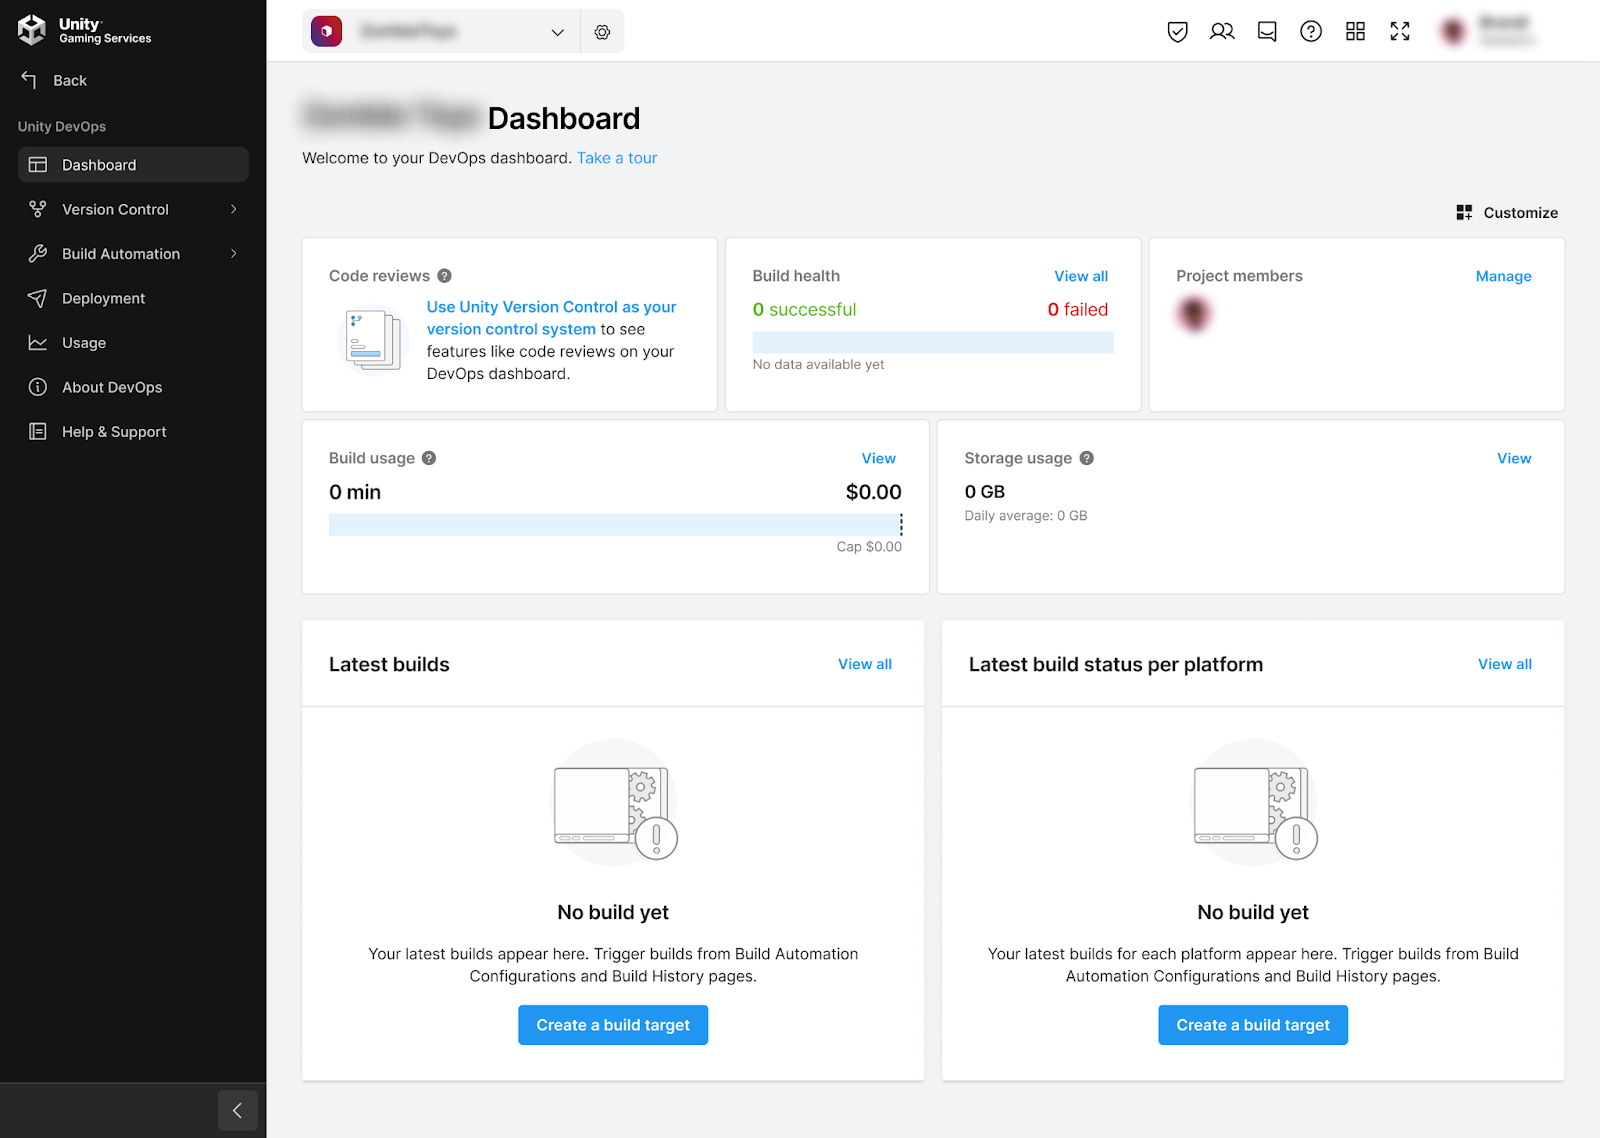
2. If you’re not already signed in to your Unity account, select Sign in. Once you’re signed in, your Unity Dashboard will be visible.
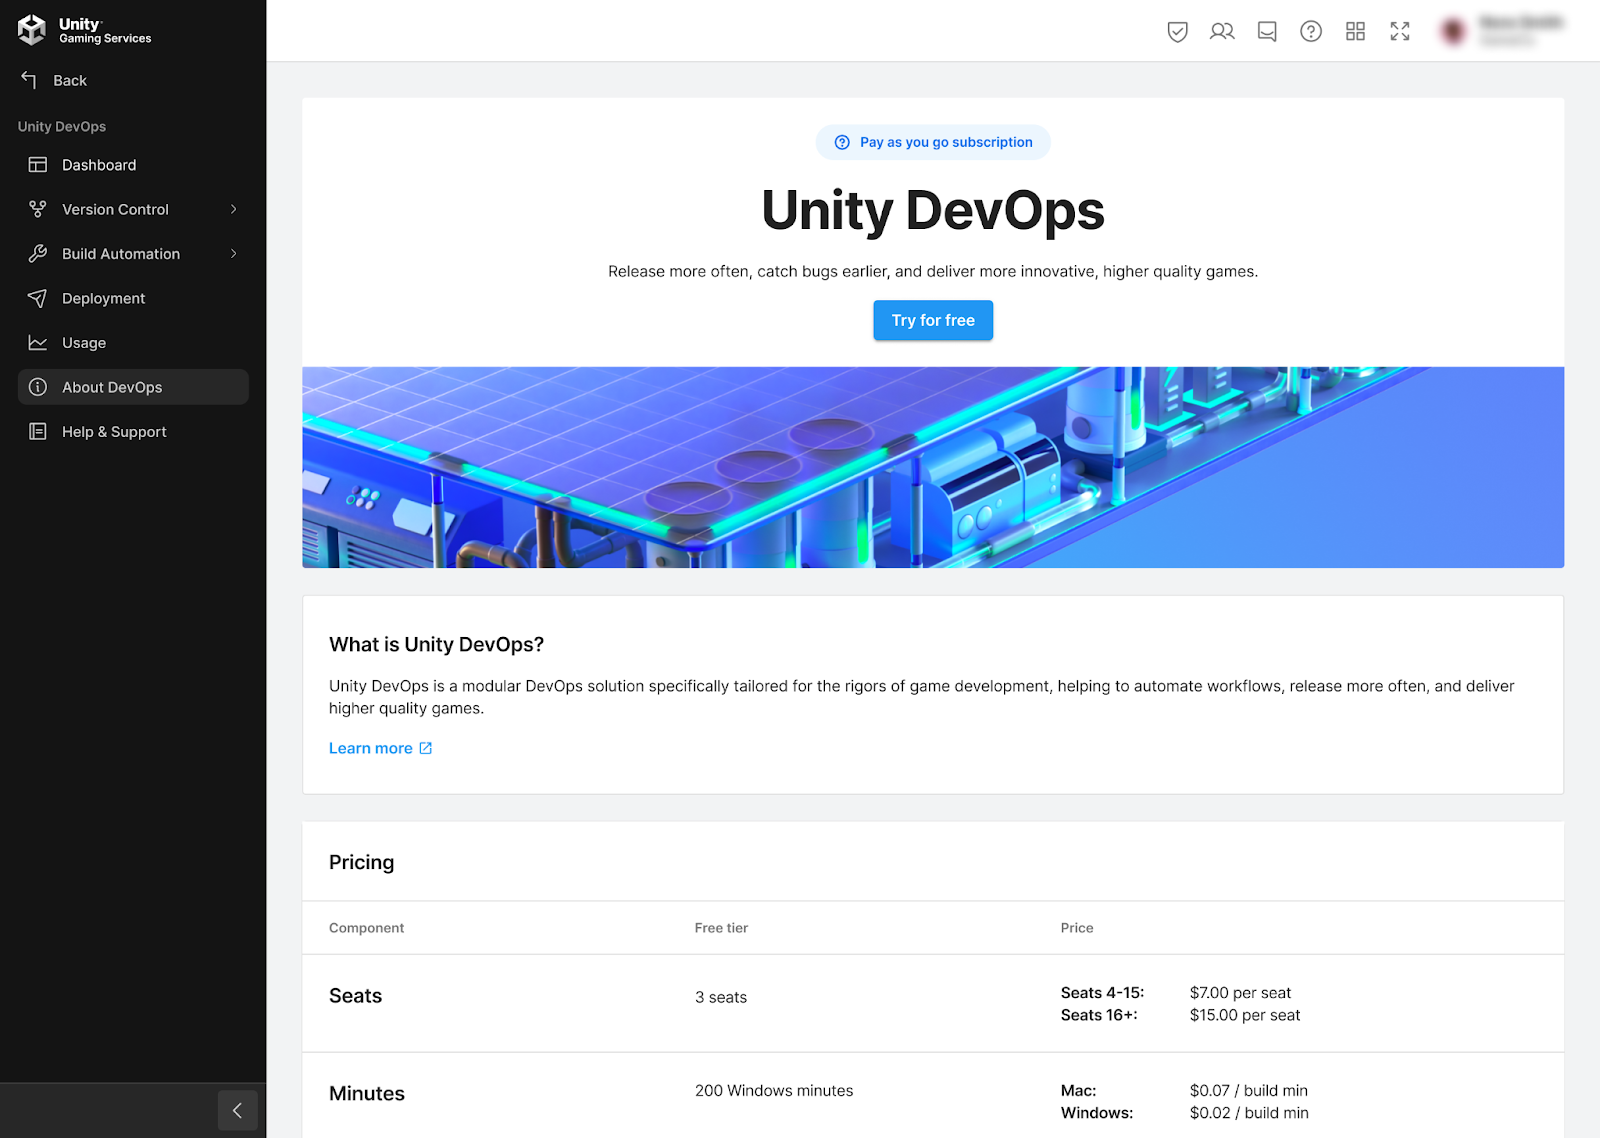
3. Select the DevOps tab on the leftmost menu to display your DevOps Dashboard.
Set up your Unity project
You will need a Unity project set up with Unity Version Control (formerly Plastic SCM) for this tutorial. If you are completing the full Get started with Unity DevOps course, you will have already prepared this.
Follow these instructions if you do not have a Unity project set up for this tutorial:
1. Create a new Unity project or choose one of your existing projects.
2. Set up a Unity Version Control repository for the project.
3. Request a code review
First, let’s explore how to initiate a code review. If you already have a project using Unity Version Control, we encourage you to follow along by using your own project as an exercise material. Otherwise, you can create a new project using the repository that you created when you set up Unity Version Control.
To set up a code review for a changeset that you have created, follow these instructions:
1. Go to https://dashboard.unity3d.com/devops. You will need to sign in with your Unity ID or create one to progress.
2. Open the Version Control dropdown and select Repositories.
3. From the list of the repositories you have access to, select TestProject.
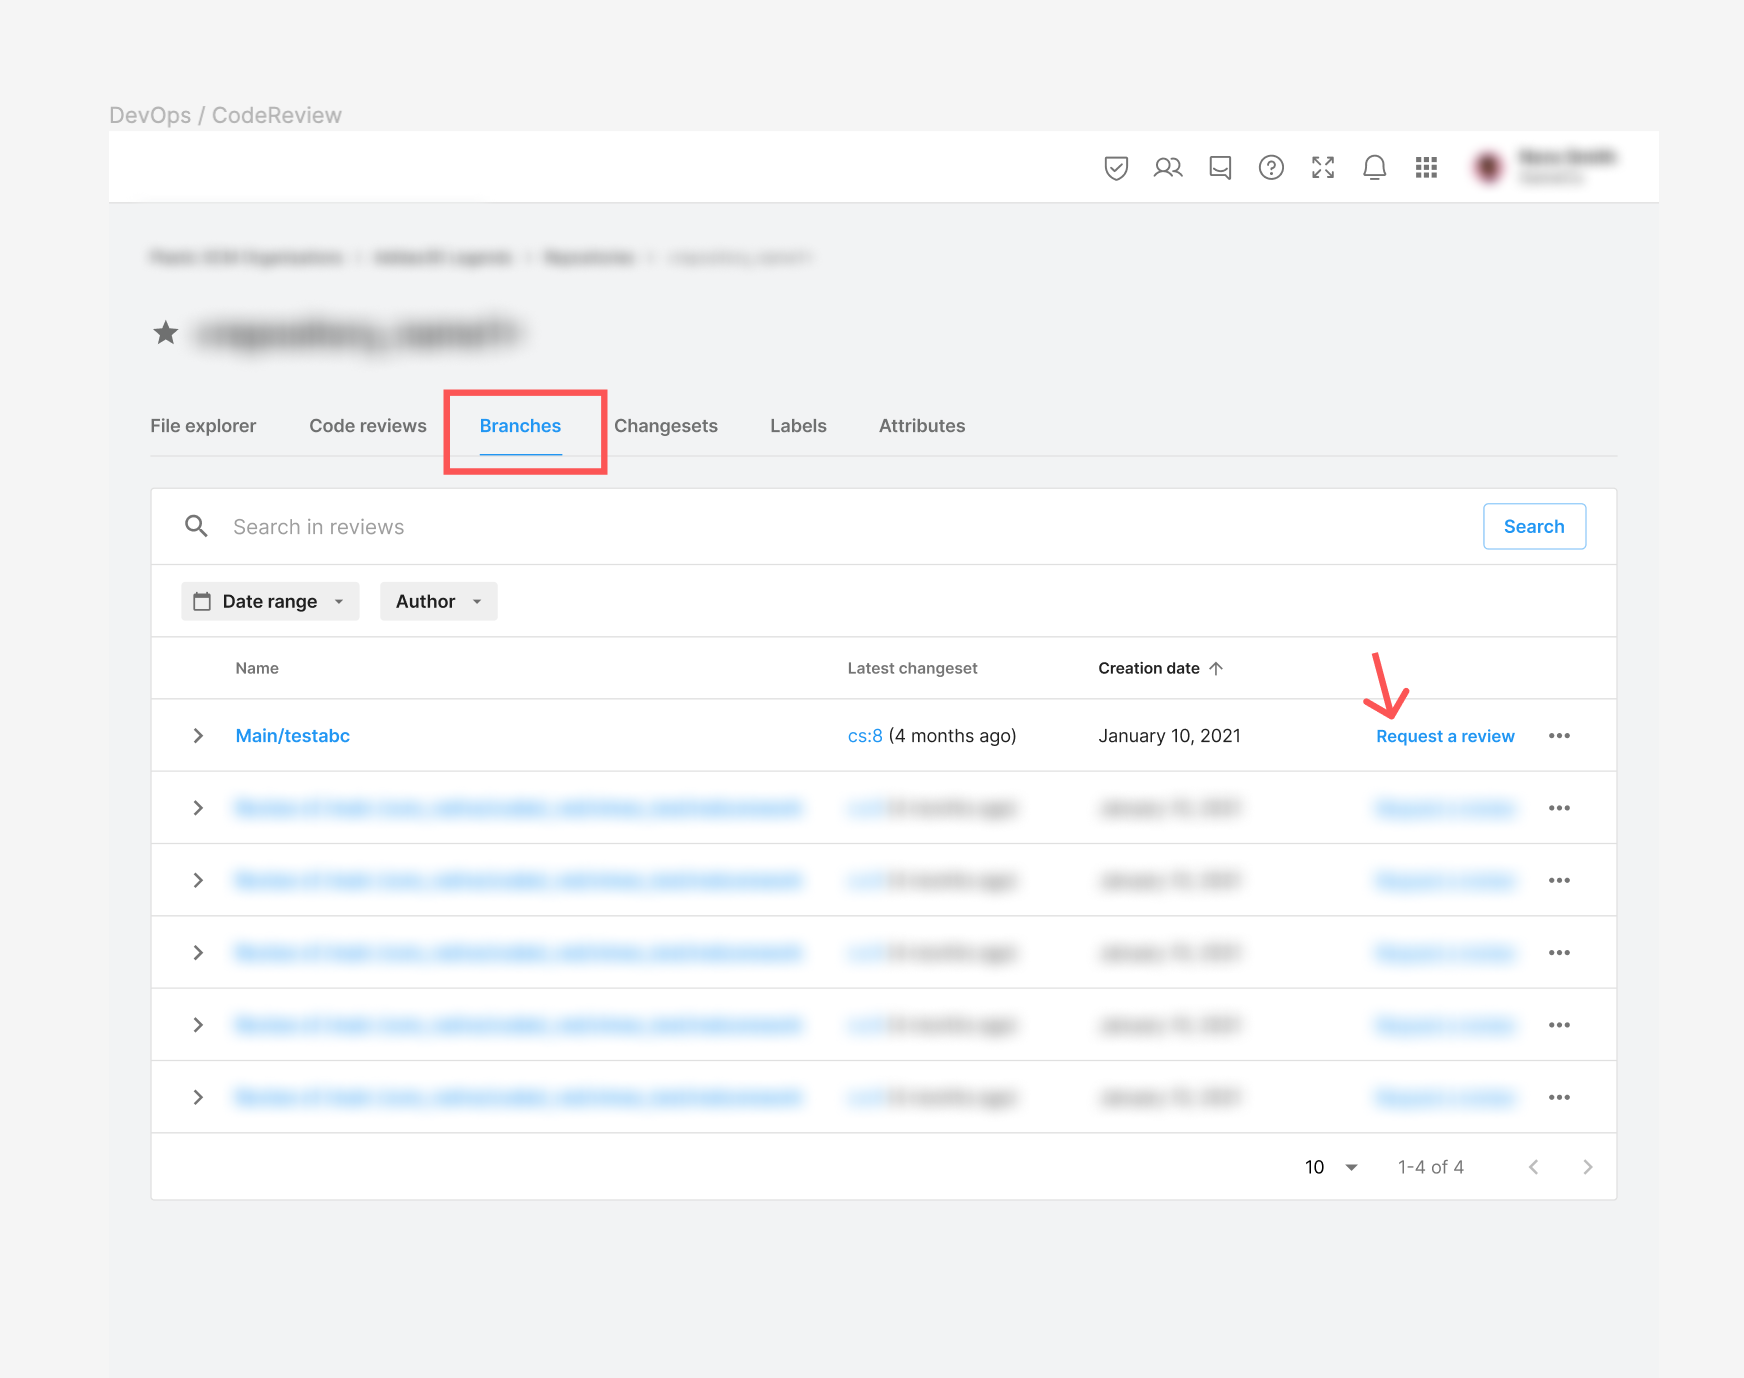
4. Select the Branches tab.
5. Select the Request a review button for the /main branch
Note: You can also request a code review from the Changeset tab. Using the Branch tab is useful when you want to request a review of larger updates to your project. The Changeset tab provides a more detailed look at changesets, which occur much more frequently in projects.
6. Enter “Main branch first review” in the title box and “This is my first code review of the main branch!” in the Leave a description box.
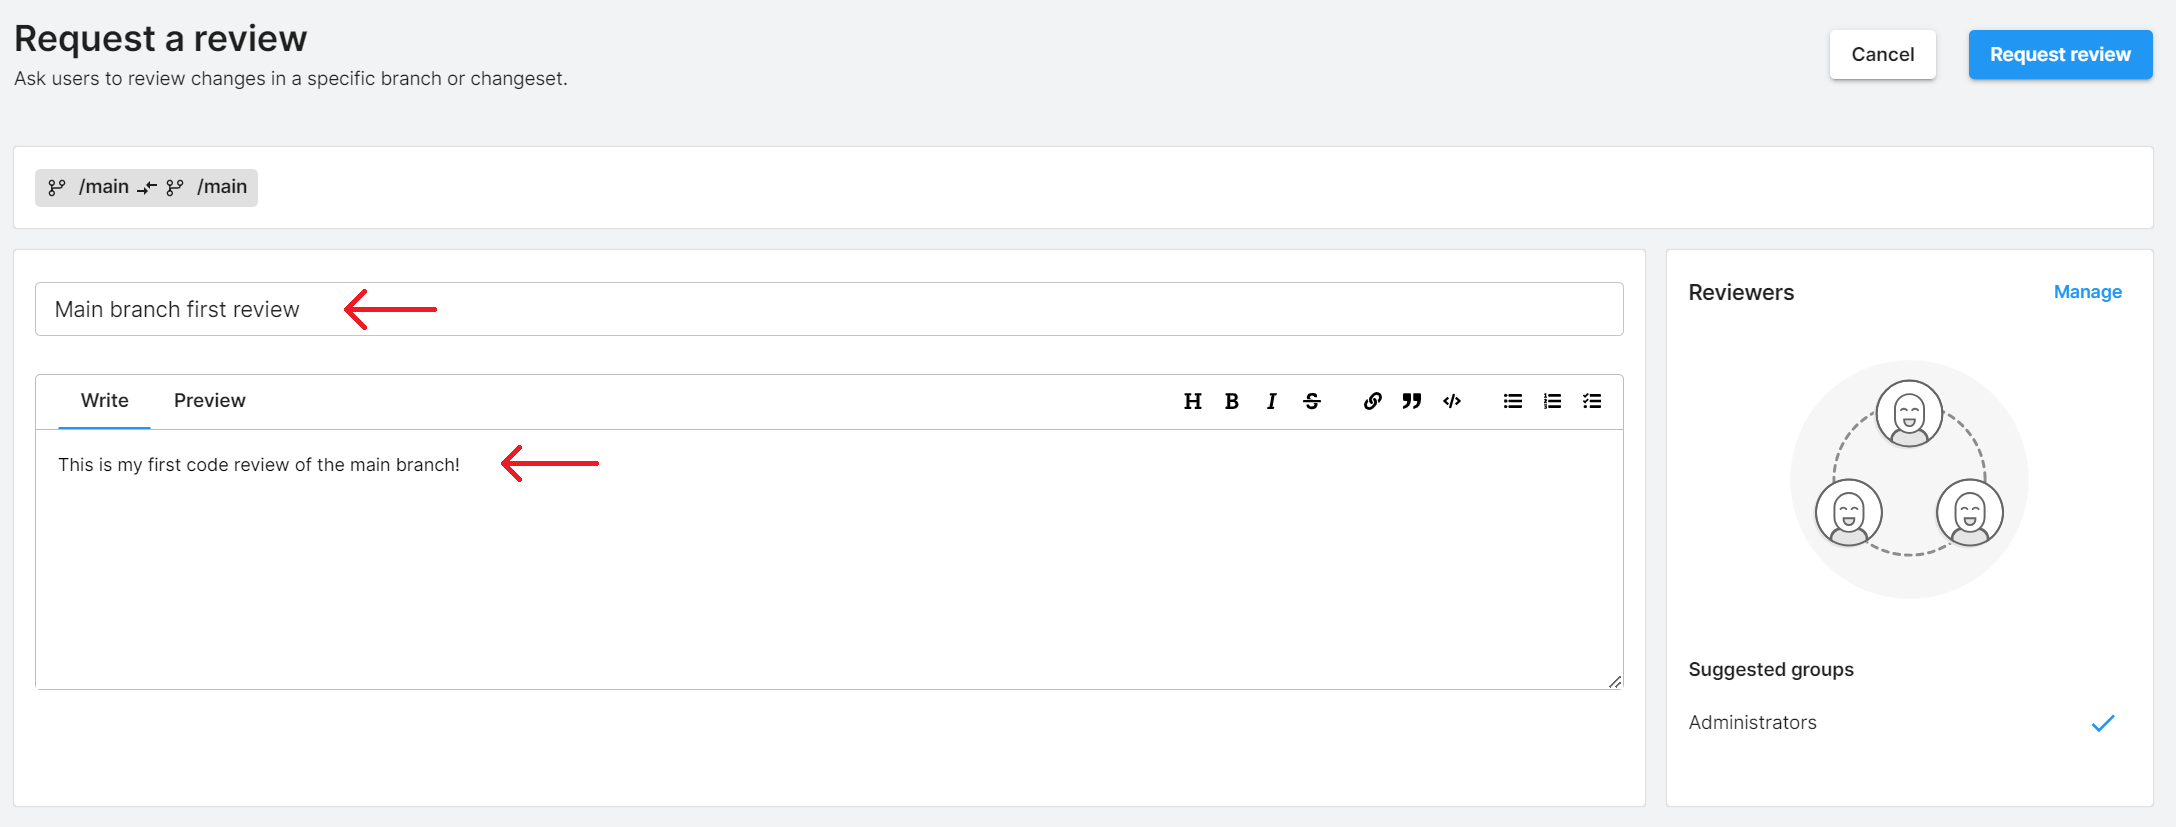
Note: The title box is automatically populated with the branch name, but you can change this name if you want.
7. Select Manage.
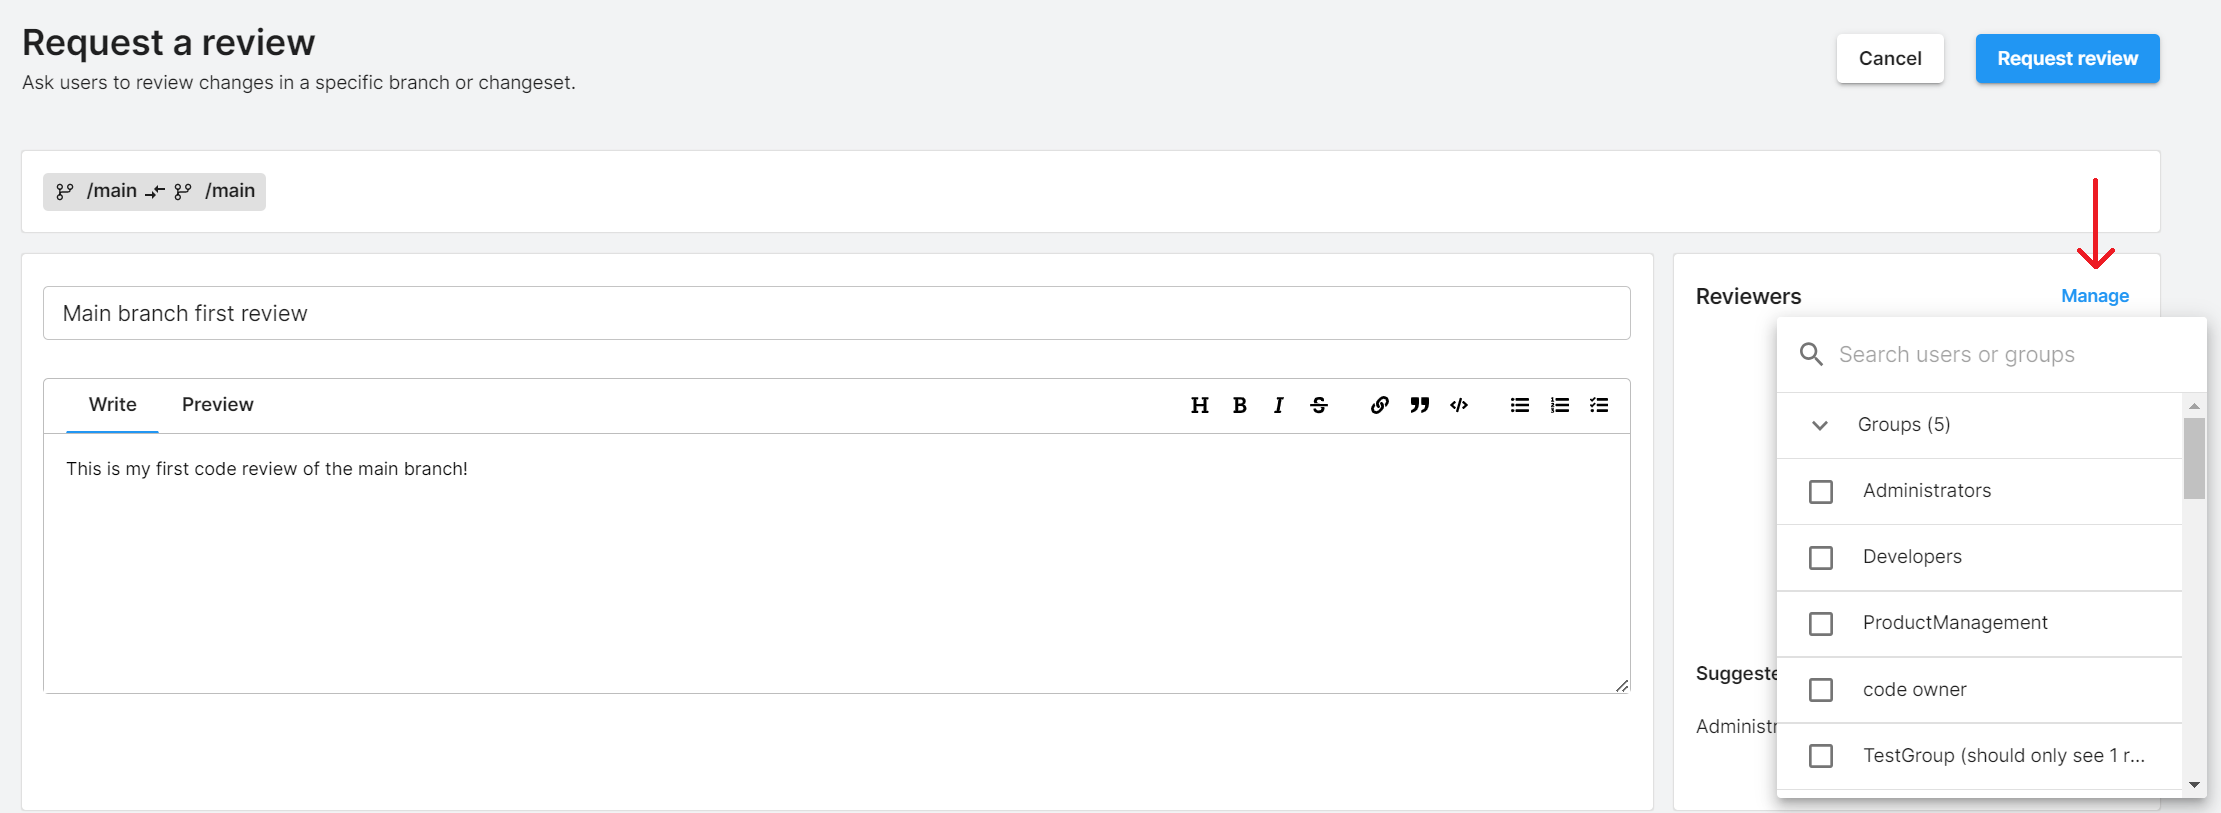
In the Manage reviewers dialog , you can add the email address of anyone who needs to review your code.
Note: You might have to assign a seat to your code reviewer if they don’t already have access to your project.
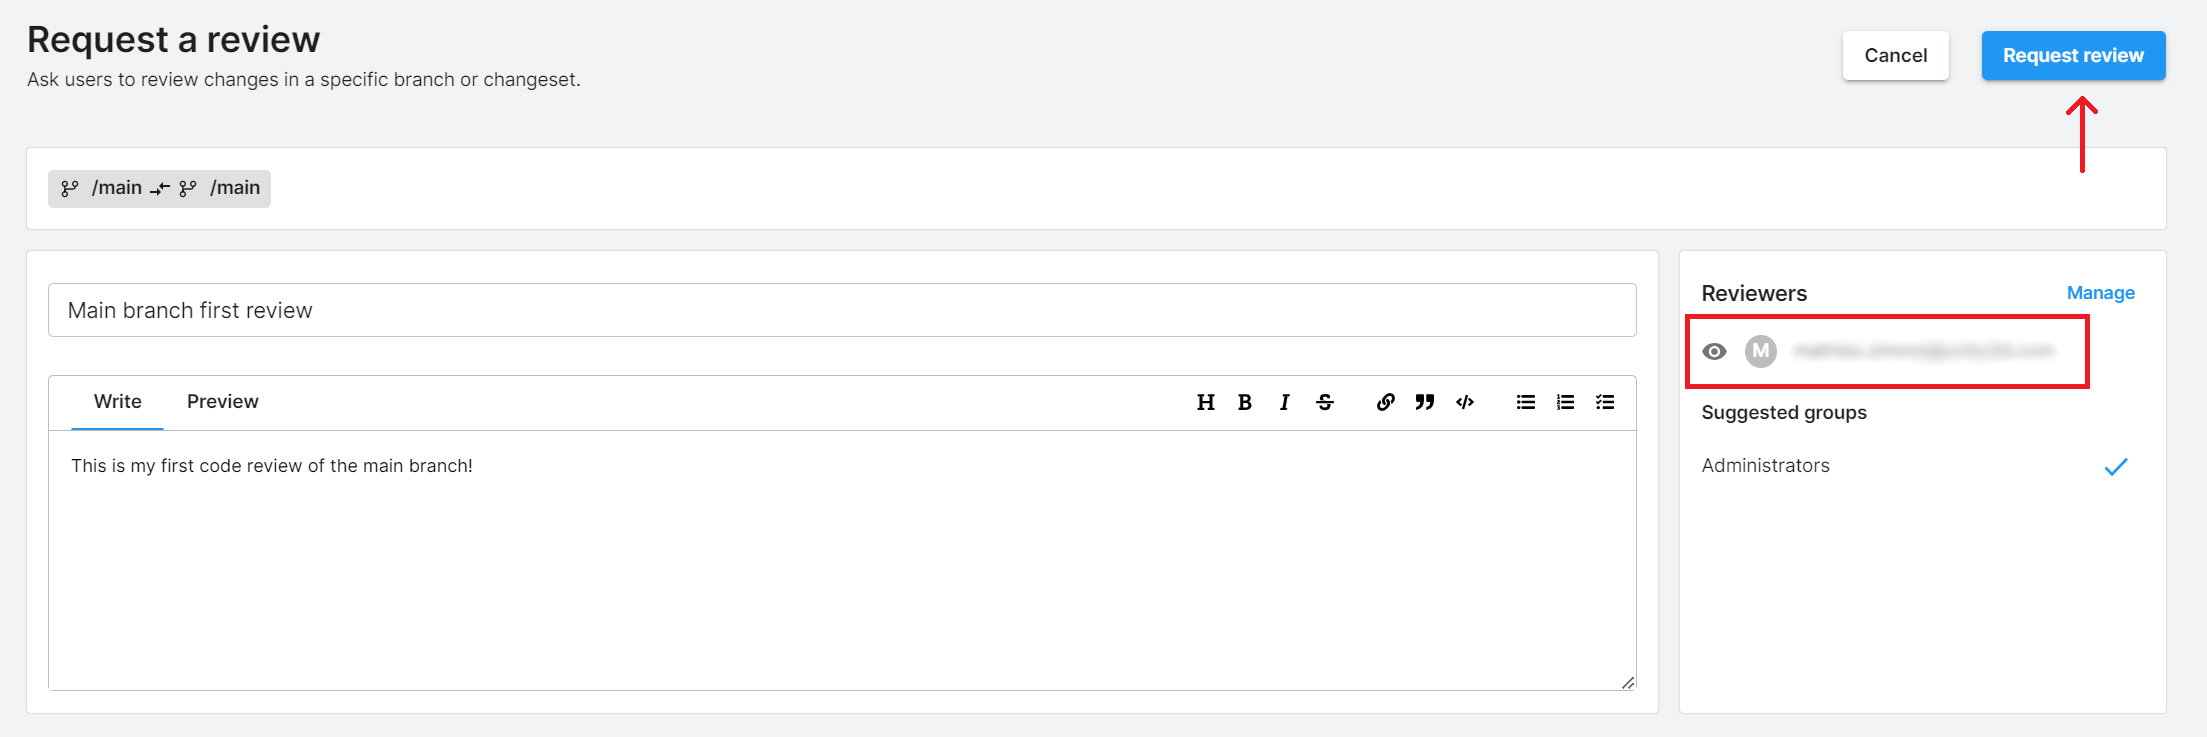
8. To assign the code review to yourself, add your own email address from the menu, then click outside the menu to save your choice.
Important: While it’s a useful way to learn how to complete code reviews in Unity Version Control, self approval of code reviews is not best practice. The whole purpose of code reviews is to have someone other than the author check over code for any mistakes!
9. In the main dashboard view, select Request Review. Your code review will then be displayed in the Code reviews tab.
4. Code review interface
Now that you know how to create a code review, ext, let’s check out the different features available to you when you start a code review.
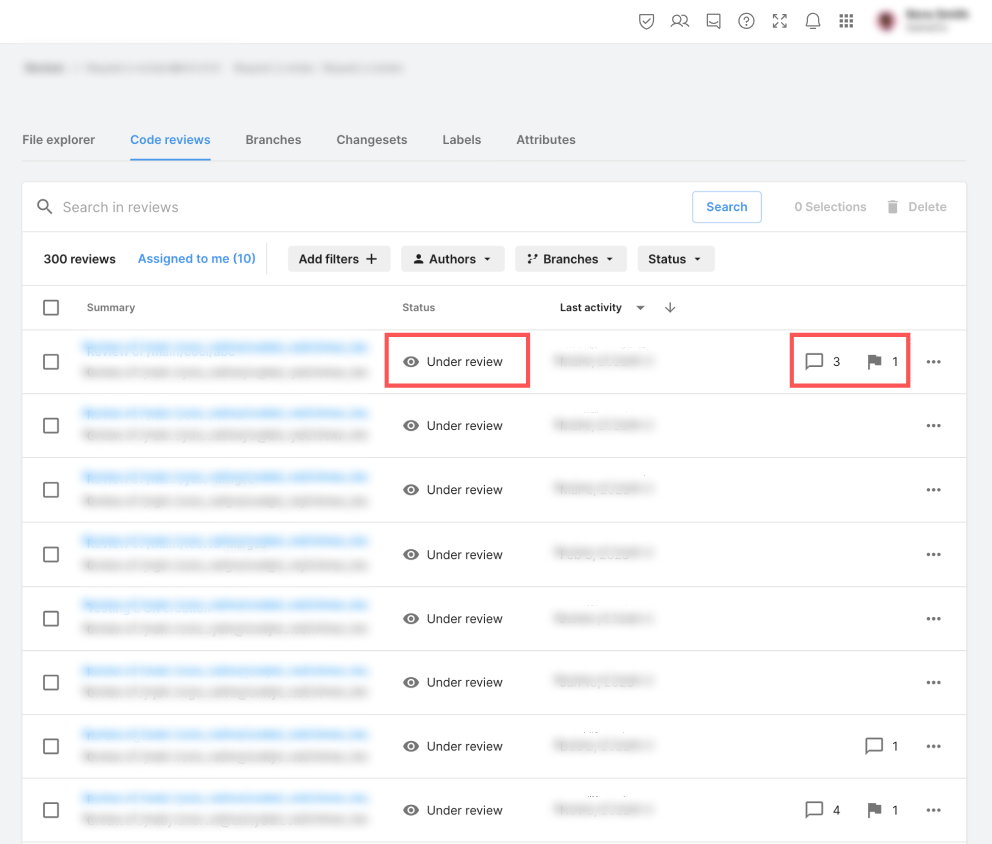
In the Repositories menu (Version Control > Repositories > TestProject), select the Code reviews tab. Take note of the following pieces of information:
- There is a code review for each specific branch in your repository. Code reviews can be done for the main branch or a child branch.
- The code review on the first line in the screenshot shows Under Review, which means a review is currently in progress. Code reviews remain Under Review until you or other reviewers approve them or ask for changes to be made to them.
To get more familiar with the code review interface, let’s create a code review in a real project:
1. Open TestProject in the Unity Editor.
2. In the main scene, right-click in the Hierarchy window and select 3D Object > Cube to add a 3D cube GameObject to the scene. Then, select File > Save.
3. Select the Unity Version Control tab and enable the Item checkbox at the top of the list to select all of the files you want to check in.
4. Enter “Added a 3D cube in the main scene” in the Your check-in comment… box and select the Check in Changes button.
5. In the main scene of TestProject, move the 3D cube a little bit to the right.
6. Select File > Save and then, in the Unity Version Control tab, enter “Moved the 3D cube to the right” in the Your check-in comment… box.
7. Enable the Item checkbox at the top of the list to select all of the files you want to check in. Then, select the Check in Changes button.
You’ve just created two different changesets in Unity Version Control! This means that your 3D cube has two separate changesets associated with it.
Let’s take a closer look at these changesets:
1. In your browser, navigate to the Unity DevOps page.
2. Select your organization and select the TestProject repository.
3. Select the Changeset tab, then select the Request a review button associated with your latest changeset.

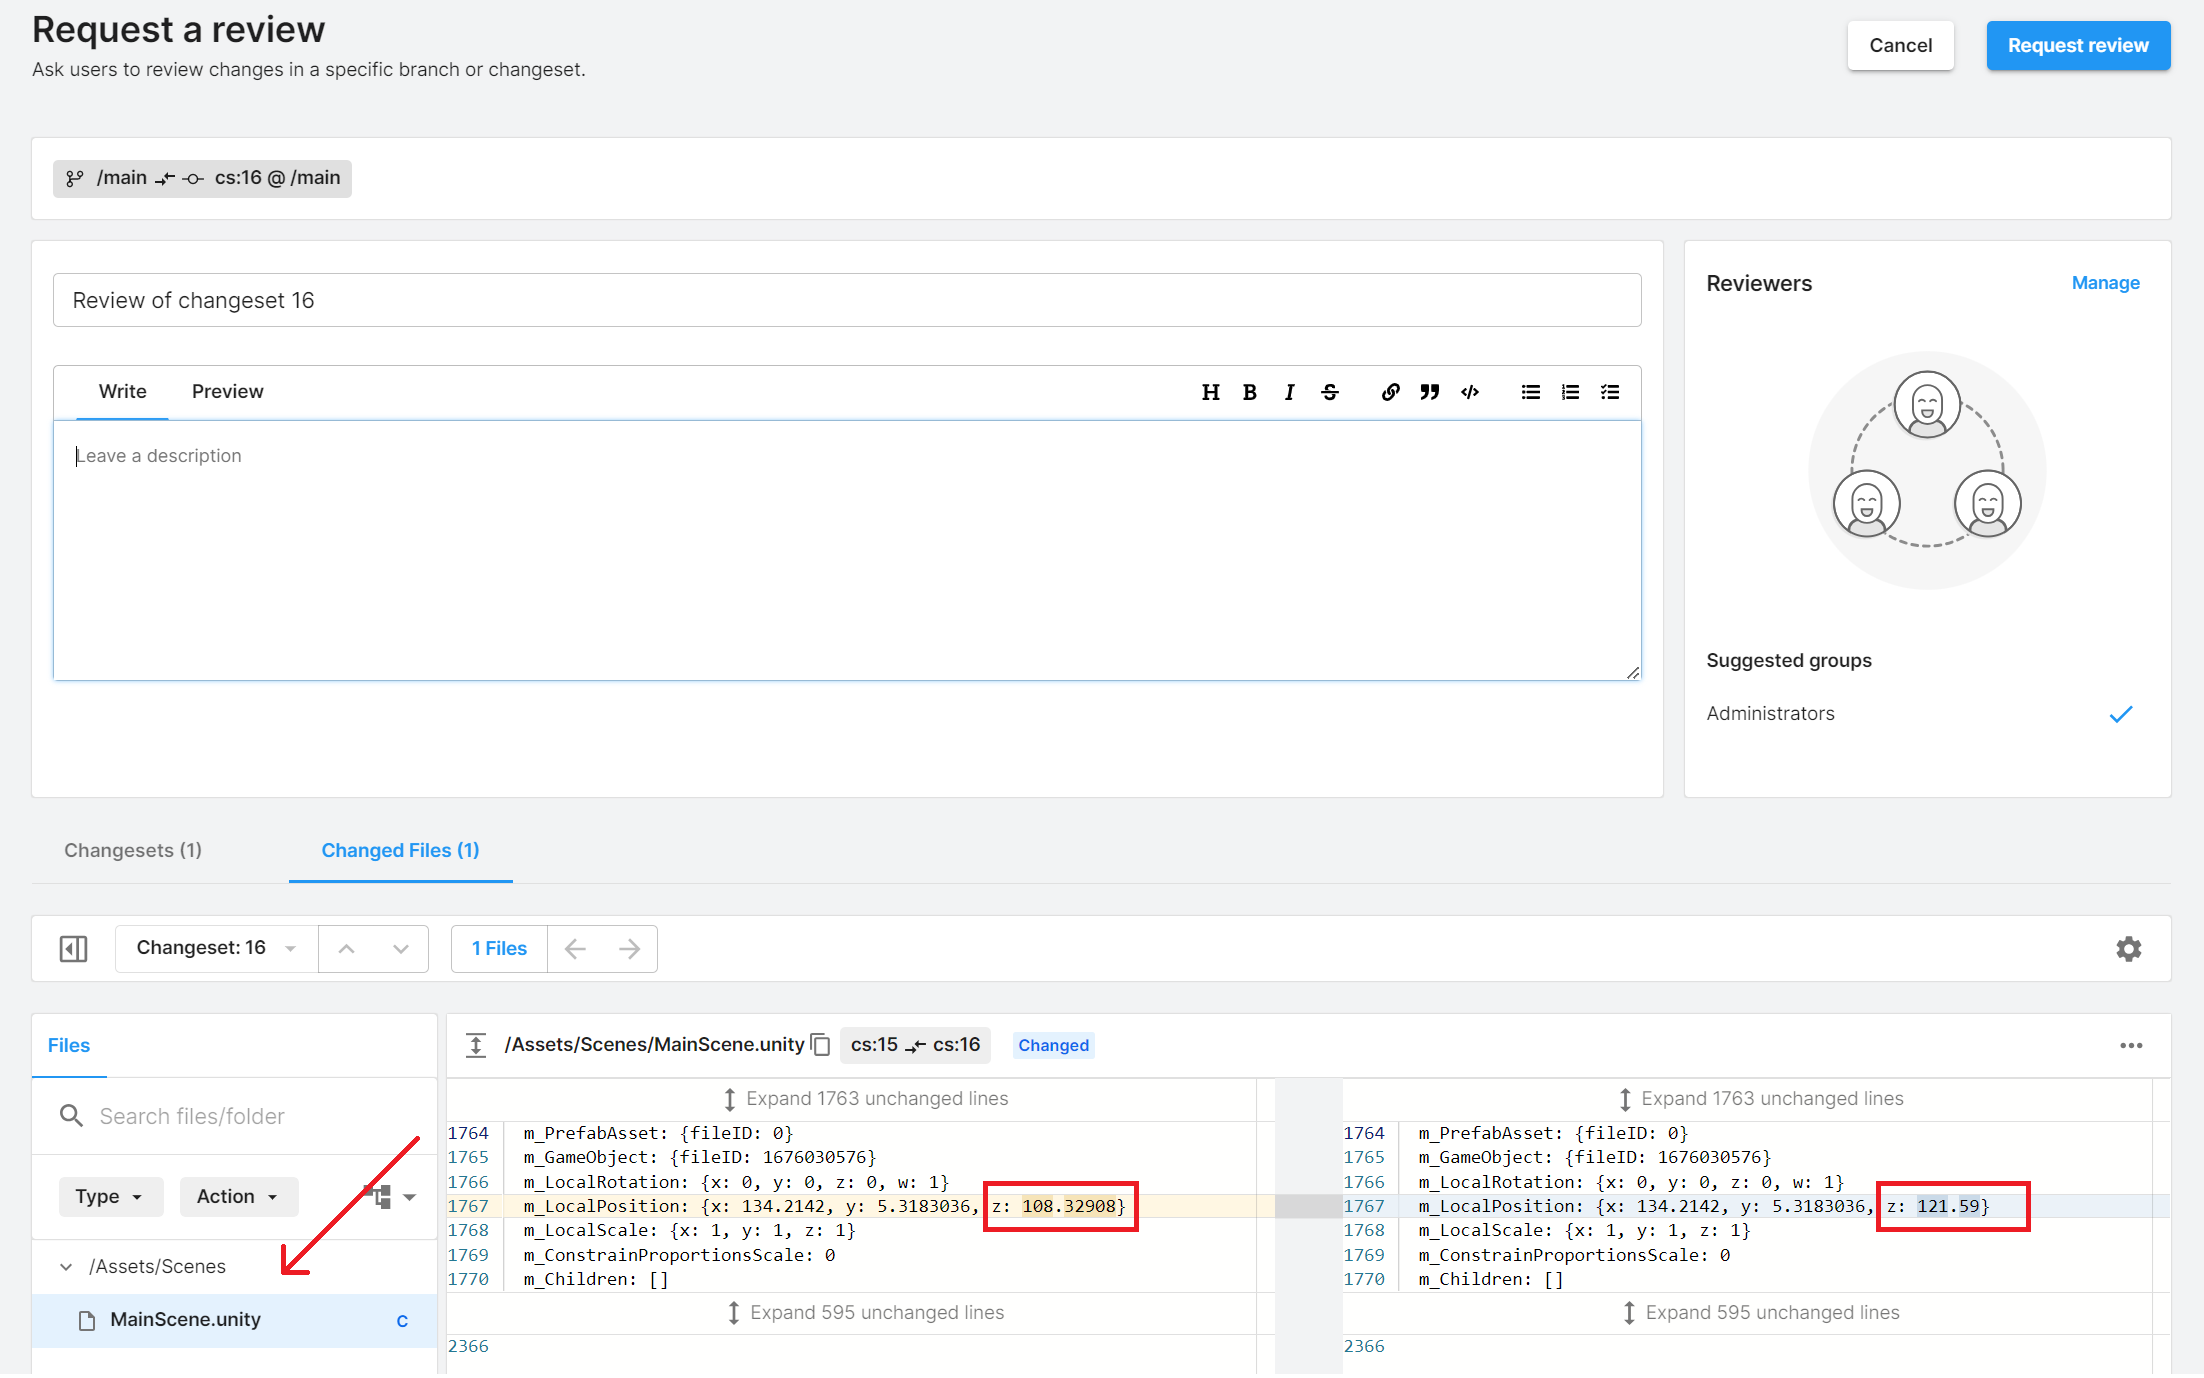
4. Scroll down in the Request a review window and make sure that the Scene.unity file is selected. Look at the code displayed on the table in the center of the screen.
Notice that one line is highlighted in yellow, on the left side of the table. This is the original position of the 3D cube when you first created it. The Z position is highlighted. The right side of the screen shows another Z position, highlighted in blue. This is the new position of your 3D cube, after you moved it to the right in the Editor.
5. Add yourself to the list of reviewers and select the Request review button.
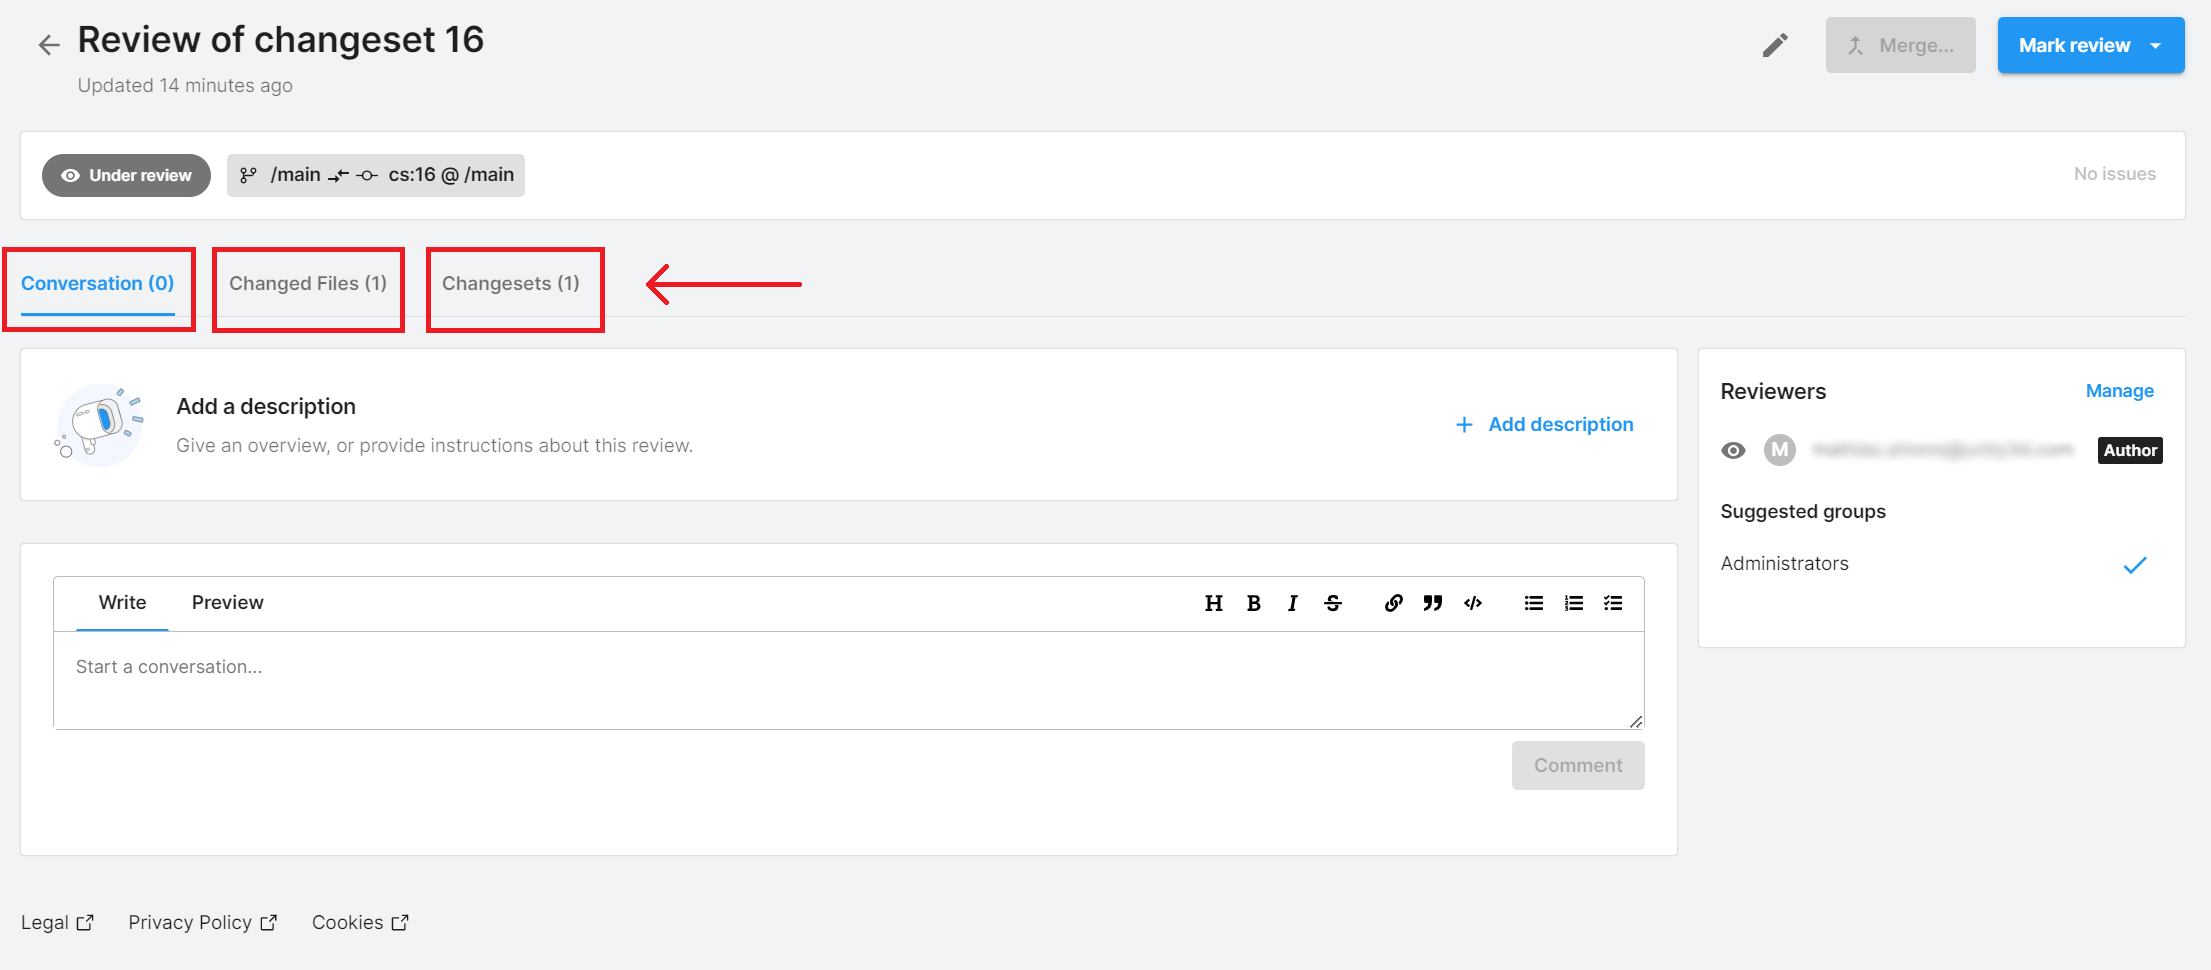
You should now see a more detailed view with three tabs: Conversation (comments), Changed Files (modified files during the review), and Changesets (all the different changesets that are part of this review). You’ll learn about what each tab does in the next step of this tutorial.
5. Review a changeset
In order to approve a changeset as a reviewer, you need to go through the changes that your collaborator has made to the project. This is what a code review is all about: looking at changes made to your project, making sure they don’t break anything, and storing them safely in the cloud with all your other project files.
To explore the options for reviewing a changeset in the DevOps dashboard, follow these instructions t:
1. Select the Changed files tab.
From here, you can do the following:
- View the status (under review, rework required, or reviewed) and read comments.
- Compare two versions of the same file side-by-side, in order to see what changed between the original version (on the left) and your newer version (on the right). This is an important step of the code review process and is sometimes called Diffing.
- Enter focus mode, to remove the unnecessary navigation bars (you can also use the following shortcut: Ctrl+Shift+F (macOS: Cmd+Shift+F).
- Mark any file as Viewed once you’re happy with a change.
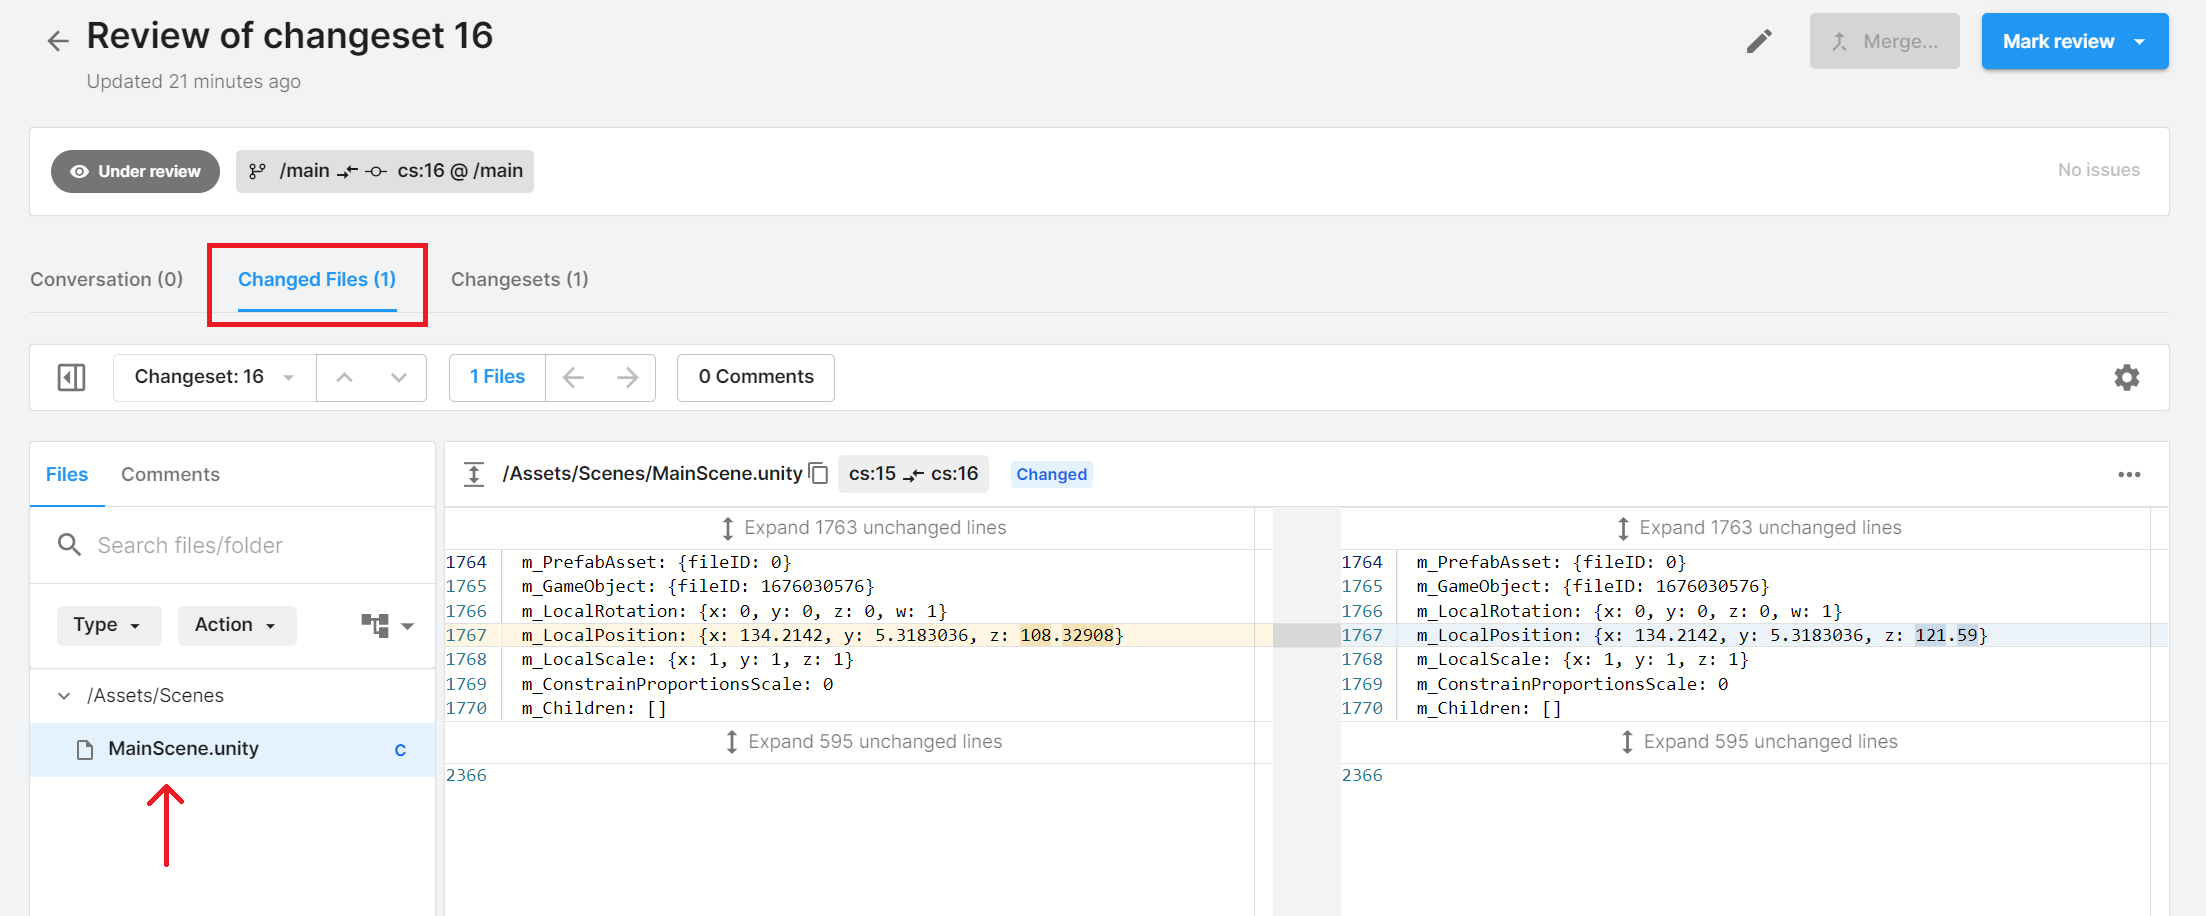
In the navigation bar, you can see the number of files available for review. Since you only added and moved a single 3D cube in your scene, this code review should only have one file to review. But keep in mind that when you start making bigger changes, you might have to review more than one file in your future code reviews.
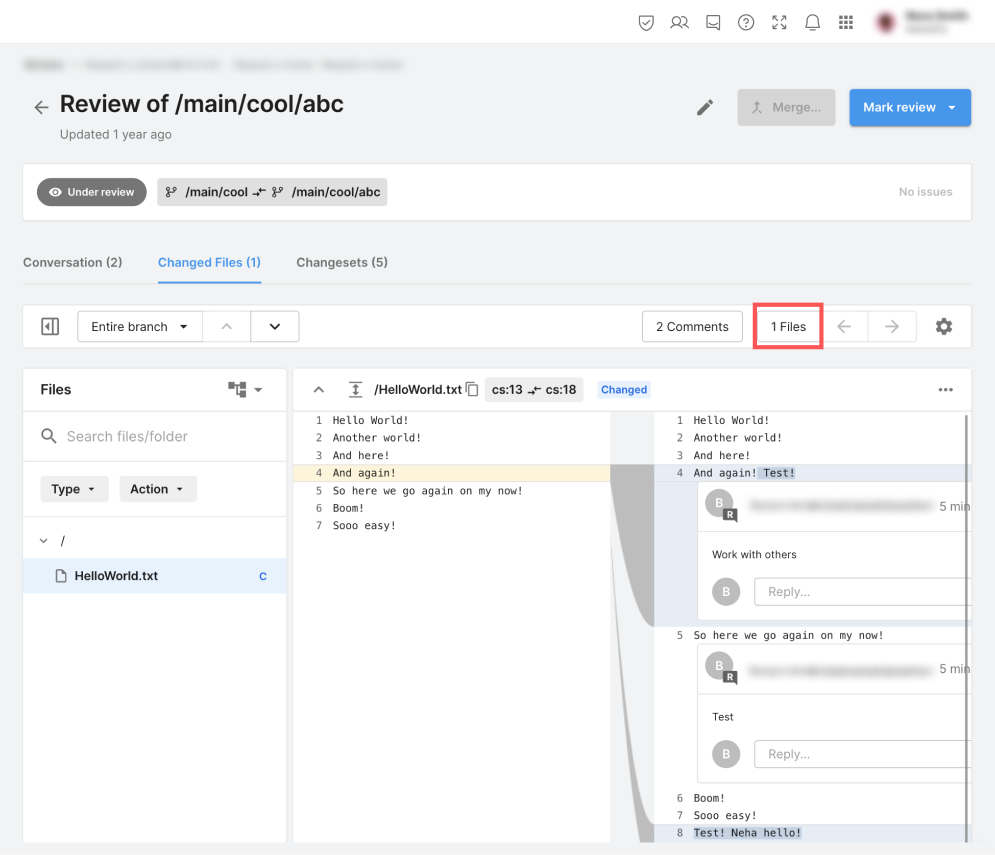
2. Select the box to display the Files tab.
All changed files are marked with a C next to the file name. Your Scene.unity file shows a blue C because you only changed the position of your cube in this changeset. It’s just a change of the cube’s properties.
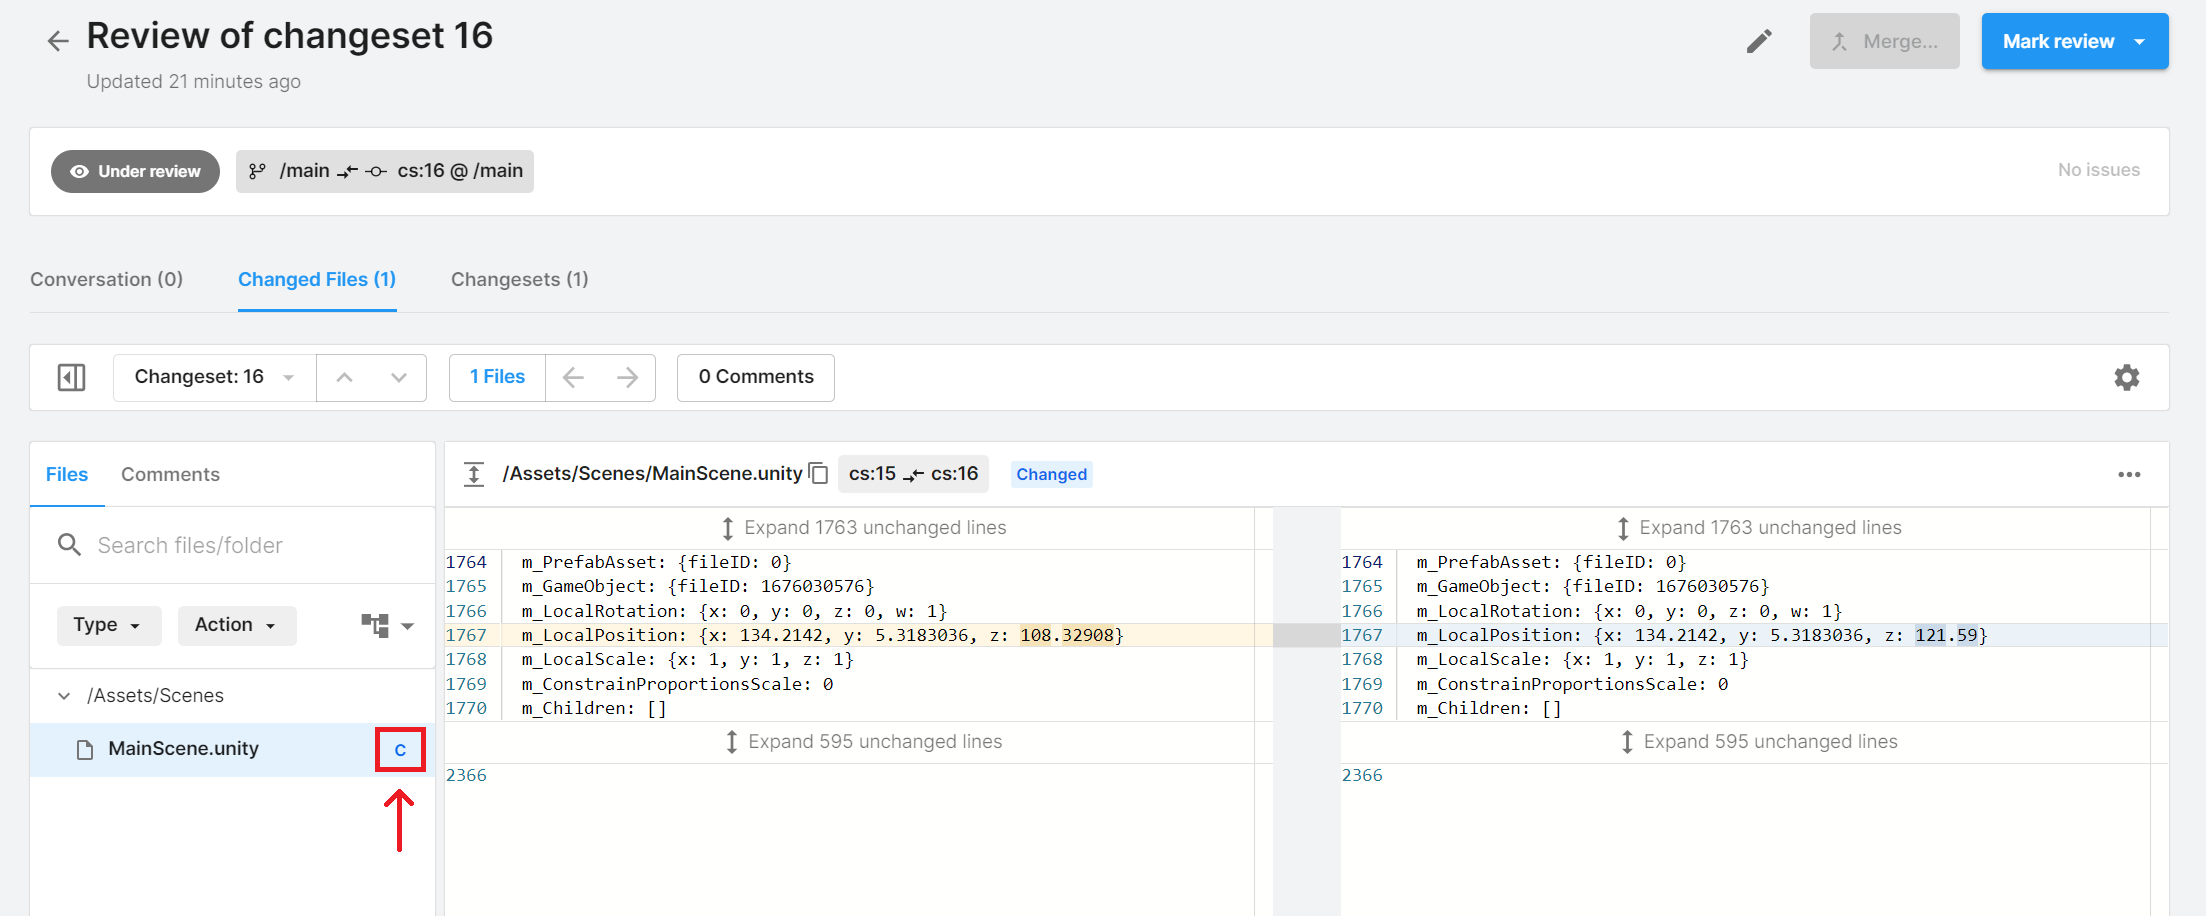
From here, you can also filter by file type and by action (Added, Changed, Deleted, and Moved).
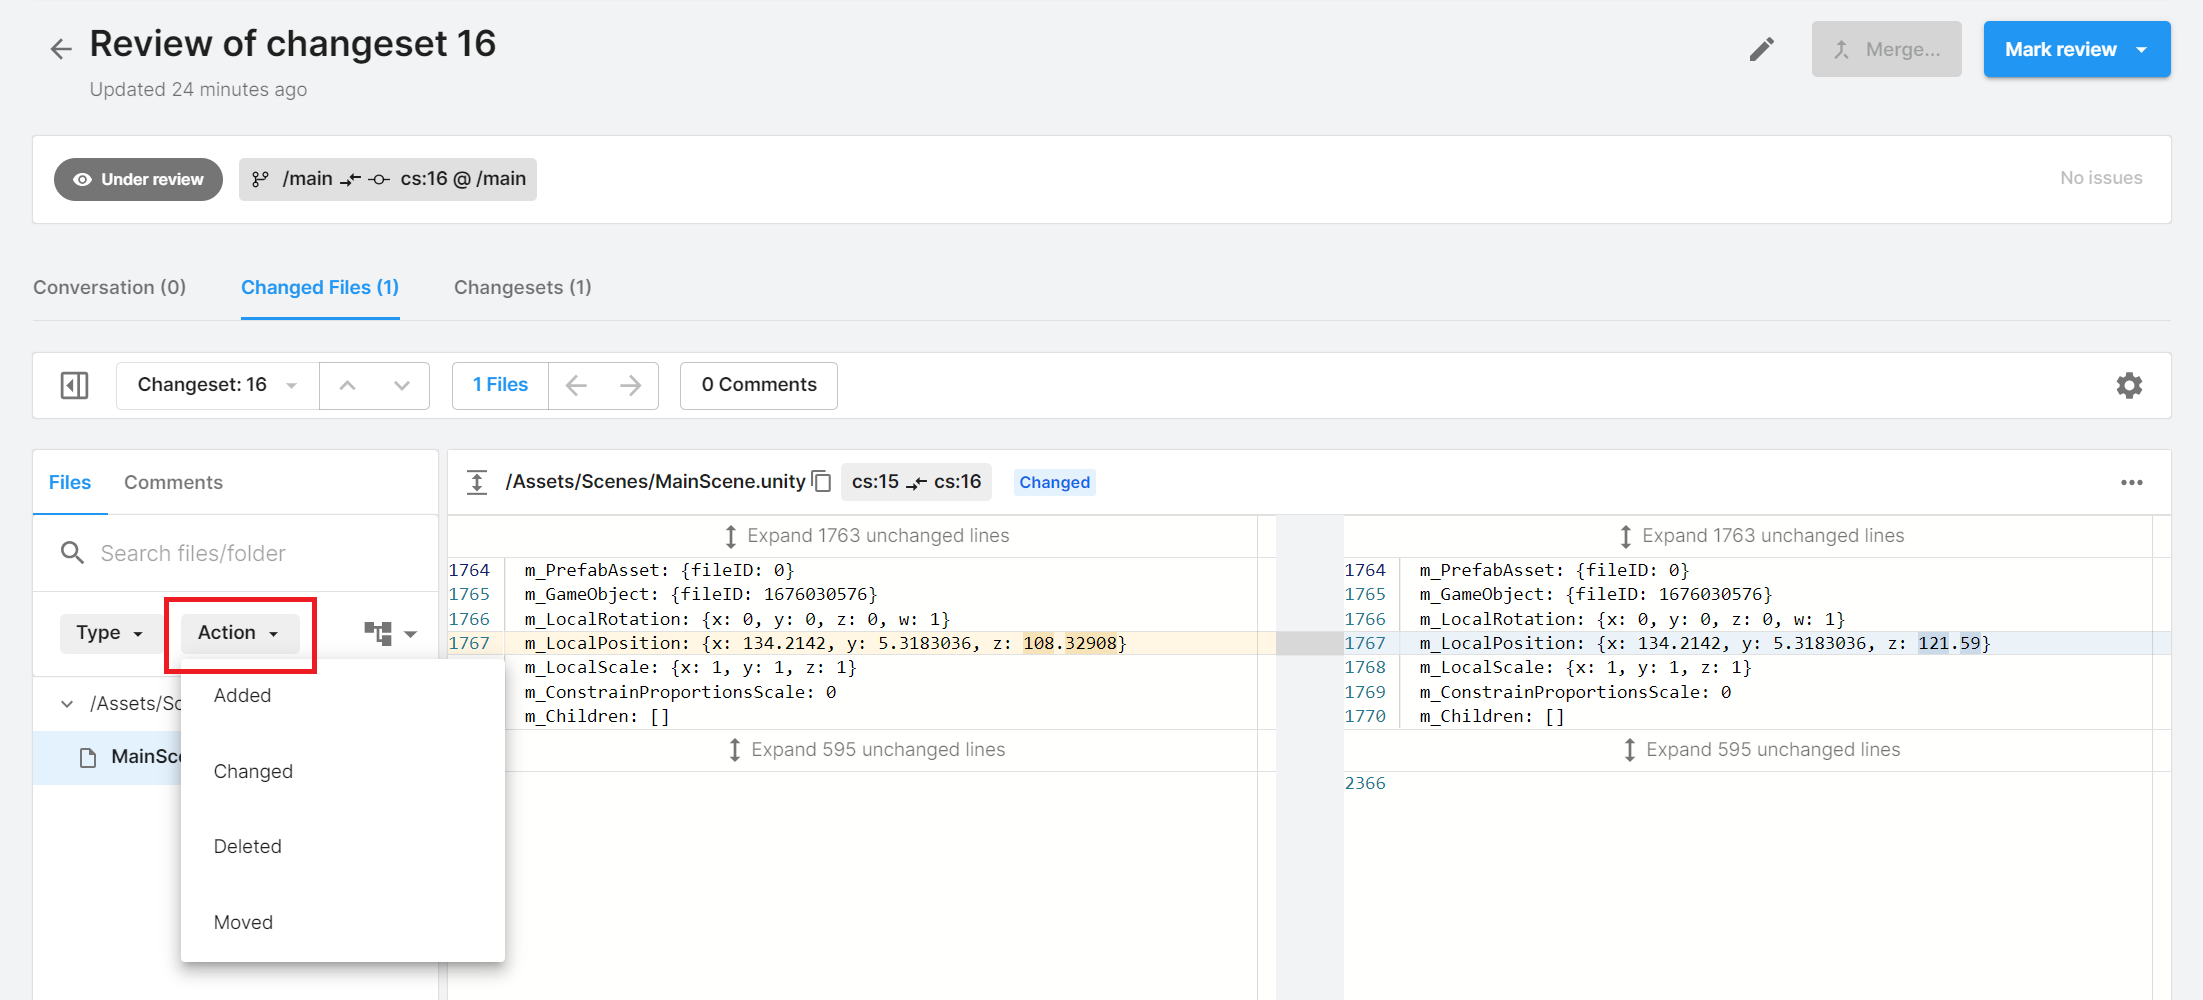
In our example, we only have one file, the MainScene.Unity, which was changed. However, when you start dealing with multiple changed files, this filtering option can be very useful.
6. Review comments on the changeset
The navigation bar also shows the number of comments made by you or other members of your team in the current code review. Let’s proceed and add a new comment in this file.
1. On the right side of the screen, hover your cursor over the line m_LocalPosition: {x:0, y:0, z: your number} and select the blue cross icon.
2. Enter “The 3D cube is too far on the right” in the Write box.
3. Use the foldout (triangle) to expand the Comment button. Select Request a change from the dropdown and select the Request a change button.
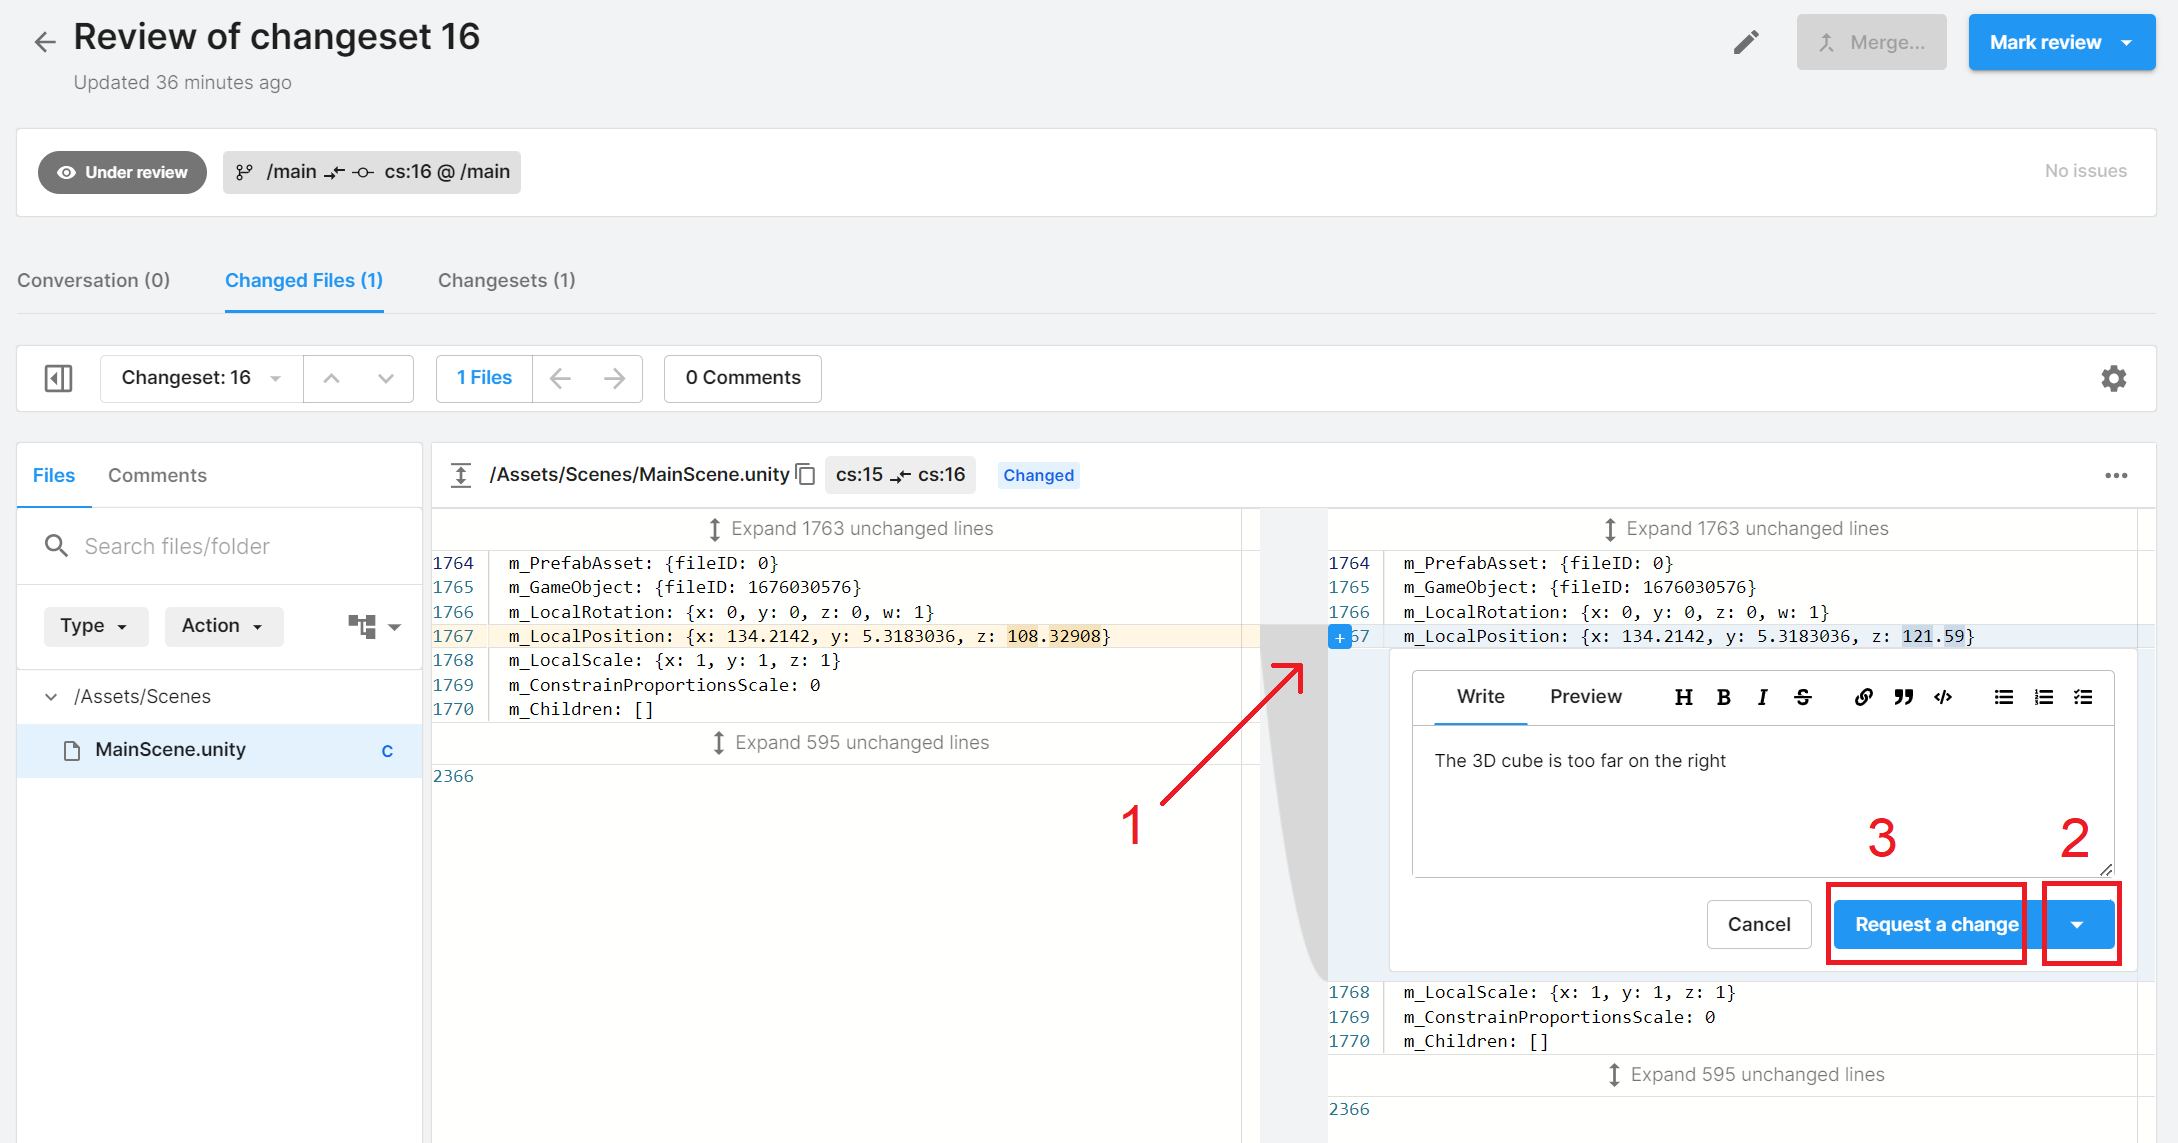
Imagine this is a comment from one of your team members. Before you can finish your code review, you need to resolve all items that have Request a change attached to them.
This is the entire purpose of the code review process: getting your changes verified and approved by others as a safeguard against bugs or other issues. Notice how three new pieces of information are displayed on the screen: a Reply box, a Resolve change request button, and a 1 unresolved issue notification at the top.
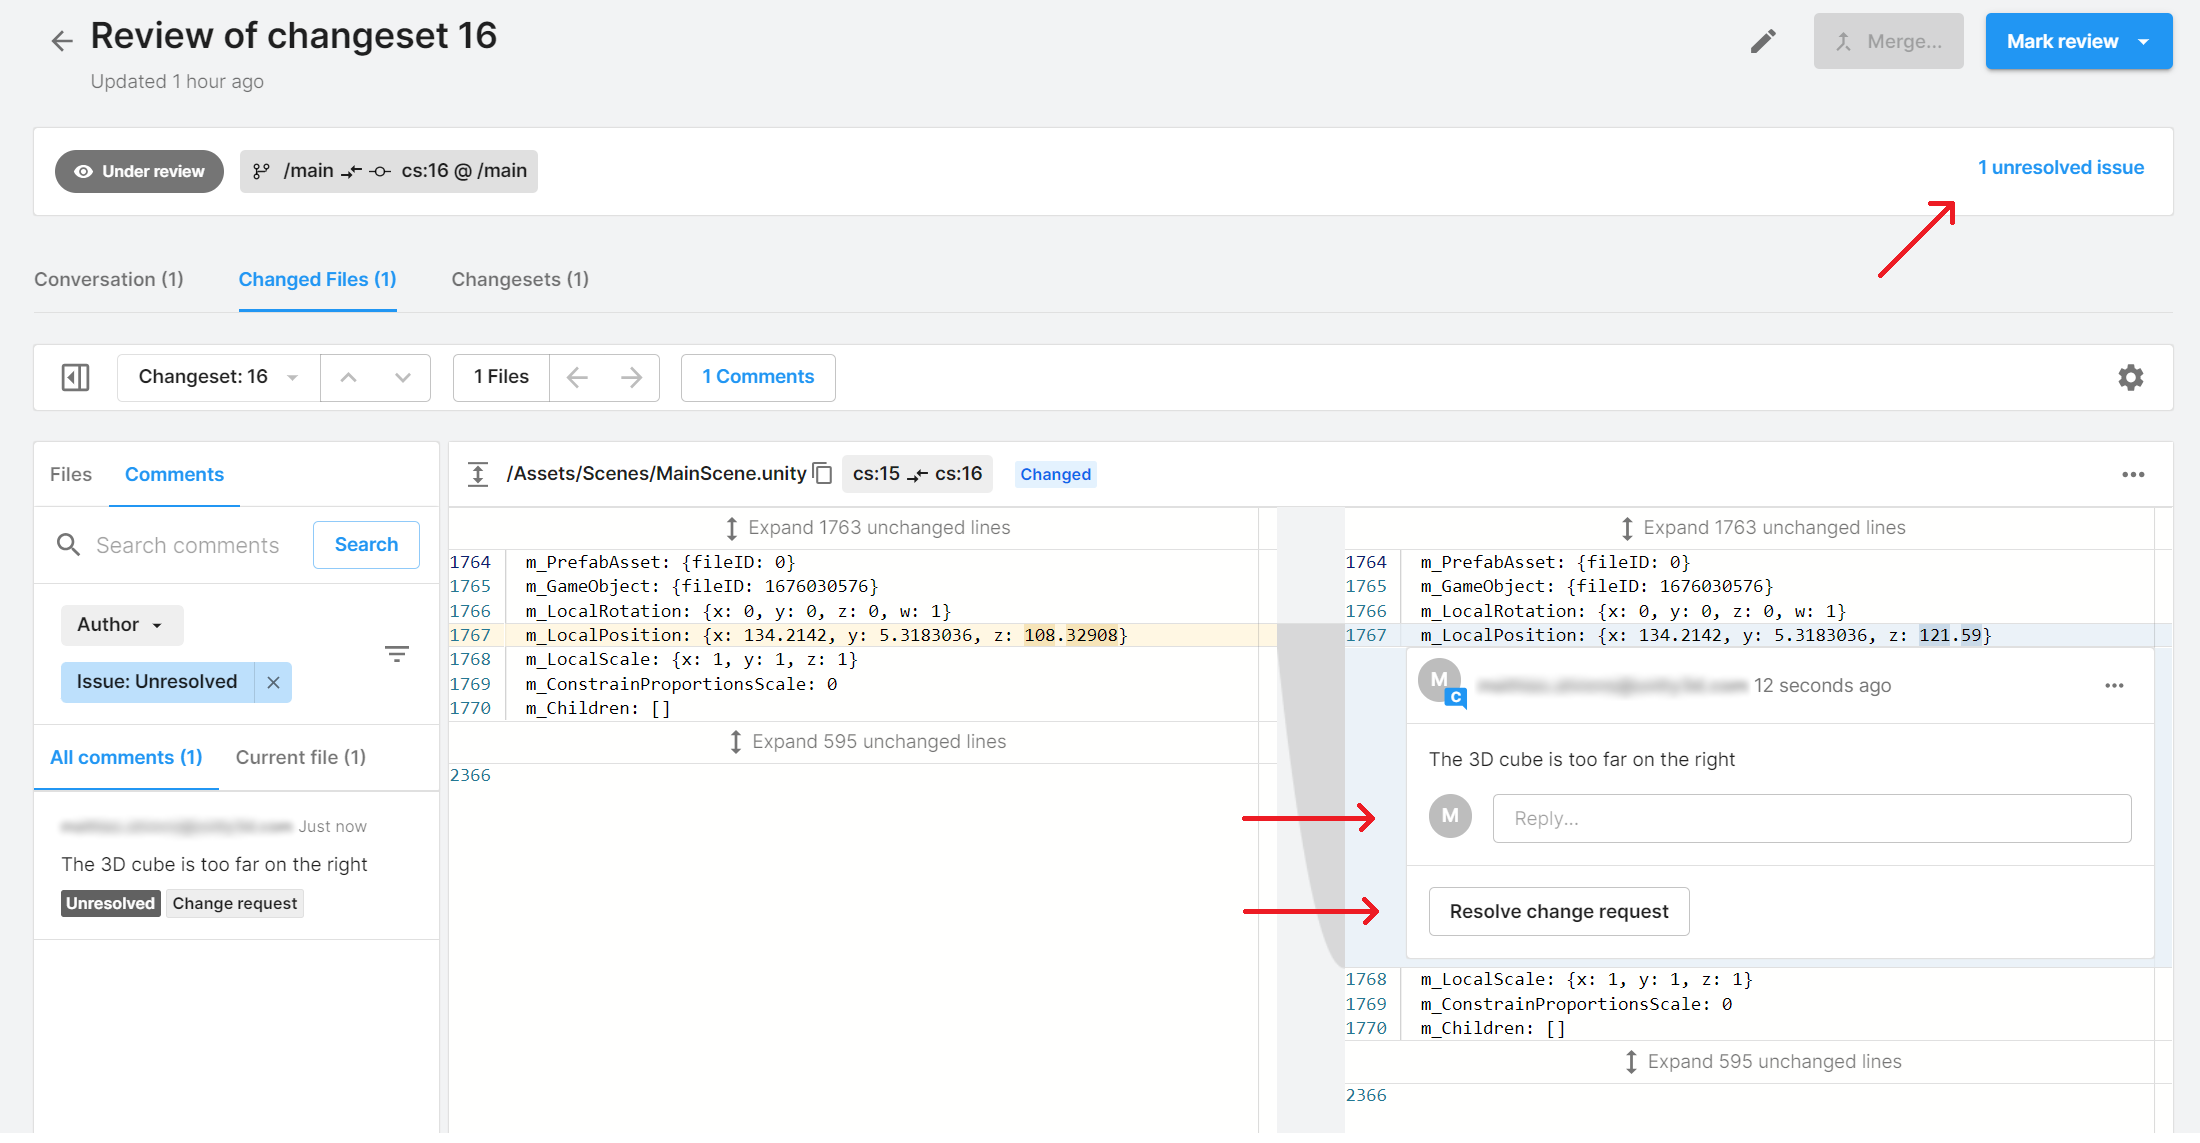
Now, let’s indicate that this code review can’t be approved for the moment, as there is one change request that needs to be fixed first.
5. Select the Mark review button at the top and select Rework required. Then, enter a comment like “I found one issue that needs to be fixed before this code review can be approved” in the Comment (optional) box and select Mark as Rework required.
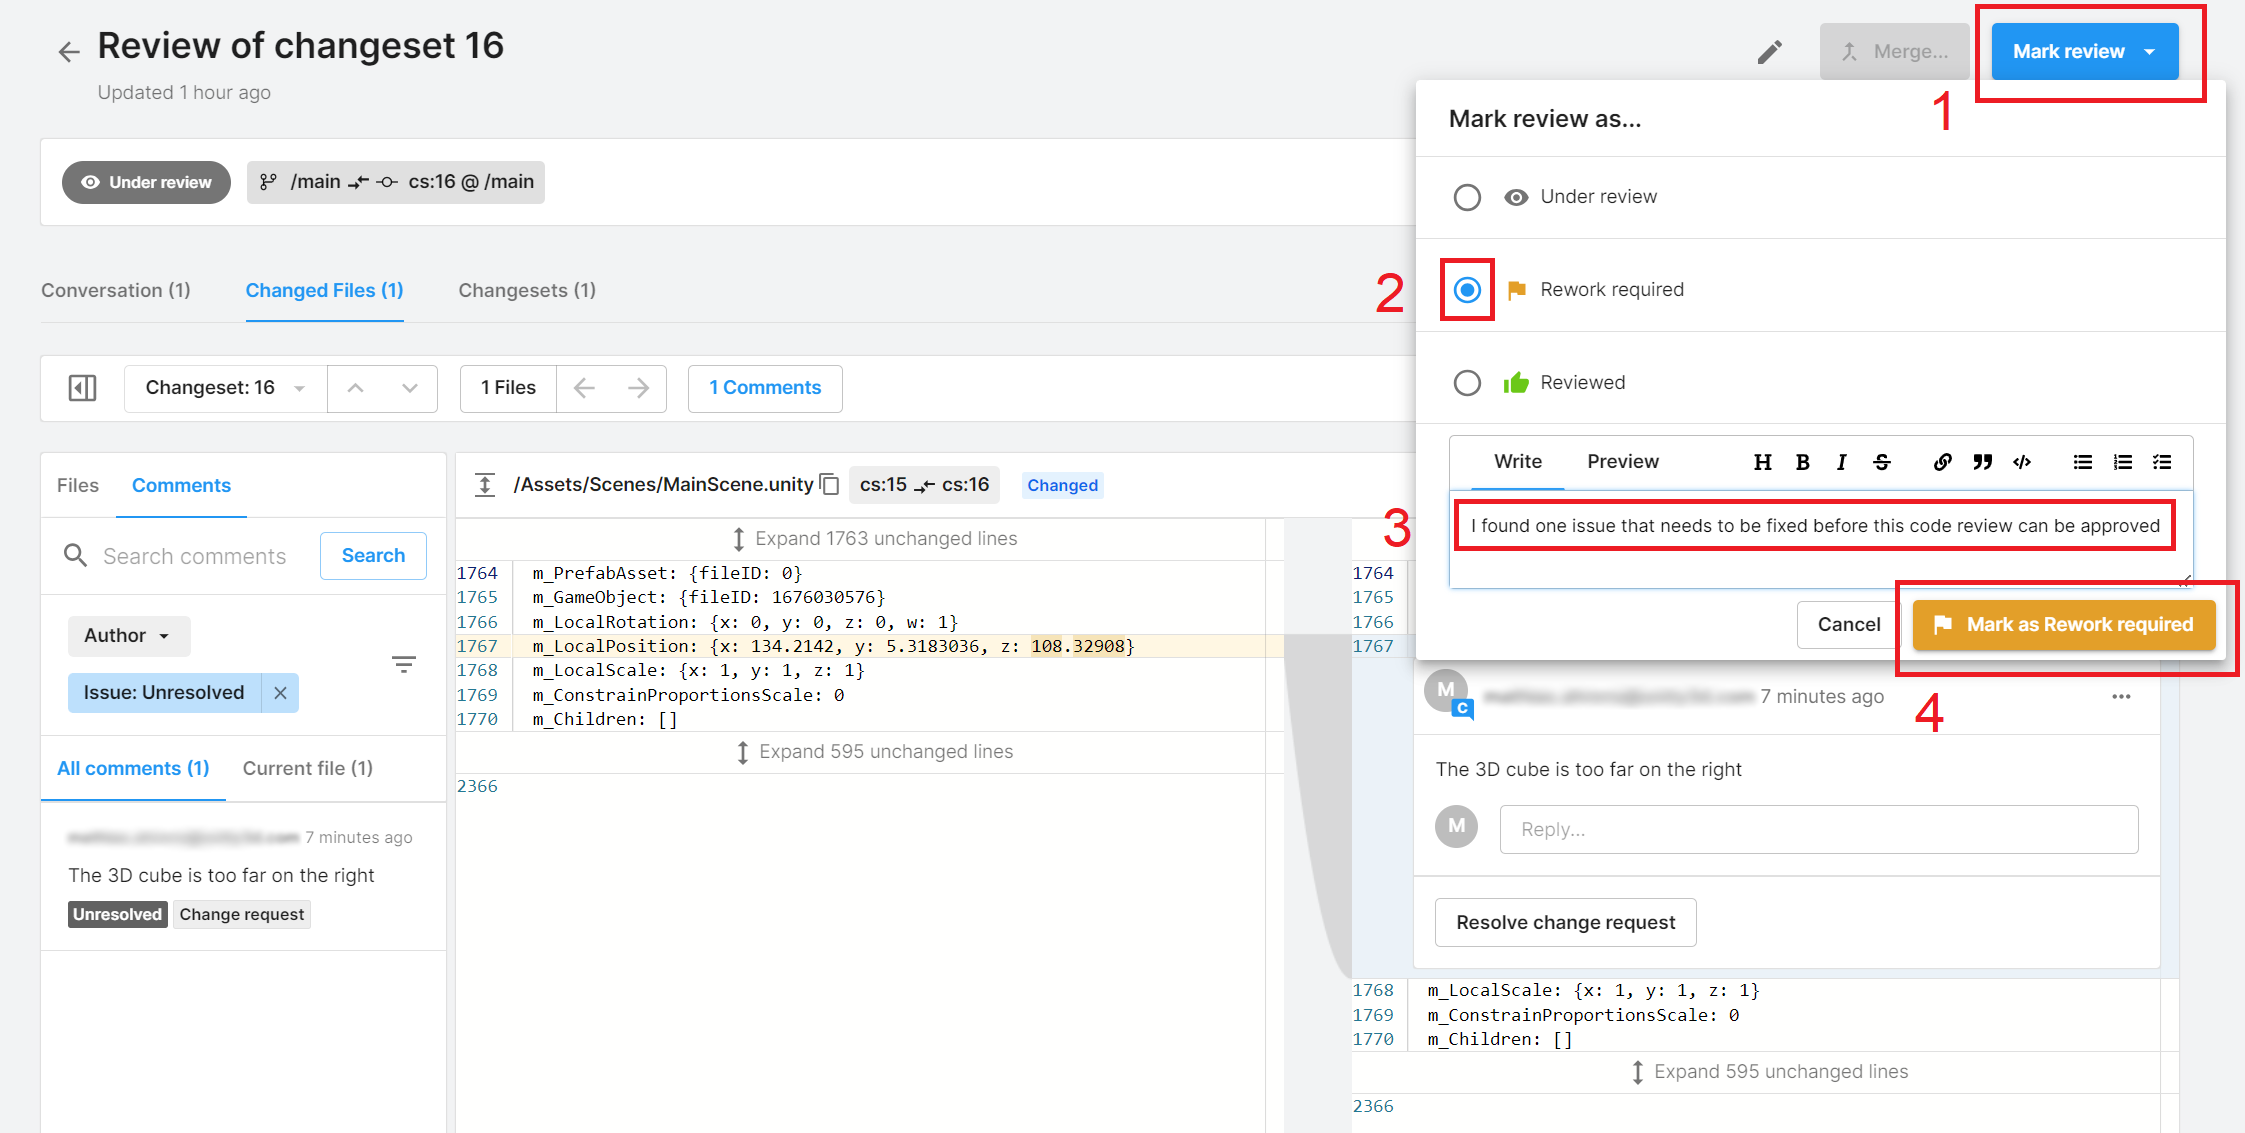
Now that you know what needs to be fixed, you need to close that request before you can finish this code review.
6. In the Unity Editor, move the 3D cube a little bit to the left in the main scene. Then save your work and check in your change in the Unity Version Control tab.
7. In the Unity Dashboard, in the Change Request window, select the Resolve change request button. Then, select the Mark as resolved button.
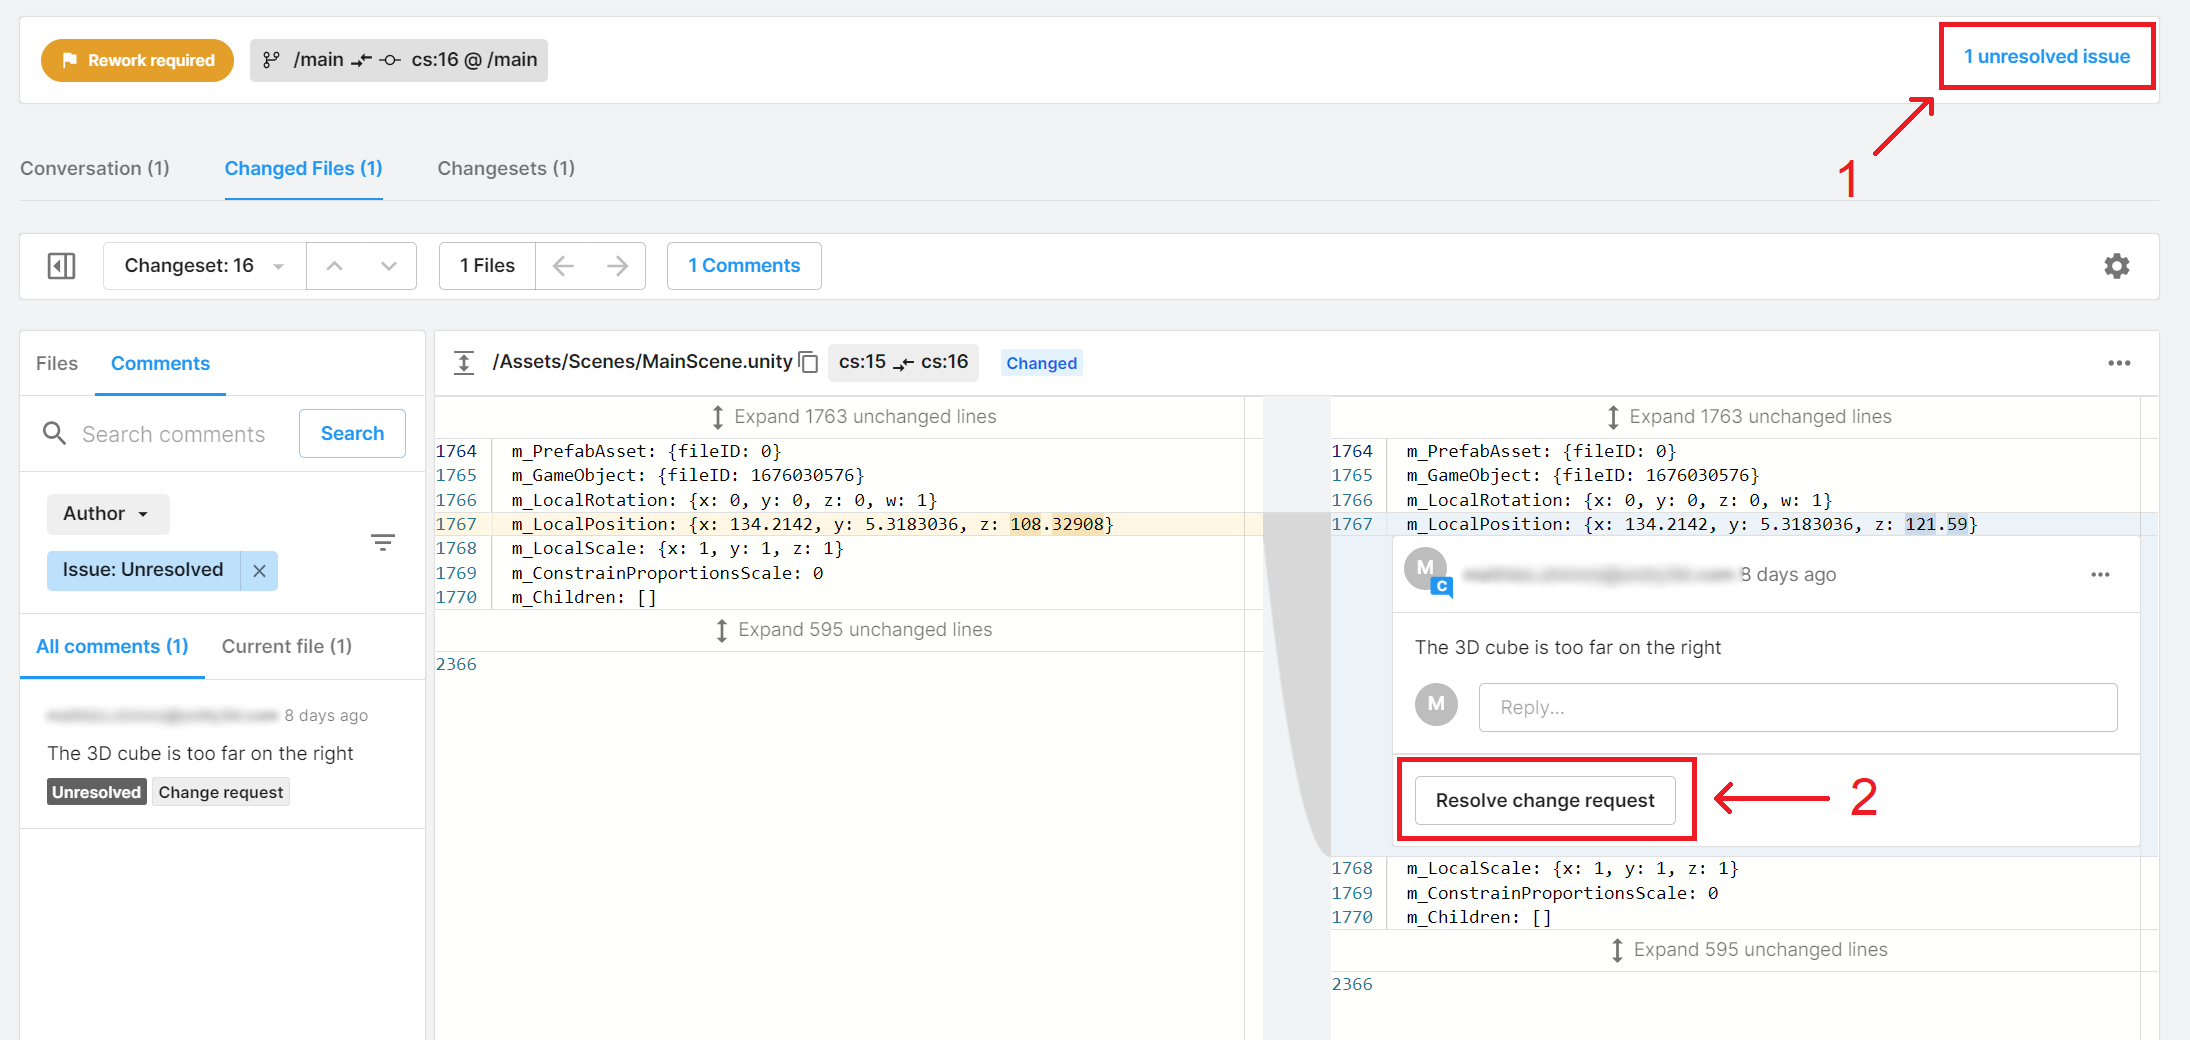
You should now see the request to change has changed to resolved
You just requested a change and fixed it, great job! Your code review can now be completed.
8. Finally, to complete the entire code review, select the Mark review button at the top and select the Reviewed option. Enter a comment like “Thanks for the fix, this code review has now been approved!” and select Mark as reviewed.
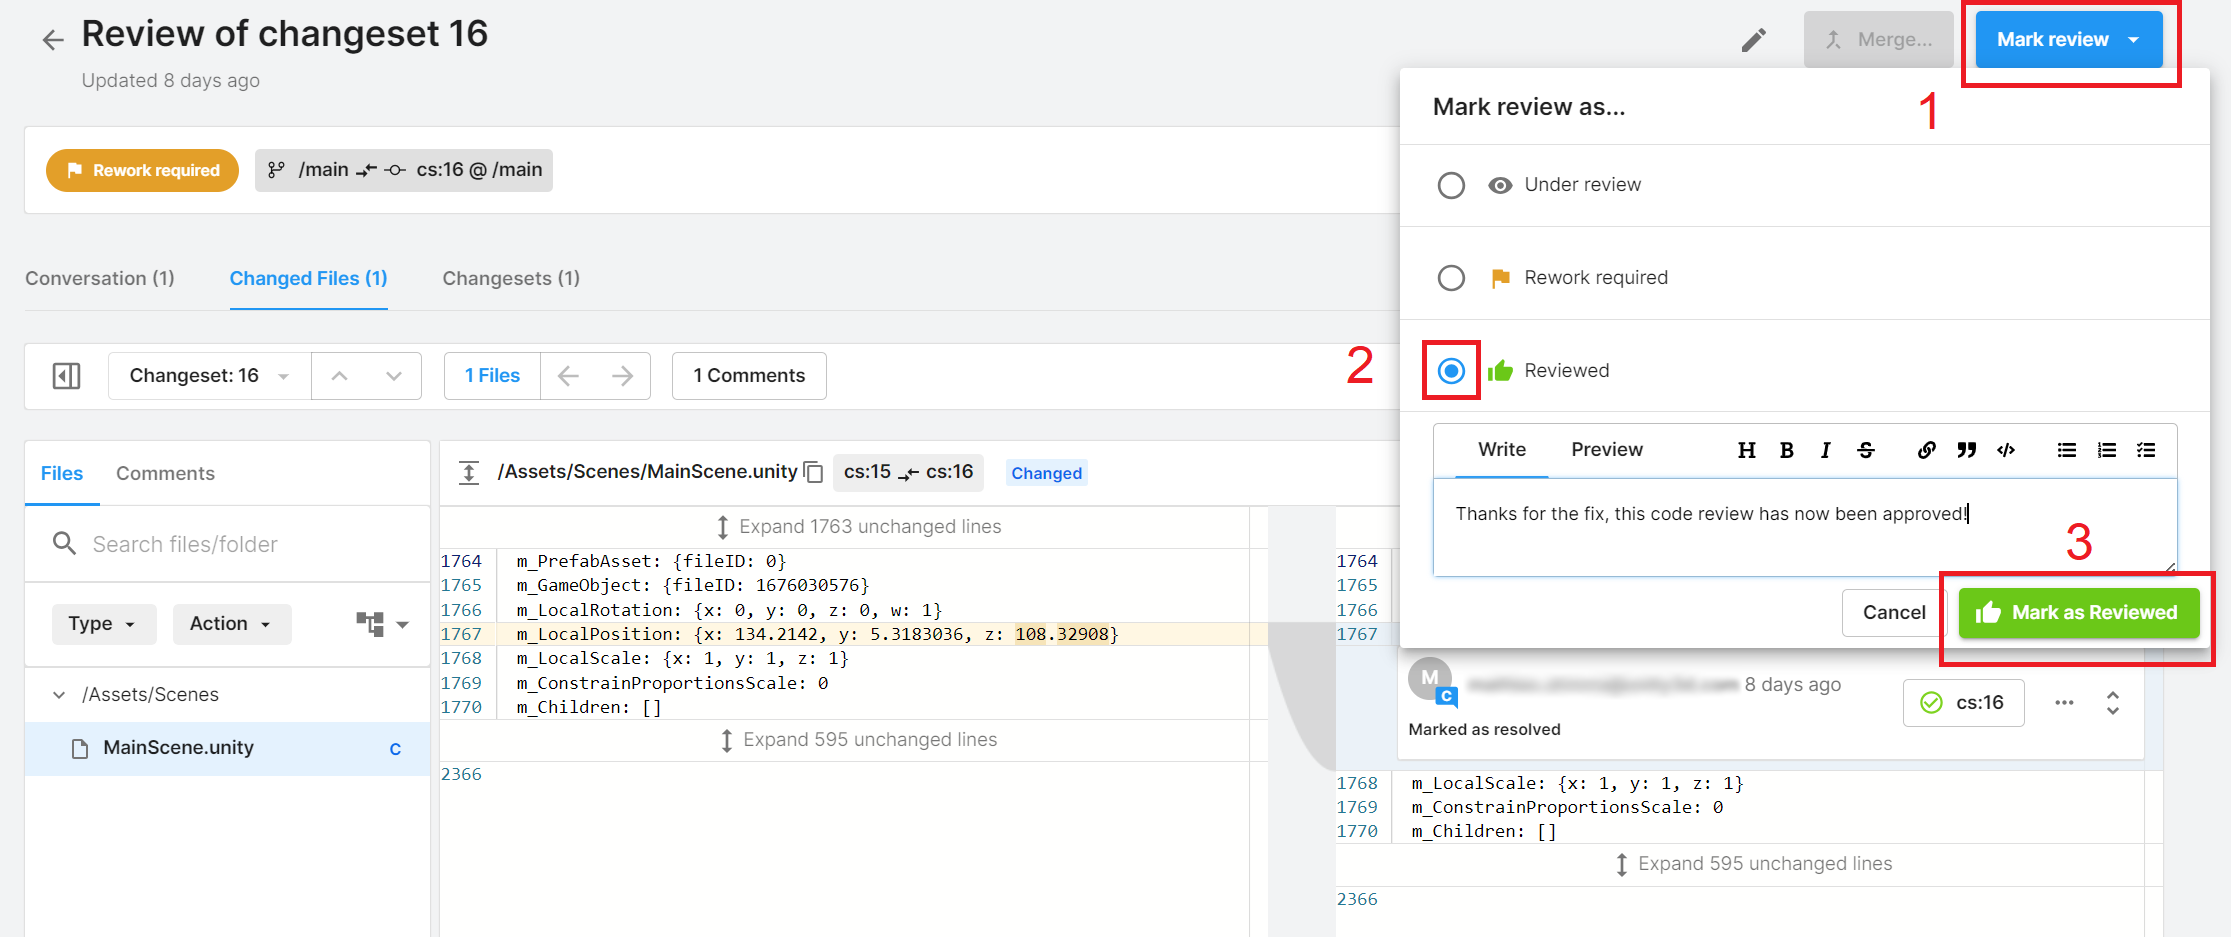
Congratulations, you just completed your first code review!
You can see its status in the Code Review tab.

7. Next steps
Congratulations, you’ve just completed your first successful code review!
Share your feedback
This learning experience was created by the Unity DevOps team. If you have any feedback, please share it in the DevOps forum.
Further resources
If you want to learn more about DevOps beyond these tutorials, here are some useful resources: