Configure the Directional Light and skybox
Tutorial
Beginner
+10XP
25 mins
232
Unity Technologies
When you create a new scene in the Unity Editor, your Scene view loads to a bright blue sky. The Directional Light is one of the two GameObjects created for you. These two things are the absolute basics of lighting in Unity, present by default to help creators get started.
By the end of this tutorial, you'll be able to:
- Identify key considerations for lighting outdoor scenes realistically.
- Describe the role of the Directional Light in a scene.
- Configure the Directional Light in a scene to achieve common effects.
- Describe the role of a skybox in a scene.
- Create a procedural skybox.
Languages available:
1. Overview
When you create a new scene in the Unity Editor, your Scene view loads to a bright blue sky. The Directional Light is one of the two GameObjects created for you. These two things are the absolute basics of lighting in Unity, present by default to help creators get started.
By the end of this tutorial, you'll be able to:
- Identify key considerations for lighting outdoor scenes realistically.
- Describe the role of the Directional Light in a scene.
- Configure the Directional Light in a scene to achieve common effects.
- Describe the role of a skybox in a scene.
- Create a procedural skybox.
As you do this, you’ll begin the process of converting the outdoor scene from early evening to late-night lighting.
2. How do you light a scene realistically?
As you learned in Get started with lighting, the way that light works in Unity uses physically-based rendering to simulate the way that light works in the real world.
Lighting a project in a way that is functionally effective and evocative is one of the key challenges for lighting artists, as our expert creators share:
But what does that mean in practice?
3. Identify the types of light source
There are all sorts of spaces you might want to create in a real-time experience: indoor and outdoor spaces, realistic (to some degree) or entirely fantastical. Even if you’re working on a fantasy or science fiction project, lighting can help ground a real-time experience and make it feel more immersive to the person experiencing it.
Identifying the required light sources for a scene is a key initial step for lighting design and implementation. This includes:
- Natural lighting, which is often the sun or moon.
- Motivated lighting, which mimics a specific realistic source of light in the scene — for example a street lamp or car headlights.
- Key lighting, which is light without an identifiable source which illuminates an object of focus in a scene.
- Ambient lighting (also called diffuse environmental light in Unity), which is the other light contributing to a scene that doesn’t come from a specific source object.
Note: There are more kinds of lighting than this, but these four are a great starting point for this learning experience!
You might not know the exact lighting setup that you want to achieve immediately, but by considering these kinds of lighting and thinking about the mood and aesthetic that you’re trying to create, you can come up with an initial plan.
Your goals for the outdoor scene
Take a moment to think about converting the outdoor scene to have late-night lighting and note down your ideas:
- What are the significant light sources going to be?
- What additional light sources would you like to add?
- What different moods could you create, depending on how you configure those lights?
Over the next few tutorials, use these initial thoughts as a guide when you have the opportunity to customize the scene!
4. Configure the Directional Light
In outdoor settings, a common natural source of light is the sun during the day and the moon at night. In Unity, whenever you create a scene it comes with a Directional Light already added to the Hierarchy; this light functions as your sun or moon.
A Directional Light casts straight parallel rays of light in the direction indicated by the gizmo (a graphic overlay associated with a specific GameObject and displayed in the Scene view):
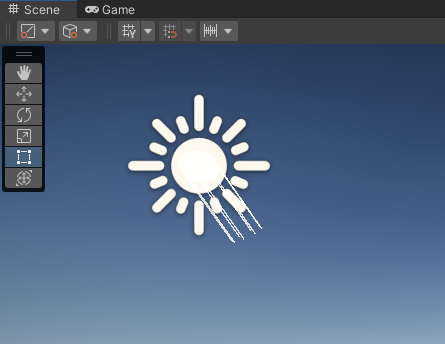
Light waves naturally want to spread out, but in the case of the Directional Light you don’t get that effect because it’s very far away from the scene (as the sun is very far away from the Earth). Instead, it casts straight parallel rays of light into your scene.
You can position the Directional Light anywhere in your scene and it won’t impact the light being cast. You need to explicitly change the direction of the light to change it in your scene.
Test it out:
1. Open the Creative Core: Lighting project in the Unity Editor, if you haven’t already done so.
2. In the Project window, go to Assets > CreativeCore_Lighting > Scenes and open TutorialScene_Lighting_Outdoor. The previous scene you reviewed was a polished example — this is the scene that you’re going to be working in for the first few tutorials. At the moment you should just see an empty amphitheater with a sky background.
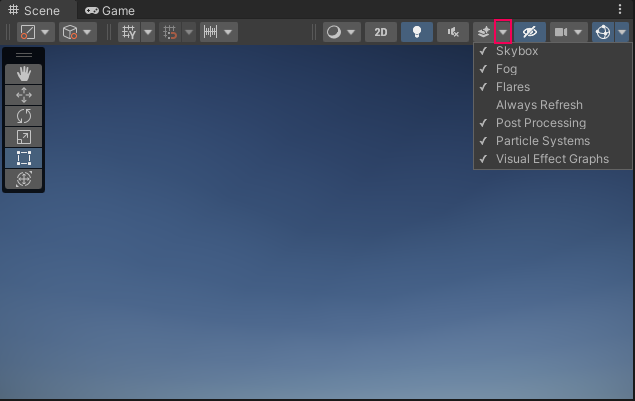
If you only see grey in the Scene view, use the Effects dropdown in the Scene view control bar to enable the skybox.
3. In the Hierarchy, expand the Lighting GameObject.
4. Select the Directional Light GameObject. You should notice it above the central space in the amphitheater. If your icons are set large enough, you should see a sun icon as well as the light direction gizmo.
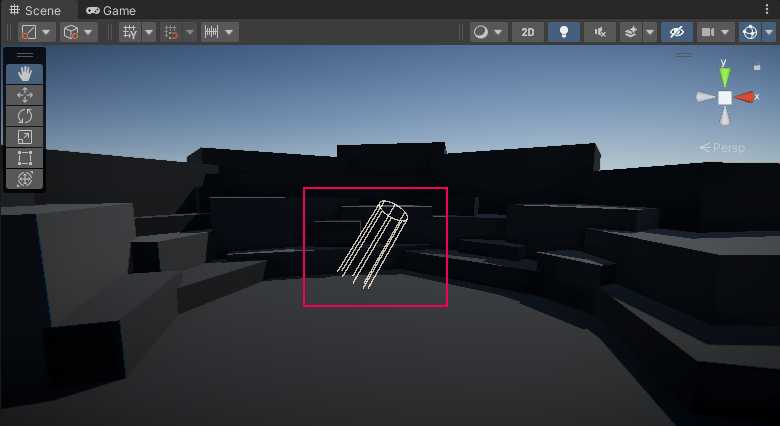
Tip: If you don’t see the icon and want to, select the Gizmos dropdown in the Scene view control bar and increase the 3D Icon size using the slider.
5. Try moving the Directional Light to different positions in the scene: closer or further away. You should notice that there’s no difference in the lighting caused by these changes — unlike the real sun, the position of the Directional Light doesn't change the direction of the light.
6. Use the Rotate tool (E) to change the direction of the Directional Light. You should notice that the sky that’s already in the scene responds to its changing position.
7. With the Directional Light GameObject still selected, go to the Inspector and find the Color property in the Light component.
8. Select the color box to open the Color picker window and choose a new shade. Pay attention to the amphitheater structure — this is where it’s easiest to see the impact of the color change. This can help you set a mood in the scene.
This effect can be relatively subtle, and isn’t necessarily suited to the way the scene is currently configured. A mysterious purple or ominous red could have much more impact if this was a scene set late at night rather than early in the day. Feel free to experiment with different colors now, but you’ll have the opportunity to adjust the Directional Light more at the end of this tutorial.
5. Advanced uses of Directional Lights
There are some more advanced uses of Directional Lights that are beyond the scope of this introductory learning experience. You may find it helpful to be aware of these situations and their complexity, particularly if you are interested in developing your lighting skills beyond Creative Core: Lighting.
Creating multiple functional suns or moons
You can add multiple Directional Lights to a scene, but only one of them will properly function as the sun or moon unless you specially configure your project to account for that.
Time of day transitions
You may have played games where the time of day changes as you play rather than staying the same. This can be done in Unity, but it is beyond the scope of this learning experience.
6. Get started with the skybox
Now that you’ve gone through the basics of the Directional Light, it’s time to focus on the sky.
Sky backgrounds in Unity are created using a special type of material called a skybox. Skyboxes are cubes with a different texture on each face. When you use a skybox to render a sky, Unity essentially places your scene inside the skybox cube. Unity renders the cube first, so the sky renders behind anything else in your scene.
Although the default skybox for scenes is just a basic daytime sky on a fine day, this background could include environmental features in the distance. These help contribute to a sense of space and depth, and include:
- Landscape features — consider a cinematic set with a distant alpine mountain backdrop
- Buildings — for example, a vast fantasy city just visible on the horizon
The alien video game shop guided project, for example, has a fun skybox to fit its mood and out-in-space theme.
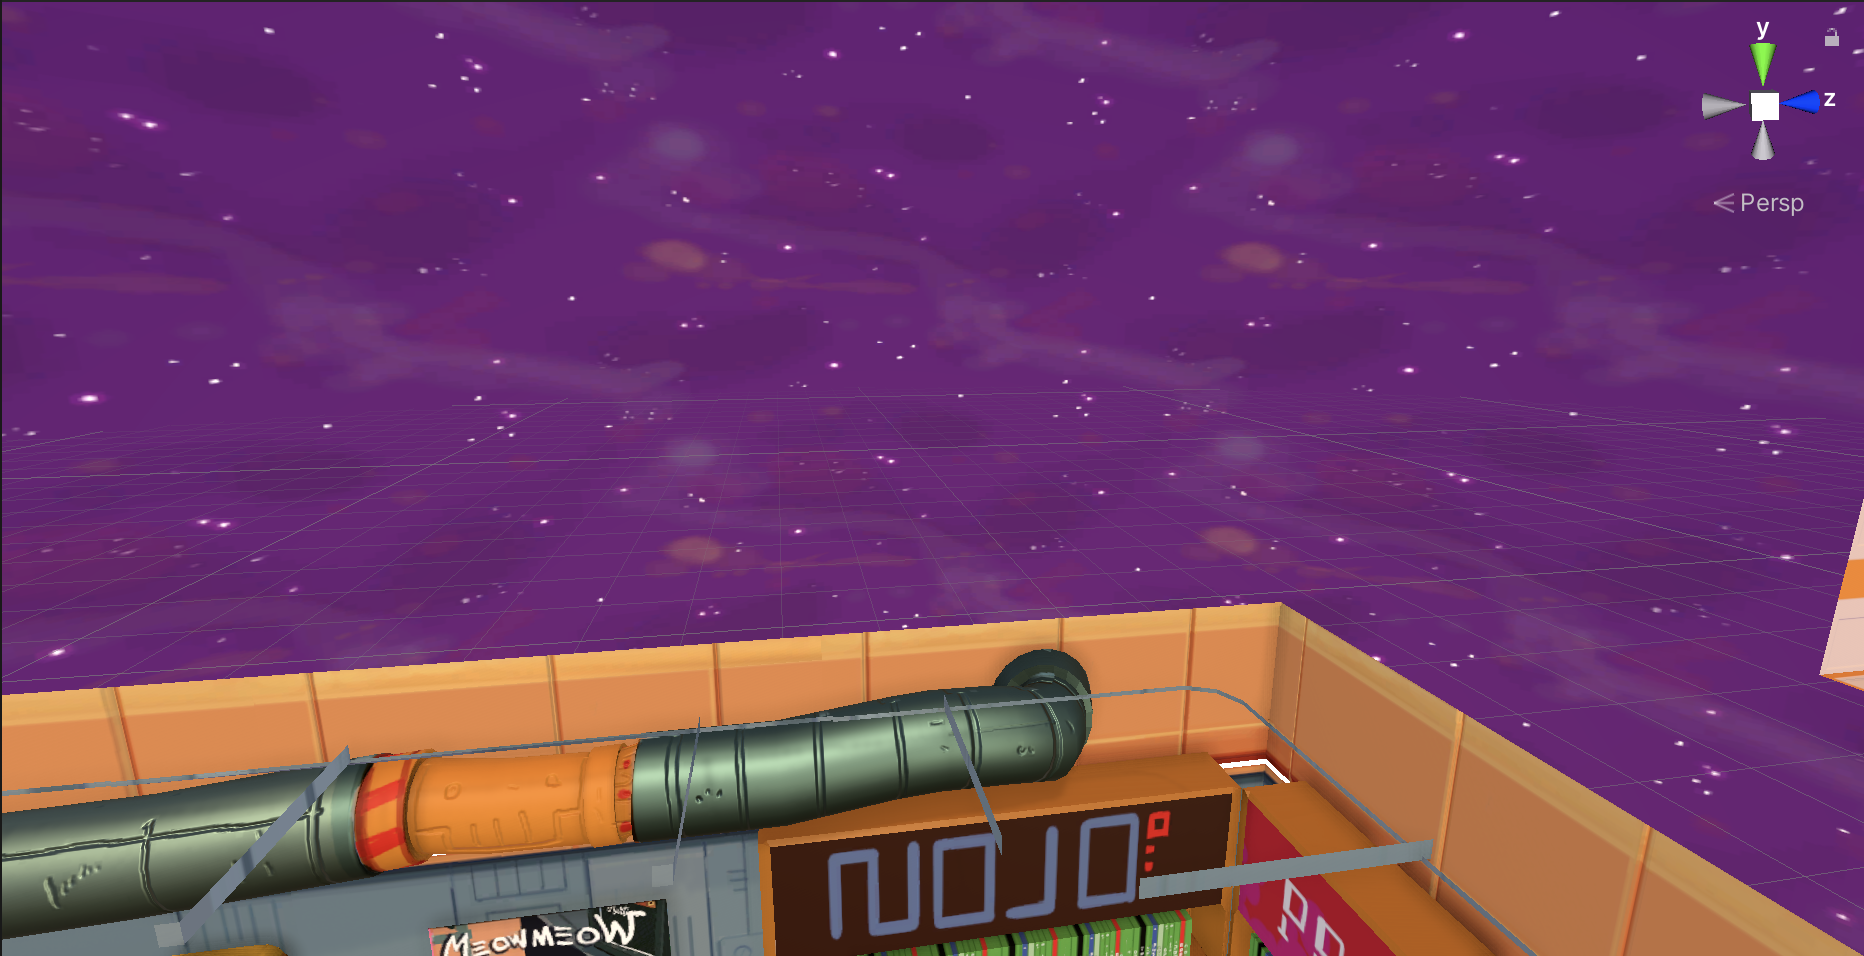
The materials that are applied to a skybox cube need to use a Skybox shader. There are two categories of Skybox shader:
- Textured: A group of Shaders that use material textures to generate the skybox.
- Procedural: A shader that uses properties on the material to generate the skybox.
In this learning experience, you’ll focus on the procedural Skybox shader.
7. Create a new procedural skybox
Next, switch the default skybox for a custom procedural skybox:
1. In the Project window, navigate to Assets > CreativeCore_Lighting > Materials.
2. Right-click in the window and select Create > Material. Give your new material a clear name, to help you find it later.
3. In the Inspector, go to the Shader property and select Skybox > Procedural using the dropdown.

Like other shaders you've seen if you completed Creative Core: Shaders and Materials, this shader has a certain set of properties that you can configure using a material.
4. Before you configure your skybox, it’s helpful to render it in the scene so you can see the impact of your changes. Go to where you have docked the Lighting window and select the Environment tab.
5. Drag your new material to the Skybox Material property and release to assign it.
6. Now return to your custom material’s settings in the Inspector. Take a moment to review the properties you can configure:
- Sun: This is the method that Unity uses to create a sun disk in the skybox. Set this to Simple.
- Sun Size: This is the size modifier for the sun disk — the higher the value, the larger it will appear in the sky.
- Atmosphere Thickness: The density of the atmosphere — the more dense an atmosphere, the more light will be absorbed by it.
- Sky Tint: A color tint for the sky.
- Ground: The color of the area below the horizon (the ground).
- Exposure: This adjusts the sky’s exposure. Larger values produce a more exposed skybox that seems brighter.
Next, you’ll experiment with these to customize your skybox.
8. Create a late-night look
Now you’re ready to apply what you’ve learned as you begin to configure this scene for a late-night look. Take this opportunity to experiment with the different atmospheres you can achieve just by configuring your custom procedural skybox material and the Directional Light — relatively small changes can sometimes make things feel drastically different!
Take a look at the example below:
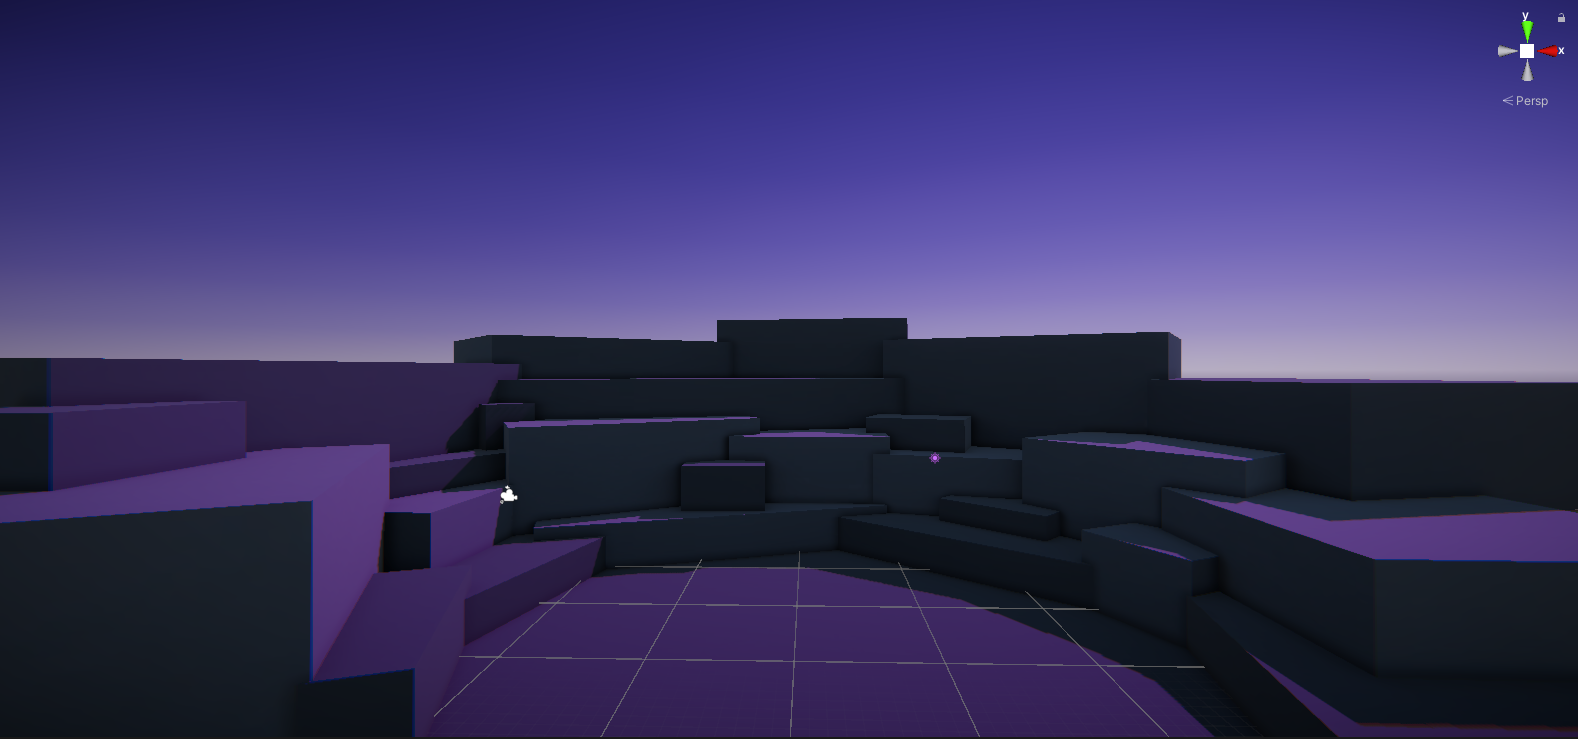
Here the sky has a purple tint and it’s still quite bright, especially close to the horizon line. The pink-purple color of the Directional Light is now easy to see, but the sky and Directional Light are currently providing a very stylized look.
Let’s say that we wanted to develop this example to create a more realistic-feeling night look. We could try adjusting the colors and slightly decreasing the Atmospheric Thickness value in the procedural skybox material:
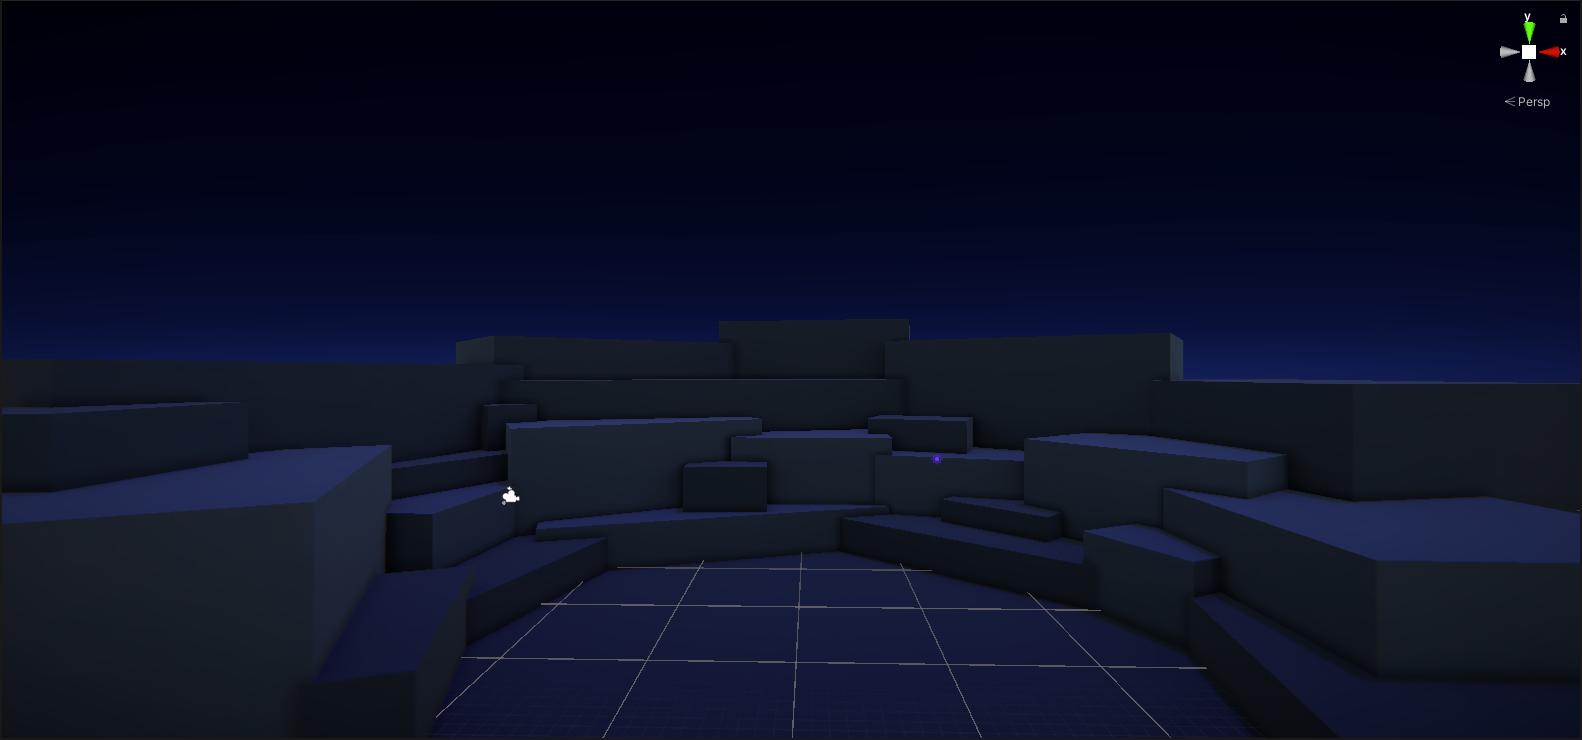
That’s a lot better! As you work on your own, remember to save your changes regularly.
Tips:
- The skybox changes can be much more dramatic, but don’t forget to adjust your Directional Light configuration too. Small changes to the Color property can have a subtle but effective impact on the mood of the scene.
- Just like the example, it’s absolutely normal to iterate your lighting a few (or many) times until you achieve a result that you’re happy with.
9. Next steps
Next in your journey to style a late-night scene, you’ll turn your attention to other light sources and shadows.