
Debug the App
Exercise
Beginner
+60XP
30m
Unity Technologies
In this exercise, you will be challenged to debug a provided project so that it can run as intended.
Resources
Languages available:
1. Overview
As a programmer, you’re going to spend a lot of time debugging code. By debugging your scripts on a regular basis, you’ll improve your code comprehension and be able to anticipate problems during the development process. In this challenge, you’ll be tasked with debugging an existing project and making it run as intended.
2. Download the provided assets and import them into a new Unity project
To begin this challenge, you must first download the challenge assets and import them into a new Unity project:
1. Download ErrorProject.zip.
2. To unzip the contents of the folder, right-click the folder and select Extract All (macOS: double-click the zipped folder). Inside you will find ErrorProject.unitypackage.
Note: While it is possible to view the contents of a folder while it’s still zipped, the data is still compressed. Attempting to import the contents of the Error Project folder while it’s still zipped will result in an error message in Unity. Ensure that you have unzipped the folder before proceeding to the next step.
3. Create a new Unity project using the 3D template — remember to use one of the supported versions of Unity, such as 2022.3 LTS, 6000.0 LTS or 6000.3 LTS.
4. Import ErrorProject.unitypackage into your new 3D template project.
3. Review the project
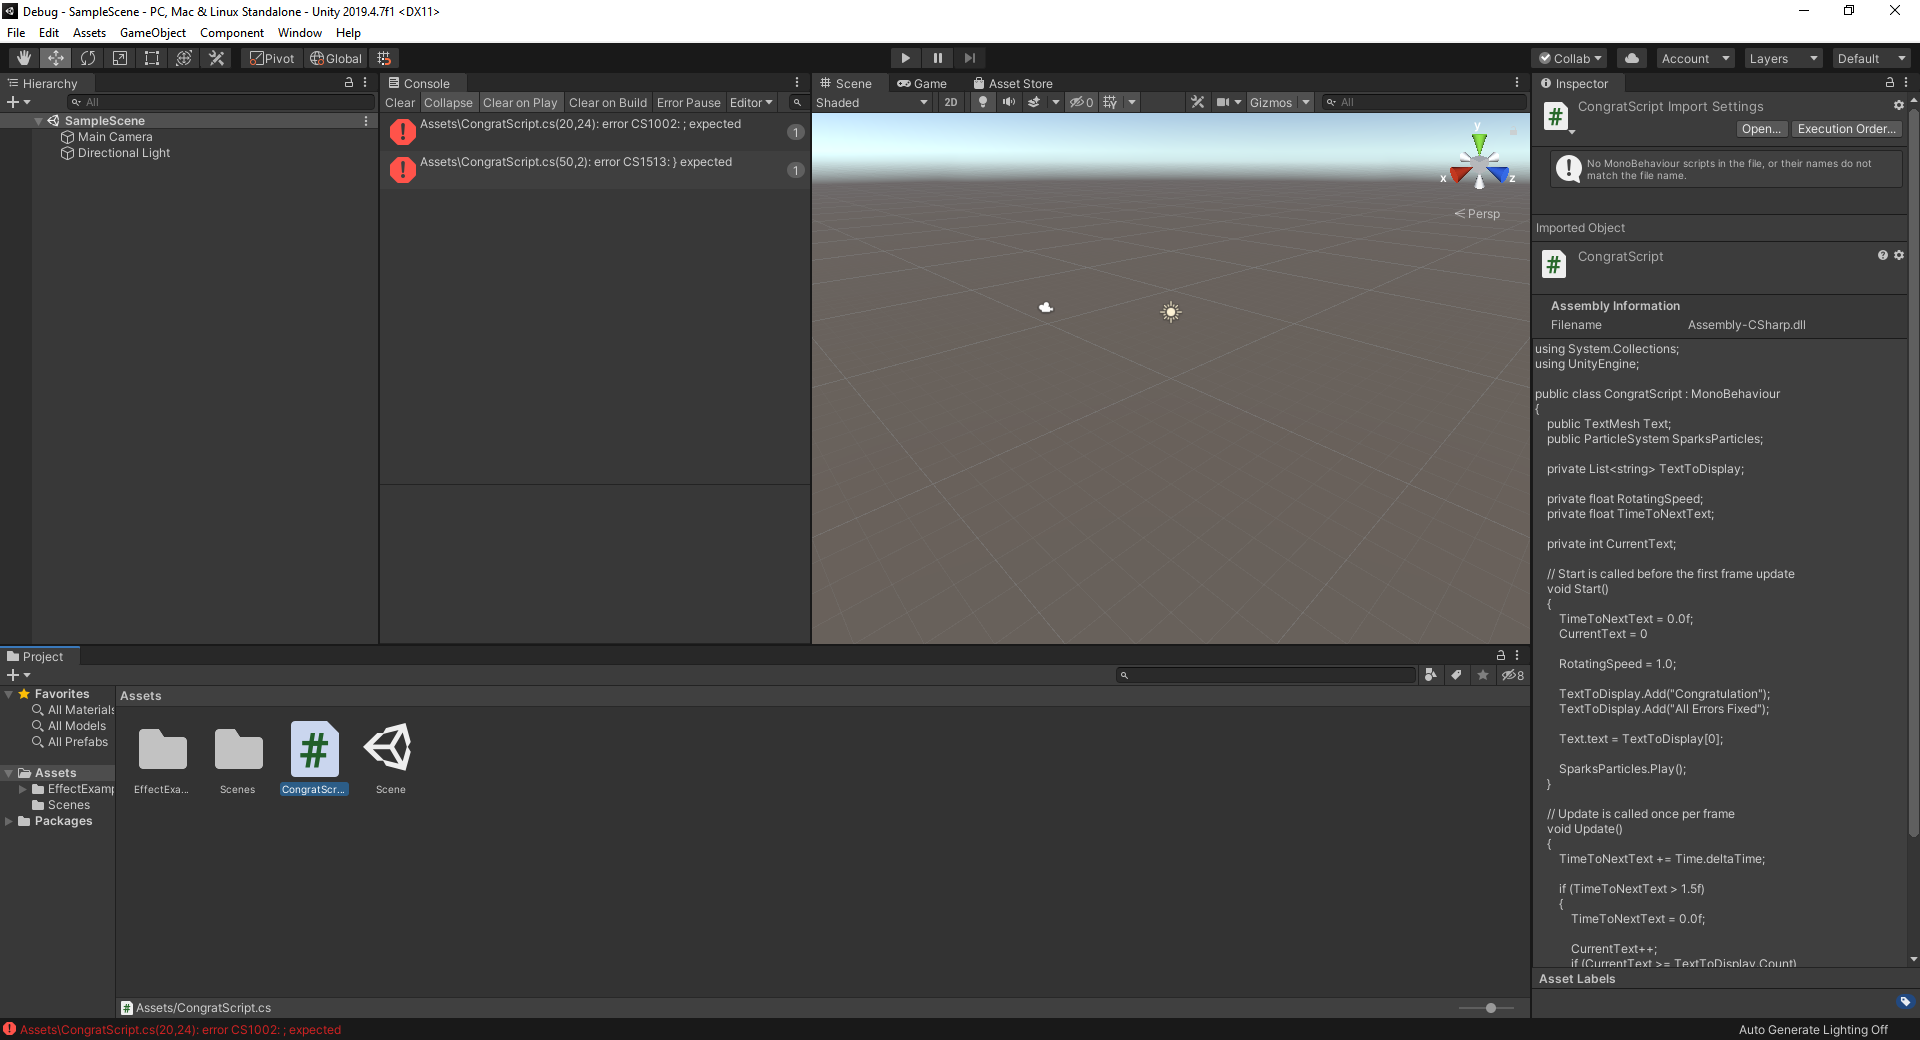
Before you begin debugging the project, take a few minutes to learn all you can about it. As soon as you import the .unitypackage, you’ll see two error messages appear in the Console window. These errors will prevent you from testing the scene, so try to determine what the project does based on the contents of the Hierarchy in the included scene and the script attached to the TextDisplay object.
4. Debug the app
Once you feel confident that you understand what the app is trying to do, make changes to the scene and script as needed so that the code compiles and you’re able to test the scene. What you see in the Game view should make it clear whether or not your application is fully fixed.
5. Create a WebGL build of the debugged app
Once your app is fully functioning, you will create a WebGL build of your project, upload it to Unity Play, and then complete this challenge by linking your submission below. To do so:
1. Save your scene.
2. Ensure that your version of Unity has the WebGL module installed.
3. Install the WebGL Publisher package. This package will allow you to easily publish your project on Unity Play. If you aren’t sure if you have the package or don’t know how to add it, refer to this tutorial.
4. Select File > Build Profiles from the main menu. Under the Platforms section, select Web, then select the Switch Platform button and wait until the process finishes.
5. Create a WebGL build of your project. This may take a few minutes, depending on your computer. If you need help creating the build, refer to step 3 of Getting started with Unity Web.
6. Publish your WebGL build on Unity Play.
7. Copy your Unity Play link, and paste it below!
6. Criteria
You’ll know you’re successful if you’ve met these criteria:
- There are no errors or warnings present in the Editor console.
- You are able to press Play in the Editor and see the active scene.
- You have created a WebGL build of your project.
- You have uploaded the WebGL build to Unity Play.
- You’ve copied your Unity Play link for submission.
7. Next steps
Congratulations on completing the second mission in the Junior Programmer learning pathway. After completing the final quiz, you will have acquired all of the skills needed to take the Unity Certified User: Programmer certification exam. You can find out more about the exam by visiting the certification page.
8. Submission
Paste your Unity Play link below!
Please login to submit
Complete this Tutorial
Submission Gallery

Rotating?
変数 RotatingSpeed は何に使うつもりだったんだろう。。。X軸で回転させました。
Debug the App
Debug the App
exercise
exercise
Debugging Text
Did as told,run into some issues with build
ErrorProject
Debugging code challenge
Debug the App
In this exercise, you will be challenged to debug a provided project so that it can run as intended.