Examine and complete the indoor scene
Tutorial
·
Beginner
·
+10XP
·
35 mins
·
(164)
Unity Technologies
Now that you’ve worked on implementing lighting in an outdoor scene, it’s time to turn your attention indoors. The same basic principles of lighting apply to indoor environments, but just as light indoors and outdoors tends to be different in the physical world, there are particular considerations that it’s important to make when lighting an indoor space for a real-time experience.
By the end of this tutorial, you'll be able to:
- Identify key considerations for lighting indoor scenes realistically.
- Add emissive materials to a scene.
- Check emissive materials in a diagnostic view.
- Place Light Probes in a 3D volume arrangement within a scene.
Languages available:
1. Overview
Now that you’ve worked on implementing lighting in an outdoor scene, it’s time to turn your attention indoors. The same basic principles of lighting apply to indoor environments, but just as light indoors and outdoors tends to be different in the physical world, there are particular considerations that it’s important to make when lighting an indoor space for a real-time experience.
By the end of this tutorial, you'll be able to:
- Identify key considerations for lighting indoor scenes realistically.
- Add emissive materials to a scene.
- Check emissive materials in a diagnostic view.
You’ll also practice placing Light Probes in a scene. When you’ve completed this tutorial, you’ll be ready to refine and troubleshoot the scene.
2. What makes a great lighting artist?
So far in this learning experience, you’ve been getting a taste of what it means to work with lighting in Unity. You’ve also applied your creative perspectives and ideas to create your own variations on the scene.
You’re currently developing your beginner lighting skills, but let’s take a moment to think about taking lighting to the next level. What do you think makes a great hobbyist or professional lighting artist for real-time experiences? Take a moment to consider this question yourself, and then reflect on the insights that our expert creators have shared based on their own experience and careers.
3. Identify the indoor light sources
In these indoor-focused tutorials, you’ll use the same gallery space that you worked in if you completed Creative Core: Shaders and Materials.
If you haven’t completed that learning experience, don’t worry — you’ll explore the example completed space now:
1. Open the Creative Core: Lighting project in Unity Editor, if you haven’t already done so.
2. In the Project window, go to Assets > CreativeCore_Lighting > Scenes and open the FinalScene_Lighting_Indoor scene.
3. Navigate into the gallery building and take some time to identify the primary sources of light and features of interest from a lighting perspective. When you’re done, read on to review the answers!
Check your work
In the indoor scene, you should be able to identify the following light sources:
- The central skylight, which is currently filling the gallery space with light.
- Spot Lights over the display plinths.
- Colored Area Lights, which function as small light strips over art on the walls.
- Some lamp props in the space: a tall standing lamp and a short exposed lightbulb lamp.
4. Examine the working scene lighting
To streamline the process of working in this scene for you, we’ve already implemented basic lighting in your scene.
Examine the basic configuration of the scene now:
1. Open the TutorialScene_Lighting_Indoor scene.
2. Open the Light Explorer window (top menu: Window > Rendering > Light Explorer) or go to where you docked it. Take some time to review the scene yourself and consider the way that the light sources have been set up.
3. Select the Directional Light and examine its configuration.
4. In the Lighting window, select the Environment tab and examine how the skybox and ambient lighting have been set up.
When you’ve finished, read on for a high-level summary of the lighting implemented in the scene.
Check your work
Here’s a summary of the lighting configuration in the tutorial scene:
- Directional Light: The Directional Light is less intense, but it’s still visible through the large gallery skylights.
- Skybox: This scene is using the default skybox.
- Other light sources: There are white Spot Lights in the ceiling illuminating the plinths for displaying objects to the right of the space. There are blue and red Area Lights illuminating wall displays on the left side of the space. There’s also a floor lamp in the lower left corner of the space.
- Baked lighting: Baked lighting has been implemented in the scene.
- Shadows: The shadows look a little odd here — you’ll investigate that soon.
5. What are the key considerations for indoor lighting?
When you’re lighting an indoor space, indirect light is very important. Most light indoors will hit multiple objects before making its way to your eyes (or in this case, the Camera). Ambient and bounced lighting play a huge part in making indoor lighting feel realistic in real-time experiences.
There are also some particular challenges that indoor spaces offer a lighting artist. Meshes with just the front faces rendered (sometimes known as single-sided geometry) can cause some issues with lights not behaving as you might expect, which you then need to troubleshoot to achieve your desired outcome. And as with lighting a real-world space, where you place light sources has a big impact on the overall illumination and mood created in the space.
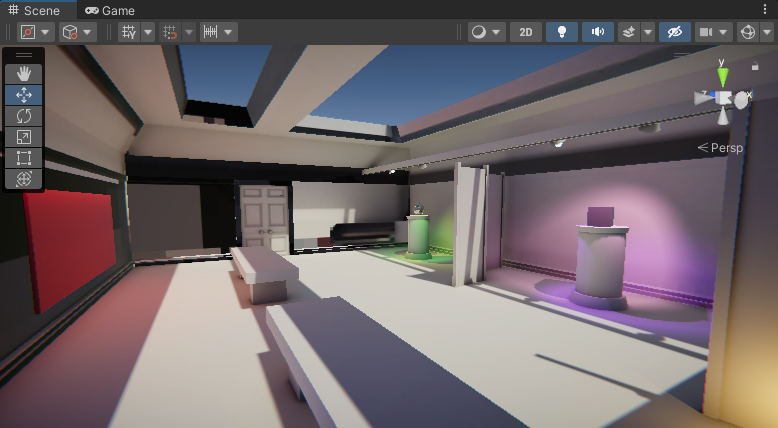
The basic lighting that’s been set up is a good start — it functionally illuminates the space and is broadly appropriate for a gallery. However, it’s still quite dark in there and there are some issues that need to be addressed to improve the overall look of the scene.
Scope your expectations
Before you continue, let’s take a moment to clarify your goal for this tutorial. You’ll be improving the lighting in this space and addressing some issues with the basic implementation, but there’s a lot more that could be done here.
Remember, being a lighting artist is a rich and varied role in real-time design and development! Your goal in this learning experience is to establish a good baseline rather than achieve complex and nuanced lighting effects that you don’t have the experience to achieve yet.
6. Create and configure an emissive material
One type of light source that you haven’t encountered yet in this learning experience is an emissive material. Emissive materials give off light across their source area. You can control their color and intensity, and they contribute to the bounced lighting in your scene.
Note: If you completed Creative Core: Shaders and Materials you’ve already worked with emissive materials. This is a great opportunity to consolidate that work before you go on to refine and troubleshoot the indoor scene.
Add an emissive strip light to the ceiling in the gallery:
1. In the Project window, go to Assets > CreativeCore_Lighting > Materials.
2. In the folder, right-click and select Create > Material. Name your new material “Emissive”, or something that you will easily remember. If you’ve already created an emissive material, you can use that instead.
3. In the Inspector, set the material’s Workflow Mode to Specular.
4. Enable the Emission property.
5. In the Hierarchy, expand the GameObject nesting to go to Environment > GalleryInterior > LightingBeam.
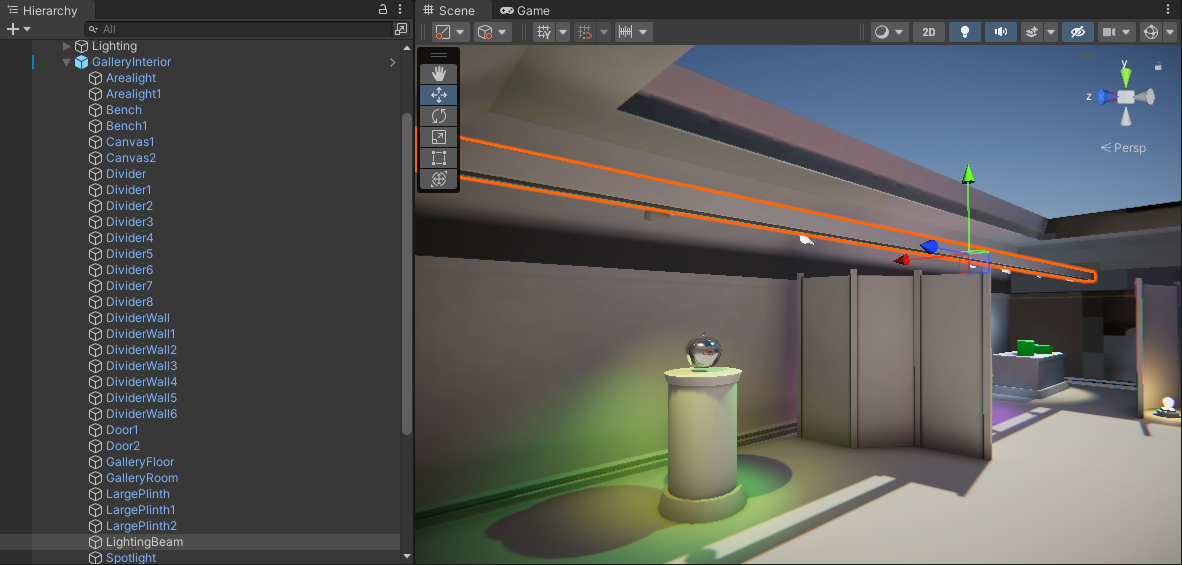
6. In the Inspector, check that the LightingBeam GameObject is set as Static.
Important: If the LightingBeam is not set as Static, this will cause issues with the bake that you will complete in the next step.
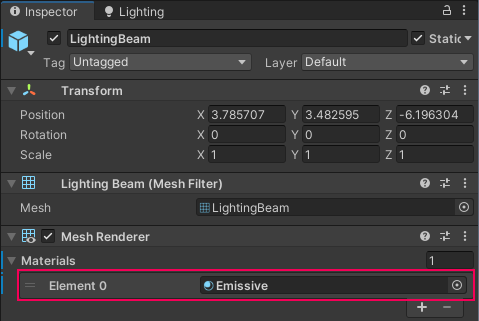
7. In the Inspector, go to the Materials section of the Mesh Renderer component and find the Element 0 property. Drag your new emissive material from the Project window to this property to apply it to the lighting beam.
There’s already reasonable lighting in the room, but you should notice the difference that the emissive material makes in your scene.
8. In the Project window, select your emissive material.
9. In the Inspector, select the HDR Color property.
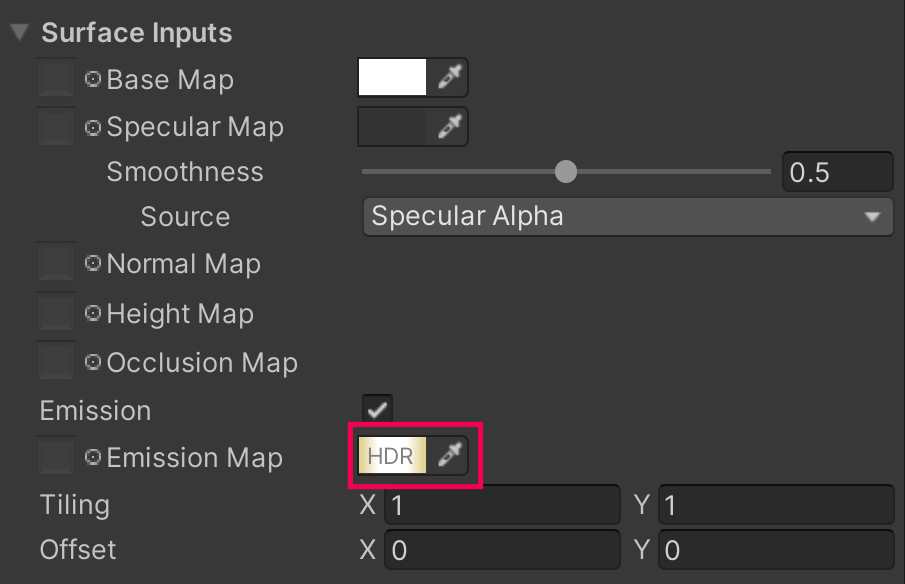
10. In the HDR Color picker window, choose the Color for your emissive material and set its Intensity.
Tip: To start with, try an Intensity of 2.5.
7. Check the Emissive diagnostic view
Now you’re ready to bake your emissive material and check your addition to the scene in diagnostic views:
1. In the Lighting window, select Generate Lighting to rebake the scene lighting. Remember, this process may take some time to complete.
2. In the Scene view control bar, use the Debug Draw Mode dropdown to select Emissive.
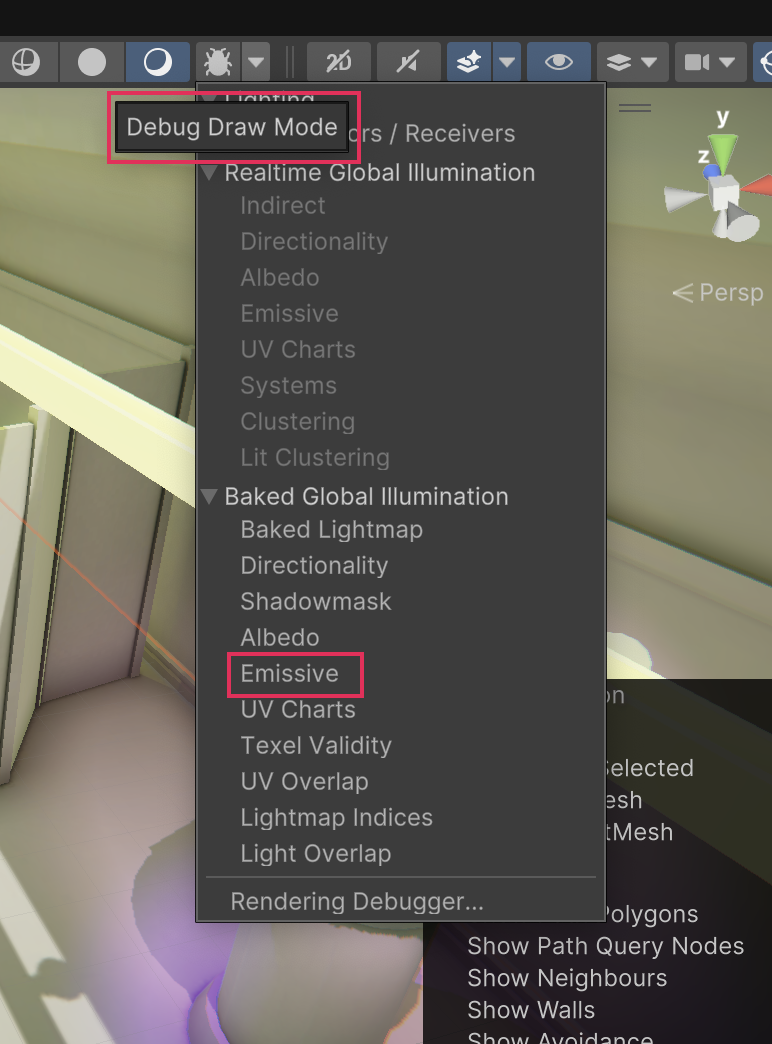
3. In this Draw Mode, the checkered overlay shows the resolution of the scene’s emission texture. Emissive objects are bright yellow — the beam is the only emissive object in your scene.
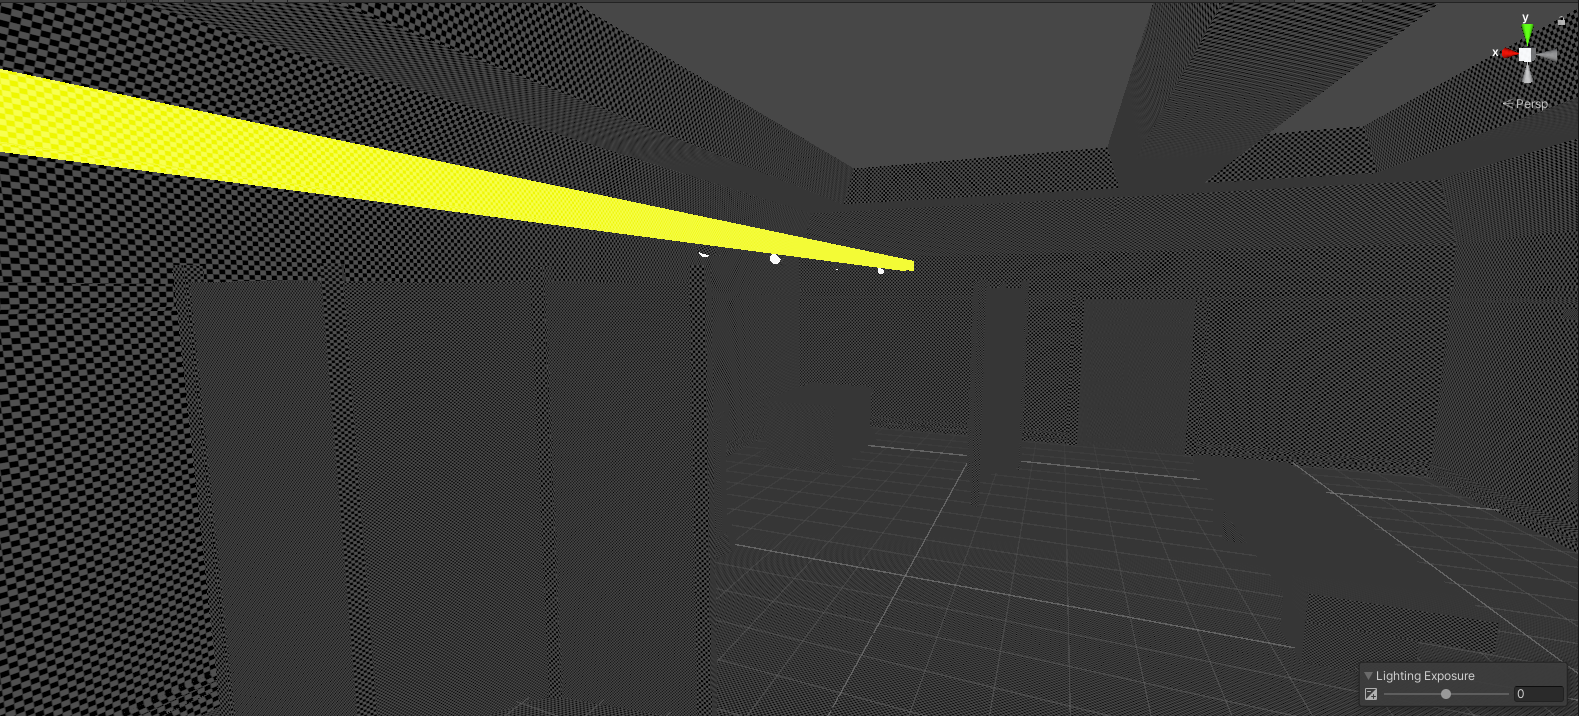
Important: If the Draw Mode view does not show the expected results, check that the LightingBeam GameObject is set as Static. If it is not set as Static, you will need to rebake the lighting.
4. In the Scene view control bar, set the Debug Draw Mode back to Shaded when you’re done.
8. Place and configure Light Probes
Emissive materials only affect static geometry in your scene by default. If you want them to impact moving objects, you’ll need to use Light Probes. As you learned when you implemented them in the outdoor scene, Light Probes are also very useful for improving the quality of your baked lights.
Create a new Light Probe Group and place Light Probes around the indoor gallery space. Try to recall the process independently first, but if you need guidance you can always refer back to the instructions.
Tips:
- You can create a primitive shape like a sphere to test the impact of the emissive material before and after, as you did when you first used Light Probes.
- Light Probes should be arranged in a 3D volume — a grid with at least two vertical levels.
- Remember to rebake the scene’s lightmap and then save your changes when you’re done.
Additional help with Light Probe placement
If you need to adjust Light Probe placement in your project and would like additional guidance, try High quality lighting using Light Probes by Brackeys (YouTube).
9. Next steps
Now that you’ve examined the indoor scene and made some small additions, you’re ready to begin to refine the lighting and troubleshoot a few issues to make it even better.