Get started with Creator Kit: Beginner Code
Tutorial
·
Beginner
·
+0XP
·
10 mins
·
(302)
Unity Technologies

In this first tutorial, you’ll:
- Set up the Creator Kit in Unity Editor
- Review Unity Editor navigation and functionality
- Try out the example Creator Kit game
When you’ve finished, you’ll be ready to explore programming in Unity.
Languages available:
1. Overview
Creator Kit: Beginner Code (Overview)
Welcome to Creator Kit: Beginner Code! In this project, you’ll use an action RPG game to learn the basics of writing code for Unity.
This project is made up of focused tutorials:
- 10 sequential tutorials to guide you through the basics of editing C# scripts for Unity, from importing the Creator Kit Assets to creating your first custom script for the game.
- One reference tutorial to help use the templates we’ve created to further customize the game.
Prerequisites
You’ll get the most out of this project if you’ve already completed one of our code-free introductions to digital making in Unity:
Each kit provides a different introductory experience, but they’ll all provide you with the right experience in the Unity Editor for this project. If you haven’t completed one yet, choose the one that best matches your personal interests and return to this project when you’re done.
2. Before you begin
Update the Unity Hub
Before you begin to set up your Unity project, consider updating your Unity Hub to the latest release. If you are using an older version of the Hub, there may be differences between the guidance provided and your experience.
Review the Unity Editor basics
If you need to refresh your memory of the Unity Editor basics, you can take a moment to review Explore the Unity Editor at any time.
Set up your Unity project
To set up your Unity project:
1. Open the Unity Hub.
2. Create a new Unity project using the 3D(URP) Template. Remember to use Unity 2022.3.
3. Go to the Creator Kit: Beginner Code assets in the Unity Asset Store.
4. Download and import the assets into your Unity project.
3. Review key concepts for working in Unity
Let’s review some key concepts explored in the code-free Creator Kits, which will help you as you begin to explore editing scripts for the game.
Scenes
In Unity, areas of the game that a player can interact with are generally made up of one or more Scenes. Small games may only use one Scene; large ones could have hundreds. We used a number of different Scenes when making the Creator Kit: Beginner Code game — the one you should use to play and customize the game in these tutorials is called ExampleScene.
GameObjects and components
Every object in the game world exists as a GameObject in Unity. GameObjects are given specific features by giving them appropriate components, which provide a wide range of different functionality.
When you create a new GameObject, it comes with a Transform component already attached. This component controls the GameObject’s positional properties in the 3D (or 2D) gamespace. You need to add all other components manually in the Inspector.
Prefabs
Prefabs are a great way to configure and store GameObjects for re-use in your game. They act as templates, storing the components and properties of a specific GameObject and enabling you to create multiple instances of it within a Scene.
All copies of the Prefab template in a Scene are linked. This means that if you change the object values for the health potion Prefab, for example, each copy of that Prefab within the Scene will change to match it. However, you can also make specific instances of the GameObject different to the default Prefab settings.
4. Try the game
Now you’re ready to visit Rancho Rodadora and explore the game!
NOTE: This Creator Kit includes a lot of systems which can be customized to create a full player experience, but you’ll be doing a lot of this yourself. This means that things may feel a little unfinished — don’t worry, these tutorials will give you step-by-step support and we’ve prepared a reference guide to help you lasso that code into line when you’ve finished.
To play the basic game:
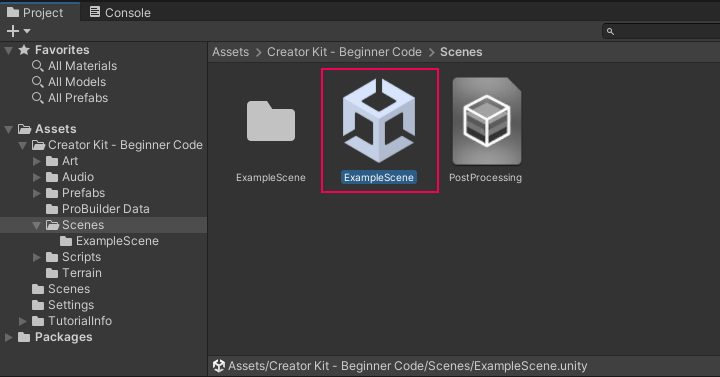
1. In the Project window, go to Assets/Creator Kit - Beginner Code/Scenes.
2. Double-click the ExampleScene Scene icon to open the Scene.

3. Click the Play button in the toolbar to enter Play Mode and test the game.

(Remember to click the Play button again when you’re done, to exit Play Mode!)
Navigation
This is a hack-and-slash RPG game with a point-and-click control system. This means you can click on:
- A location to move there
- A target to attack
- An item to add it to your inventory
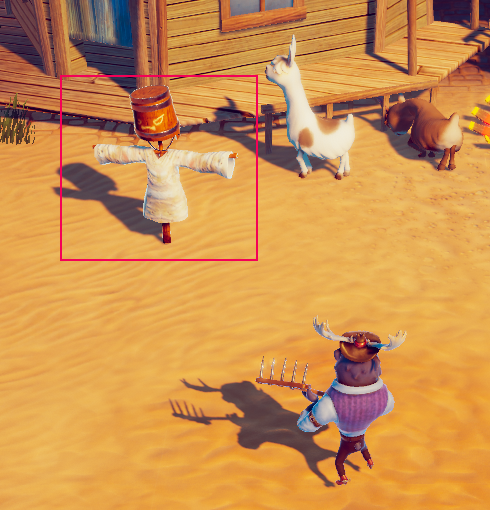
Try attacking the fiendish Training Dummy to get started. You can zoom in and out using your scroll wheel.

Inventory and character stats
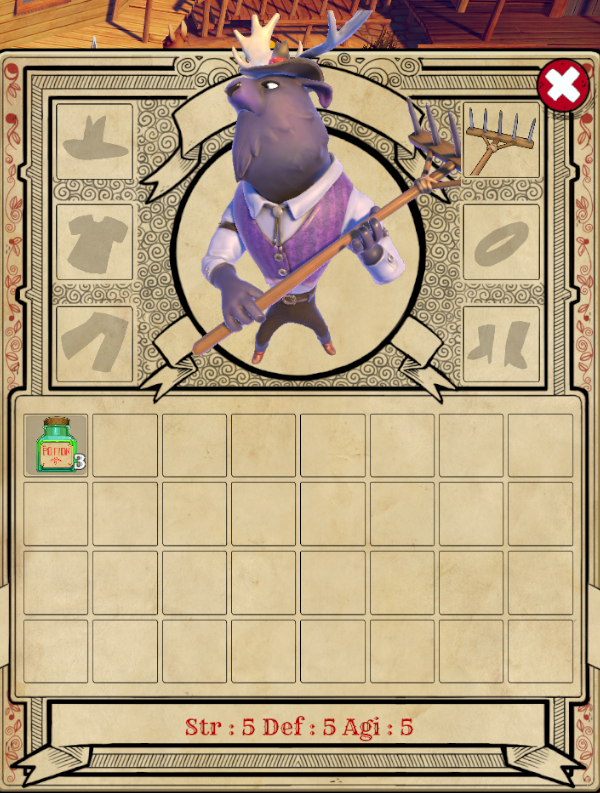
Click on the inventory satchel in the bottom left-hand corner of the screen to:
- Review character stats (strength, defense and agility)
- Review equipment and inventory items (hover the mouse over them to reveal more details)
- Use or equip items by double-clicking the icon
You can also open/close the inventory with the keyboard shortcut I.
