
1.3 - Grabbable Objects
Tutorial
Beginner
+10XP
90 mins
Unity Technologies
In this lesson, you will learn how to configure objects for basic grabbable interactivity in VR. By the end of this lesson, users will be able to pick up objects in the scene and throw them around.
This lesson is part of the Create with VR course.
Languages available:
Overview Video
1. Choose hand models
You can choose the models to represent the user’s hands in VR rather than just using simple spheres.
1. Browse options for hand models:
- In the Project window, open Course Library > Prefabs > VR > Hands, then determine which VR_Hand option you prefer.
2. Assign a model to your left hand:
- In the Hierarchy, select XR Rig > Camera Offset > LeftHand Controller.
- In the XR Controller Component, for the Model Prefab property, drag and drop your hand prefab of choice to assign it.
3. Assign a model to your right hand:
- In the Hierarchy, select XR Rig > Camera Offset > RightHand Controller
- Repeat the same step as above to assign a prefab for your right hand.
When you test your app, you should now see the hand models you selected instead of grey spheres.
2. Add a grabbable object
Now that you can see your VR hands, you should add objects to grab with them.
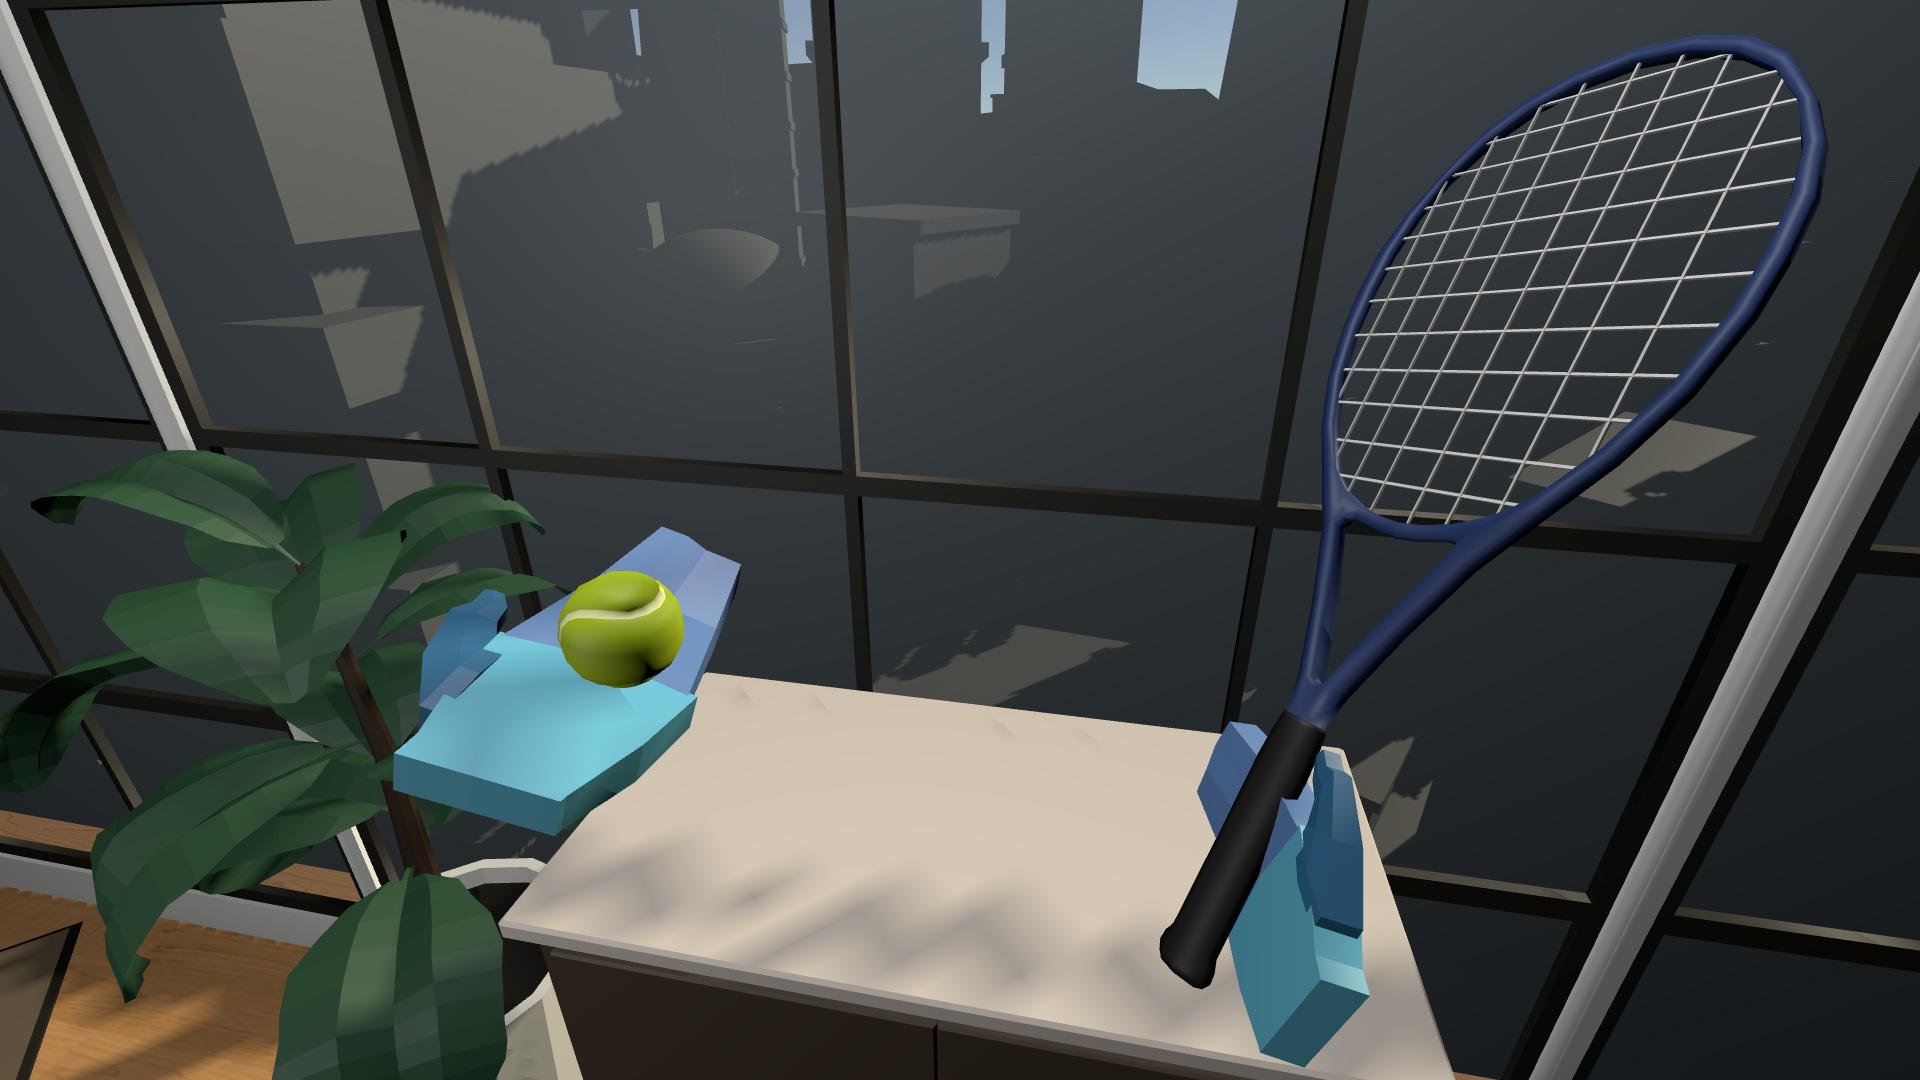
1. Add a ball to the scene:
- Go to Course Library > Prefabs > Objects > Sports.
- Drag a ball onto an accessible surface in the room.
2. Make the ball grabbable:
- Add an XR Grab Interactable component to the ball.
- Note: This will automatically add a Rigidbody component to the ball object as well.
3. Test your grabbable object:
- Reposition the XR Rig to be in front of the table with the grabbable ball object.
- Run your application.
- Test grabbing the object by aiming your ray at it and pressing the Grip button.
4. Make sure that the object is the correct scale:
- In the Hierarchy, create a new 3D Object > Cube object, and rename it “Measuring Stick”.
- Use Google to determine the correct official diameter of the ball and then convert the dimensions you found into meters.
- In the Measuring Stick’s Transform component, set the X and Z Scale to 0.01 and the Y scale to the length you calculated.
- Position the measuring stick next to your ball to make sure it’s accurately sized. If it is not, use the Scale tool to correct it.
You should now be able to pick up the ball using the Grip button, release the grip button to throw it.
Note: If you are using the XR Device simulator, you can toggle a controller with T or Y, rotate it to point at an object by holding the middle mouse button, then press and hold G to grab and hold an object.
3. Hide hands and disable anchor control
Currently, the hand model overlaps the object you’re holding and you are able to change that object’s position in your hand with the controller. This is not optimal for interacting with the scene.
1. Stop the user from moving the object with the left joystick:
- In the Hierarchy, select XR Rig > Camera Offset > LeftHand Controller object.
- In the XR Ray Interactor component, disable the Anchor Control setting.
2. Make your hand model disappear when you grab an object:
- In the XR Ray Interactor component, enable the Hide Controller on Select setting.
3. Apply these changes to your right controller:
- Repeat the steps above on the RightHand Controller object.
Your hands should now disappear when you pick up an object and you should no longer be able to move or rotate the object with the joystick.
4. Fine-tune the throwing experience
The object can be grabbed, but there are some minor aspects of its behavior that need to be tweaked.
1. Make the ball bouncy:
- In the Ball object’s Sphere Collider component, locate the Material property.
- Click the circular button to assign one of the provided Physics Materials.
2. Prevent a dropped object from going through the floor:
- In the Ball object’s Rigidbody component, set the Collision Detection setting to Continuous Dynamic.
3. Allow the ball’s rigidbody physics to work while in your hand:
- In the XR Grab Interactable component, ensure that the Movement Type is set to Kinematic so it can physically interact with other objects in the scene.
4. Smooth the motion of the object:
- In the XR Grab Interactable component, enable the Smooth Position and Smooth Rotation properties.
The ball should now bounce, not fall through the floor, and move smoothly in your hand.
5. Add an object with a handle
You have added a ball object that is held at its center and where orientation is not important. Now you will add an object that will be grabbed at a very particular point and orientation.
1. Add a sports racket, paddle, or bat into the scene:
- Go to Course Library > Prefabs > Sports
- Drag one of the sports implements onto the surface next to the ball.
2. Make the new object grabbable:
- Select the new object and add an XR Grab Interactable component.
- In the XR Grabbable component, enable both the Smooth Position setting and the Smooth Rotation properties to decrease jitter.
- In the Rigidbody component (which was added automatically), for the Collision Detection option, select Continuous Dynamic to prevent it from going through the floor.
3. Create a specific attach point for the object:
- In the Hierarchy, right-click the object and create an Empty child object.
- Rename this empty object “Attach”.
- Reposition and rotate the Attach object so that it matches the position and orientation your hand model should be when you grab the new object.
4. Assign the attach point to your sports implement:
- In the Hierarchy, re-select the parent sports object.
- In the XR Grab Interactable component, locate the Attach Transform property.
- Drag and drop your new Attach object to assign it to the Attach Transform property.
You should now be able to grab the sports implement object by the handle and hit the ball with it.
6. Organize the Hierarchy
Before you get too many objects in the Hierarchy, it’s good to set up an organizational system for your objects.
1. Make organizer objects in your Hierarchy:
- In the Hierarchy, create new empty GameObjects named “XR,” “LIGHTING”, “STATIC,” and “DYNAMIC,”
- Reset all of their positions to 0, 0, 0.
2. Organize your objects into categories:
- Drag objects from your Hierarchy onto the organizer objects - the advantage of this technique is that it keeps your Hierarchy nice and neat.
- Alternatively, drag your objects underneath these organizer objects - the advantage of this technique is that it keeps your objects easily accessible.
The Hierarchy should now be more usable, organized into categories.
7. Recap
New Features:
- Hand models
- Simple grabbable ball
- Grabbable tool with attach point
- Organized Hierarchy
New Concepts & Skills
- Unity vs Real-world scale
- Grabbable object properties
- Collision detection modes
(discrete vs continuous dynamic) - Movement types
(kinematic, instantaneous, velocity-tracking)
Next Lesson:
- Sockets
8. Extensions
If you want to further develop your skills, explore new concepts, and improve your project, check out some of the optional extension activities below.
Each one is tagged as [Easy], [Medium], [Difficult], or [Expert] and will also include a [Requires Programming] tag if some coding is required.
1. Fill your room with objects [Easy]
Add fun decorative and grabbable objects to your scene to make it feel more interactive, even if those objects aren’t fully functional yet:
- Browse through the Course Library > Prefabs > Objects folders for ideas.
2. Experiment with the grab interactable properties [Easy]
Add a new grabbable object to your scene and experiment with the various properties of the XR Grab Interactable component, including:
- Movement type: Kinematic vs Instantaneous vs Velocity Tracking
- Smooth Position/Rotation Amount and Tighten Position
- Throw on Detach properties
3. Add a magnifying glass [Difficult]
Add a functional magnifying glass to your scene that you can use to pick up and examine objects:
- You could use a Camera Render Texture similar to the way the mirror works.
- Don’t worry if the ray gets in the way - that will be resolved when we can toggle the rays on and off.
4. Add a notebook that swings open [Expert]
Add a notebook with a front cover that swings open when you grab it:
- Hint: The Notebook_Cover needs a hinge joint with its Connected Body property set to the notebook’s Rigidbody.
- If you want, try adding some text to the notebook.