
Introduction to Object Pooling - 2019.3
Tutorial
intermediate
+10XP
20 mins
(180)
Unity Technologies
Object Pooling is a great way to optimize your projects and lower the burden that is placed on the CPU when having to rapidly create and destroy GameObjects. It is a good practice and design pattern to keep in mind to help relieve the processing power of the CPU to handle more important tasks and not become inundated by repetitive create and destroy calls. In this tutorial, you will learn to use Object Pooling to optimize your projects.
Languages available:
1. Introduction
If you are using Unity 2019.2 or below, click here.
Object Pooling is a great way to optimize your projects and lower the burden that is placed on the CPU when having to rapidly create and destroy GameObjects. It is a good practice and design pattern to keep in mind to help relieve the processing power of the CPU to handle more important tasks and not become inundated by repetitive create and destroy calls. This is particularly useful when dealing with bullets in a top-down shooter game.
Object Pooling is a creational design pattern that pre-instantiates all the objects you’ll need at any specific moment before gameplay. This removes the need to create new objects or destroy old ones while the game is running. Object Pools are primarily used for performance: in some circumstances, object pools significantly improve performance when a project is creating and destroying the same GameObject repeatedly in rapid succession. It works by creating a set amount of GameObjects before the game’s runtime and simply inactivates or activates the GameObjects required, effectively just recycling the GameObject and never destroying it.
Object Pooling is an important concept to understand due to the nature of some GameObjects and how often they will be created or destroyed during gameplay. When you are handling a multitude of instantiation and destroy calls of a single GameObject, it may be time to consider implementing an Object Pool. The following example of a Space Shooter is an ideal candidate for implementing Object Pooling to help optimize the project's runtime. (Figure 01)
2. Example of a situation needing Object Pooling
When the spaceship shoots, it creates several bullets that travel up the screen, it will then destroy the objects if they collide with another object or leave the screen. This creates a considerable drag on the CPU and therefore, Object Pooling would be a great candidate to optimize in this situation as it will alleviate the need to constantly create and destroy objects during runtime.
3. Creating an Object Pooling Script
1. Create a new script and call it Object Pool
2. Attach the script to your game controller.
3. Open the script and write the following within the class definition:
public static ObjectPool SharedInstance;
public List<GameObject> pooledObjects;
public GameObject objectToPool;
public int amoutToPool;

void Awake()
{
    SharedInstance = this;
}

void Start()
{
    pooledObjects = new List<GameObject>();
    GameObject tmp;
    for(int i = 0; i < amountToPool; i++)
    {
        tmp = Instantiate(objectToPool);
        tmp.SetActive(false);
        pooledObjects.Add(tmp);
    }
}
This simple setup allows you to specify a GameObject to pool and a number to pre-instantiate. The For Loop will instantiate the objectToPool the specified number of times in numberToPool. Then the GameObjects are set to an inactive state before adding them to the pooledObjects list.
4. Select the game controller which contains the script you just created. It’ll have the pooledObjects and the amountToPool where you can set both respectively. Dragging the bullet prefab to pooledObjects will tell the script what object you wish the pool to consist of.
5. Set the amountToPool to a relatively large number such as 20. The reason for this is we want to make sure we have enough GameObjects to work with (Figure 02).
Now the script will always create 20 PlayerBullets before the game even runs. This way there will always be a collection of pre-instantiated bullets for our use. In order to take advantage of this we need to do two more things at minimum.
6. Reopen the Object Pool script you created so you can create a new function to call from other scripts to utilize the Object Pool. This will help utilize the idea of not needing to redundantly instantiate and destroy objects during runtime. This will also allow the other scripts to set the objects to active or inactive states which creates a graceful process where we adhere to the Object Pooling design.
public GameObject GetPooledObject()
{
    for(int i = 0; i < amountToPool; i++)
    {
        if(!pooledObjects[i].activeInHierarchy)
        {
            return pooledObjects[i];
        }
    }
    return null;
}
7. Go into the scripts that instantiate the bullets. Here you will want to replace any code that instantiates the bullets, such as: ‘Instantiate(playerBullet, turret.transform.position, turret.transform.rotation);’
Use the following code to replace the Instantiate calls:
GameObject bullet = ObjectPool.SharedInstance.GetPooledObject();
if (bullet != null)
{
    bullet.transform.position = turret.transform.position;
    bullet.transform.rotation = turret.transform.rotation;
    bullet.SetActive(true);
}
8. The code will request a GameObject to become active, and set the properties of that given GameObject. It removes the need to instantiate a new object and efficiently requests and acquires a GameObject that is only pre-instantiated, relieving the burden from the CPU to having to create and destroy a new one.
Next, replace any code that destroys the bullets, such as:
Destroy(gameObject);Instead of destroying the GameObject, deactivate it to return it to the pool.
gameobject.SetActive(false);4. Running the Project
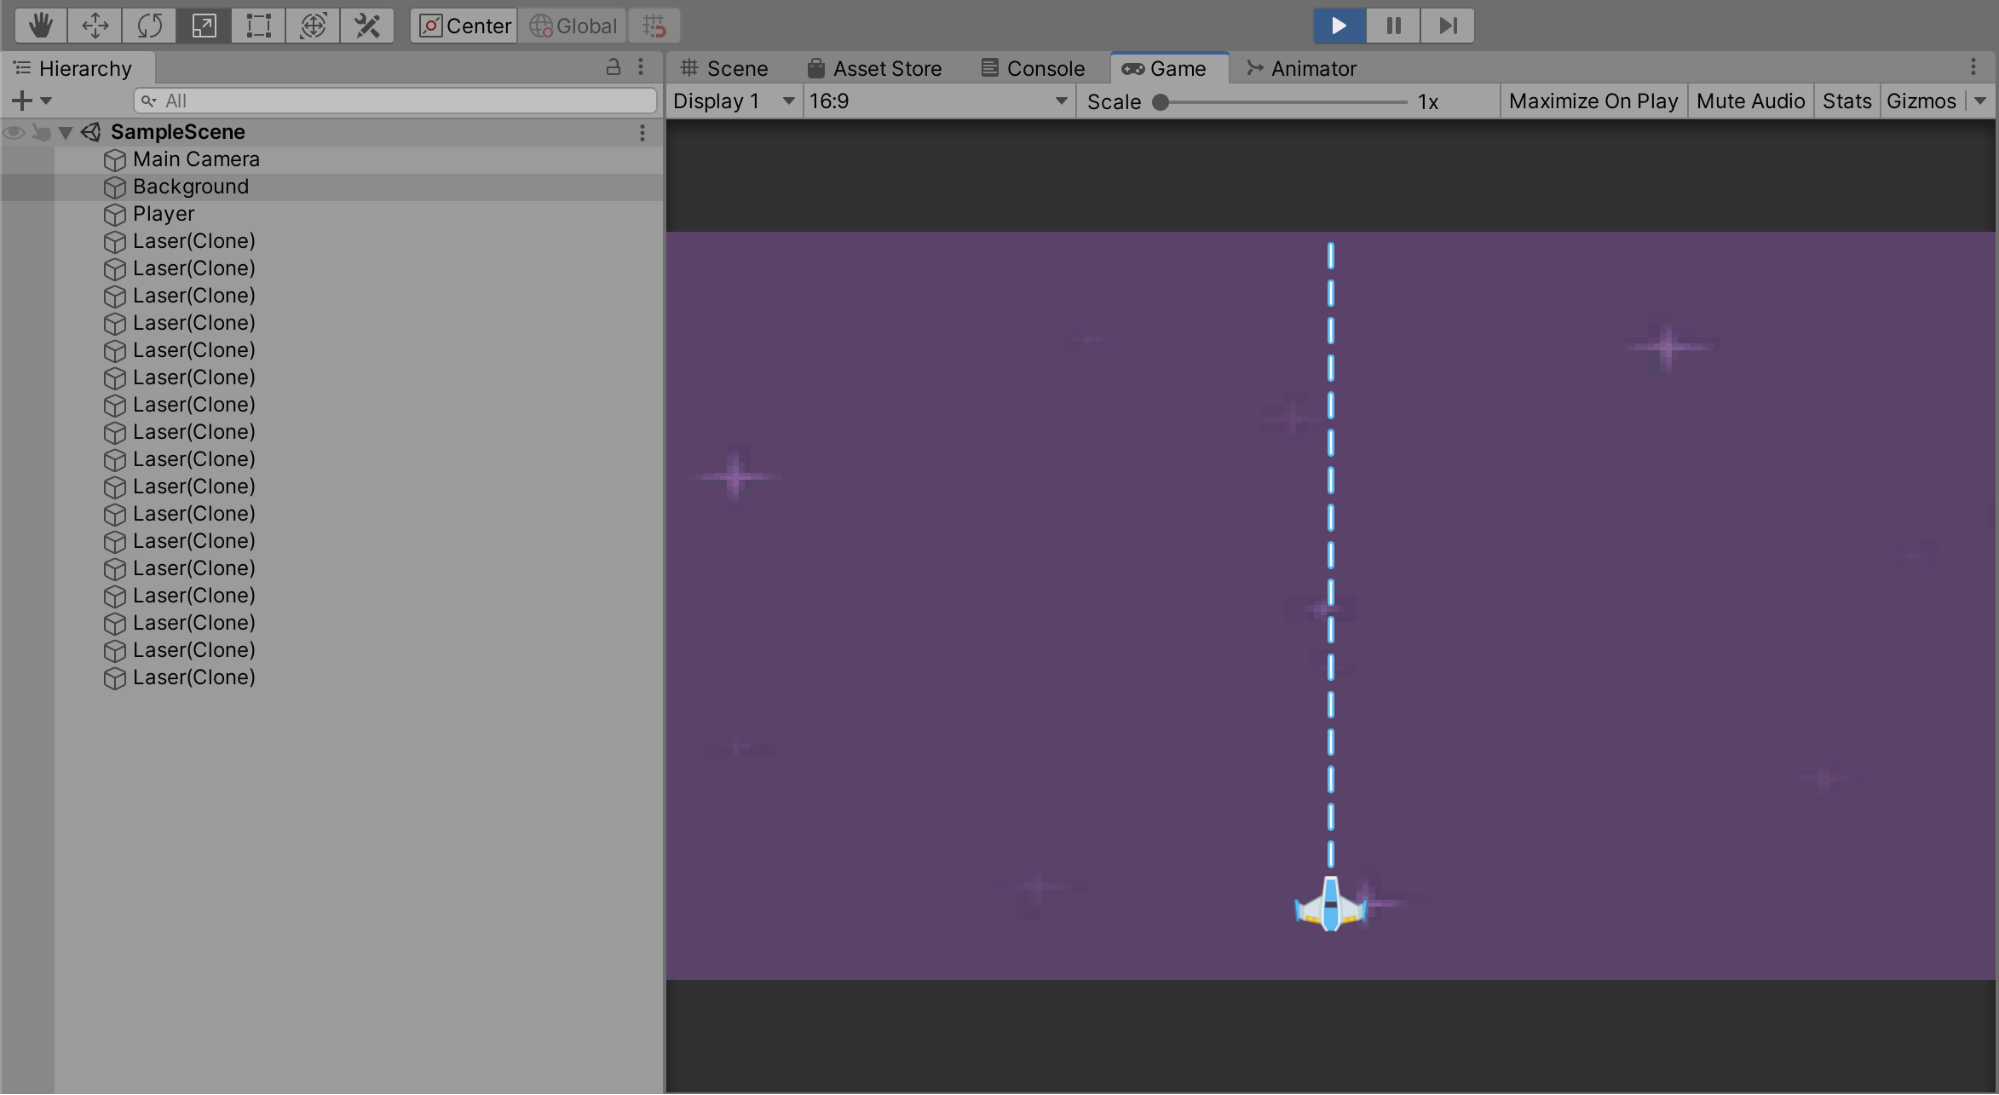
Now when you run the game, you will have the objects pre-instantiated and set to an inactive state. You can see this in the Hierarchy while the game is playing (Figure 03).
With what we have right now, we have a finite pool of GameObjects pre-instantiated. Now, when playing the game and firing your gun on the player you will notice only the needed PlayerBullets will become active, and as soon as they collide or leave the screen, they will become inactive.
5. Conclusion
With Object Pooling, you can expand the code provided to handle multiple different GameObject types and really expand on the optimization of your projects and lowering the burden that is being placed upon the CPU when having to repeatedly create or destroy GameObjects. It is a good practice and design pattern to keep in mind to help relieve the processing power of the CPU to handle more important tasks and not be inundated by a massive amount of instantiating and destroy calls.