
Detecting Mouse Clicks
Tutorial
Beginner
+10XP
5 mins
230
Unity Technologies
How to detect mouse clicks on a Collider or GUI element.
This tutorial is included in the Beginner Scripting project.
Previous: GetAxis
Next: GetComponent
Languages available:
1. Overview
In this tutorial you will be learning about some of the basic ways that mice and other pointers can be used in games and other applications. The three techniques you will be learning about are:
- Using the MonoBehaviour method OnMouseDown.
- Using the mouse position to raycast manually.
- Using the UGUI event system.
2. Before you begin
New to Unity?
If you’re new to Unity, welcome! The Unity Essentials learning pathway has been designed to help you get set up and ready to create in the Unity Editor. We recommend you complete this pathway before continuing with Beginner Scripting.
Review the Unity Editor basics
If you need to refresh your memory of the Unity Editor basics, you can take a moment to review Explore the Unity Editor at any time.
3. Using OnMouseDown
MonoBehaviours have a number of methods which are called automatically under certain circumstances. These are methods such as Update, which is called every frame, and Start which is called just before the first Update. Another of these methods is OnMouseDown.
If a MonoBehaviour with an implementation of OnMouseDown is attached to a GameObject with a Collider then OnMouseDown will be called immediately when the left mouse button is pressed. Here is an example:
using UnityEngine;
public class Clicker : MonoBehaviour
{
   void OnMouseDown()
   {
       // Code here is called when the GameObject is clicked on.
   }
}
This is probably the easiest way to detect mouse clicks. If you are just starting out using Unity and only have a simple use case then this is recommended. However, if you need a little more flexibility in the way you handle mouse clicks then using input might be more useful to you.
4. Using input to manually raycast
When using input to detect what a mouse click was over, the first thing to consider is which input system is being used. This tutorial will cover both the Input Manager and Input System package though it is recommended that you use the Input System package to future-proof your project.
The basic technique
Regardless of which input system you use, the basic technique follows the same steps:
- Check if the mouse button was pressed.
- If it was, find the position of the mouse pointer.
- Create a ray into the screen at the position of the mouse pointer.
- Cast the ray using a Raycast method of your choice.
- Check what was hit by the raycast.
Because all projects are different, there may be ways you wish to tweak these steps to better suit you.
Now let’s look at using the different input systems for specific implementations.
The Input System package
When using the Input System package, first make sure that it is imported into your project. Details on using Unity’s Package Manager can be found here. With the Input System package you need to specify which input system you need to use: the Input Manager, the Input System package or both. When you first import the package you will be asked if you want to change this setting automatically. If you wish to change this later, the setting can be found here:
Project Settings > Player > Other Settings > Configuration > Active Input Handling
Once the setting is either “Both” or “Input System Package (New)” you can begin writing code using the new Input System. Here is an example following the basic steps outlined above.
using UnityEngine;
using UnityEngine.InputSystem;
public class Clicker : MonoBehaviour
{
   Camera m_Camera;
   void Awake()
   {
       m_Camera = Camera.main;
   }
   void Update()
   {
       Mouse mouse = Mouse.current;
       if (mouse.leftButton.wasPressedThisFrame)
       {
           Vector3 mousePosition = mouse.position.ReadValue();
           Ray ray = m_Camera.ScreenPointToRay(mousePosition);
           if (Physics.Raycast(ray, out RaycastHit hit))
           {
               // Use the hit variable to determine what was clicked on.
           }
       }
   }
}
The first thing to note in this example is that it uses the UnityEngine.InputSystem namespace which is included at the top. Next the Clicker script caches a reference to the camera to be used later.
Within each Update, the current mouse being used is cached and then checked to see if the left button was pressed this frame. If it was, the same mouse is used to get its position. Once the position has been found, it is passed to a method on the camera called ScreenPointToRay. This method uses the position and rotation of the camera, along with the position of the mouse on the screen to create a ray (a line with a direction) the points directly into the screen. This ray is then used to Raycast and information about what is hit is retrieved using the RaycastHit variable.
The Input Manager
If you decide to use the Input Manager then there is no need to import any packages or change project settings. Here is the above example rewritten to use the Input Manager:
using UnityEngine;
public class Clicker : MonoBehaviour
{
   Camera m_Camera;
   void Awake()
   {
       m_Camera = Camera.main;
   }
   void Update()
   {
       if (Input.GetMouseButtonDown(0))
       {
           Vector3 mousePosition = Input.mousePosition;
           Ray ray = m_Camera.ScreenPointToRay(mousePosition);
           if (Physics.Raycast(ray, out RaycastHit hit))
           {
               // Use the hit variable to determine what was clicked on.
           }
       }
   }
}
As you can see above, the only differences between using the Input System package and the Input Manager are how the mouse button being clicked is detected and the mouse position is found.
The above techniques work best when dealing with objects in 3D space but a common requirement is being able to detect mouse clicks on parts of the UI. These clicks should be handled in a very different way.
5. Using the UGUI event system
This part of the tutorial will be covering how to detect mouse clicks in the UGUI system. This is the system that uses Canvases and Rect Transforms and is distinct from the UI Toolkit package. For more information on the UI Toolkit package, follow this tutorial.
Principles and requirements
In the UGUI system, the basic principles of how clicks are detected are the same: the mouse position is still checked, a raycast is sent into the scene and it checks for anything beneath it. The differences stem from how these things happen. They require 4 separate parts to function properly:
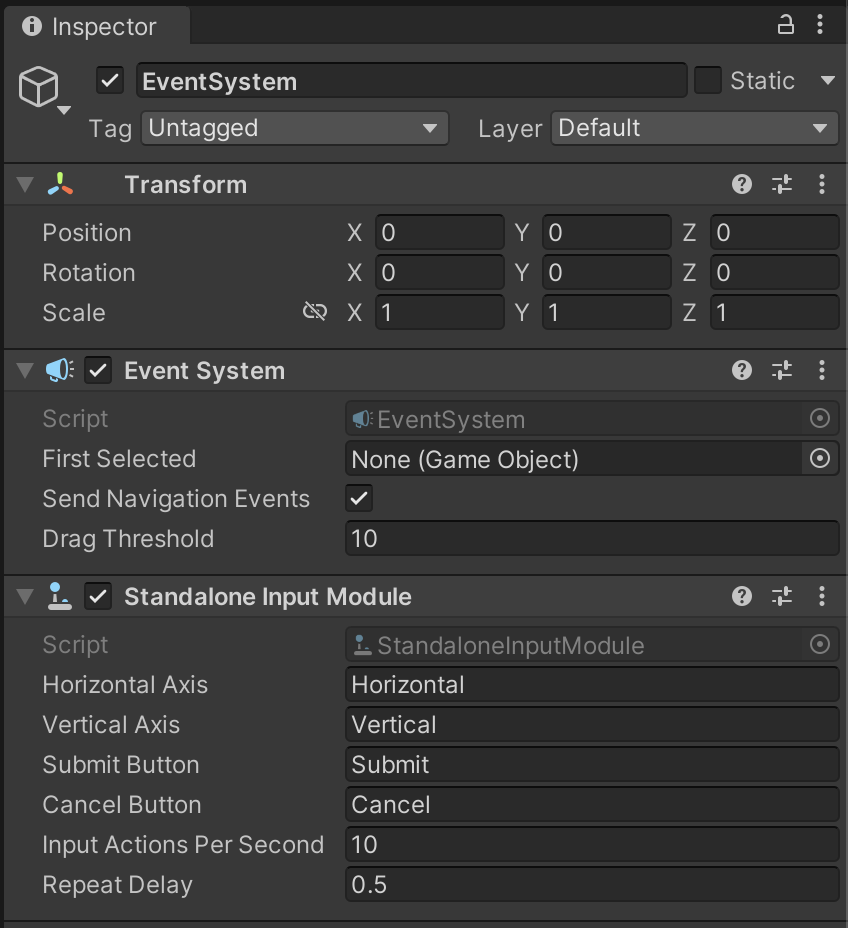
1.Something to manage events.
This part takes the form of 2 components: the Event System component and an Input Module component. To use a normal mouse, a Standalone Input Module is used for the Input Manager or an Input System UI Input Module for the Input System package.
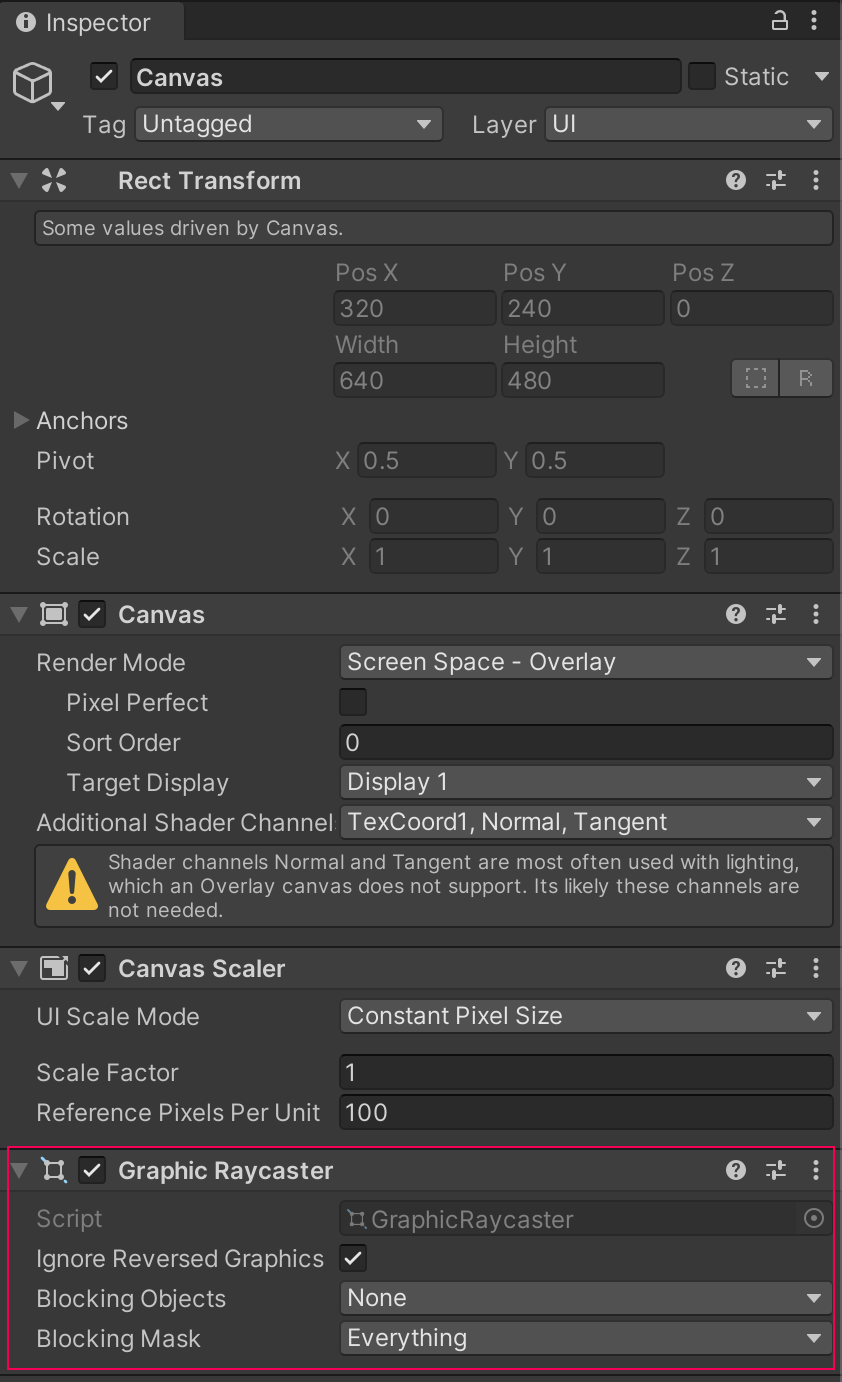
2.Something to cast rays.
This part takes the form of a component called Graphic Raycaster which should be on the same GameObject as the Canvas. Note that these rays are different from normal physics rays in that they are blocked by UI elements rather than Colliders.
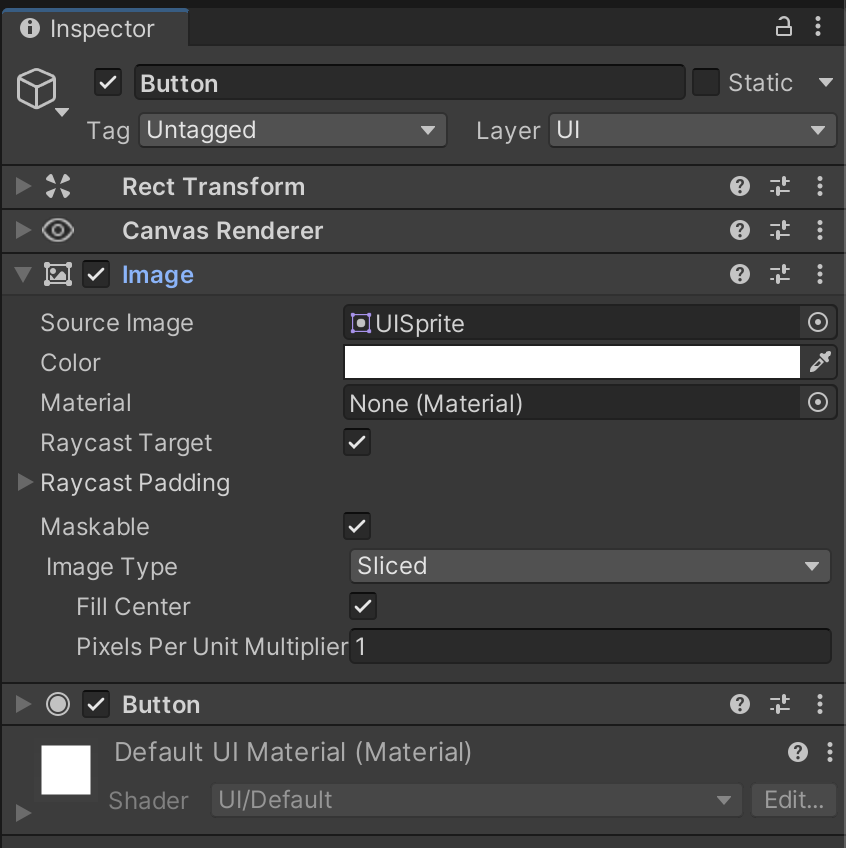
3. Something to be hit by rays.
This part is one of several different components such as Image or Text. They all have the Raycast Target field which is visible in the Inspector. So long as this is true the UI element can be clicked on and will generate events when this happens.
4.Something to use the events.
This is again a single component that is on the same GameObject as whatever is hit by the rays or on a parent GameObject. These can be many different component types but the most common components for detecting clicks are Button and Event Trigger.
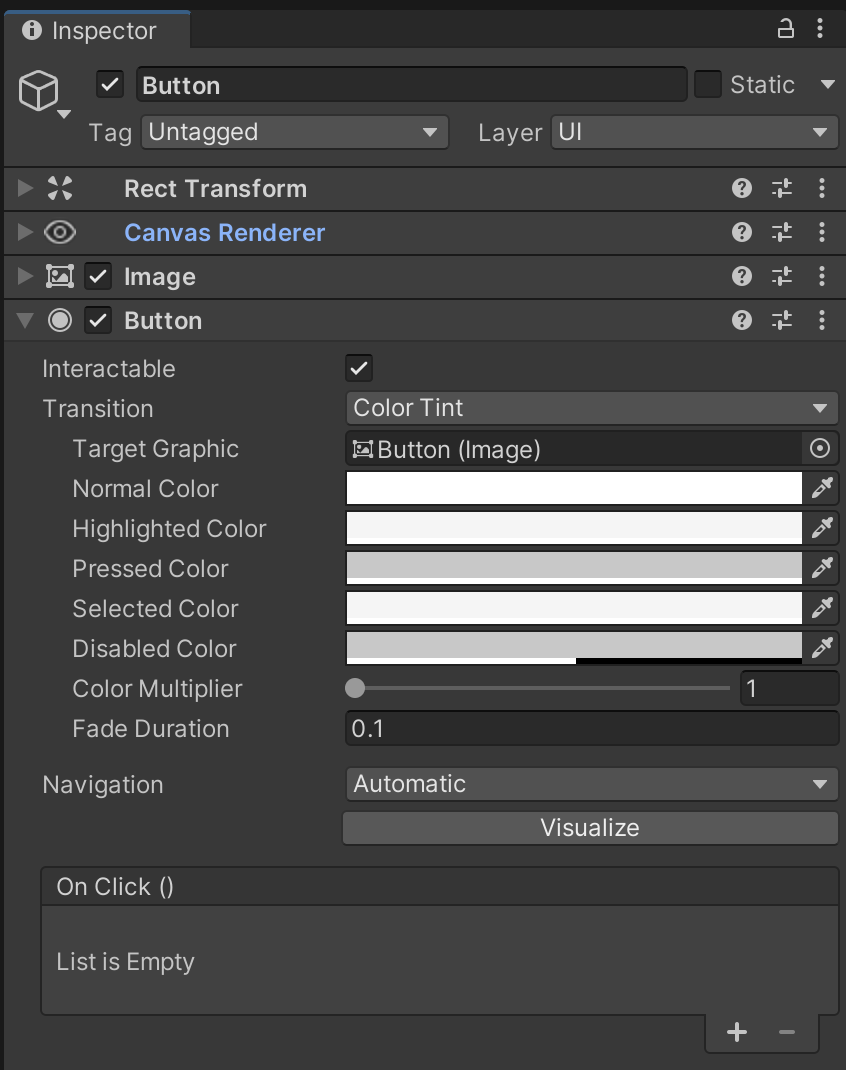
Whenever you create UI GameObjects such as Buttons in the scene using the Hierarchy menu or the GameObject > UI menu, a Canvas GameObject will be created and an Event System GameObject will be created automatically. Generally this means that you only need to worry about the third and fourth parts: something to be hit by the rays and generate events, and something to use those events.
Event Setup
Just as the Canvas and Event System GameObjects are automatically generated for you, the Image component is automatically added to the GameObject when you create a Button, for example.
Once you have created something to use the events, you need to give it something to do when it uses them. Button components have a list of methods to call when they are clicked on called OnClick. Click the plus button to add a method to the list.
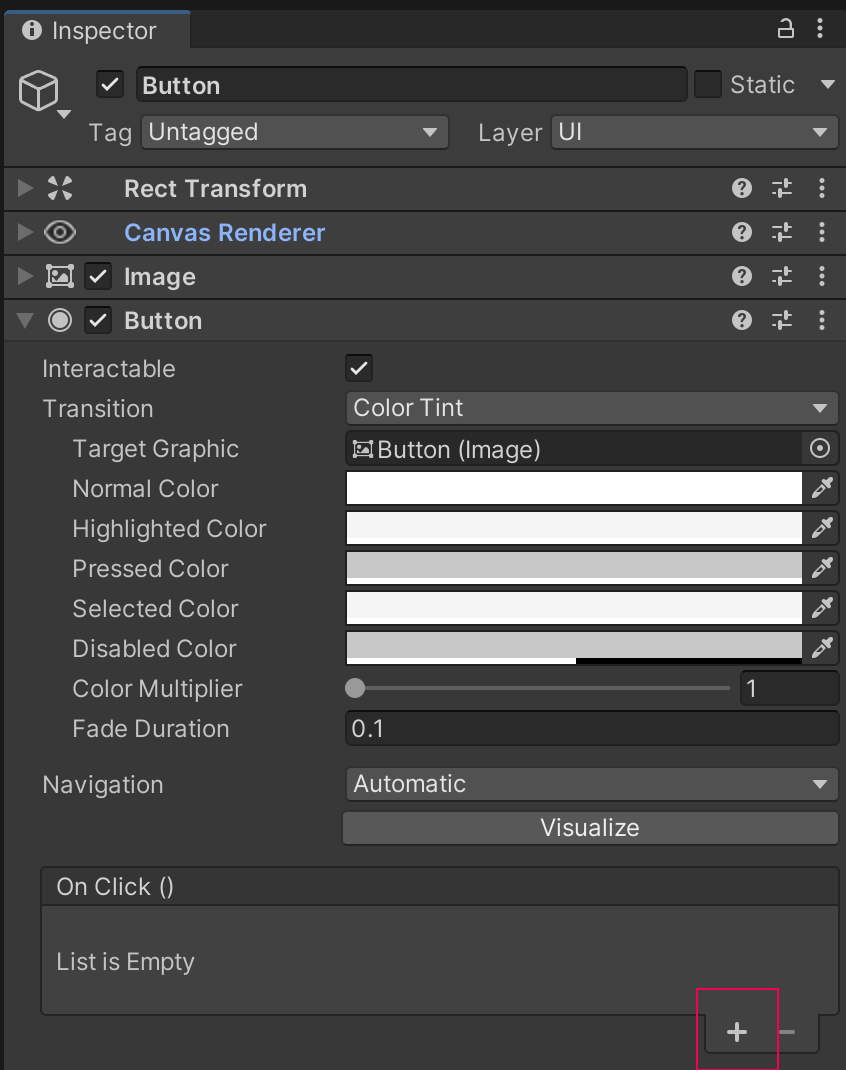
Each entry on the method list has an object reference for specifying the instance that the method can be called from. Typically this would be a GameObject or Component but could also be an asset or anything else that works with Unity’s object referencing.

Once an object has been referenced, The available functions are selectable from the function dropdown. If the referenced object is a GameObject this list of functions will include all available GameObject functions and functions from all the GameObject’s components.
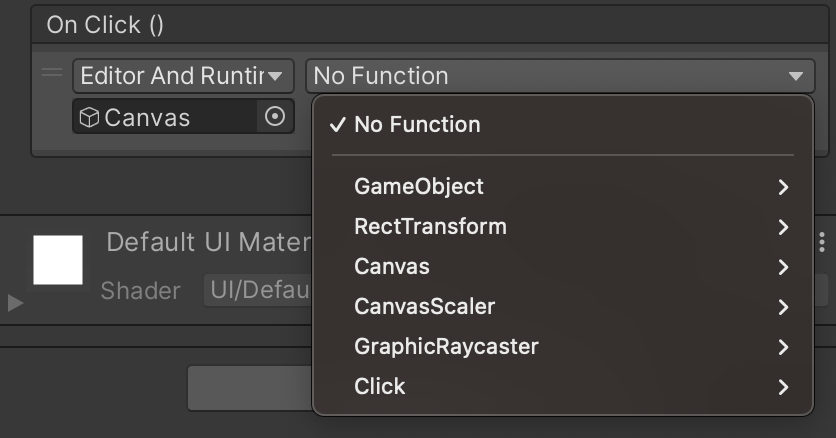
Simply click on the desired function to select it.

The functions that can be selected from this list are limited. The acceptable methods for an OnClick event must meet the following criteria:
- They have no parameters and no return type.
OR - They have one parameter of the following types: integer, float, string or object and no return type.
Because the function you choose can be from a wide variety of places, it is easy to create your own function that will be called when something is clicked on. The easiest way is to get custom functionality for something like a UI button is to create a MonoBehaviour script with your desired behavior in a method; attach the MonoBehaviour to a GameObject in the scene and then reference that GameObject in the Button component’s OnClick list. Here is an example script to show what could be added to a button.
using UnityEngine;
public class Clicker : MonoBehaviour
{
   void OnButtonClick()
   {
       // Code here is called when the Button is clicked on.
   }
}6. Summary
In this tutorial you looked at various ways to handle clicking on things with a mouse. Each way of approaching this has strengths and weaknesses. Perhaps for simplicity you only need to use OnMouseDown, or otherwise you might need the flexibility and future-proofing of writing something yourself using the Input System package. Keep in mind what you requirements are before selecting and implementing one of the techniques you learnt here.