
Set up a DevOps integration for Discord
Tutorial
Beginner
+10XP
15m
(118)
Unity Technologies
Clear communication between collaborators is a critical aspect of effective game development. In this tutorial, you’ll learn how to set up a Discord integration that provides DevOps notifications.
Note: This tutorial is part of Get started with Unity DevOps. Explore the rest of the course to learn more about how DevOps can support your work as a creator.
Languages available:
1. Overview
In this tutorial, you will learn how to connect your Discord server to the Unity DevOps trigger system. This will allow your project to automatically send notifications in your Discord server whenever something happens; for example, when you add a new file to your game project.
2. Before you begin
New to Unity?
If you’re new to Unity, welcome! The Unity Essentials learning pathway has been designed to help you get set up and ready to create in the Unity Editor. We recommend you complete this initial pathway before continuing with this DevOps tutorial.
Confirm access to the Unity Dashboard
To review the Unity DevOps tools and workflows on the Unity Dashboard as you work through this tutorial, you’ll need to activate a subscription for Unity DevOps and access your account on the Unity Dashboard.
Important: Unity DevOps is free to use and doesn't require a credit card. The paid version will only be required if you add more than three users to or use more than 5 GB data on the DevOps account.
Sign in to Unity DevOps
Follow these instructions to sign in to your Unity DevOps Dashboard if you have an active DevOps subscription:
1. In your browser, navigate to the Unity DevOps page.
2. If you’re not already signed in to your Unity account, select Sign in. Once you’re signed in, your Unity Dashboard will be visible.
3. Select the DevOps tab on the leftmost menu to display your DevOps Dashboard.
Set up your Unity project
You will need a Unity project set up with Unity Version Control (formerly Plastic SCM) for this tutorial. If you are completing the full Get started with DevOps course, you will have already prepared this.
Follow these instructions if you do not have a Unity project set up for this tutorial:
1. Create a new Unity project or choose one of your existing projects.
2. Set up a Unity Version Control repository for the project.
3. Create a new Discord integration
First, follow these instructions to create a new create a new Discord integration for your project:
1. Login to your account in the DevOps section of the Unity Dashboard.
2. Select either the Settings button in the leftmost menu or select the Manage settings button in your organization’s page.
3. Select the Integrations tab at the top of the Version Control Settings page, then select Discord.
4. Open the New integration dropdown and select the Configure with Webhook menu item.
4. Configure your integration with a Webhook
Follow these instructions to configure your new Discord integration for DevOps notifications:
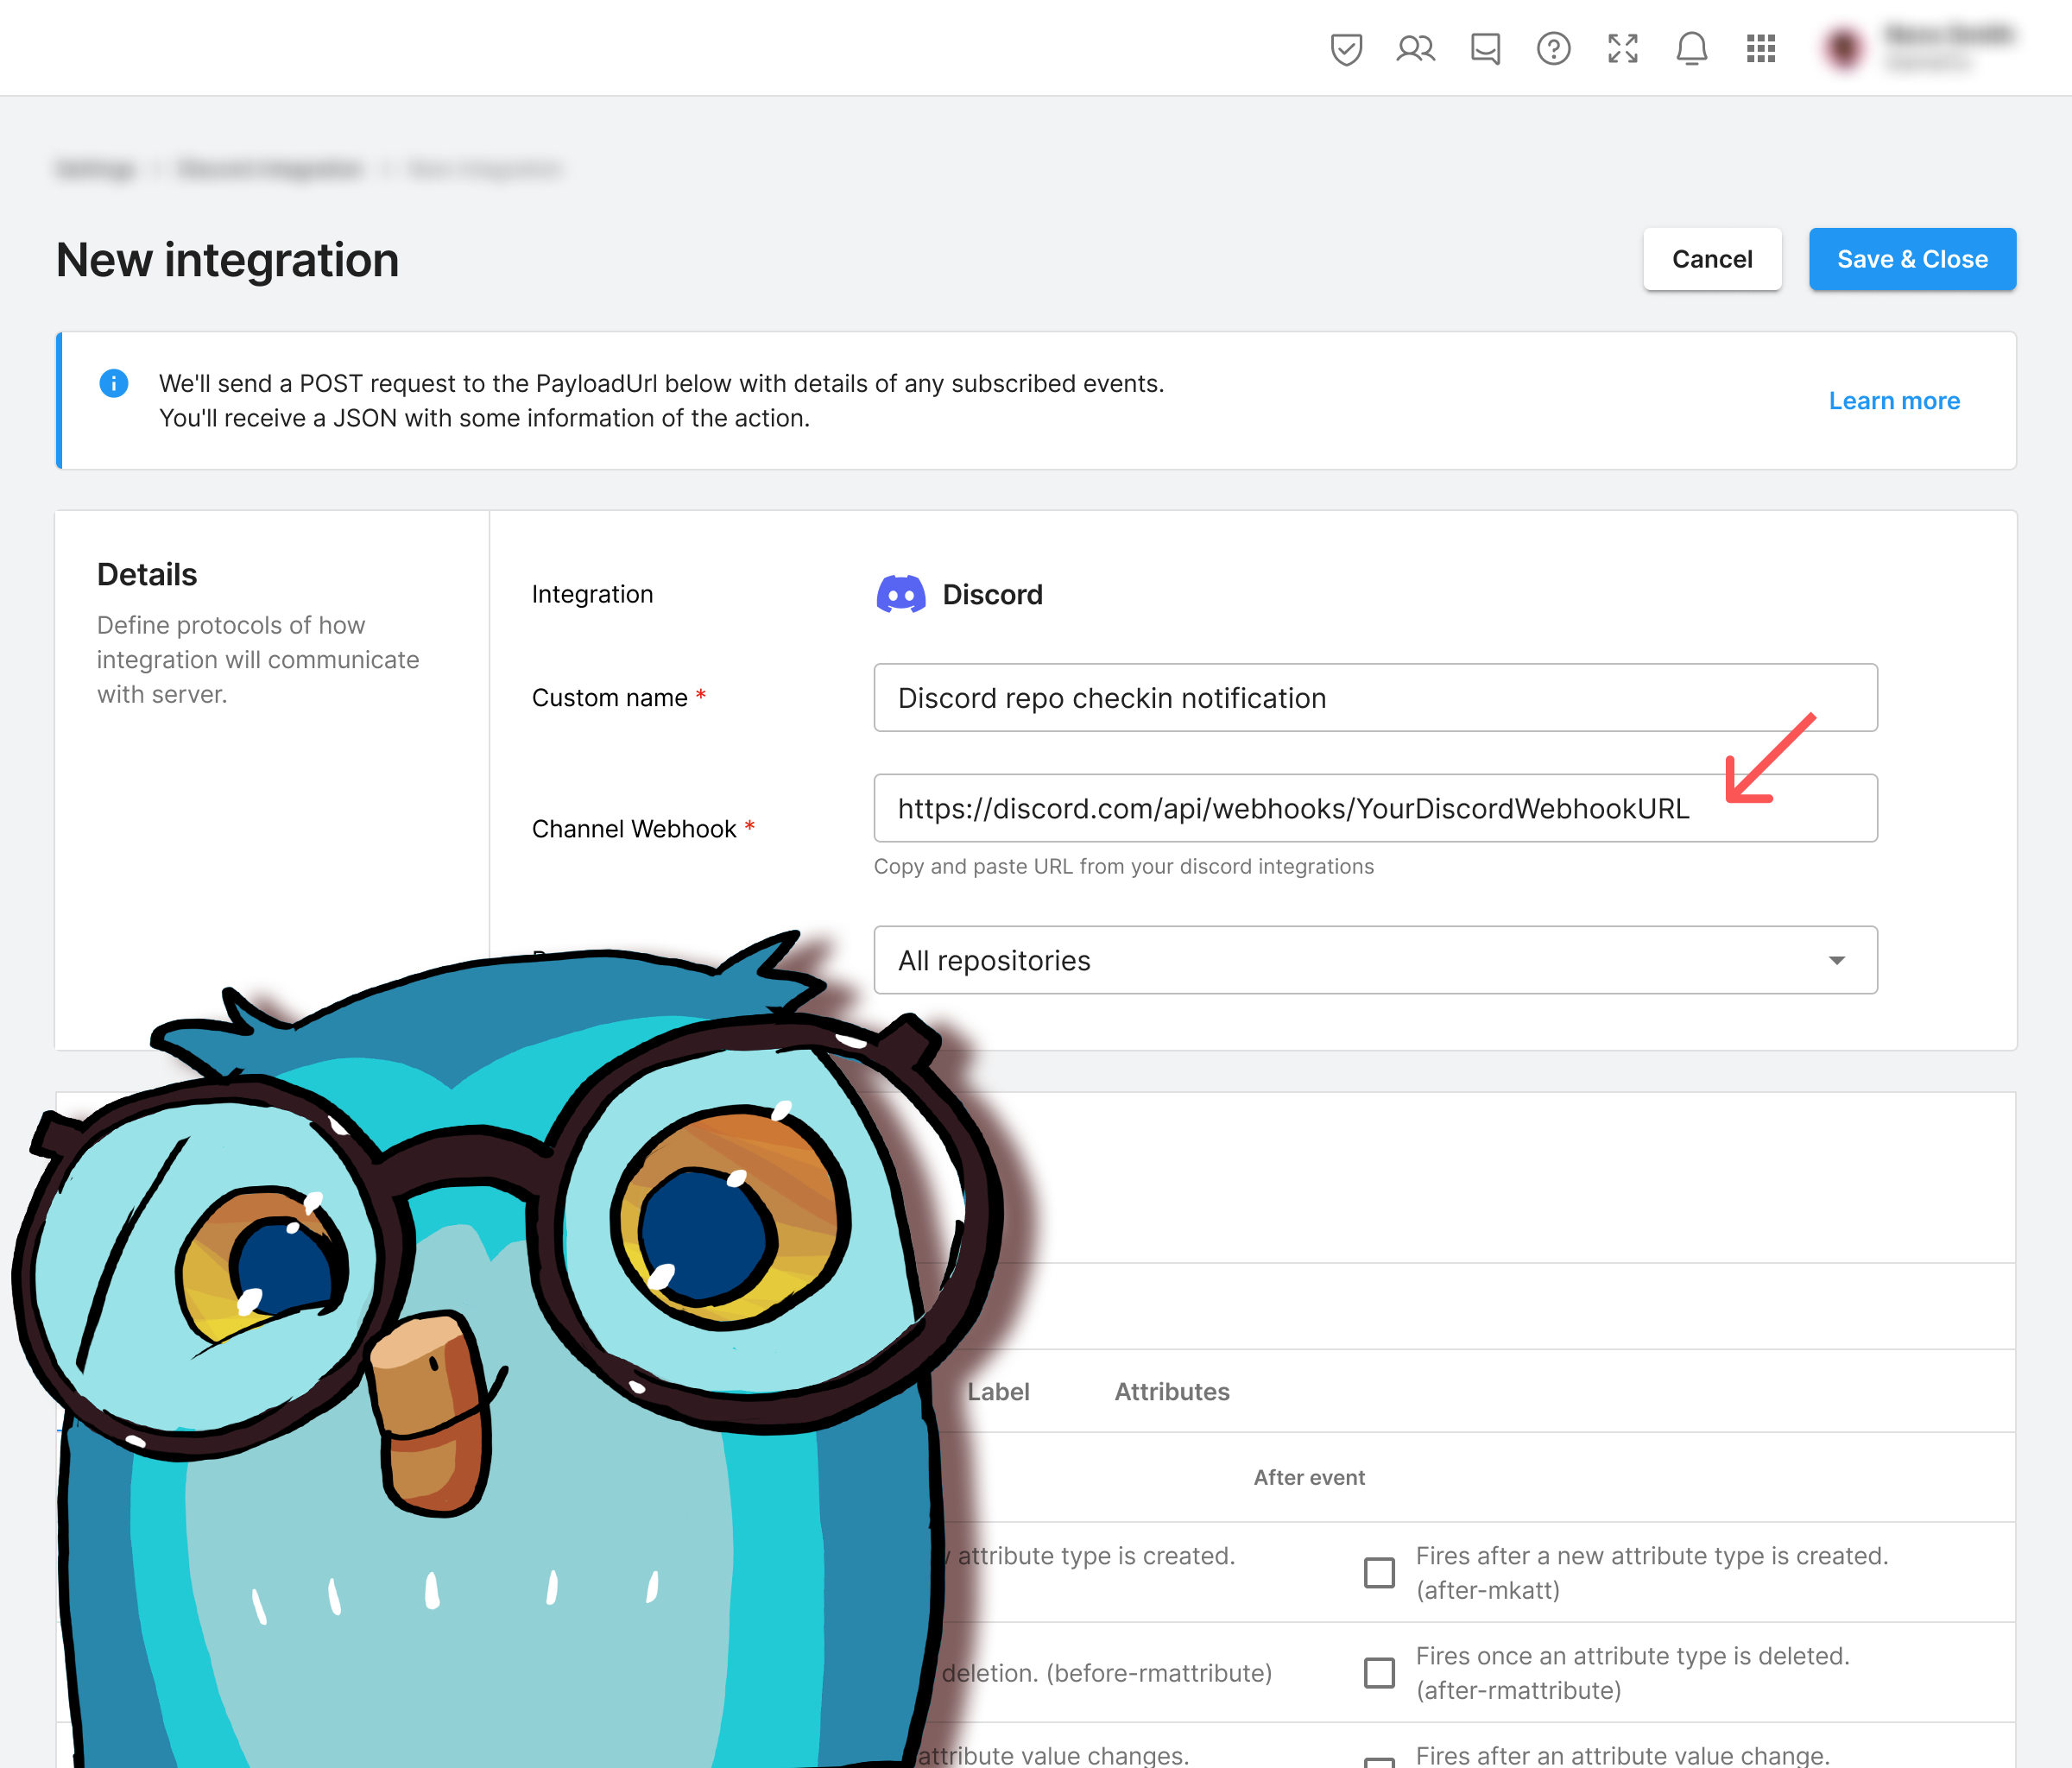
1. Name your new integration something like, “Discord repo checkin notification”.
Note: The name you give your new integration will not change anything about the integration itself, but it will remind you what each Discord integration does at a glance in the Settings menu.
2. Find the Channel Webhook property. This is where you will add a specific webhook for your Discord server.
3. In your Discord app, select Server settings, then select the Integrations option in the leftmost menu.
4. Select View Webhooks.
5. Select New Webhook.
6. Find the new Webhook that you just created and select Copy Webhook URL.
7. Return to the Discord Integration screen in the Unity Dashboard. Paste the Webhook URL you just copied into the Channel Webhook property.
8. Select the repository you want the Discord integration to be applied to. The New integration window should look something like this:
5. Select the event for Discord to display
Now, the exciting part begins! Scroll down in the Settings page to display the list of possible events that you could display in Discord.
You get to choose the event that your Discord server should display to your team members.
Should the integration publish a Discord notification when a team member uploads a new file in your project using Unity Version Control? Then, activate Checkin > Fires after checkin completes. Good for notifications. (after-checkin) under the After event column.
Note: While there are many different checkboxes that you can choose from, we recommend going with this simple checkbox option for now because it’s the most classic one that almost every project will benefit from. But if you’re feeling more creative, then take a look at the different checkboxes available; there are lots available and you can customize your Discord notification system to your liking!
Once you’re done with exploring and selecting the checkboxes, scroll to the very bottom of the page and select the Save & Close button.
You should now see the new Discord integration in the list of your dashboard, like this:
Now you can go back to your Discord server and see all the notifications appear whenever you or your team members do something in your project. Your Discord server will now display notifications! These notifications are a great way to keep everyone on the team informed about your game’s development progress.
Below is an example of how your Discord channel will look when someone adds game files to your repository:
6. Next steps
Congratulations, you now have successfully created your first Discord server integration!
Share your feedback
This learning experience was created by the Unity DevOps team. If you have any feedback, please share it in the DevOps forum.
Further resources
If you want to learn more about DevOps beyond these tutorials, here are some useful resources: