
Set up version control
Tutorial
foundational
+10XP
15 mins
2977
Unity Technologies
In this tutorial, you’ll learn about the basics of Version Control, and the reasons to implement it in your own projects, even if you’re developing applications by yourself. You’ll also learn about the different Version Control options available to use with Unity, and put your new skills into practice by downloading the project that you’ll use throughout the upcoming tutorials.
By the end of this tutorial, you will be able to:
- Identify the different version control solutions that can be used to maintain a project.
- Describe how version control is used to maintain a project
Resources
Languages available:
1. Overview
Whether you’re working alone or on a team, an important aspect of project development is deciding how you’ll manage your project files. If you’re a solo developer, there’s always some level of risk associated with keeping the only instance of your project on a local hard drive — if the drive fails, your project is lost! Keeping multiple backup copies of your project on different drives or stored in the cloud can be cumbersome to keep up to date. If you’re a developer on a team, you have to determine how everyone will access the project, and how to ensure that the work one person is doing doesn’t overwrite or damage the work of someone else.
Fortunately, the solution to all of these issues is quite simple: version control.
If the idea of working with version control seems intimidating, don’t worry! Many people feel overwhelmed by the idea of version control when they are first getting started with development. False starts and confusion when attempting to set up that first repository can make new developers hesitant to try again, despite how helpful version control can be. If you fall into this category, take heart that you aren’t alone — and try again in this project!
2. What is version control?
Version control (which is sometimes called source control) is a system that manages and tracks information. Version control systems can be configured to store, manage, and track changes to any kinds of files, software, websites, or other data.
Individuals, small teams, or large organizations will often use a version control system to help back up and manage complex projects. Since version control systems work with cloud storage services, you can take advantage of useful features such as:
- Backup storage
- Revision tracking
- Project management
In this tutorial, you’ll learn about version control systems which use cloud storage, as opposed to those that use localized storage, which is more suitable for special team circumstances.
3. Who uses version control?
When multiple team members are involved with developing coordinated projects or software, it can become difficult to manage without a version control system in place. Everyone needs it!
As a project becomes more complex, team members need to stay up to date with changes their fellow teammates make. If they don’t coordinate consistently, they will face inefficiencies, bottlenecks, lost code, rework, and a lot of frustration. The purpose of version control is to avoid these issues.
4. Select your version control tool
Version control systems vary depending on your project needs. Unity has its own version control solution called Collaborate, which is available as a package. However, for this learning project, we’ll be using Github, an extremely popular version control solution that you’re likely to encounter during your development career. It’s also easy to work with, especially for beginners with version control.
To make things even simpler, we’ll guide you to use GitHub Desktop, an easy-to-use application that allows you to access GitHub projects through a graphical user interface, instead of from a command line using Git commands. If you are already familiar with GitHub or prefer to work with the command line, feel free to skip the next step!
If you’re interested in reading more about how Unity integrates with other version control systems, please refer to our tutorials on Introduction to Unity Collaborate and Working with Unity and Helix Core Perforce.
5. Get started with GitHub Desktop
To create a GitHub repository, , you’ll need to sign up for a free GitHub account and install GitHub Desktop.
To set this up:
1. If you don’t already have one, sign up for a free GitHub account at github.com.
2. Download and Install GitHub Desktop at desktop.github.com, which is available for both Mac and PC. The site should automatically detect what platform you’re using, or you can manually select your platform type.
3. After installation, sign into your account on GitHub Desktop:
- On Windows, select File > Options > Account.
- On Mac, select GitHub Desktop > Preferences.
More information about logging in and authenticating your account can be found in the GitHub documentation.
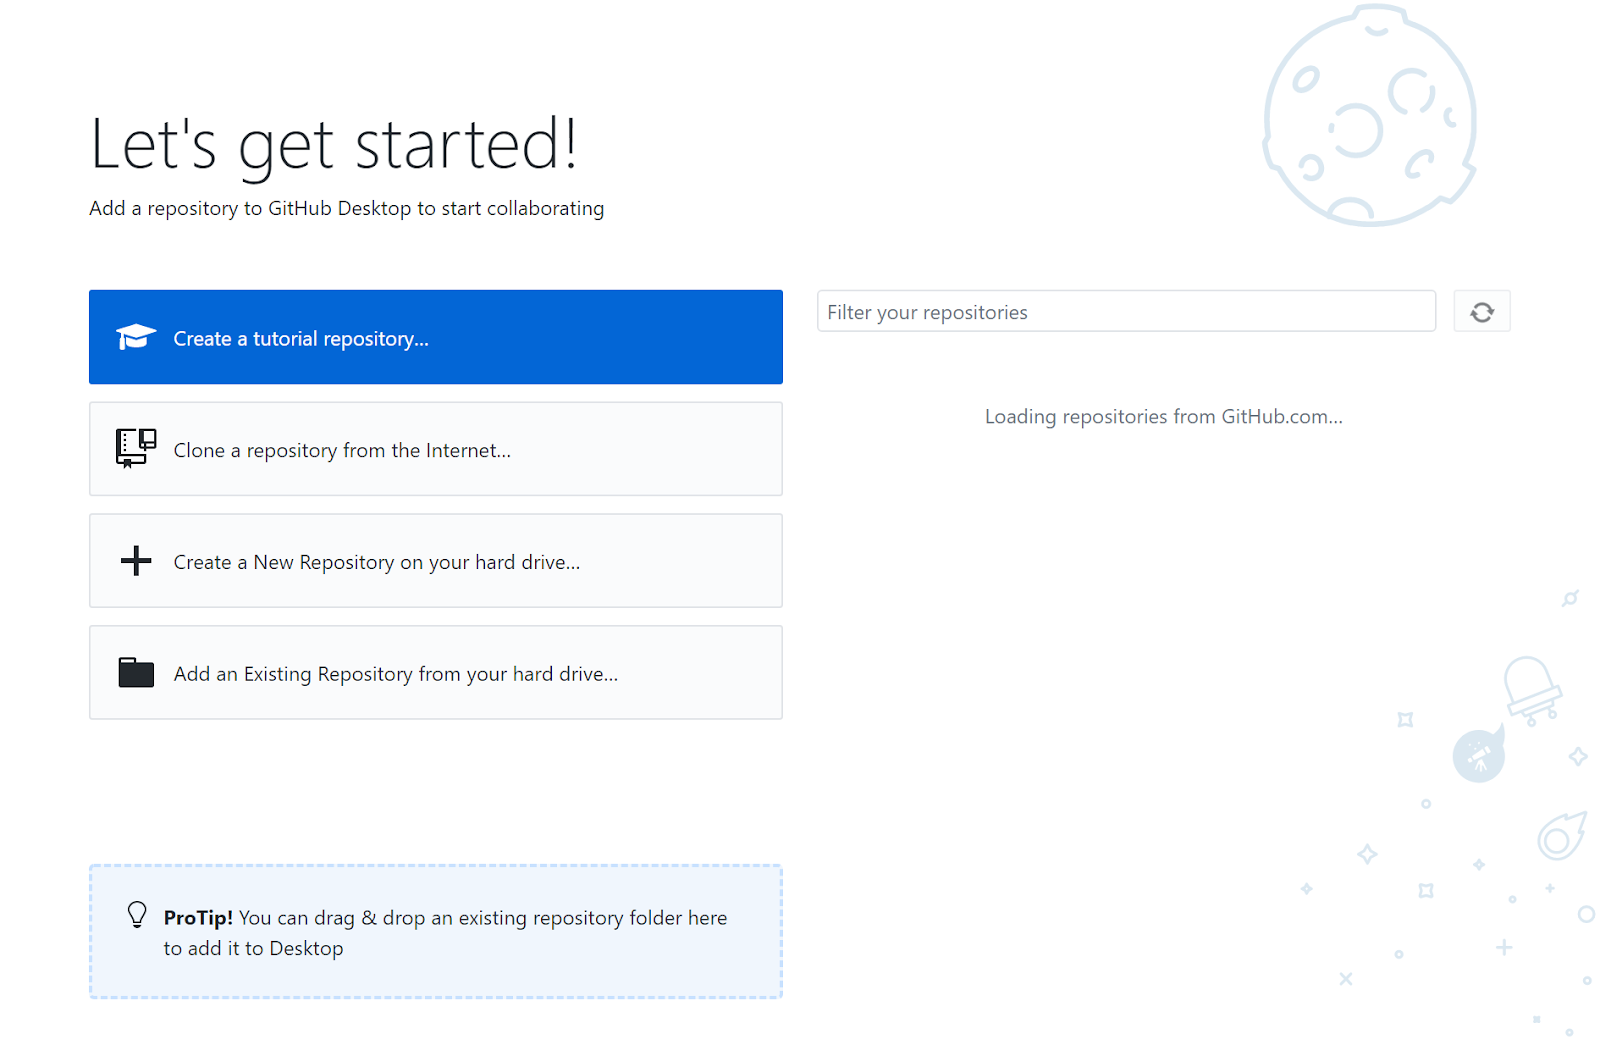
If you don’t already have any repositories associated with your account, you should now see this welcome screen, encouraging you to get started!
6. Create a new repo on your hard drive
A GitHub repository (usually shortened to “repo”) is a folder that a project lives in. Inside this folder, any and all changes are carefully tracked by your version control software. The first thing to do is create an empty repo that is configured specifically for a Unity project.
1. From the welcome screen in GitHub Desktop, select Create a New Repository on your Hard Drive.
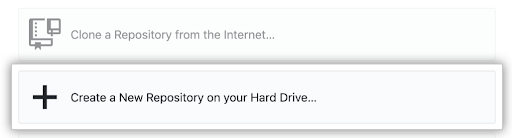
You can also click File > New Repository from the top menu of GitHub desktop.
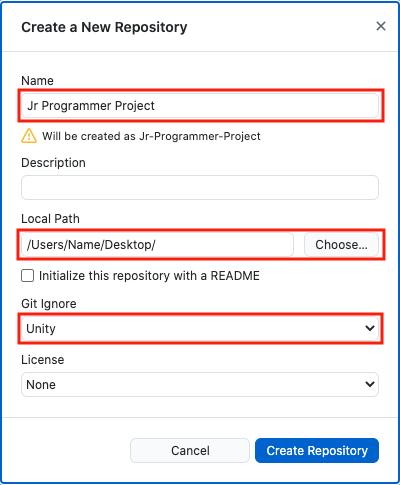
2. In the Create a New Repository window that appears, configure your repo’s settings:
- Give your repo a Name like “Jr-Programmer-Project”. Note that spaces will be replaced with hyphens.
- Select the Local Path where you would like to save your repo. A folder with the name you just entered will be created there.
From the Git Ignore dropdown, select the Unity option. This will create a preconfigured .gitignore file in your repo that lists all the file types that you do not want to store in version control. For Unity, that means it will only focus on the files specific to your project, and ignore everything else.
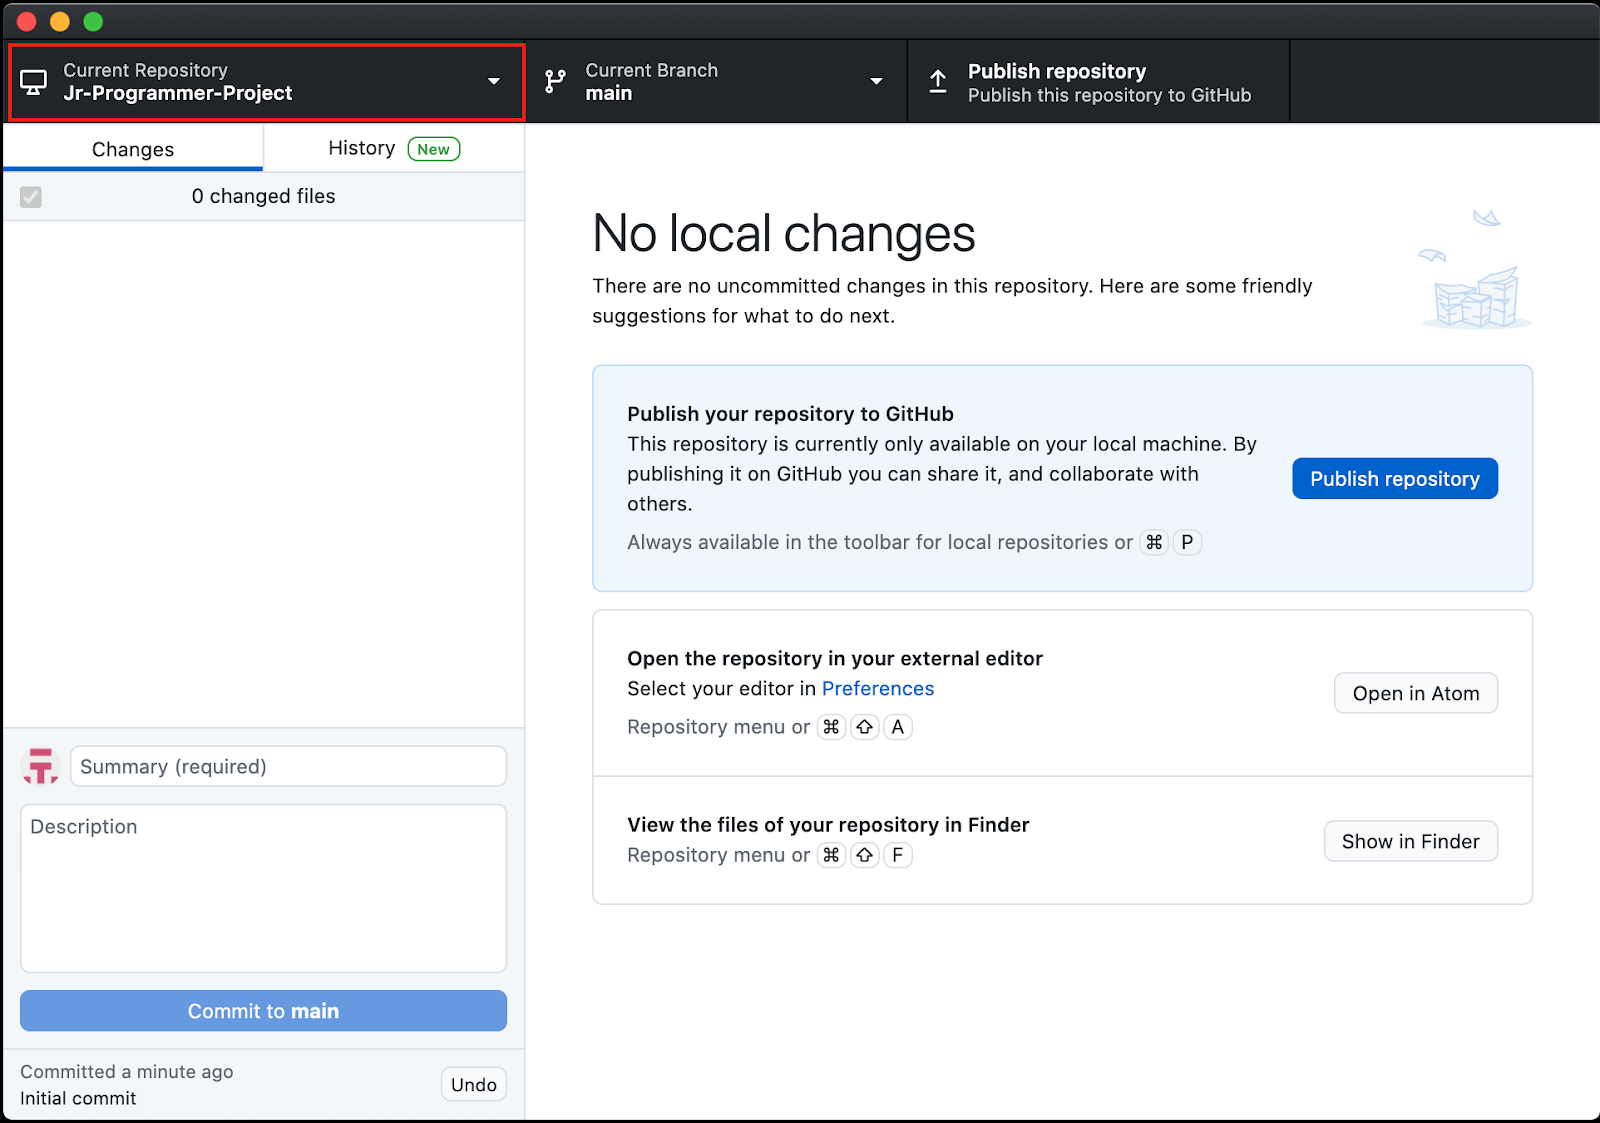
3. Select Create Repository. This will set the Current Repository dropdown to your new repo. In the main window, you will see that there are currently “No local changes.” That is because this is a brand new repo that you haven’t edited yet.
4. Open the folder that was just created on your computer at the location you specified. If your computer is configured to view hidden files, you will see it contains three items:
- .git folder
- .gitattributes
- .gitignore
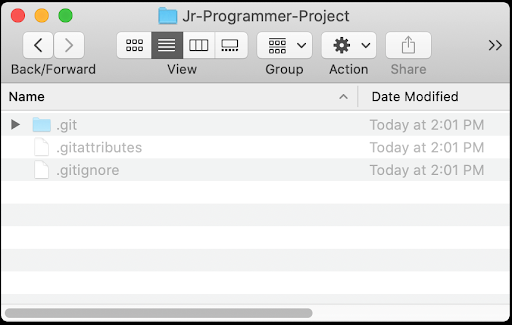
The .git folder tells GitHub that this is, in fact, a GitHub repo. The .gitignore and .gitattributes specify the configuration of your repo. It’s not necessary, but if you would like to see these hidden files, you can Google how to do so for Windows or Mac.
To give GitHub something to track, you will put an actual Unity project in this folder in the next step.
7. Download, open, and start tracking your project
With your empty repo patiently awaiting changes to track, let’s add a Unity project to it and open it for the first time.
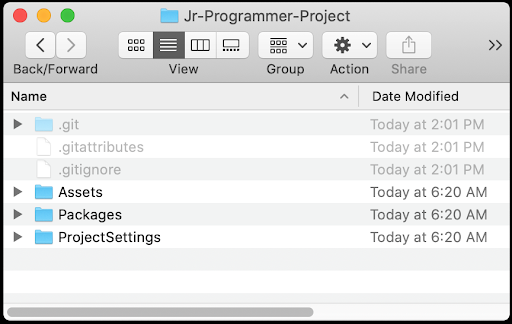
1. Download the project zip folder, extract it, and open the Junior-Programmer-Starter-Files folder. In it, you find the following folders:
- Assets
- Packages
- ProjectSettings
2. Use Ctrl+A (Windows) or Cmd+A (Mac) to select all three folders, then copy and paste them into your repo folder, right next to your hidden .git files. This folder is now ready to be opened as a Unity project.
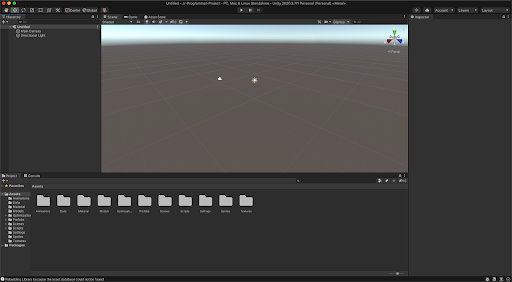
3. Add your project repo folder to Unity Hub, and then open the project in the Unity Editor.
Note that this project requires Unity 2020.3 LTS. If it’s not installed, a warning notification will be displayed below its listing in the Unity Hub with a prompt to install the correct version.
4. In your Github Desktop window, a long list of new files now appears in the Changes panel with a little green plus (+) icon next to each file, indicating that it’s new.

Congratulations! Your project is now ready for version control. Any changes you make to this project will be tracked by GitHub.
8. Do an initial commit and publish your repo
The first set of files you commit to your repo will be included in the initial commit. You would usually do an initial commit after you first set up your project, so let’s do that now.
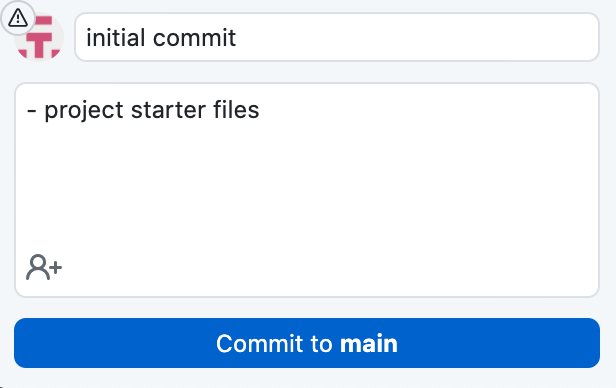
1. In the Summary field below the changes listed to your repo, type “initial commit” and fill in the Description (e.g. “project starter files”). Then select Commit to main to save your changes to the “main” branch of the project. If you don’t know what branches are, don’t worry — we’ll cover that in a later tutorial.
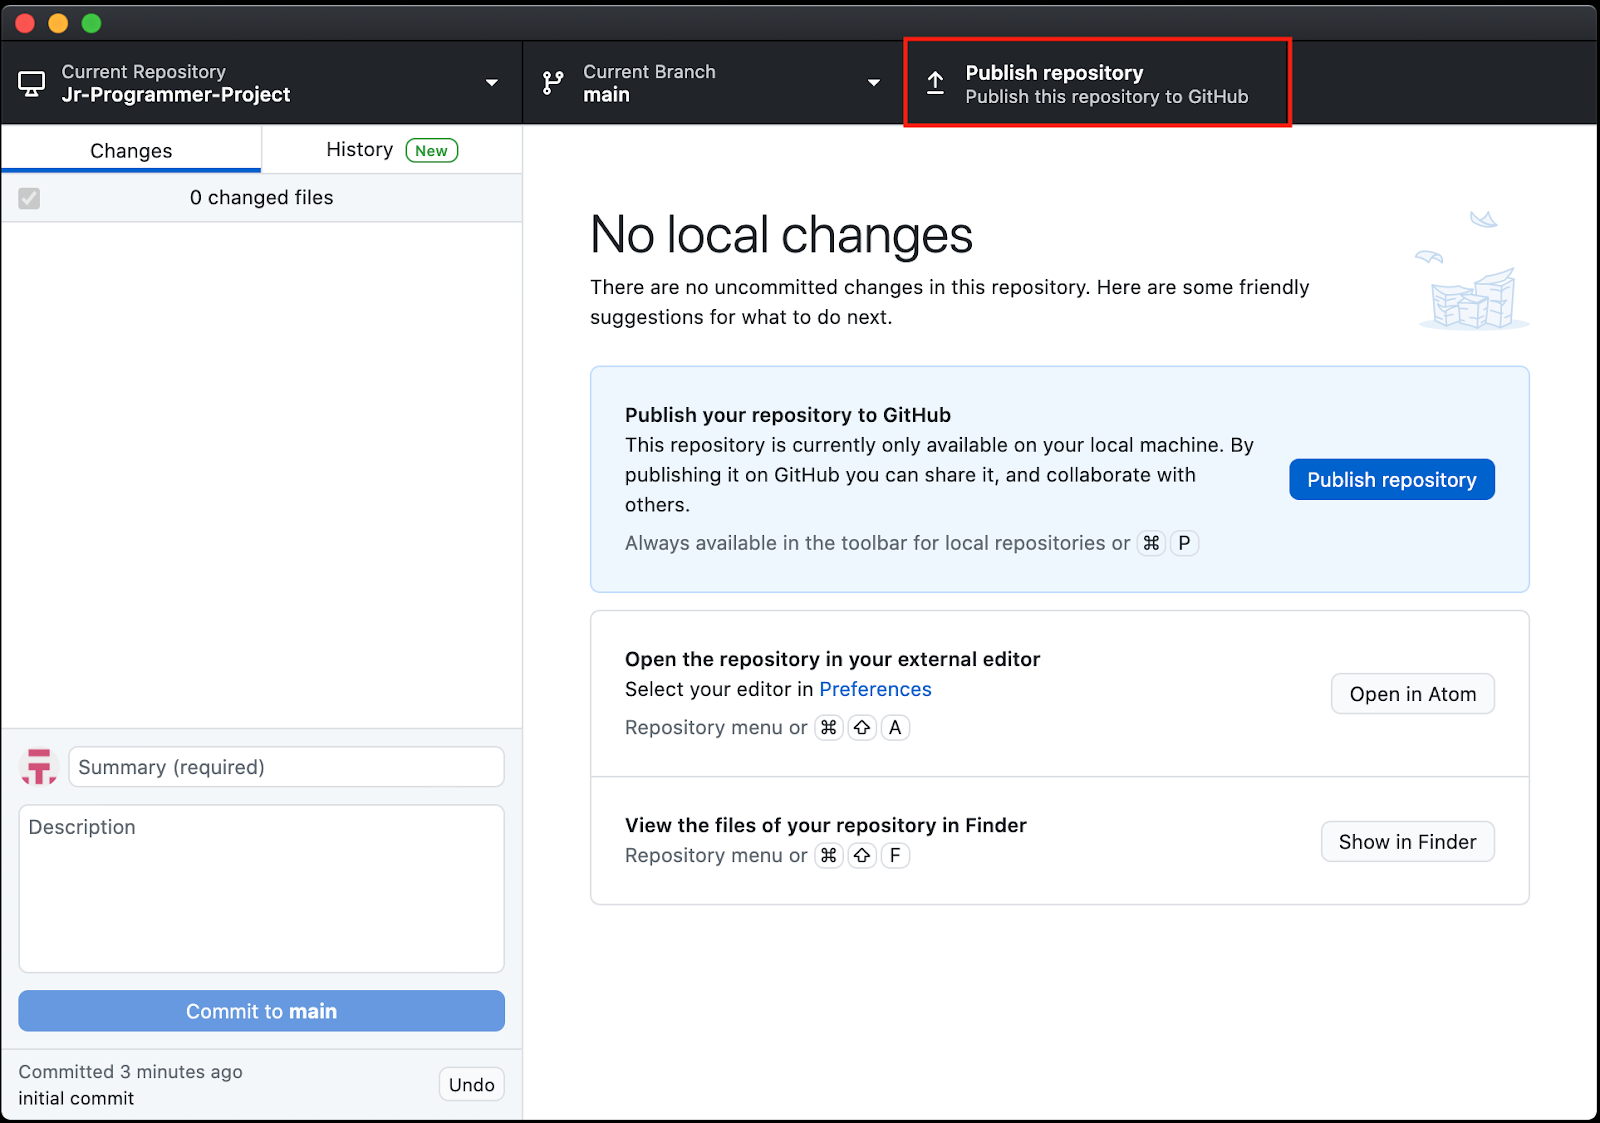
After you click Commit, all of the changes listed should disappear, since they are now safely stowed away in version control.
However, even though all of your changes will be tracked locally on your hard drive, what if you accidentally drop your computer off a cliff? All your work would be lost! Let’s back up your project on the cloud just in case.
2. From the GitHub Desktop interface, select Publish Repository.
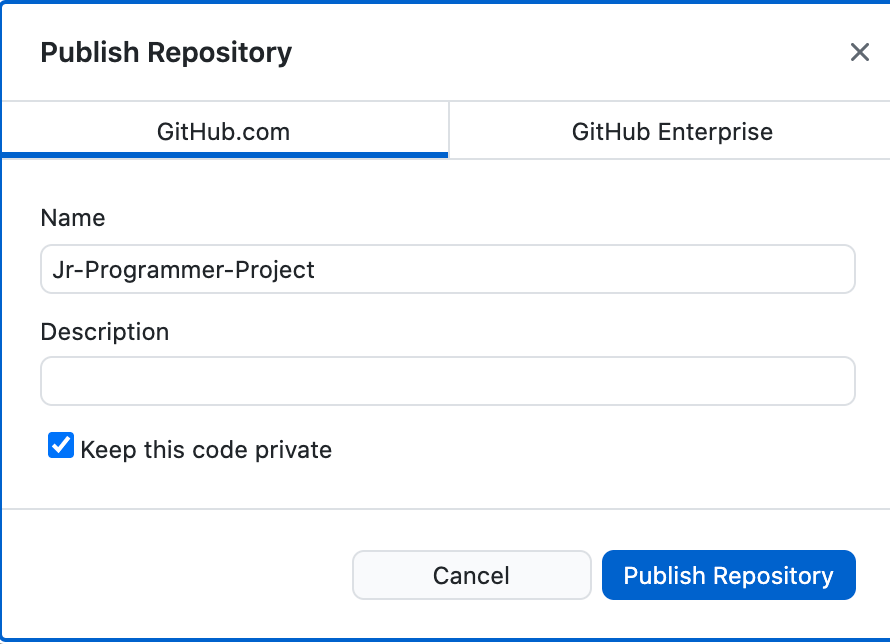
3. In the window that opens, confirm the Name of your project, and whether you want to keep your code public or private. Then select Publish Repository.
4. To see your repo backed up and published on GitHub.com, go to the top menu of GitHub desktop and select Repository > View on GitHub. Here, you can explore all of the files, view the commit history, log issues, and a lot more. Feel free to explore the interface to get a bit more comfortable.
9. How does version control work?
Pushing and pulling changes
When you use version control, you’ll save your changes to the project via a cloud repository (or file storage directory) with a note documenting the changes that you’ve made.
This means that you’ll be able to pull (download) and open up the most recent version of a project, make changes to it locally, and then push (upload) your changes back to the cloud repository.
Merging changes
When multiple people are working on the same project simultaneously, they can sometimes make different changes to the same file. For example, one person might change the texture assigned to a prop asset in a Unity project and another might change its position in the scene. Version control manages the project files to combine and unify all the changes in a process known as a merge. Occasionally, the changes made to a project file may affect the same values. When this happens, the version control system is unable to merge the changes together, resulting in a merge conflict, which requires a developer’s input. The version control system will identify the conflict, typically displaying the two different values side by side. The developer then determines which one to keep in order to resolve the conflict.
Reverting to previous versions
One of the major benefits of version control is keeping track of all changes over time. If any changes are in conflict, or you decide it’s best to revert to an earlier version, you can go back to any previous version of your project at any point in time and restore it.
10. Summary
Version control has major benefits for both solo developers and those working together on a team. Although it may seem intimidating to start, version control systems are powerful tools for maintaining a project as you work. In this tutorial, you:
- Learned about basic version control theory.
- Implemented that theory by setting yourself up to work within the GitHub ecosystem.