Create a basic 2D gameplay environment
Tutorial
·
Beginner
·
+10XP
·
30 mins
·
(3514)
Unity Technologies
Now the player character can move, it needs an environment to move around in. In this tutorial you’ll create a placeholder 2D environment that you can use as you continue to work on the character controller.
By the end of this tutorial, you’ll be able to do the following:
- Set up a new tilemap.
- Configure sprites to use as tiles.
- Paint the tilemap.
1. Overview
You’ve created a moving character, but at the moment it’s moving through empty space. Before you continue to develop the character movement, it will be helpful to create a basic environment for your game. Your goal at this stage is to make the environment functional rather than polished — you’ll have the opportunity to refine and enhance it later in the design and development process.
By the end of this tutorial, you’ll be able to do the following:
- Set up a new tilemap, including making sure that it is drawn before the objects that will go on top of it.
- Configure sprites to use as tiles.
- Paint the tilemap.
Working on your own project?
This tutorial is part of Beginner 2D: Adventure Game and we recommend completing the full course, but you might find the tutorial useful if you want to learn how to create a basic tilemap for your own 2D game. For further guidance on creating 2D environments, refer to Create Tilemaps in the Unity Manual.
Note: For the purposes of this tutorial, we chose to use the Ruby’s Adventure asset set, and the file paths used in instructions will reflect this. If you chose another asset set, the file names will be the same, but in your corresponding theme folder.
2. Set up your tilemap and first tile
Sprites are 2D assets you can use to create the visuals of your game. So far you’ve created a GameObject for your player character using a sprite, but it would take a lot of work to create a game environment one sprite at a time.
Instead, to create your 2D environment you’re going to use Unity’s tilemap system. Tilemap components store and handle tiles, which are assets that reference a particular sprite. You can use the tilemap system to lay out tiles on a grid, re-using and connecting tiles as needed to create your world. The tilemap system is a much more efficient way to create a game environment!
Important: In this tutorial you’ll set up a basic placeholder tilemap with individual sprite tiles — you’ll learn how to work with sprite sheets in the second unit, Game environment and physics.
To set up a new tilemap and first tile for your game, follow these instructions:
1. In the Hierarchy window, right-click and select 2D Object > Tilemap > Rectangular. This creates two new GameObjects:
- Grid, which you will use to lay out tiles evenly. The grid will appear in the Scene view when this GameObject is created.
- Tilemap, a child GameObject of the Grid GameObject, which you will use to render (display) the tiles that you set up.
2. In the Project window, go to Assets > Art > [Your Chosen Project] and create a new folder called “Tiles”, then open the Tiles folder.
3. Right-click and select Create > 2D > Tiles > Rule Tile. Call your new tile “FirstTile” and select the asset.
4. To set the sprite that the tile will reference, in the Inspector window, select Default Sprite > Select Sprite, then search for and assign the Tile1 sprite asset or your chosen project.
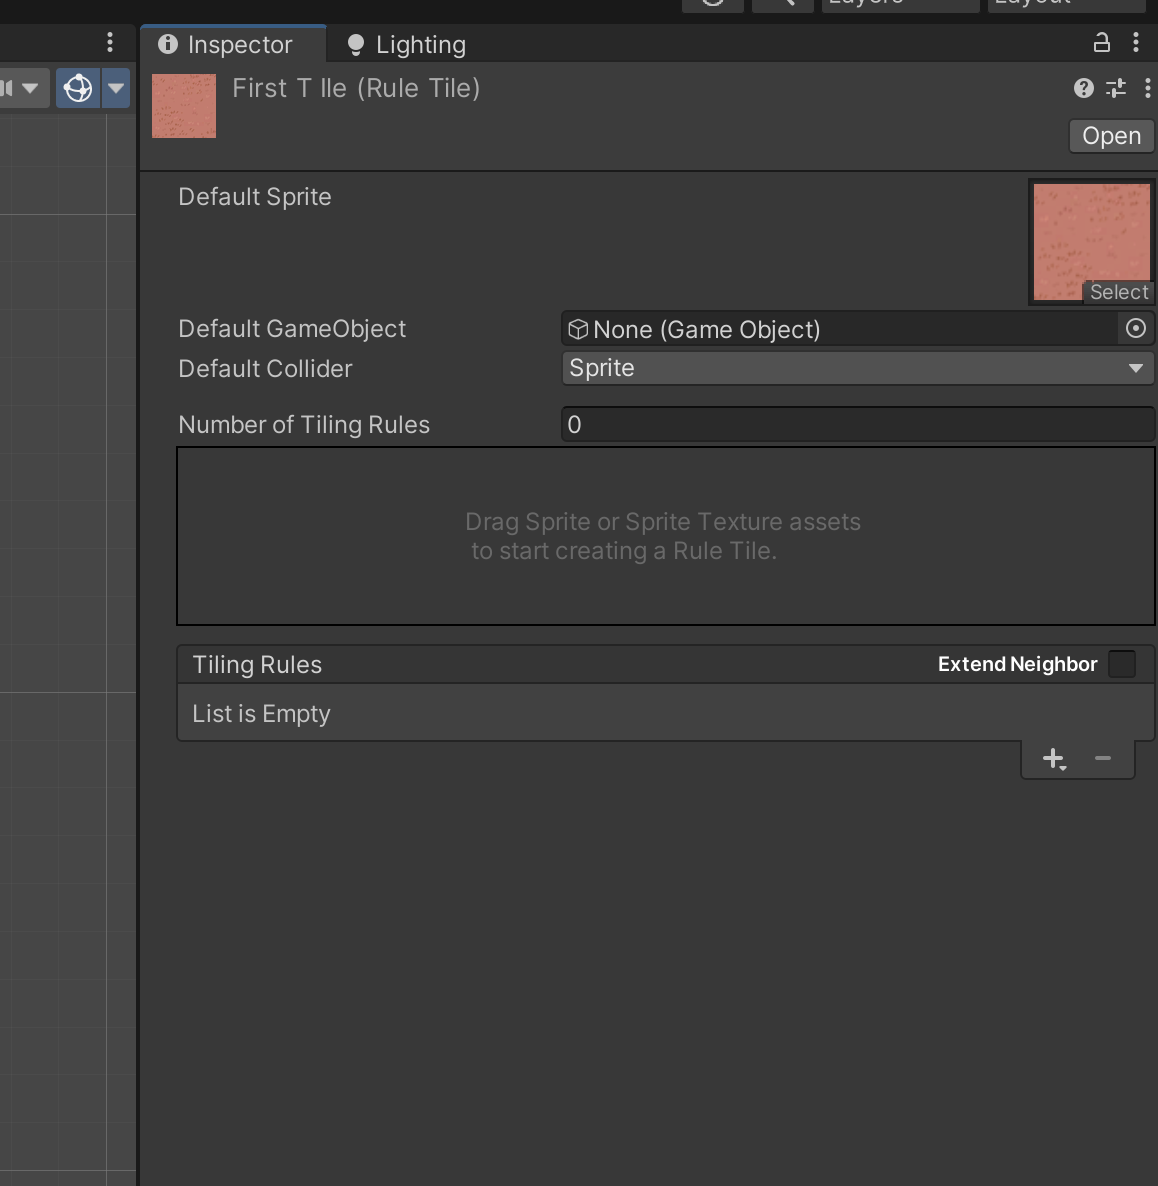
Note: You can also drag the specific sprite from the Project window and release it over the property slot to assign it to the tile.
3. Set up your tile palette
Just as a painter arranges the colors they plan to paint with on a palette, the tile palette is a tool that you will use to organize your tiles and apply them to your tilemap grid cells.
To set up a tile palette and add your first tile, follow these instructions:
1. From the main menu, select Window > 2D > Tile Palette.
Note: To keep this window locked in the Editor, left click and drag it next to the Inspector window to dock it.
2. Open the No Valid Palette dropdown, then select Create New Tile Palette.
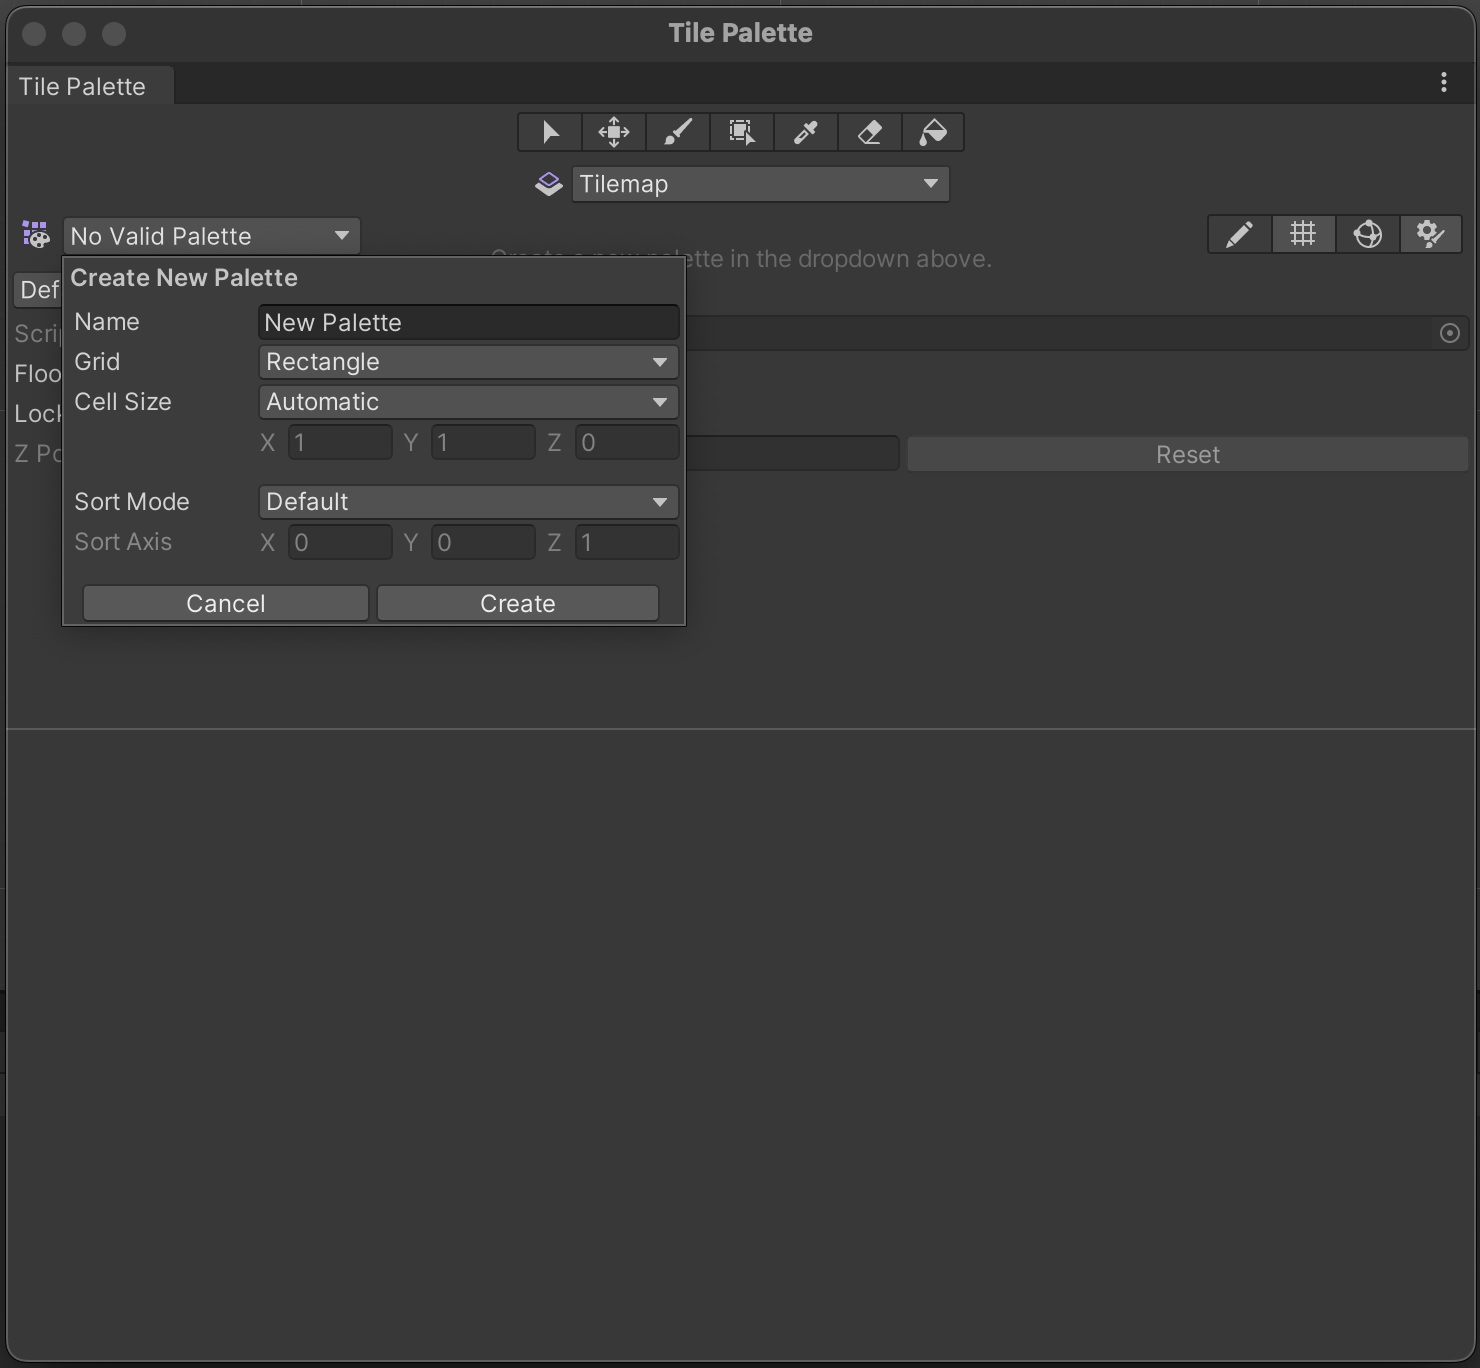
Note: If you are working in a Unity project where a tilemap has already been created, Create New Tile Palette will be displayed instead of the notification that there is no palette.
3. Name your palette “Game Palette”, then select Create.
A dialog window will appear so you can choose where to save your new palette.
4. Select the Tiles folder you created previously in this tutorial and continue.
5. Drag the FirstTile asset from the Project window and release it over the center of the tile palette area. The tile will appear in a single cell of a grid.
6. Save your changes.
Add another tile to the palette
In this tutorial, you’ll create a very basic environment that you’ll iterate on later. However, you might find it helpful to use two different tile designs when you set up character movement properly — you’ll do this before you create a full environment for your game.
Set up a new tile called “SecondTile” using the Tile2 sprite and add it to your palette before you continue.
4. Paint a placeholder tilemap
Now that you’ve set up two tiles, you’re ready to create a placeholder environment for your game. Placing tiles on the tilemap grid is called painting.
To paint a placeholder environment, follow these instructions:
1. In the Tile Palette window, select FirstTile and then select the Brush tool.
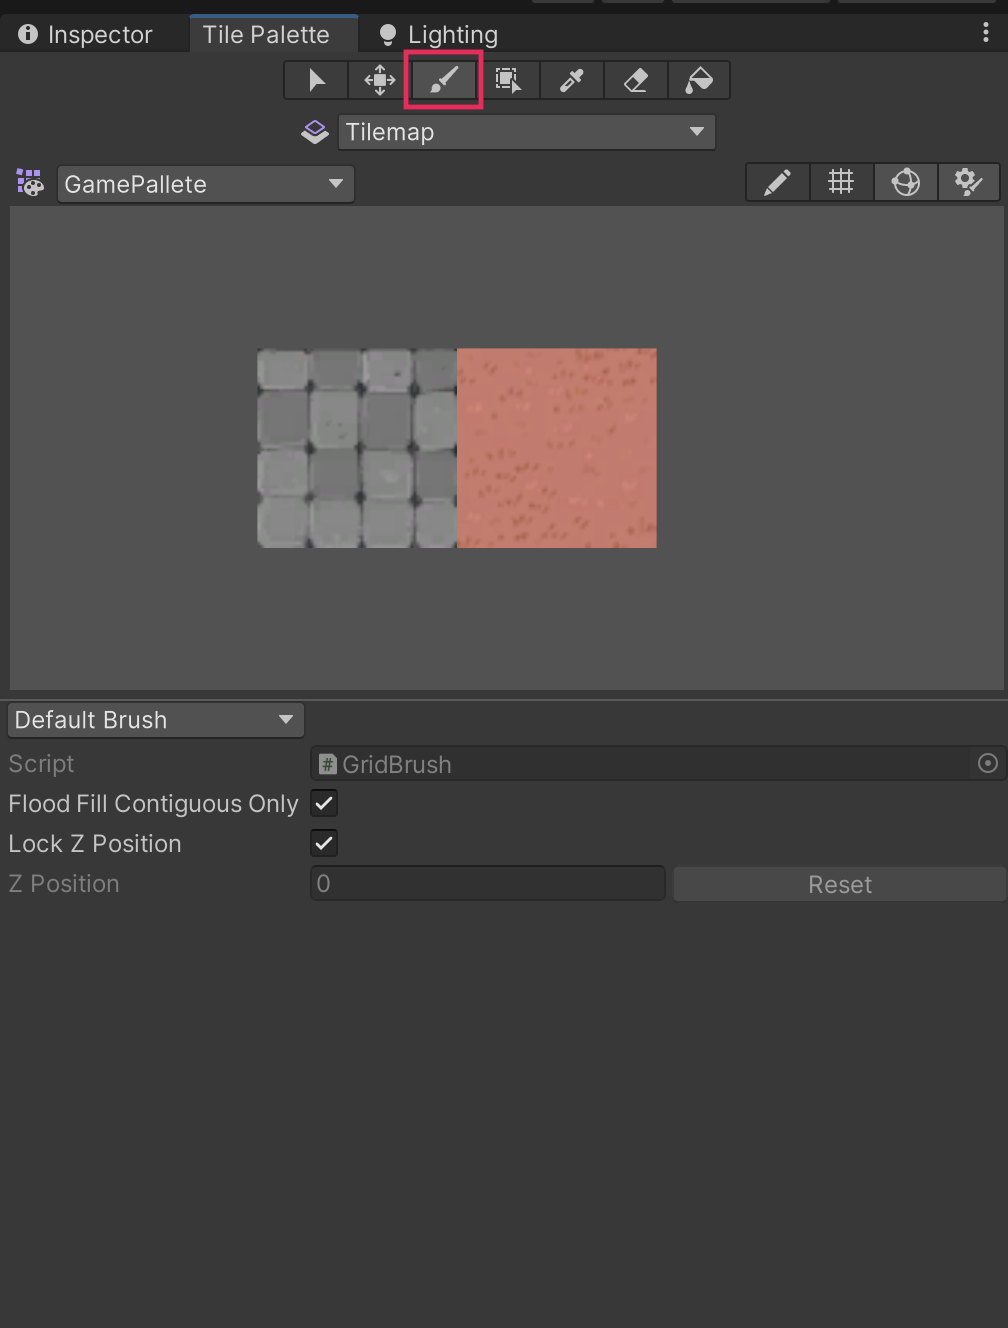
2. To paint a tile on the Scene view grid, select the cells that you want to paint. Your tilemap will look a little strange for now because the tile sprite is currently smaller than the grid cell size — you’ll fix this in the next step.
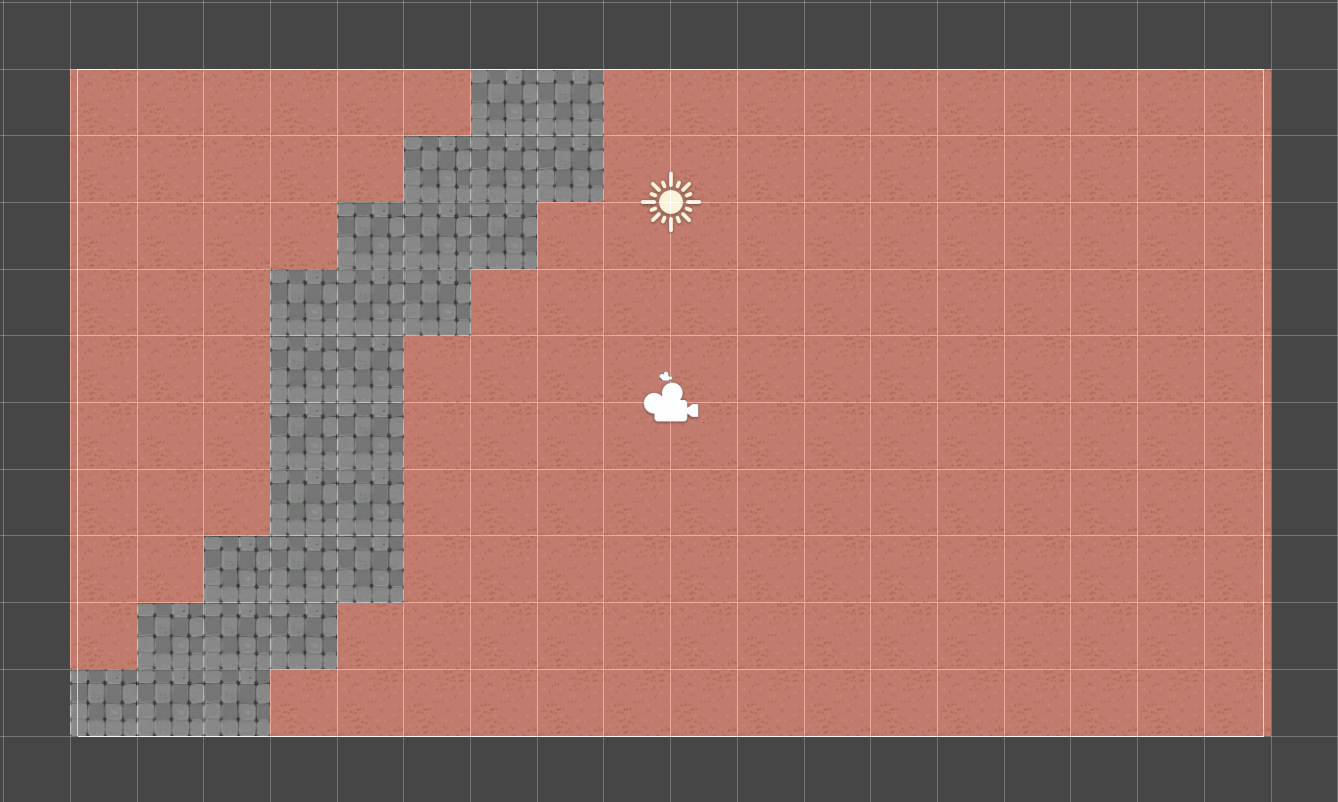
3. Switch between the two tiles and paint all the grid cells within the camera bounding box. You can create a simple path or any other tile pattern that you like.
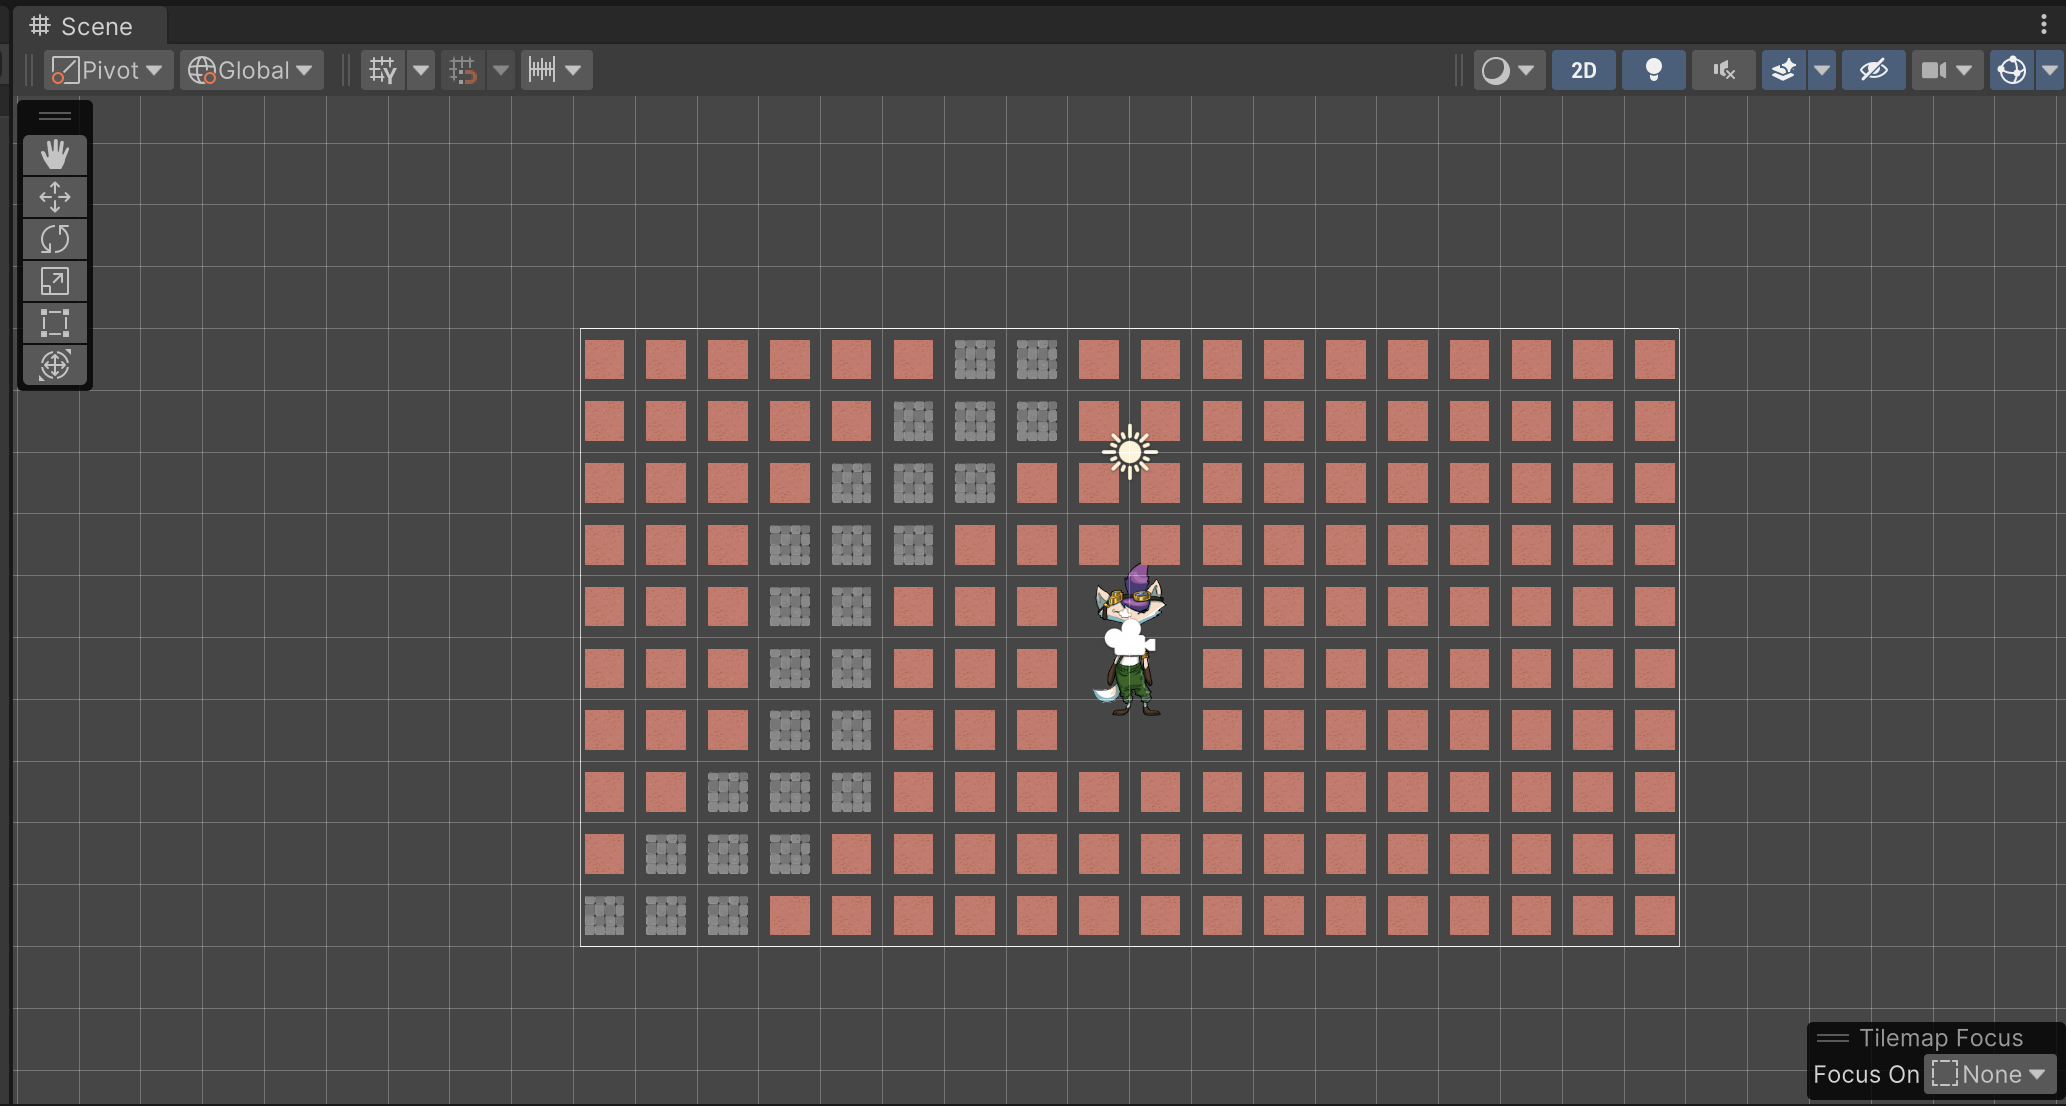
Note: To erase a tile, select the Eraser tool or hold D and select the cell with the tile that you want to remove.
4. Save your changes.
5. Fit your tiles to the grid
You’ve painted a basic tilemap, but it doesn’t look quite right at the moment. Each tile sprite has a space around it rather than filling the whole cell; this is because the sprites are smaller than the grid cells.
To fit your tiles to the grid, follow these instructions:
1. In the Hierarchy window, select the Grid GameObject.
2. In the Inspector window, go to the Grid component and find the Cell Size property. Both its X and Y-values are set to 1. That means each cell is one unit in width and one unit in height.
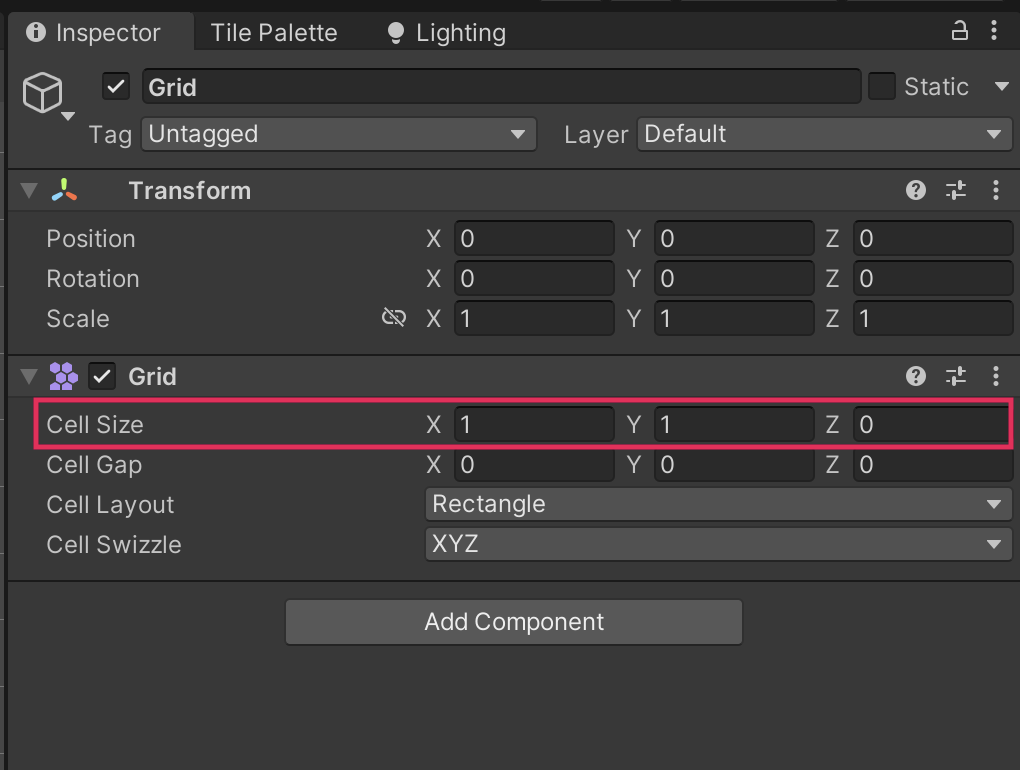
3. In the Project window, go to Assets > Art > [Your Chosen Project] Select the Tile1 sprite.
4. In the Inspector window, find the Pixels Per Unit property, which is set to 100. Pixels Per Unit (PPU) tells Unity how to size the sprite, by defining how many pixels should fit inside one unit – in this case, it’s 100 pixels per unit.
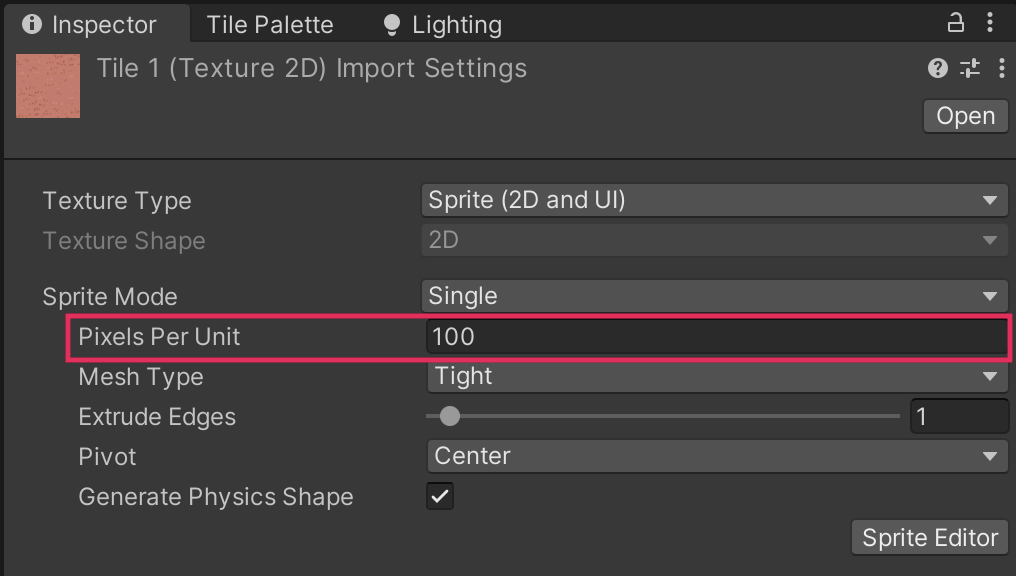
5. At the bottom of the Inspector window, find the preview image of the sprite. The sprite size is listed there as 64 x 64 pixels. The sprite is too small to fit into a grid cell which is 100 x 100 pixels.
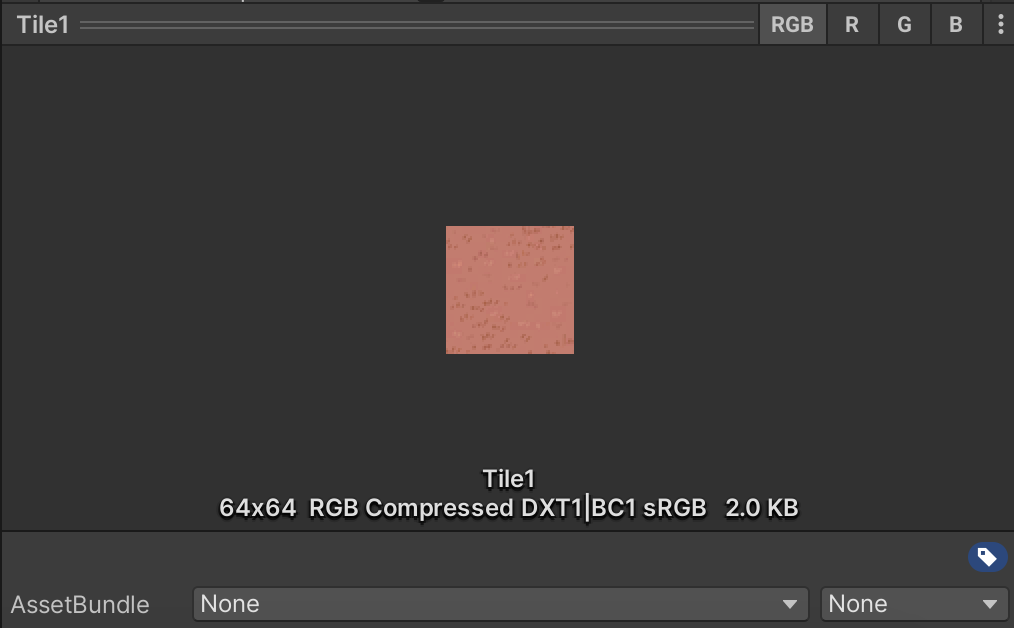
6. You now have two choices. You can do either one of the following options:
- Set the sprite Pixels Per Unit to 64 (or the appropriate scale for your own sprite asset), then select Apply. This approach will make the sprite fit one Unity unit, which is the size of one grid cell.
- Select the Grid GameObject in the Hierarchy window, and in its Grid component, adjust both Cell Size values (x,y) to 0.64.
For this example, we updated the Pixels Per Unit value.
7. Repeat this process for the second tile. Now all of your tiles should neatly fit the grid cells!
6. Set the tilemap Order in Layer
There’s one more thing that you need to adjust for your tilemap before you can continue to set up your game: the draw order.
The draw order is the order that the different visual elements of your game are rendered (displayed) on the player’s screen. At the moment, both the player character and your tilemap have the same z-axis (depth) position value of 0. Both GameObjects are also in the same default organizational group, layer 0.
This shared depth value and layer could result in the tilemap being drawn over the character, which would make your game impossible to play. A better way to organize the things that will be rendered for your game is to explicitly tell Unity the correct order to draw them.
To set the draw order for the tilemap, follow these instructions:
1. In the Hierarchy window, select the Tilemap GameObject.
2. In the Inspector window, go to the Tilemap Renderer component and find the Order in Layer property. This property defines the order in which GameObjects in the same layer are drawn.
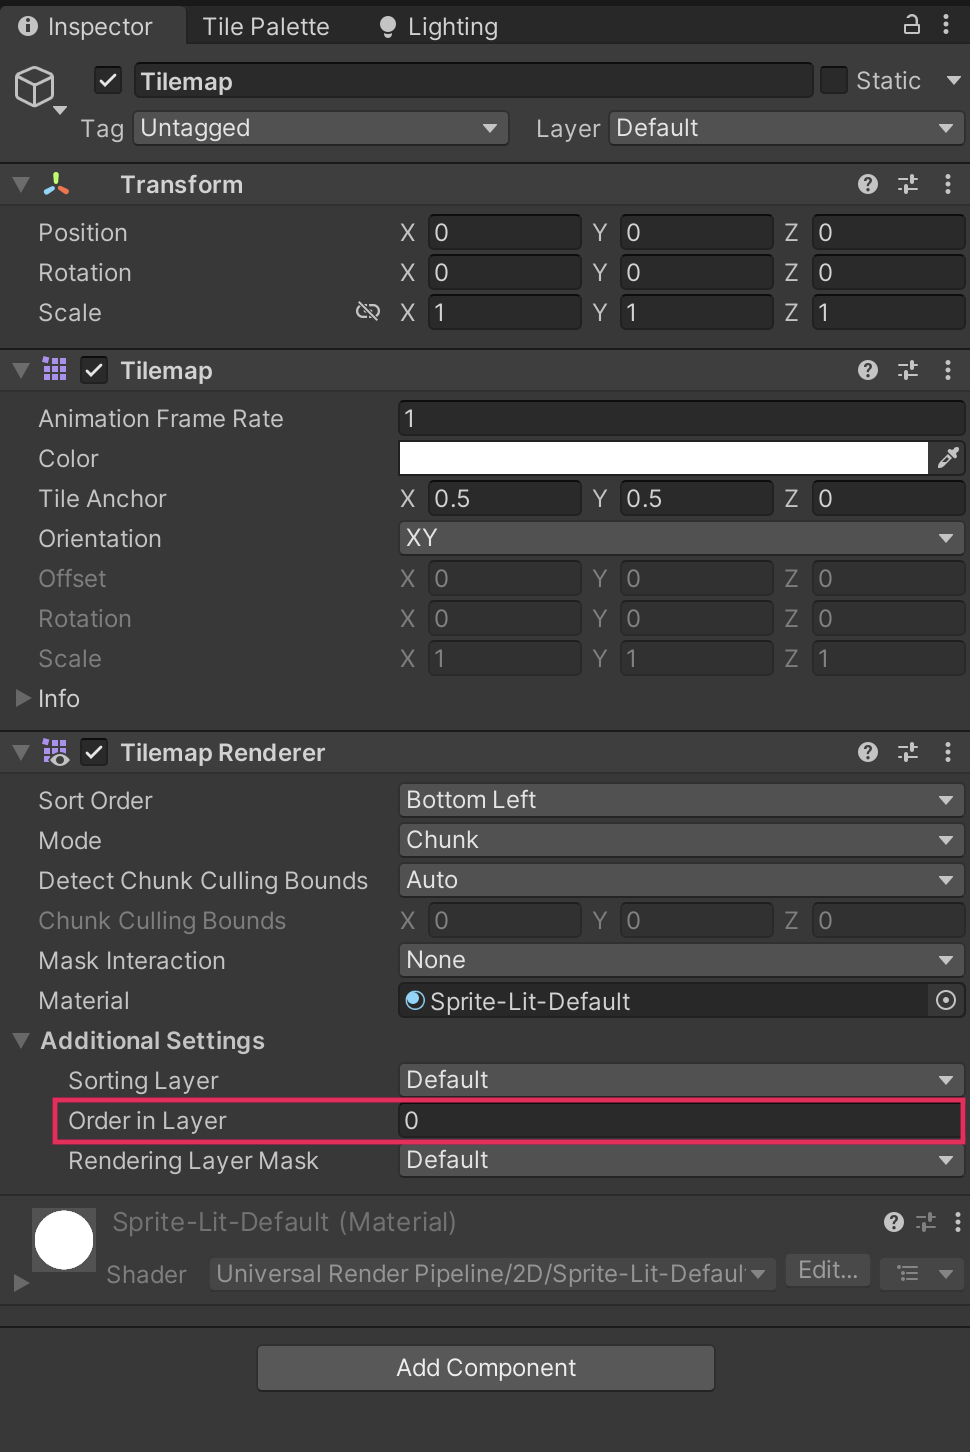
The GameObject with the lowest order value is drawn first; the higher a GameObject’s Order in Layer value, the later it is drawn. For Unity to correctly render both the PlayerCharacter and Tilemap GameObjects, you need to make sure that the PlayerCharacter GameObject’s value (0) is higher than the Tilemap GameObject’s value.
3. Set Order in Layer to -10. The tilemap will now be drawn before any GameObject that has a higher value for this property.
4. In the Hierarchy window, select the PlayerCharacter.
5. In the Inspector window, go to the Sprite Renderer component. Confirm that the Order in Layer property is set to 0.
6. Save your changes.
7. More things to try
If you want to further develop your skills, explore new concepts, or improve your project, check out some of the optional activities below. Each one is tagged as either Easy, Medium, or Difficult, so you can choose the level of challenge.
These activities are entirely optional, so if you’re not interested, no problem — just skip this step. We do recommend attempting at least one of them in order to get the most out of this learning experience. Good luck!
Easy: Add additional tiles
You’ll learn more about working with tilemaps in the next unit for this course, but you can extend your placeholder environment now by adding additional tiles. For more guidance on slicing tiles when they’re collected in a single sprite sheet (asset containing multiple sprites), review Design and paint your game tilemap.
Medium: Change the tilemap cell shape
In the Grid component, you can use the Cell Layout property to choose from a range of different cell shapes and arrangements:
- Rectangle
- Hexagon
- Isometric (rhombus-shaped)
Try importing sprites created for the different shape options and using those tiles to create the tilemap.
Medium: Plan your environment
Now that you’ve started to work with a placeholder environment, you have a better idea of how you’re going to create your final game environment. Take some time now to think about the layout that you want to use for your game. You might find it helpful to sketch a plan on paper or in a digital tool, or just to write some notes to help you later.
As you do, reflect on the following considerations for your game:
- How will you use the paths to guide the player through your environment? Will there be a benefit to staying on them or moving away from them?
- As you go through this course, you’re going to add a friendly NPC, who gives the player an initial instruction, and patrolling enemies. Where might you place these characters, relative to the player’s starting position?
- You’re going to add static damage zones and health collectibles — where might be good locations for these?
8. Next steps
Now that you’ve created a basic environment, you’re ready to implement movement for the player character based on player input. This is a key requirement for your game, and player input will be critical to the interactions and mechanics that you’ll set up later in the development process.