
Week 5 | Session 1 - Move and Orbit the Player - April 20, 2020
Tutorial
Beginner
+10XP
60 mins
(38)
Unity Technologies
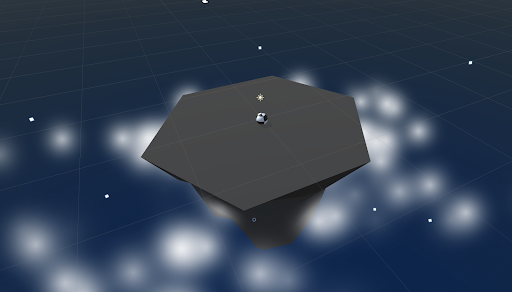
First thing’s first, we will create a new prototype and download the starter files! You’ll notice a beautiful island, sky, and particle effect... all of which can be customized! Next you will allow the player to rotate the camera around the island in a perfect radius, providing a glorious view of the scene. The player will be represented by a sphere, wrapped in a detailed texture of your choice. Finally you will add force to the player, allowing them to move forwards or backwards in the direction of the camera.
Resources
1. Overview
This is the same content covered in Lesson 4.1 in the independent Create with Code Course.
What you will make:
- The camera will evenly rotate around a focal point in the center of the island, provided a horizontal input from the player. The player will control a textured sphere, and move them forwards or backwards in the direction of the camera’s focal point.
What you will learn:
- Apply Texture wraps to objects
- Attach a camera to its focal point using parent-child relationships
- Transform objects based on local XYZ values
2. Before you Begin
To participate in this session and follow along, you need:
- Unity 2018.4 installed
If this is your first Create with Code live learning session, you can catch up by:
- Following along with the recordings of our previous live learning sessions
- Completing the same lessons in the independent Create with Code Course
*Note - it is not necessary for you to catch up, but it is recommended for an ideal learning experience.
3. Recorded Live Session - 20th April - 9am PST
If you missed this session, you can catch up with the video below.
4. Recorded Live Session - 20th April - 5pm PST
If you missed this session, you can catch up with the video below.
5. Next Steps
Get caught up:
If you were not able to finish the session along with the instructors, you can catch up by:
- Re-watching this recorded session when it is posted in Step 3 above at 3am PT (10am UCT) the morning after this session's date
- Picking up where you left off in Lesson 4.1 of the independent Create with Code Course
Bonus Challenges:
- Experiment with new features (after making a backup)
- Change the orbiting and forward/backward force to be controlled by mouse movement
(bonus: create a keyboard shortcut to switch between mouse vs keyboard control) - Create a “hop” button to allow the ball to hop up and down
- Change the orbiting and forward/backward force to be controlled by mouse movement
- Look ahead to the next lesson
- If you want to go ahead and preview what we'll be covering in the next session, you can give it a try in Lesson 4.2 of the independent Create with Code Course.