3.2 - Optimization
Tutorial
·
Beginner
·
+10XP
·
90 mins
·
(16)
Unity Technologies

In this lesson, you will learn about each of the key performance metrics for VR (fps, polycount, and draw calls) and how to ensure these metrics are optimized. By the end of this lesson, your app will be more optimized for performance.
This lesson is part of the Create with VR course.
Overview Video
1. Take stock of current fps
Before you start optimizing your code, you’ll want to identify your performance goals and how to evaluate if your app is meeting them.
1. Determine your device’s target frames per second (fps):
- Use the links below as reference and write down your target fps.
2. Determine the frames per second (fps) running on your device:
- From the _Course Library > _Prefabs > Testing folder, drag the FPS Overlay UI prefab into your Hierarchy window.
- Assign the Main Camera GameObject to the FPS Overlay UI prefab’s Canvas component’s Render Camera property.
- Run your application to see your fps.
Note: If you are running the app through the Unity Editor, this will not be an accurate prediction of the fps.
3. View the fps in the Unity Stats window:
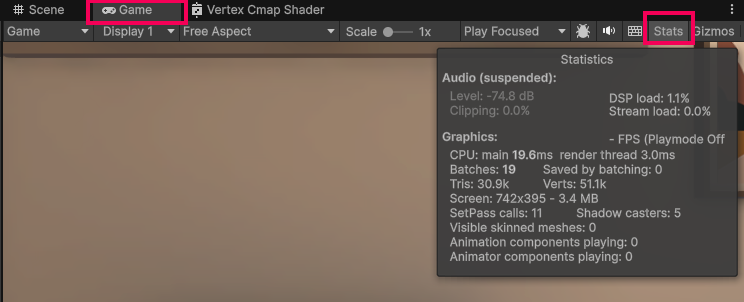
- In the upper-right corner of the Game view, select the Stats tab and locate the fps number.
4. Explore the Unity Profiler:
- Select the Play button.
- From the main menu, select Window > Analysis > Profiler.
- If the Profiler window isn’t recording, select the circular record button in the Profiler window.
5. To test the true frames per second running on a mobile headset:
- Build and run the app on your device with no connection to the computer.
You should now know where to find target metrics for your device and how to find the frames per second on your device.
Related resources:
- Target performance metrics
- Unity Tools
- Stats window
- Frame debugger
- Profiler
2. Optimize draw calls
In order to render a single frame, Unity draws things to the screen in batches of GameObjects. Every time Unity calls on the engine to draw something to the screen is called a draw call. If you can minimize draw calls, you can improve performance.
1. Determine your device’s target draw calls (batches):
- Consult your platform’s website to find your target draw call metric.
- If you look at the Guidelines for VR Performance Optimization for Meta Quest, you’ll see that the target draw calls for Meta Quest 3 for example is 500 - 1000.
2. Find the number of draw calls in your scene:
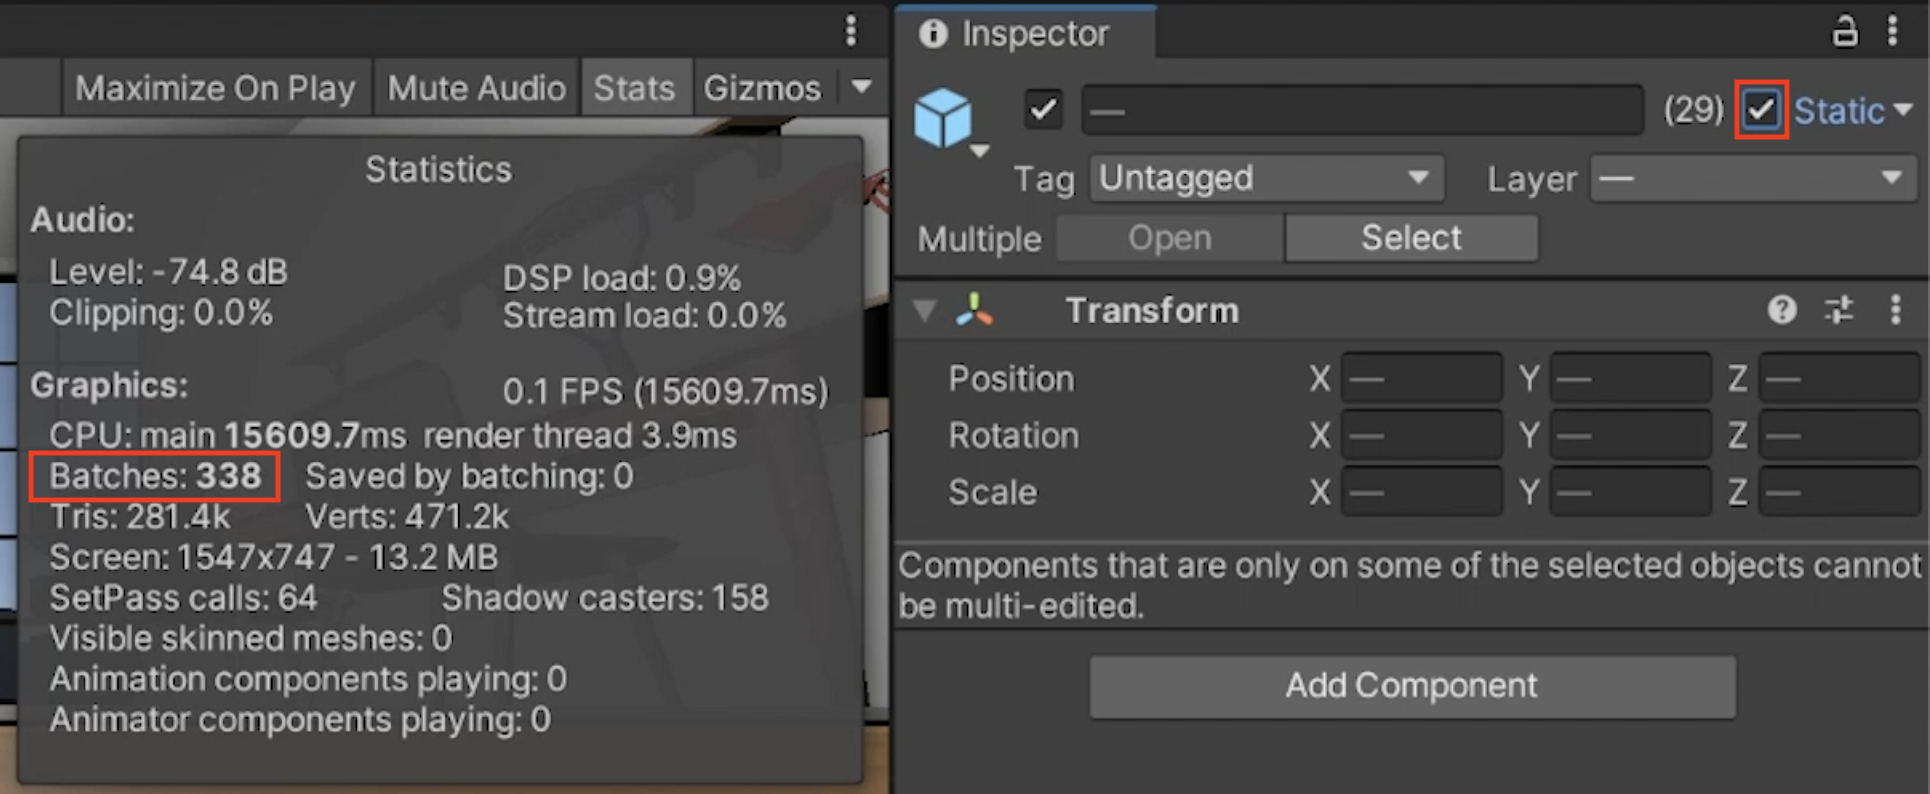
- Open the Game Stats window and locate the Batches (draw call batches) value.

3. Visualize how batching and draw calls can affect frame rate:
- In the main menu, select Window > Analysis > Frame Debugger.
- Select Enable.
- Use the left/right arrows in the Frame Debugger window and watch in the Game view to see the step-by-step creation of a single frame.
4. Make sure Static Batching is enabled:
- From the main menu, select Edit > Project Settings.
- In the leftmost panel, select Player.
- Use the foldout (triangle) to expand the Other Settings section, then make sure Static Batching is enabled.
5. Improve batching by marking unmoving GameObjects as Static:
- Make sure your Hierarchy window is organized so that all static GameObjects can be easily selected.
- Select all static GameObjects (including lighting GameObjects like lamps and chandeliers).
- At the top of the Inspector window, enable the Static property.
- When prompted, select Yes, change children.
- Notice the effect this has on Batches when you select the Play button.
6. If your Batches number is still very high (over 175):
- Consider removing the Mirror GameObject from the scene.

You should have now reduced the number of draw calls through batching GameObjects with shared materials.
Related resources:
3. Optimize polycount
The most straight-forward performance metric is the poly (polygon) count. The poly count is often measured in counting triangles(Tris) or counting vertices (Verts).
1. Determine your device’s target polycount (triangles):
- Consult your platform’s website to find your target triangles metric.
2. Find the number of triangles in your scene:
- Open the Game Stats window and locate the “tris” (triangles) value.
3. Visualize your triangles more clearly:
- From the Scene view , change from the Shaded draw mode to the Wireframe draw mode.
4. Determine the number of triangles for an individual GameObject:
- Select a GameObject.
- In its Mesh Filter component, select its Mesh property.
- Select that Mesh in the Project window to view its triangle count in the Inspector window.
Note: Anything under 1,000 tris is considered low poly.
5. Notice how your tris change depending on what GameObjects are in frame:
- Monitor the stats window as you rotate the XR Origin (VR) GameObject around.
6. If you are not hitting the suggested target for Tris:
- Remove or replace assets with high polygon counts until you reach your target.
- You can also try removing the mirror from your scene.
You should now be hitting your target for Tris and have an understanding of where you are spending your tri budget.
Related resources:
4. Optimize textures
In addition to evaluating the draw calls Unity makes, it’s also important to consider the size of the textures used in your scene.
1. Add a painting to the scene to better analyze the impact of texture settings:
- From the _Course Library > _Prefabs > Art folder, add a piece of art to a wall in your scene.
2. Access the material for the GameObjects in your scene:
- In the painting’s Mesh Renderer component, use the foldout (triangle) to expand the Material section.
- Select the material in the Project window.
3. Locate the texture atlas used for the material:
- Use the foldout (triangle) to expand the material’s Surface Inputs section, then select the thumbnail next to Base Map property to locate the texture in the Project window.
- Select this texture to view the texture’s Import Settings.
4. Experiment with the texture settings:
- Under the texture’s Default tab, adjust the Max Size, Resize Algorithm, Format, and Compression properties.
- Select Apply to see the impact each setting has on the visuals in your scene.
- Once you’ve observed the difference, revert back to the original settings.
5. Enable mipmaps to automatically reduce the resolution of textures seen from a distance :
- Locate and select the InteriorColorSwatch texture in the Project window.
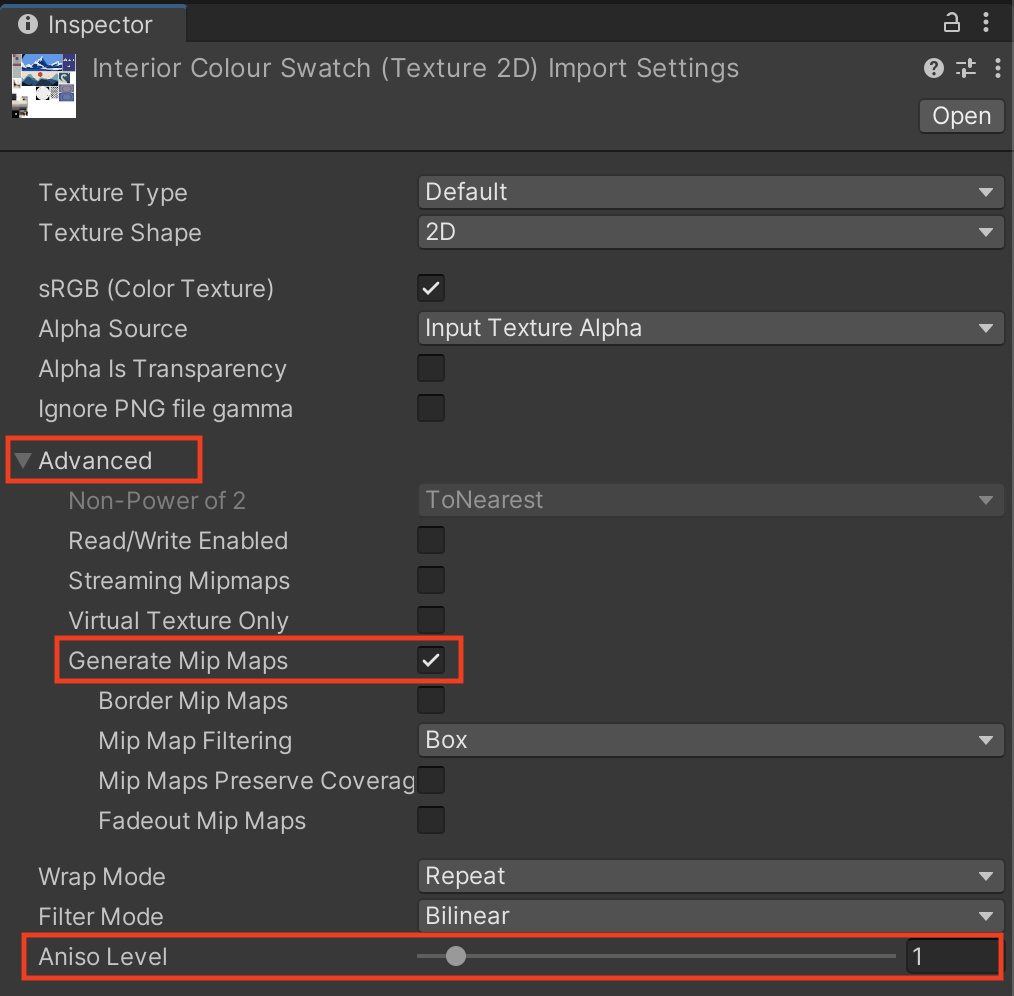
- In the Inspector window, use the foldout (triangle) to expand the Advanced section and select Generate Mip Maps.
- Select Apply. This will generate and apply lower quality textures on farther-away GameObjects.
6. Enable Anisotropic Filtering to improve the visuals of textures when viewed at a shallow angle:
- Locate and select the WoodFloor_Texture in the Project window.
- In the Inspector window, drag to increase the Aniso Level slider.
- Select Apply. This will increase Anisotropic Filtering to improve texture visuals when viewed at shallow angles.

You should now know which settings exist to optimize textures for performance and/or visual quality.
Related resources:
5. Optimize particles and post-processing
Particles and post-processing also impact performance. You’ll now look at how these can affect frames per second and ensure they aren’t causing performance issues in the project.
1. Optimize the particle’s shader so that it doesn’t respond to dynamic lights:
- Select the Particle_Fire GameObject.
- Open the Shader property dropdown at the bottom of the Inspector window.
- Make sure your particle is using the Universal Render Pipeline > Particles > Unlit shader.
2. Experiment with post-processing:
- In your XR Origin (VR) > Camera Offset > Main Camera GameObject’s Camera component, use the foldout (triangle) to expand the Rendering section, then enable the Post-processing property.
- Add a Volume component.
- Select the New button to create a new Post-Processing profile.
- You can then experiment by selecting the Add Override button and enabling new effects.
Warning: If you’re going to add any post-processing effects, color adjustments are a good option. Lens distortions and motion blurs induce cyber sickness; avoid using these effects.
You should now have appropriate particles and post-processing for your app.
Related resources:
6. Enable anti-aliasing
You might have noticed that the edges of some of the 3D GameObjects appear jagged. This can be immersion-breaking in VR. You can smooth these jagged edges with anti-aliasing.
1. Access the render pipeline settings:
- In the Project window, search for “UniversalRenderPipelineAsset” and select it to see its properties in the Inspector window.
2. Enable anti-aliasing in the Universal Render Pipeline (URP) asset:
- Use the foldout (triangle) to expand the Quality section, then change the Anti-Aliasing property from Disabled to 4x.
3. If you want to add additional anti-aliasing on the Main Camera:
- Select the XR Origin (VR) > Camera Offset > Main Camera GameObject, and in its Camera component, use the foldout (triangle) to expand the Rendering section.
- Change the Anti-Aliasing property to Fast Approximate Anti-Aliasing (FXAA).
- Make sure the Post-Processing setting is enabled to be able to see the effect.
Note: This may have a significant impact on fps.
4. Apply anti-aliasing to the Mirror GameObject:
- Locate the Mirror_Texture in your project.
- Change the Anti-Aliasing property from None to 4 samples.
Your Main Camera GameObject and your Mirror GameObject should now have much smoother edges than they did before.
Related resources:
7. Recap
New Functionality:
- Higher frame rate
New Concepts and Skills:
- Target metrics for VR
- Polycount
- Draw calls
- Texture and materials optimization
- Particles and FX optimization
- Anti-aliasing
Next Lesson:
- Lighting
8. Extension Activities
If you want to further develop your skills, explore new concepts, and improve your project, check out some of the optional extension activities below.
Each one is tagged as [Easy], [Medium], [Difficult], or [Expert] and will also include a [Requires Programming] tag if some coding is required.
1. Learn more about VR optimization [Medium]
Read more about optimization techniques and strategies for VR. Note that a big part of optimization is lighting, which you’ll tackle in the next lesson:
2. Research platform-specific tools [Hard]
Depending on what platform you’re using, there might be specific tools available for monitoring performance on your device:
- If it requires a separate application download, you might need to “sideload” the app onto your device rather than downloading it from an official store (for example, using SideQuest for Oculus).
- Examples:
- Oculus - OVR Metrics Tool
- HTC Vive - Android Systrace
- Valve / SteamVR - Frame Timing Tool
3. Explore the Unity Profiler [Expert]:
Get more comfortable with the Unity Profiler window.