
How to use Smart locks
Tutorial
intermediate
+10XP
20m
(52)
Unity Technologies
When you’re working on binary files, such as 3D models, textures, or project scenes, it’s important to reduce merge conflicts to a minimum.
In this tutorial, you’ll discover how to use Smart locks, which has been designed to keep track of who on your team is working on which file, lock these files and therefore reduce the risk of wasting work once it gets merged into the main branch of your project.
Note: This tutorial is part of Get started with Unity DevOps. Explore the rest of the course to learn more about how DevOps can support your work as a creator.
1. Overview
When you’re working on binary files as a group, such as 3D models, textures, or project scenes, it’s important to reduce merge conflicts to a minimum, because it’s very difficult to merge two different versions of the same binary file (for example if two artists work on the same .JPEG file and make changes to it). It can take a lot of time to merge the two versions and sometimes, you might even want to just discard one version and only keep the other version, which means throwing away a lot of work.
Binary files are a type of file that is used to store any data; for example a .JPEG image is a binary file. The data stored in these files is stored as raw bytes, which can’t be read by humans and require a computer system to be read (contrary to C# scripts, which can be easily understood by just reading the code).
In this tutorial, you’ll discover how to use Smart locks, which have been designed to keep track of who on your team is working on which file, lock these files and therefore reduce the risk of wasting work once it gets merged into the main branch of your project.
By the end of this tutorial, you’ll be able to do the following:
- Explain the concept of a Smart lock.
- Understand why it’s useful for binary assets in particular.
- Configure a rule for Smart locks in your project.
- Learn the Smart locks’ iconography and UI to help you reduce merge conflicts.
- Remove a lock and understand the associated capacities of an Admin .
2. Before you begin
Confirm access to the Unity Dashboard
To review the Unity DevOps tools and workflows on the Unity Dashboard as you work through this tutorial, you’ll need to activate a subscription for Unity DevOps and access your account on the Unity Dashboard.
Important: Unity DevOps is free to use and doesn't require a credit card. The paid version will only be required if you add more than three users to or use more than 5 GB data on the DevOps account.
Sign in to Unity DevOps
Follow these instructions to sign in to your Unity DevOps Dashboard if you have an active DevOps subscription:
1. In your browser, navigate to the Unity DevOps page.
2. If you’re not already signed in to your Unity account, select Sign in.
Once you’re signed in, your Unity Dashboard will be visible.
3. Set up a rule for Smart locks
Once you’re logged in to cloud.unity.com with your Unity credentials, you’re ready to start using Smart locks:
1. Select the Unity DevOps product.
Note: if you don’t have the DevOps product on your Cloud dashboard, you can easily add it as a shortcut by selecting the Add shortcuts (+) button.
2. Select the Settings button in the Version Control panel.
Here, you can see your list of repository lock rules. You have the choice to create rules that apply to all the projects, or only specific ones.
3. Select the New rule button to create a new smart lock rule.
This will open the Create Lock Rule window.
4. Open the Apply rule to dropdown and select the repository that you want this lock rule to apply.
5. In the Lock destination field, select any available branch.
In most projects, it will be /main, but you can also select a child branch - for example /main/task001 - if you have any. This allows you to customize your lock's rules and have more granular lock rules for the different branches in your project.
In the future, when you check out a file and start working on it, this will be the branch where all your locked files will need to be checked into, if you want the lock to be lifted.
6. Select the Generate common rules button to use our recommended file formats, which will be protected by the lock system.
These recommended file formats are popular game development binary files, which are difficult to merge in the case of a conflict.
7. Select the Save button once you’re happy with your selection and ready to proceed to the next step.
Once saved, the newly created lock rule will appear in your list and a confirmation message will be displayed at the bottom of the page.
Let’s now see how a lock appears in the Unity Editor.
4. Lock a file
The following example applies to any file type that you listed in the lock file extension field. Imagine that you want to start editing this ammo pickup sound for a zombie survival game. Because it is a .wav file, it falls under the file extension rule that you created in the previous step.
1. Go to the Unity Hub and launch the project you just created a lock for.
2. In the Project window, right-click the file.
3. In the submenu, select Unity Version Control > Checkout.
After a few seconds, the file thumbnail in the Project window will have a new purple lock icon. If you hover over this icon, the tooltip will show you who locked the file.
This is a useful feature if you want to work on a file and realize it is locked.
Once you lock a file, it is protected and no one else working on the project can edit it, meaning you can edit the file without fear that someone else will change it at the same time.
When you’re ready to submit your work to the main branch of your project repository, the checkin operation will remove the lock, and other people will be able to work on it.
You can also see your locked files directly from the Unity Editor in the latest versions of the Unity Version Control package by selecting the Show locks icon on the right side of your Unity Version Control plugin:
This will display the current locks in your project, as well as their branch location.
From here, you can also configure, release, and remove a lock.
If you select one of the two buttons, you’ll see a warning dialog asking if you’re sure.
This is in order to avoid any unwanted wrong operation.
5. Manually remove a lock
Imagine that you go on vacation, but before you do, you forgot to checkin a file you created a lock for. While you’re away, the rest of the team can’t work on the file you created a lock for.
They can always wait for you to come back and checkin your file, but if it is a critical file to meet a milestone, then there is another option: removing the lock.
In the Dashboard, an admin can easily remove a lock manually if they need to:
1. In the Unity Cloud Dashboard, select the Repositories button.
2. Select your game’s repository that is associated with the locked file, from the previous tutorial steps.
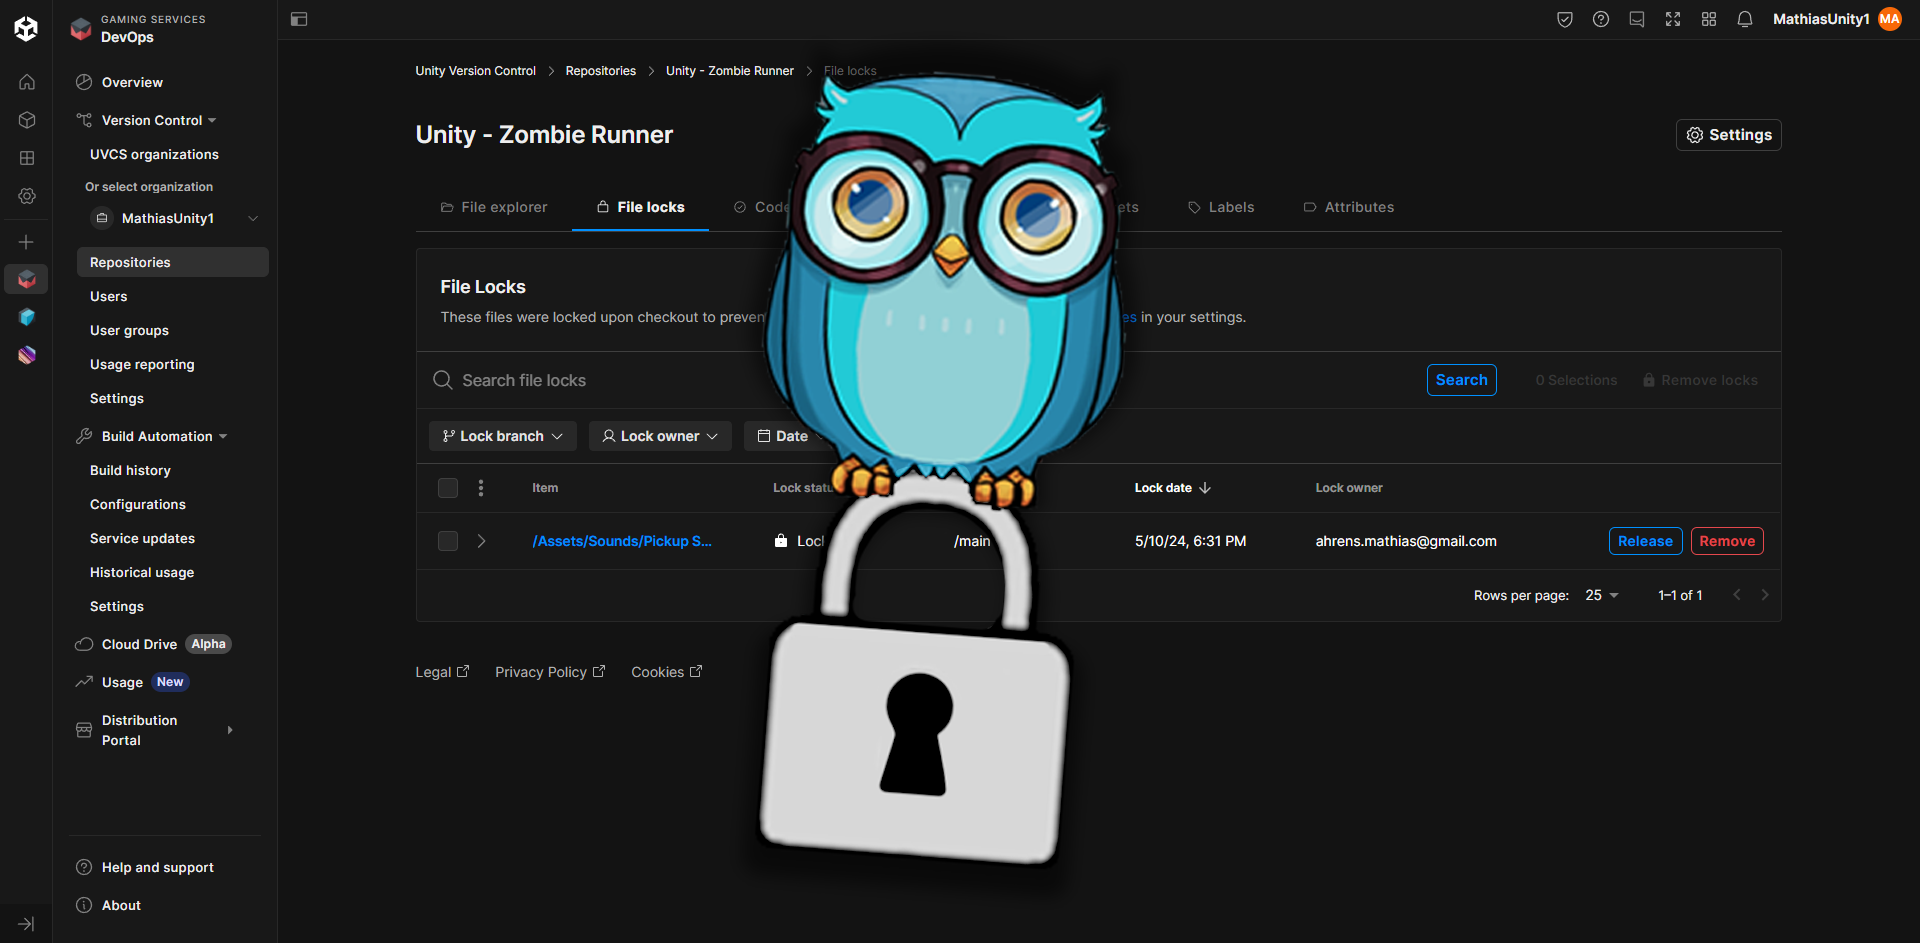
3. Select the File locks tab.
Here you’ll find a list of locked files in your project without having to launch the Unity Editor.
4. Select the > button to reveal more details about the locked file.
From here you’ll be able to see the current lock status of the file, its current branch location and destination, who locked the file (with the email address of the user), and the date when it was locked.
There is also a shortcut to go back to the settings menu if you want to configure your lock rules further.
Each lock also has two buttons on the right of the screen: Release and Remove.
The Release button allows you to remove the lock from the file, but only for the latest version of the file. Your team members will be able to keep working where you left off, meaning the latest revision of that file.
5. Select the Release button and read the dialog.
This allows you to check one last time, before releasing the lock.
6. Select the Release lock button.
After a few seconds, the page will reload and the lock will have disappeared from the list of File Locks. You will also see a confirmation message in the lower-right corner of the page.
If you go back to the Unity Editor, you will see that the lock icon has disappeared from your file thumbnail in the Project window.
Let’s checkin the file and do this process one more time to see what happens when you select the Remove button.
7. Check in the file, then right-click and check it out one more time.
The lock icon will appear again.
8. Go to the Unity Cloud Dashboard and check if the locked file appears in the list.
You may have to reload the page in your browser for the file to appear.
9. Select the Remove button.
This time, the warning message informs you that this operation can result in a future merge conflict. This is because if you remove the lock of that .wav sound file, others will be able to edit it on their side, and you will end up with 2 different versions of the sound file: one with your changes and another with your team member’s changes. This is called a merge conflict, because the project doesn’t know which version it should keep in your game. This is especially risky when team members are working on different branches.
Luckily, locks in Unity Version Control are called “Smart locks” for a reason: No matter what branch you’re working on, the lock will be displayed in all other branches. Every team member working on the project will be able to see the lock, even if they’re working on another branch. How smart!
10. Select the Remove locks button.
Wait for a few seconds for the File Locks list to refresh. A confirmation will appear in the lower-right corner of the page that the lock was successfully removed.
Your .wav sound file can now be edited by other team members on your project while you’re on vacation!
Unfortunately, all changes that you made to the file that were not checked in will be forfeited and lost if another team member starts working on it. Therefore it’s important to only use this operation if it’s really needed and to always inform the rest of your team that you are doing it. This way, you avoid unnecessary frustration and keep communication transparent in the project.
Congratulations, you have successfully created your first lock rule and have learned how to release or remove a lock from a file!
6. Next steps
Now that you have learned how to set up a lock and avoid merge conflicts, you can check out the other tutorials in the Get started with Unity DevOps course or try to add other file extensions to your lock rule configuration.
Have fun locking and unlocking files in your project! There is no better way to protect your team from any unwanted merge conflicts.