
Using the Reflect Viewer on Mobile Devices
Tutorial
Beginner
+10XP
15m
(14)
Unity Technologies
The Unity Reflect viewer allows users to access and engage with a BIM model outside of the CAD/BIM application in which the project was created. This viewer is also available as an iOS or Android based-application that can be downloaded via a client to view the project.
In this tutorial you will learn how to install and use the Reflect Viewer on both platforms.
1. Introduction
The Reflect Viewer is the main application with which to access the BIM data from a CAD application like Revit. A model exported from the BIM application can be viewed in the Reflect Viewer either on the desktop version of the application or the iOS/Android mobile applications. This allows the BIM designers to:
- Share the BIM model with clients without expensive software or technical knowledge
- Instantly activate Virtual Reality or Augmented Reality experiences
- Gain real-time access to the extensive BIM information contained in the model on relatively low-specification hardware and mobile devices.
For this tutorial you will need:
- An iOS - or Android-based device connected to the same network as the Reflect server
- A Unity account
- A Reflect project assigned to the Unity account you will be using
2. Installing the iOS Reflect Viewer application
1. Search for “Unity Reflect” in the iTunes app store (Figure 01).
2. Select the Get option to install Unity Reflect and then wait for the installation to finish (Figure 02).
3. Select the newly installed application to open the Reflect Viewer on your mobile device (Figure 03).
4. Inside the Reflect Viewer, select the sign-in option to sign in to your Unity account (Figure 04).
5. A browser window will open where you can sign in to your Unity account (Figure 05). Sign in to the account with your Reflect project(s).
6. All projects associated with the account will now show up in the Project browser panel (Figure 06). Select the Open button next to the one you wish to open.
7. Once the data is downloaded, the project will open and you can navigate the Scene using the standard Reflect mobile interactions (Figure 07):
- Rotate the Scene: Move your finger on the screen.
- Zoom Out: Pinch with two fingers on the screen to zoom out.
- Zoom In: Stretch with two fingers on the screen to zoom in.
8. Select the Free Rotate button to rotate the model in the scene by swiping your finger left and right (Figure 08).
9. Select the Camera Rotate option to rotate the camera around the scene by swiping left or right.
3. Installing the Android Reflect Viewer Application
10. Search for “Unity Reflect” in the Google play store (Figure 10).
11. Select the Install option to install Unity Reflect and wait for the installation to finish (Figure 11).
12. Open the newly installed application to start the Reflect Viewer on your mobile device (Figures 12 and 13).
13. A browser window will open where you can sign in to your Unity account (Figure 14). Sign in to the account with your Reflect project(s).
14. All projects associated with the account will now show up in the Project browser panel (Figure 15). Select the Open button next to the one you wish to open.
15. Once the data is downloaded, the project will open and you can navigate the Scene using the standard Reflect mobile interactions (Figure 16):
- Rotate the Scene: Move your finger on the screen.
- Zoom Out: Pinch with two fingers on the screen to zoom out.
- Zoom In: Stretch with two fingers on the screen to zoom in.
16. Select the Free Rotate button to rotate the model in the scene by swiping your finger left and right (Figure 17).
17. Select the Camera Rotate option to rotate the camera around the scene by swiping left or right (Figure 18).
4. Using the Reflect viewer on Mobile Devices
From this point on, all functionality is the same on all mobile devices provided that your device has the required hardware resources.
Activating the Augmented Reality Functionality
For this tutorial, we will look at the Augmented Reality option built into the Reflect Viewer. This will allow you to project the 3D model into the real world using the device’s camera. It’s a very effective way of communicating your design intent to a client.
1. With the project downloaded and open in the viewer, select the World button and then select the AR option (Figure 19).
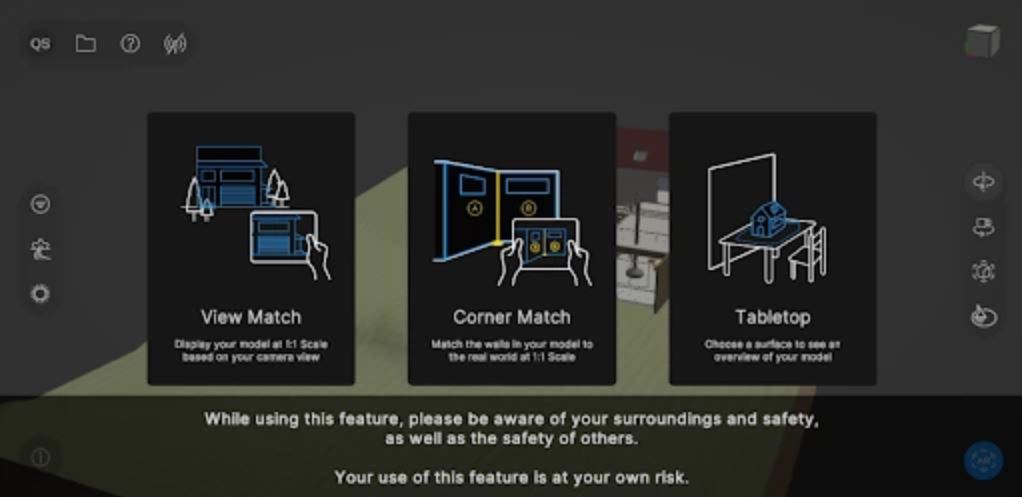
2. You are now presented with 3 AR options: View Match, Corner Match and Tabletop. Select the Tabletop option (Figure 20). Note - You can use the same World icon to switch back to standard mobile interface.
3. Move the mobile device around until it picks up a flat surface. Once the surface has been detected (Figure 21), tap the screen to lock it in and then select the OK button to place the model (Figure 22).
4. The augmented reality model will be placed in the Scene (Figure 23).
5. Conclusion
In this tutorial, you’ve learned how to install and use the Reflect Viewer on an iOS device. You have also learned how to enable AR Mode within the Reflect Viewer app.