
Develop the AR UFO abduction action
Tutorial
Beginner
+10XP
30 mins
15
Unity Technologies
Just like the movement, the abduction mechanic of the game in the desktop version uses the keyboard. To make the game compatible with mobile devices, you’ll redesign the abduction mechanic.
In this tutorial you'll do the following:
- Review the UFO abduction Visual Script
- Evaluate options for the abduction mechanic
- Create a new UI
- Reconfigure the UFO abduction Visual Script to work with your redesign
1. Overview
You’ve started the work of adapting the UFO game for your AR port, but there’s still one more key part of functionality to adjust: the game still uses the Spacebar key for abducting sheep, which will not work for mobile AR.
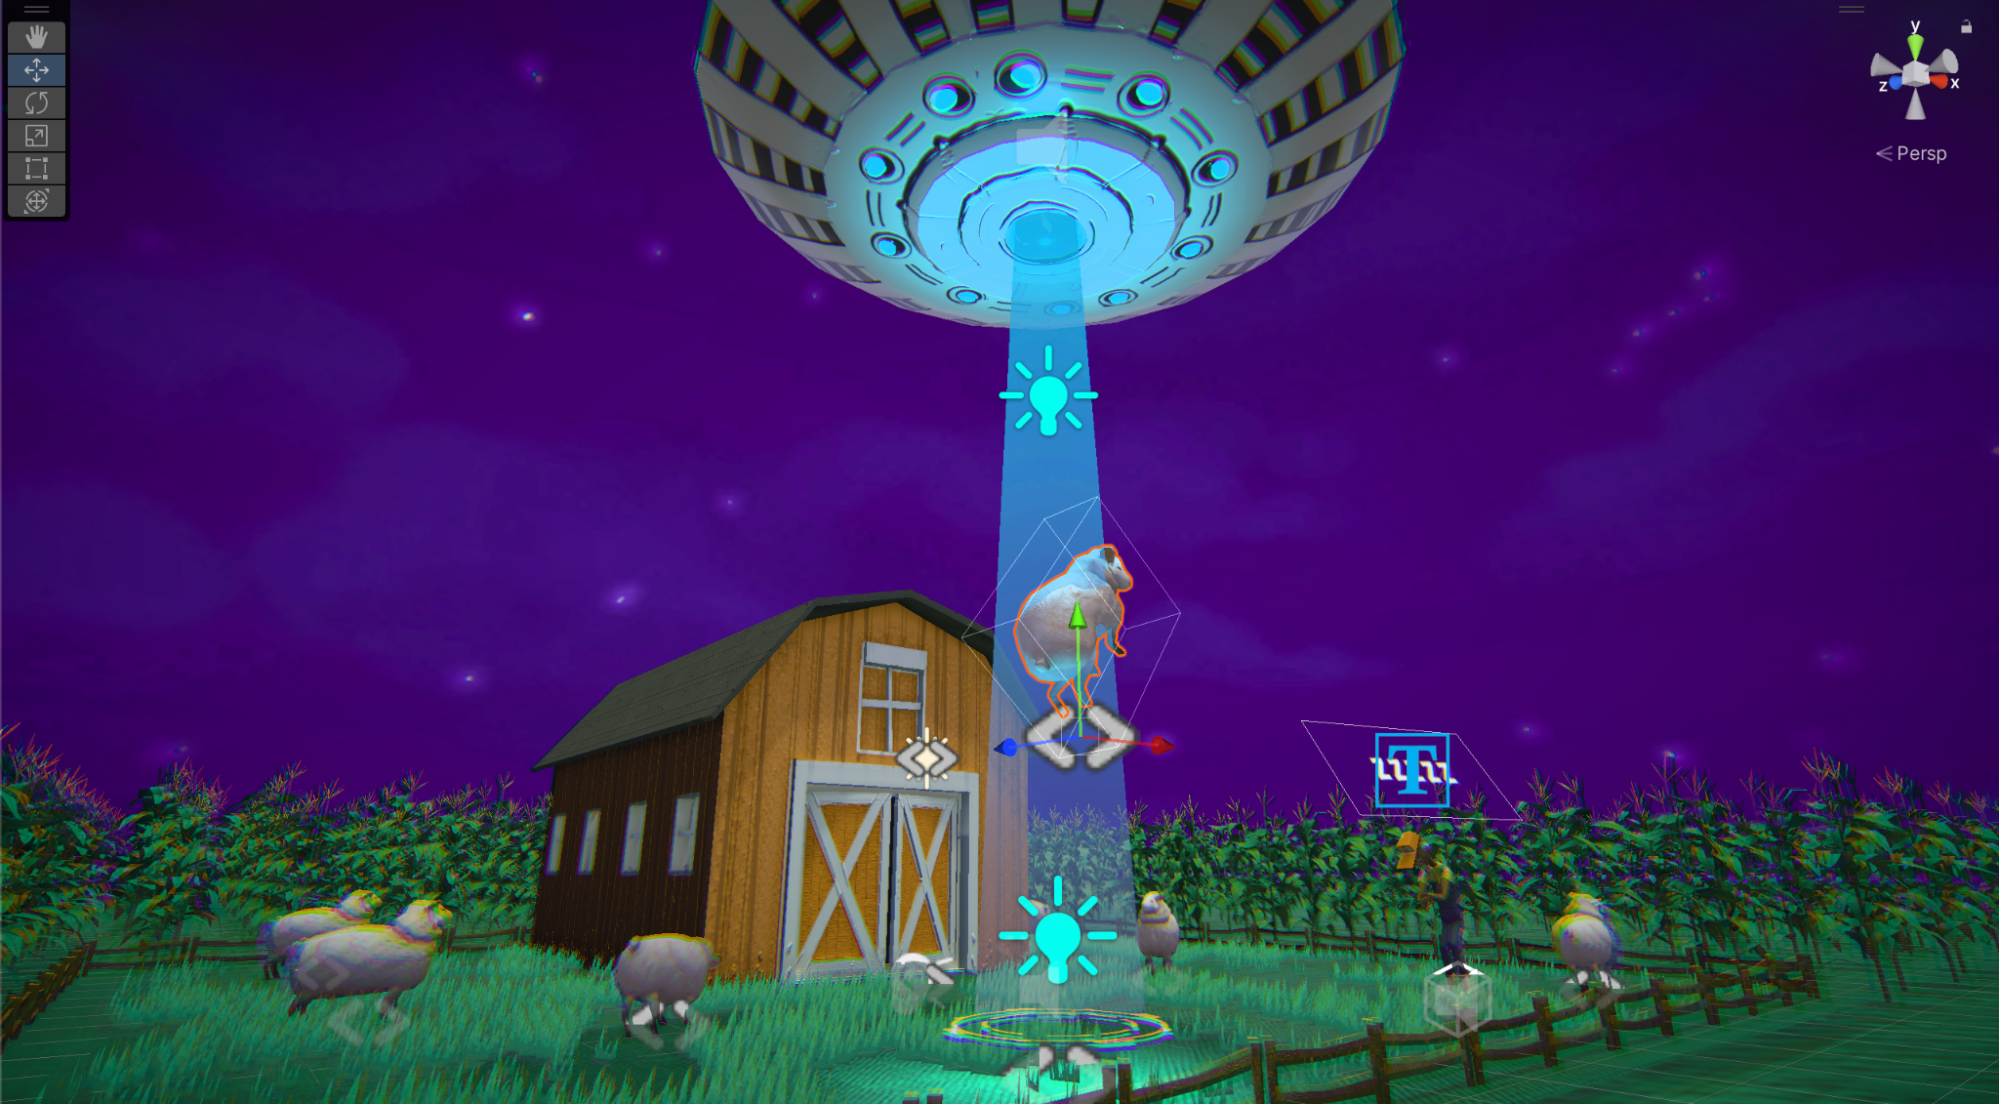
In this tutorial, you’ll adjust the UFO’s abduction action to work in AR so that players can complete the game.
2. Review the Manage Beam Script Machine
Similarly to the UFO movement functionality, the Manage Beam Script Machine makes use of On Input System Event nodes for both up and down input detection:
- When the Spacebar key is pressed, the UseBeam custom event is called and the usingBeam Boolean is set to true.
- When the Spacebar key is released, the StopBeam custom event is called and the usingBeam Boolean is set to false.
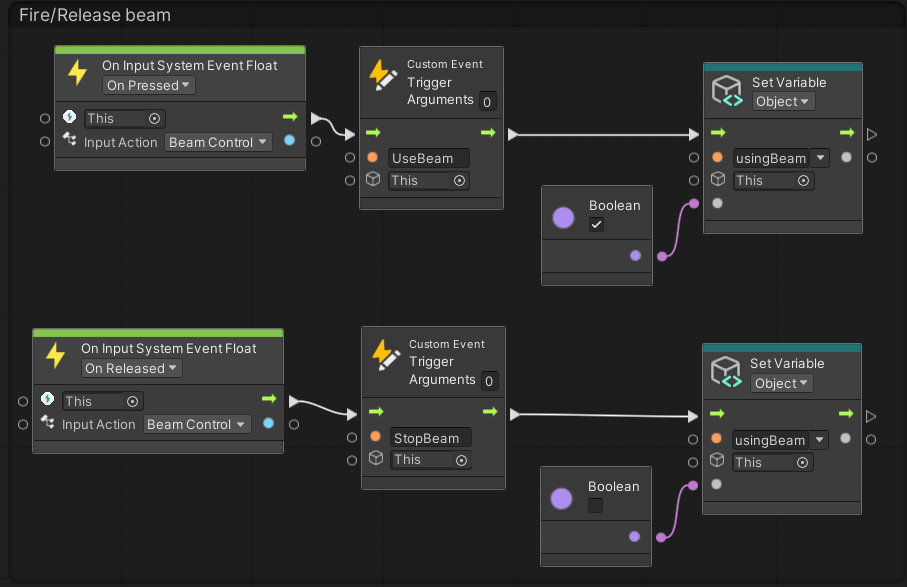
These two input system nodes will need to be replaced for your game to work in mobile AR.
3. Evaluate UI options for the abduction action
Since the user will always want easy, reliable access to the beaming action, a big button in screen space might be the best option.
For example, look at screen space controls to drive the cars in AR Real Driving - Augmented Re. They’re located in easy-to-reach locations for the user’s thumbs and are always available.
You could also have the user activate an object by touching on the object itself, which in this case would be the UFO. In Cosmic Frontline AR, for example, you have to touch the planets that you want to attack or defend.
There are so many different ways to make this interaction work. For this example, we will show you the steps to create a screen space button, but you will have an opportunity to implement a different solution at the end of the tutorial if you want.
4. Create a UI button
Follow these instructions to create a button that will control your UFO sheep abduction beam:
1. Add the Gameplay prefab into the scene temporarily so that you can preview your UI changes.
2. In the Hierarchy window, create a new UI Button GameObject as a child of GameCanvas (organized under Gameplay > MeshParent). Name the new GameObject "BeamButton".
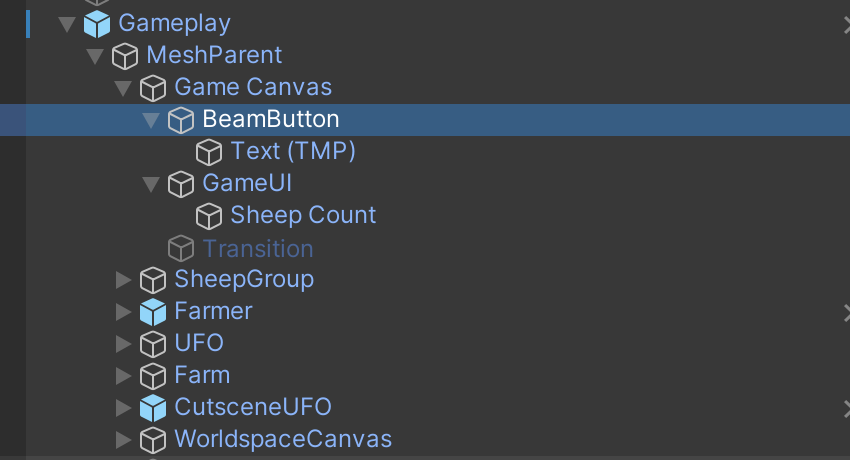
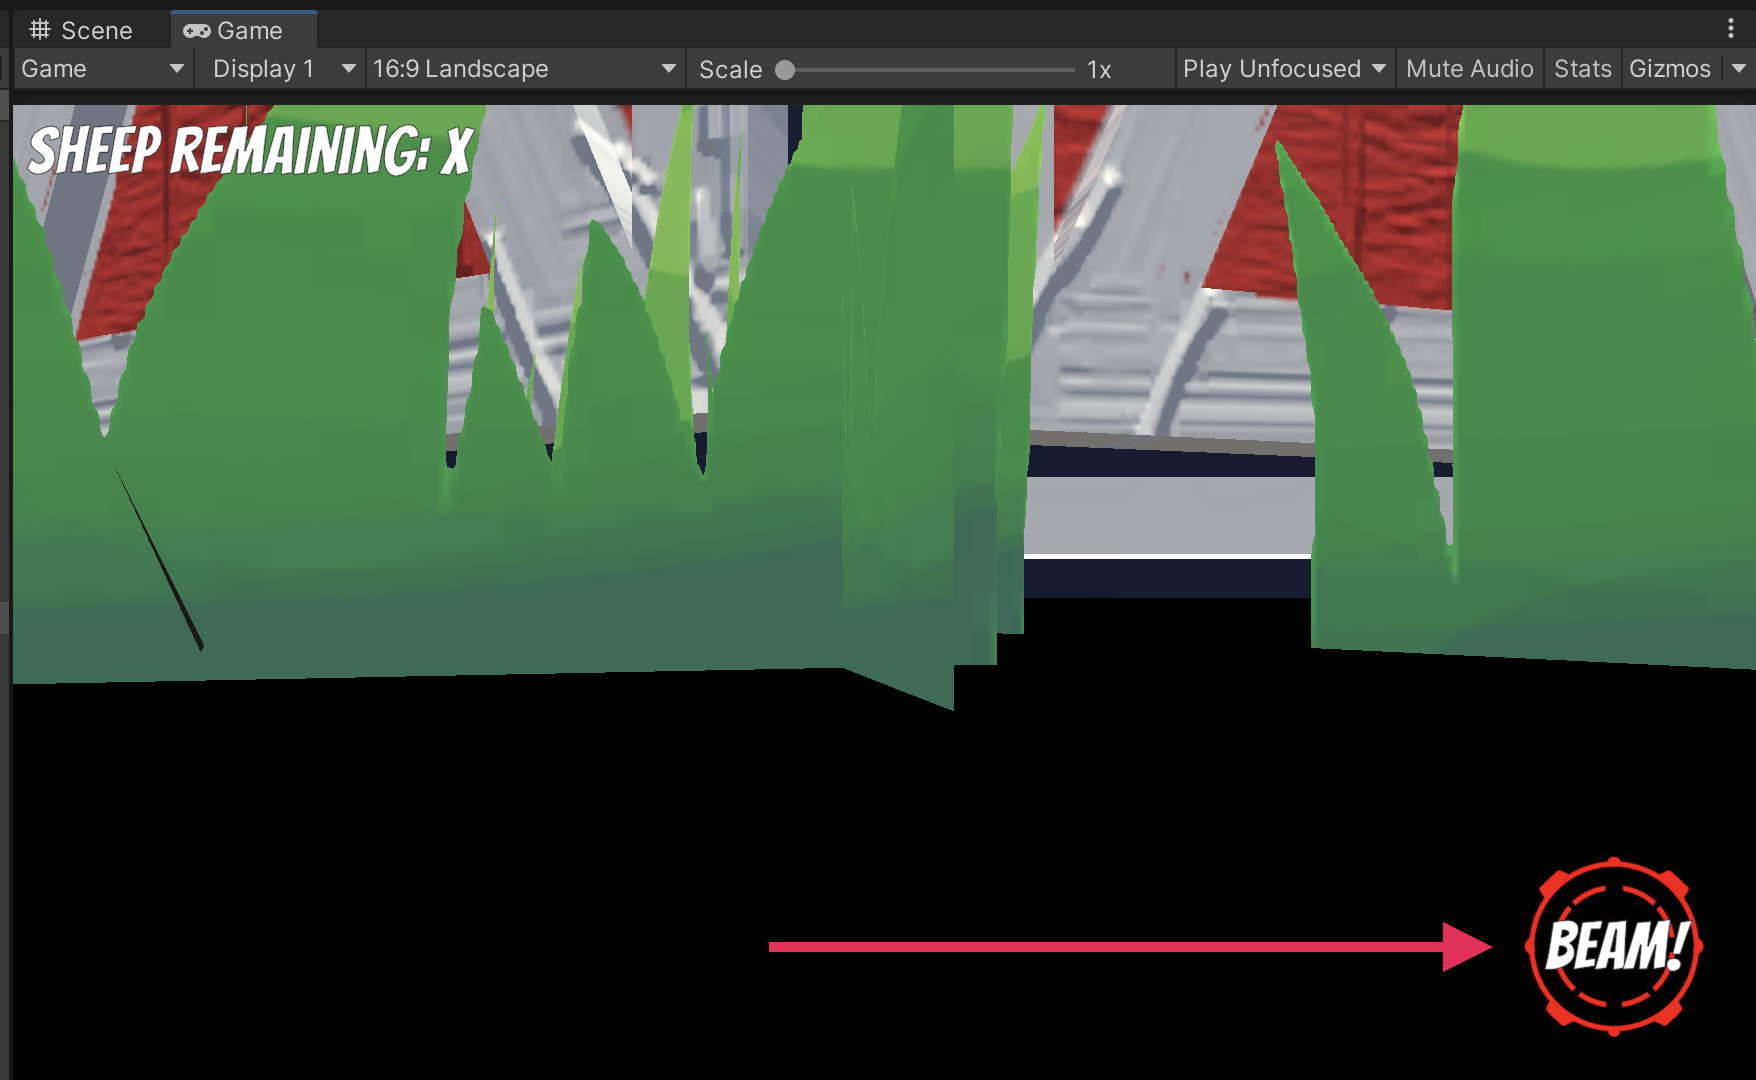
3. Design your button using the properties in the Image component, the Button component, and the TextMeshPro - Text (UI) component. You can preview your button in the Game view, even though the camera will be positioned in the ground.
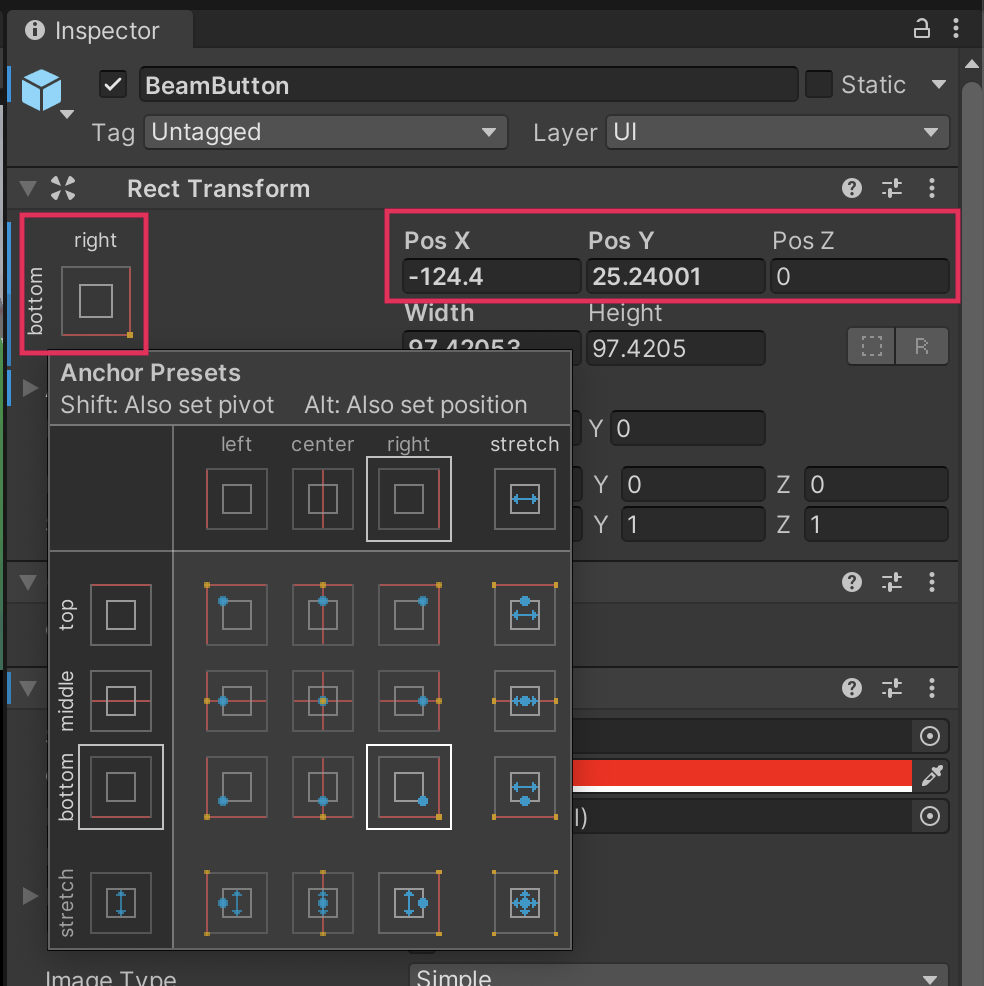
4. In the Rect Transform component, use the Anchor Presets menu and the Position properties to position the button somewhere convenient on the screen using Shift+left-click.
5. To save the changes to the Gameplay prefab, select the Gameplay GameObject, then in the Inspector window select Overrides > Apply All.
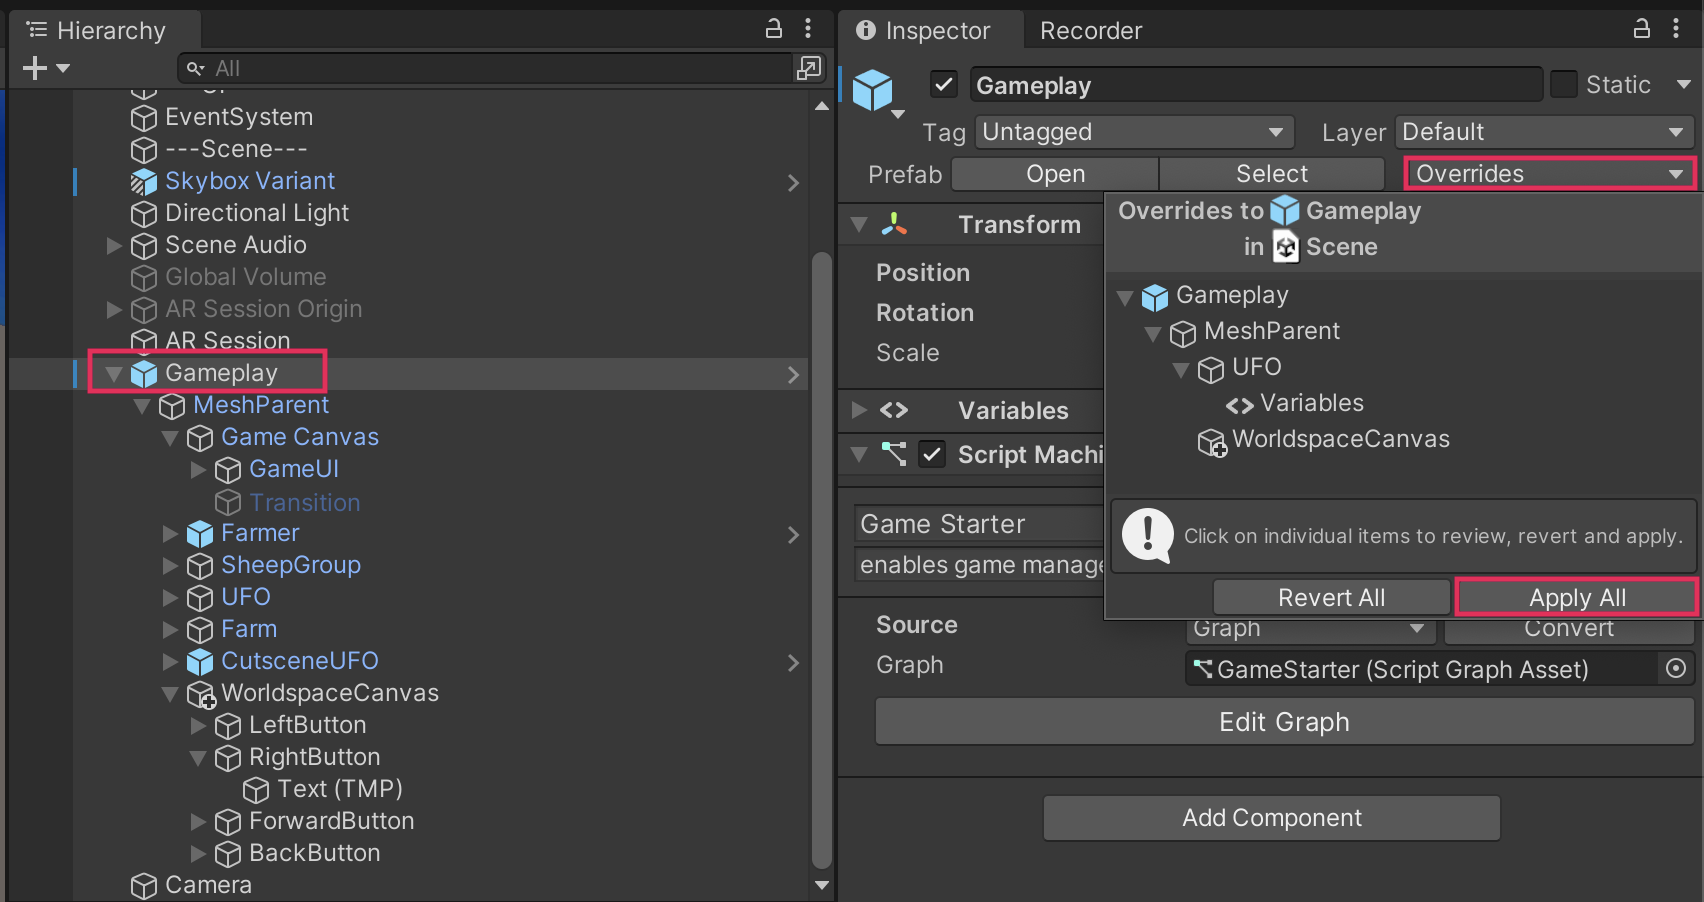
Important: You must apply the changes to the Gameplay prefab or you will lose the new functionality you just implemented when the prefab is spawned into the scene.
5. Reconfigure beam input for buttons
The beam button looks good, but it still won’t actually function. You’ll use the same process for converting keyboard input to pointer input that you used for the directional buttons.
Watch the following video to see how to modify the Manage Beam visual script or follow the instructions below:
1. Expand the Gameplay prefab and select the UFO GameObject.
2. In the Inspector window, locate the Manage Beam script graph and select Edit Graph.
3. In the Blackboard, create a new Object variable of the Button type, name it “beamButton”, and use the object picker (⊙) to add your tractor beam button.
4. Navigate to the Fire/Release beam section of the Graph Editor.
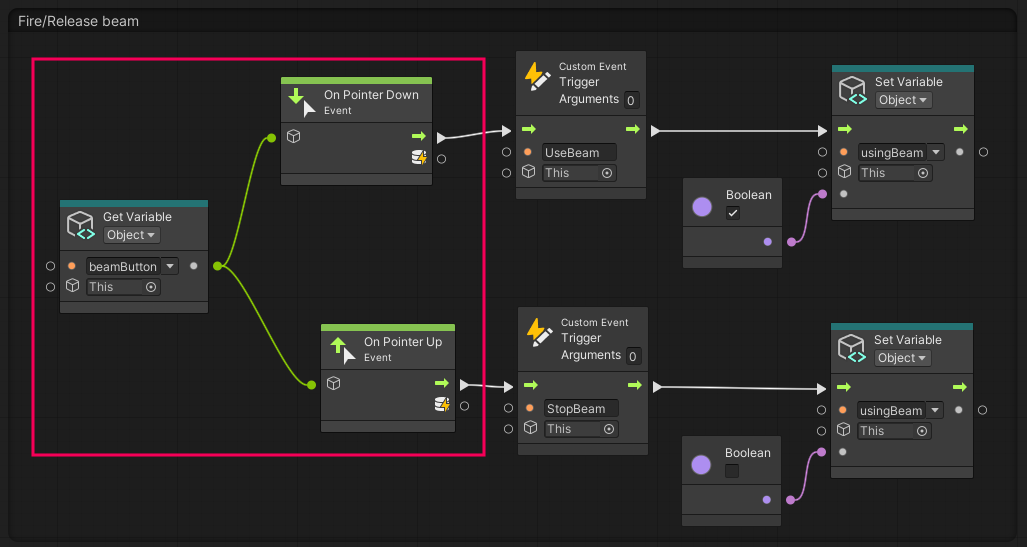
5. Add the new beamButton variable to the leftmost section of the Graph Editor.
6. Add an On Pointer Down Event node and an On Pointer Up Event node where the OnInput System Event nodes are located.
7. Delete the On Input System Event nodes.
8. Connect the On Pointer Down node to the UseBeam Custom Event Trigger node.
9. Connect the On Pointer Up node to the StopBeam Custom Event Trigger node.
10. Connect the beamButton variable to both On Pointer nodes.
11. To save your changes, select the Gameplay GameObject, then in the Inspector window select Overrides > Apply All.
12. Deactivate the Gameplay prefab from the scene, then build and test your application again.
The beam button should now work, making your game fully functional! You can also test the beaming functionality in the Editor.
6. More things to try
If you want to further develop your skills, explore new concepts, or improve your project, check out some of the optional activities below. Each activity is identified as being either Easy, Medium, or Difficult so you know what level of difficulty to expect.
These activities are entirely optional, so if you’re not interested, no problem — just skip this step.
We do recommend attempting at least one of them in order to get the most out of this learning experience, however. Good luck!
Easy - Add sound or visual effects to the abduction action
The actual beaming action is a very satisfying interaction. There’s a nice loud noise, the screen color changes — it’s very obvious. When a sheep is actually abducted, on the other hand, the sound just stops. There’s no difference between dropping a sheep and abducting one, so it’s hard to tell what has happened.
You could add a satisfying, positive sound or particle effect when a sheep is successfully abducted or add a negative effect when a sheep dropped.
Difficult: Delay the button visibility
Right now, the directional buttons and the beam button are already visible before the UFO even enters the scene. Users might be confused when they try to press these buttons but nothing happens. For a clearer user experience, the buttons should only become visible after the UFO gets into position.
7. Next steps
Congratulations! Getting this far is a major milestone. You have now replicated all of the key functionality from the original desktop game in your AR port, and the application is fully functional. As an AR designer, though, your work is not yet finished. In the next, final tutorial related to this UFO game port, you will consider other AR-specific design decisions to improve the user experience.