
Enable the play area
Tutorial
Beginner
+10XP
60 mins
18
Unity Technologies
You are now ready to begin implementing AR elements into the game. As a first step, you will determine what type of AR instantiation you wish to use, and then implement it in the app.
In this tutorial you'll do the following:
- Select how you want the AR content to anchor to the real world
- Implement AR Foundation components to instantiate AR assets in the app
- Iterate and test your mobile app
1. Overview
A critical element of an engaging AR experience is having the digital content feel anchored to the user's real physical environment. If the digital content is just floating around in space, disconnected from any real world features, there is no need for it to be an AR experience.
You can anchor your AR content to an image marker, like in the Create a marker-based AR App course.
Or you can anchor your content to a detected plane in the environment, like in the Create a plane detection AR app course.
If you haven’t completed either the marker-based project or the plane detection project, we highly encourage you to do so before moving on.
In this tutorial, you will allow the user to spawn the UFO game’s play area into their physical environment using either a marker or plane detection.
2. Choose between a marker or plane detection approach
Markers and plane detection both have benefits and drawbacks. A marker can help you ensure that your AR experience will pop up in exactly the same way every single time and can be very useful for situations where the amount of space available for playing or where precision of placement is needed. The Inkhunter app is a good example, where precision is critical, and a flat surface is not necessary.
A plane detection design can be useful in situations where the AR experience benefits from variety, where the amount of space doesn’t matter as much, or where you want your user to have more control over the placement of the interactive app. Angry Birds, Isle of Pigs is a good example, where it’s important that the user can easily play in their living rooms.
In many cases, one approach may be far better than another. Consider the following questions to help you determine whether you should use a marker or plane detection for your game port:
- Does the game experience require precise positioning in a real world environment?
- Is printing or displaying a marker likely to be a challenge for my users?
Depending on your priorities, you may also consider that implementing a marker-based approach will require significantly less development work than plane detection.
Once you have decided on the requirements of the game, you are ready to begin implementing this feature into your port project.
3. Create the Gameplay prefab
To make the game port work on your mobile device, you will need to create a prefab that contains the key gameplay objects. Then, you will be able to spawn that prefab into the scene when either a marker or plane is detected.
Follow these instructions to create a prefab for your gameplay GameObjects:
1. Open MainScene.
When you spawn the farm into your physical environment, you want the play area to be as space-efficient as possible. You most likely just want the farm area without any of the surrounding corn, the giant grassy plane, or skybox.
2. In the Hierarchy window, delete the Grass Plane, the Skybox Variant, and all of the Cornfield GameObjects (which are child GameObjects of the Farm).
You should be left with just the farm area.
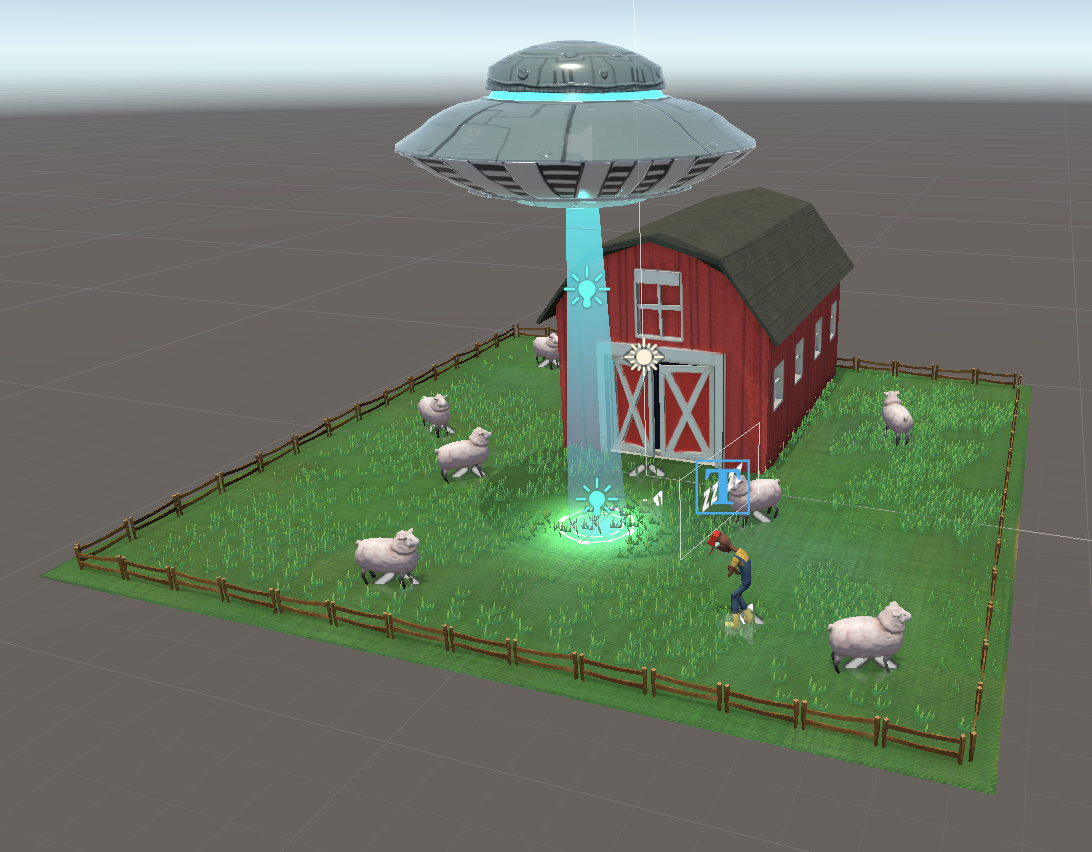
3. In the Hierarchy window, create an empty GameObject and name it “MeshParent”.
4. In the Inspector window, find the Transform component.
5. Select More (⋮) and then select Reset.
This process will reset the Transforms of MeshParent, which is very important because any offsets to the position may cause the game environment to spawn in an unexpected location.
6. In the Hierarchy window, select the Game Canvas, Sheep Group, Farmer, UFO, Farm, and CutsceneUFO GameObjects and make them child GameObjects of the MeshParent GameObject.
7. In the Hierarchy window, create another empty GameObject and name it “Gameplay”.
8. Reset the Transform component of the Gameplay GameObject like you did for the MeshParent GameObject.
9. In the Hierarchy window, make MeshParent a child GameObject of Gameplay.
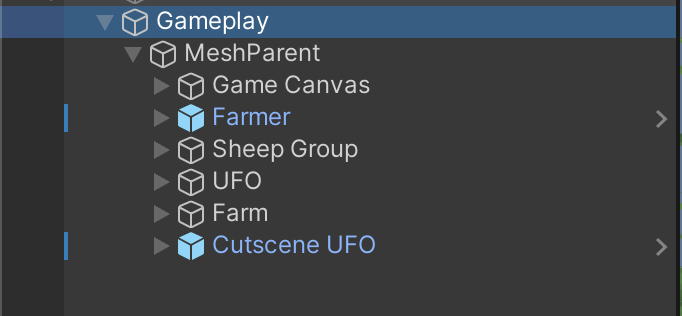
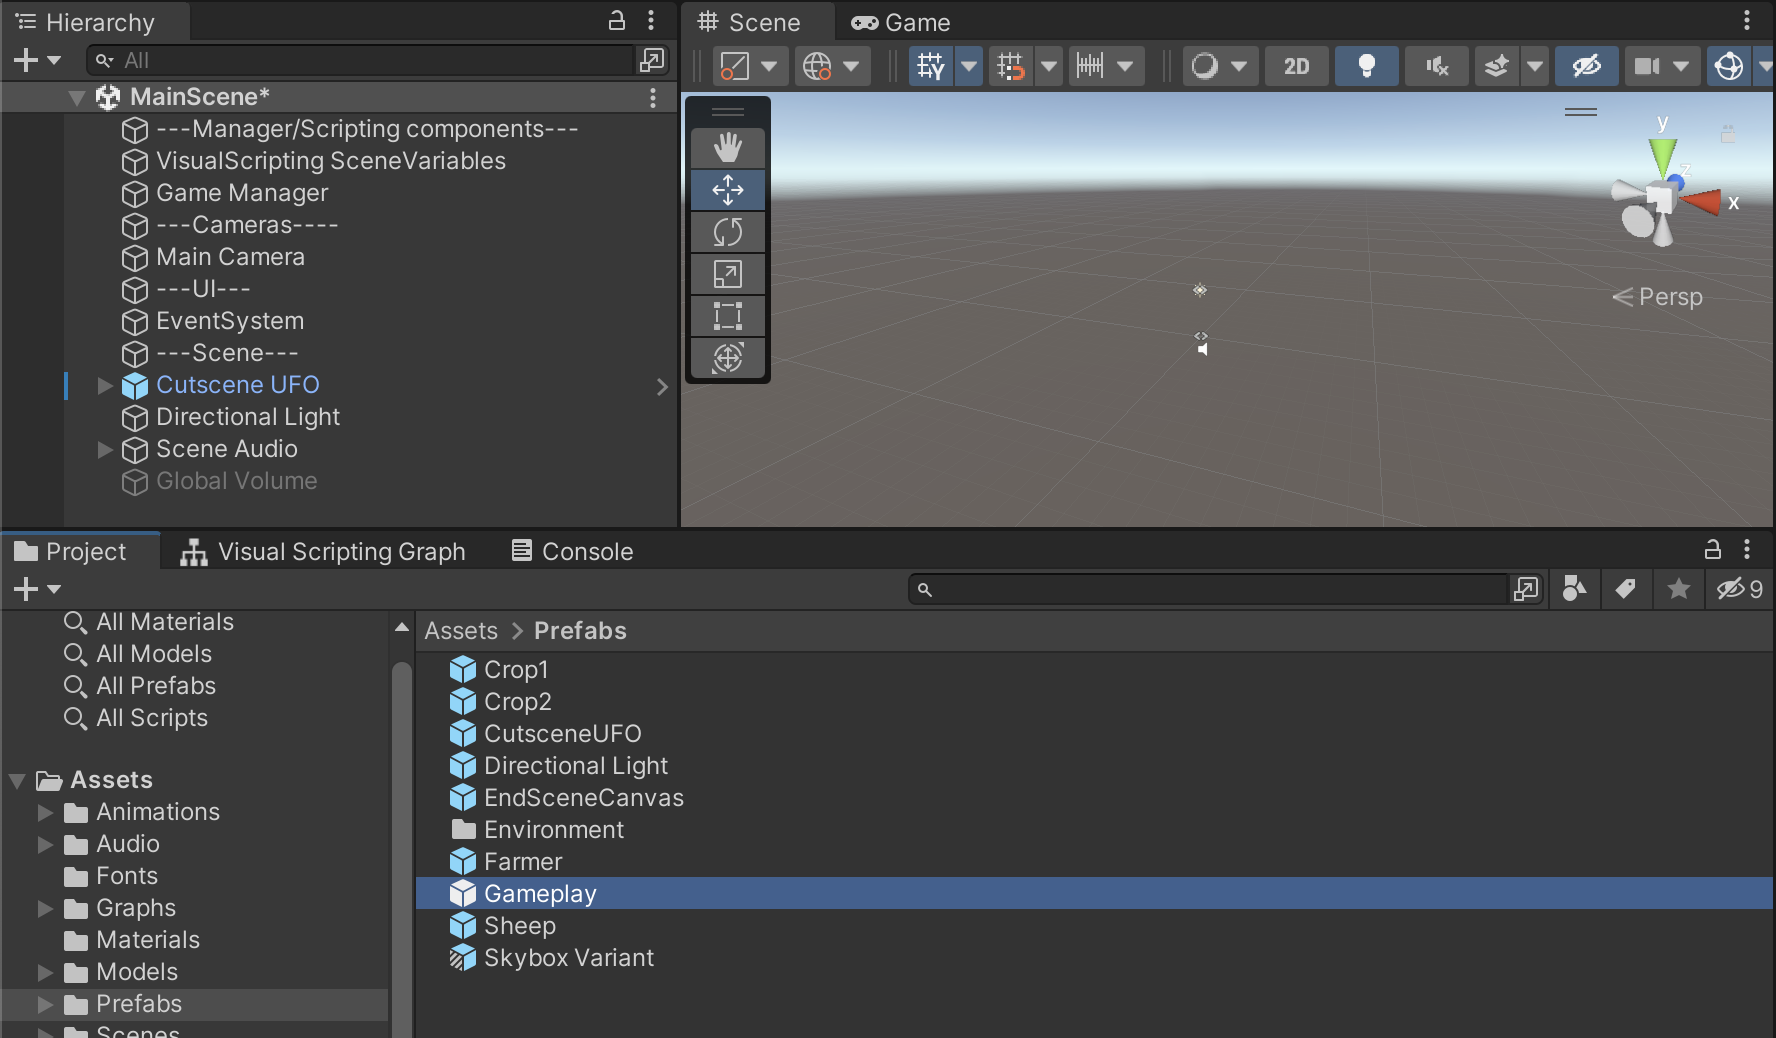
10. In the Project window, navigate to the Prefabs folder. Click and drag the Gameplay GameObject from the Hierarchy window into the Prefabs folder to make it a prefab and then delete the Gameplay GameObject in the Hierarchy window to remove it from the scene.
Note: The Game Manager GameObject might still want to access the objects saved on your prefab that aren’t in the scene anymore, which will cause some warnings on your Console window. Don’t worry, we’ll take care of this later on!
4. Set up marker or plane detection
Now that you have created a prefab for the gameplay, you’re ready to spawn that prefab when either a marker or plane is detected in the scene.
Important: The guidance in this step is high-level because you've completed these processes (or similar variations) before. If you need more help, refer back to the relevant project in Create with AR: Markers and Planes. Creating a marker-based experience requires less time to develop than a plane-based experience but will require a marker to work properly.
Setup for marker-based ports
Follow these instructions to spawn the Gameplay prefab using markers:
1. In the Hierarchy window, select the XR Origin GameObject and add an AR Tracked Image Manager component to it in the Inspector window.
2. In the Project window go to Textures > Markers, right-click and select Create > XR > ReferenceImageLibrary to create the asset inside the Markers folder.
There’s already a marker inside the Markers folder for your convenience. If you want, you can create your own marker and import it. The marker needs to be square and a minimum size of 512x512 pixels.
3. Add your desired marker image to the ReferenceImageLibrary asset.
4. In the AR Tracked Image Manager component, assign the ReferenceImageLibrary to the Serialized Library property.
5. In the Hierarchy window, select the XR Origin GameObject and assign the Gameplay prefab to the Tracked Image Prefab property.
6. Proceed to the next step to build and test your new feature.
Setup for plane detection ports
We recommend that you complete the Create a plane detection AR app course before trying to implement plane detection in your project. As a reminder, using plane detection requires considerably more effort than marker recognition, so the following edits may take some time.
Follow these instructions to spawn the Gameplay prefab on a detected plane:
1. In the Hierarchy window, create an AR Default Plane GameObject, create and assign a new semi-transparent material to it, then drag it into the Project window to turn it into a prefab.

For a reminder of how to create an AR default plane, follow step 6 in the Detect the user’s touch tutorial. For instructions on how to create a semi-transparent material, refer to the Create translucent and transparent effects tutorial.
2. Add an AR Plane Manager component to the XR Origin GameObject if it doesn’t contain one already, select a Detection Mode, and assign your AR Default Plane prefab to it.

For a reminder of how to do this, follow step 7 in the Detect the user’s touch tutorial.
If you build and run your application now, the device should detect and display planes in the environment.
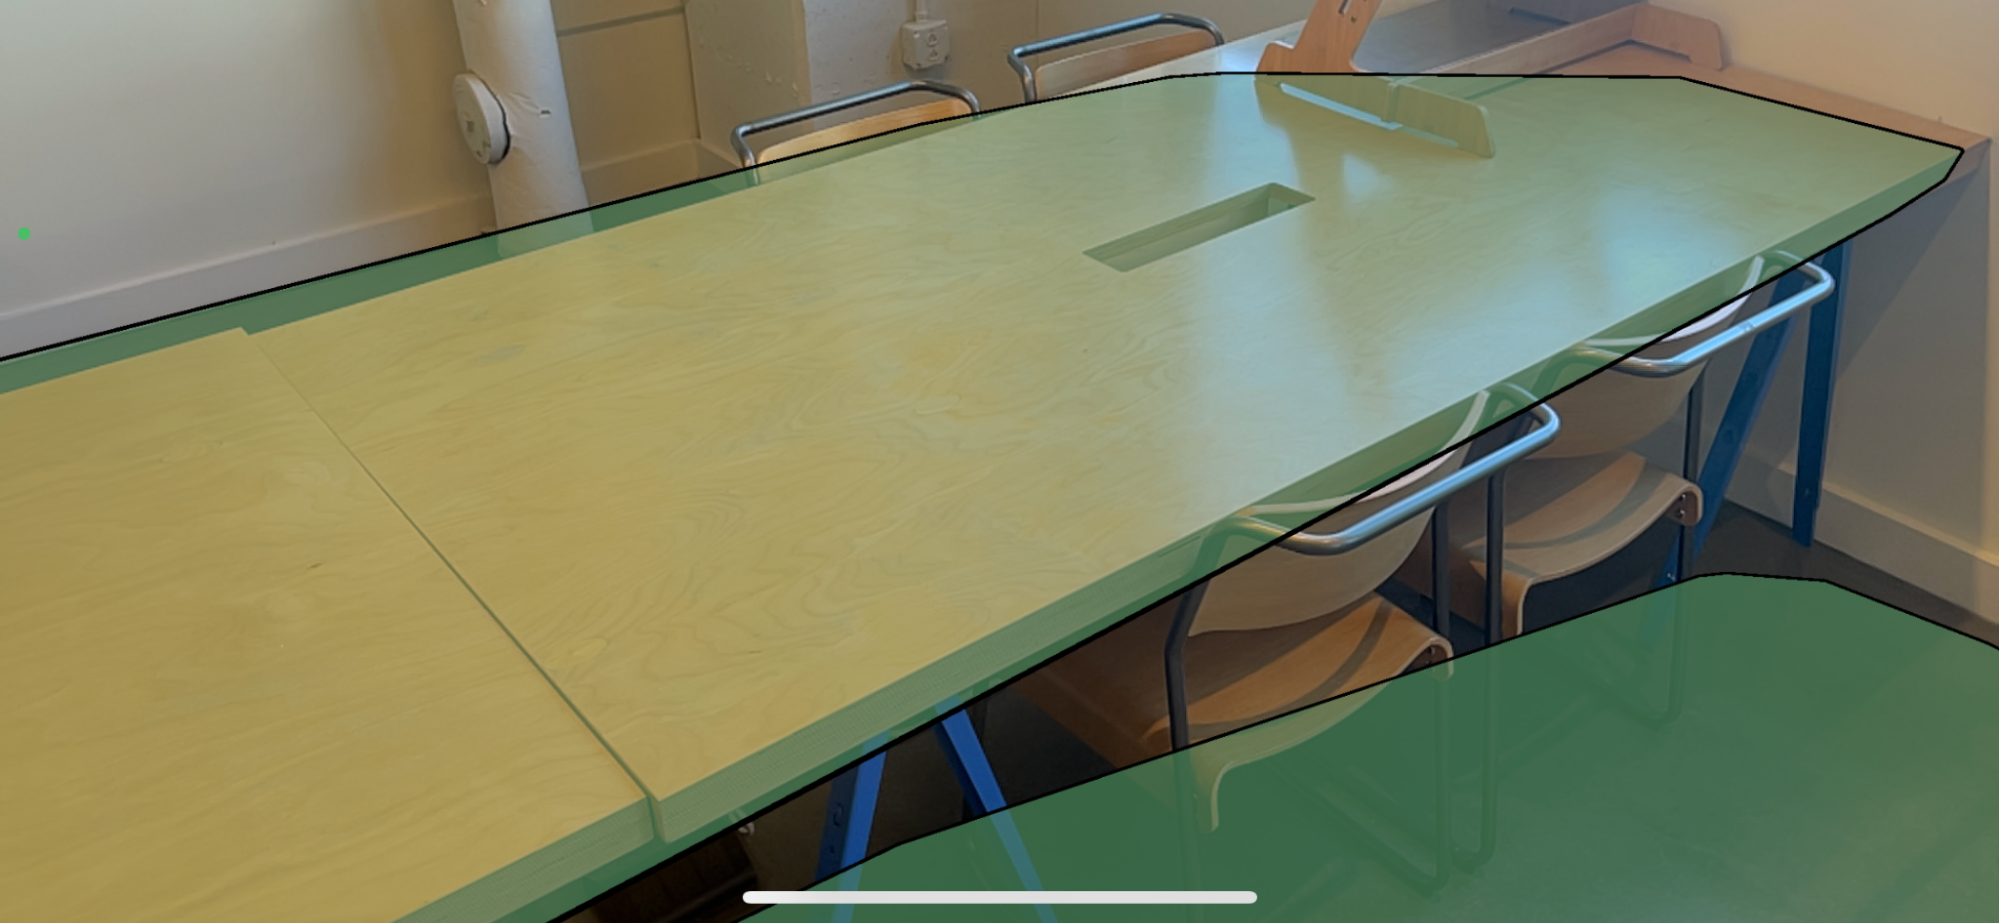
3. Add an AR Raycast Manager component to the XR Origin GameObject if it doesn’t contain one already to allow screen touch controls.
For a reminder of how to do this, follow step 3 in the Detect when the user touches a plane tutorial.
4. Add the AR Foundation Visual Scripting node in the Project settings.
This might already be set up in your project.

For a reminder of how to do this, follow step 4 in the Detect when the user touches a plane tutorial.
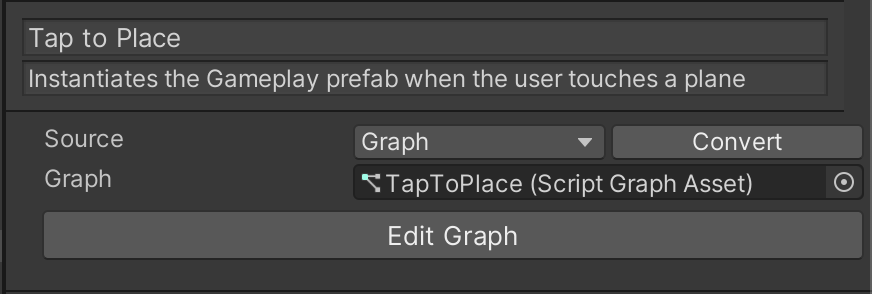
5. In the Hierarchy window, create an empty GameObject called “Tap to Place”, then add a new Script Machine component with a new TapToPlace visual script on it.
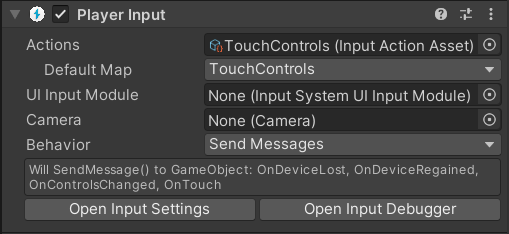
6. Add a Player Input component to the Tap to Place GameObject and, in the Actions property, select the TouchControls file that we provided as the Default Map.
7. Open the TapToPlace graph for editing and, in the Blackboard, create the following Object variables, which you will need to construct your script graph:
- barnSpawned (type Boolean, value 0)
- arRaycastManager (type AR Raycast Manager, value XR Origin)
- arPlaneManager (type AR Plane Manager, value XR Origin)
- hits (type AOT List)
8. Configure the graph so that it matches the following example screenshot.
Creating this script graph will take a little while to complete, but make sure you pay very close attention to make sure yours matches the below example exactly, otherwise yours will probably not work.

9. To improve the user experience, consider adding additional features that improve the tap-to-place functionality.
You can see examples of some possible additional features in the More things to try section of the Limit the visibility of the portal world tutorial, including adding instructions for the user about how to detect planes and adding a reset button to replace the play area. At the end of the Instantiate the portal on a plane tutorial, there’s also guidance about how to make the app detect a maximum of one plane.
10. Proceed to the next step to build and test your new feature.
It may be necessary to review Create a plane detection AR app course if your plane detection does not work as expected.
5. Build and test your changes
Now that you’ve set up the Gameplay prefab to spawn in the user’s environment, you’re ready to create a new build and run the game to test your updates.
When the game first loads, you should find that you can either scan your marker or tap on an identified plane to place the play area. However, once you do this the following issues will become apparent:
- The Gameplay prefab is far too large for the average user’s space.
- The opening sequence of the UFO flying in doesn’t play.
- There are two UFOs visible in the play area.
- The Sheep Remaining UI is not updating — it says, “Sheep Remaining: X”.
- The farmer isn’t snoring.
You can actually see these same problematic behaviors in the Editor by clicking and dragging the Gameplay prefab into the Hierarchy window after selecting the Play button.
Except for the scale of the Gameplay prefab, these issues have the same root cause: when the game first loads, the Game Manager searches for all of the components in the scene so that it can assign all the variables needed before triggering the cutscene. However, when you created the Gameplay prefab, you removed all of these components from the scene. When these removed components eventually become available after you instantiate them into the scene, it’s already too late: the Game Manager only looks for these components when it’s activated at the start of the game.
To resolve these issues, you need to deactivate the Game Manager and create a simple Script Machine that will turn on the Game Manager only once the Gameplay prefab is active in the scene.
6. Create a new GameStarter script machine
Follow these instructions to create a Script Machine to control the Game Manager:
1. In the Project window, navigate to the Prefabs folder. Double-click the Gameplay prefab to enter prefab editing mode.
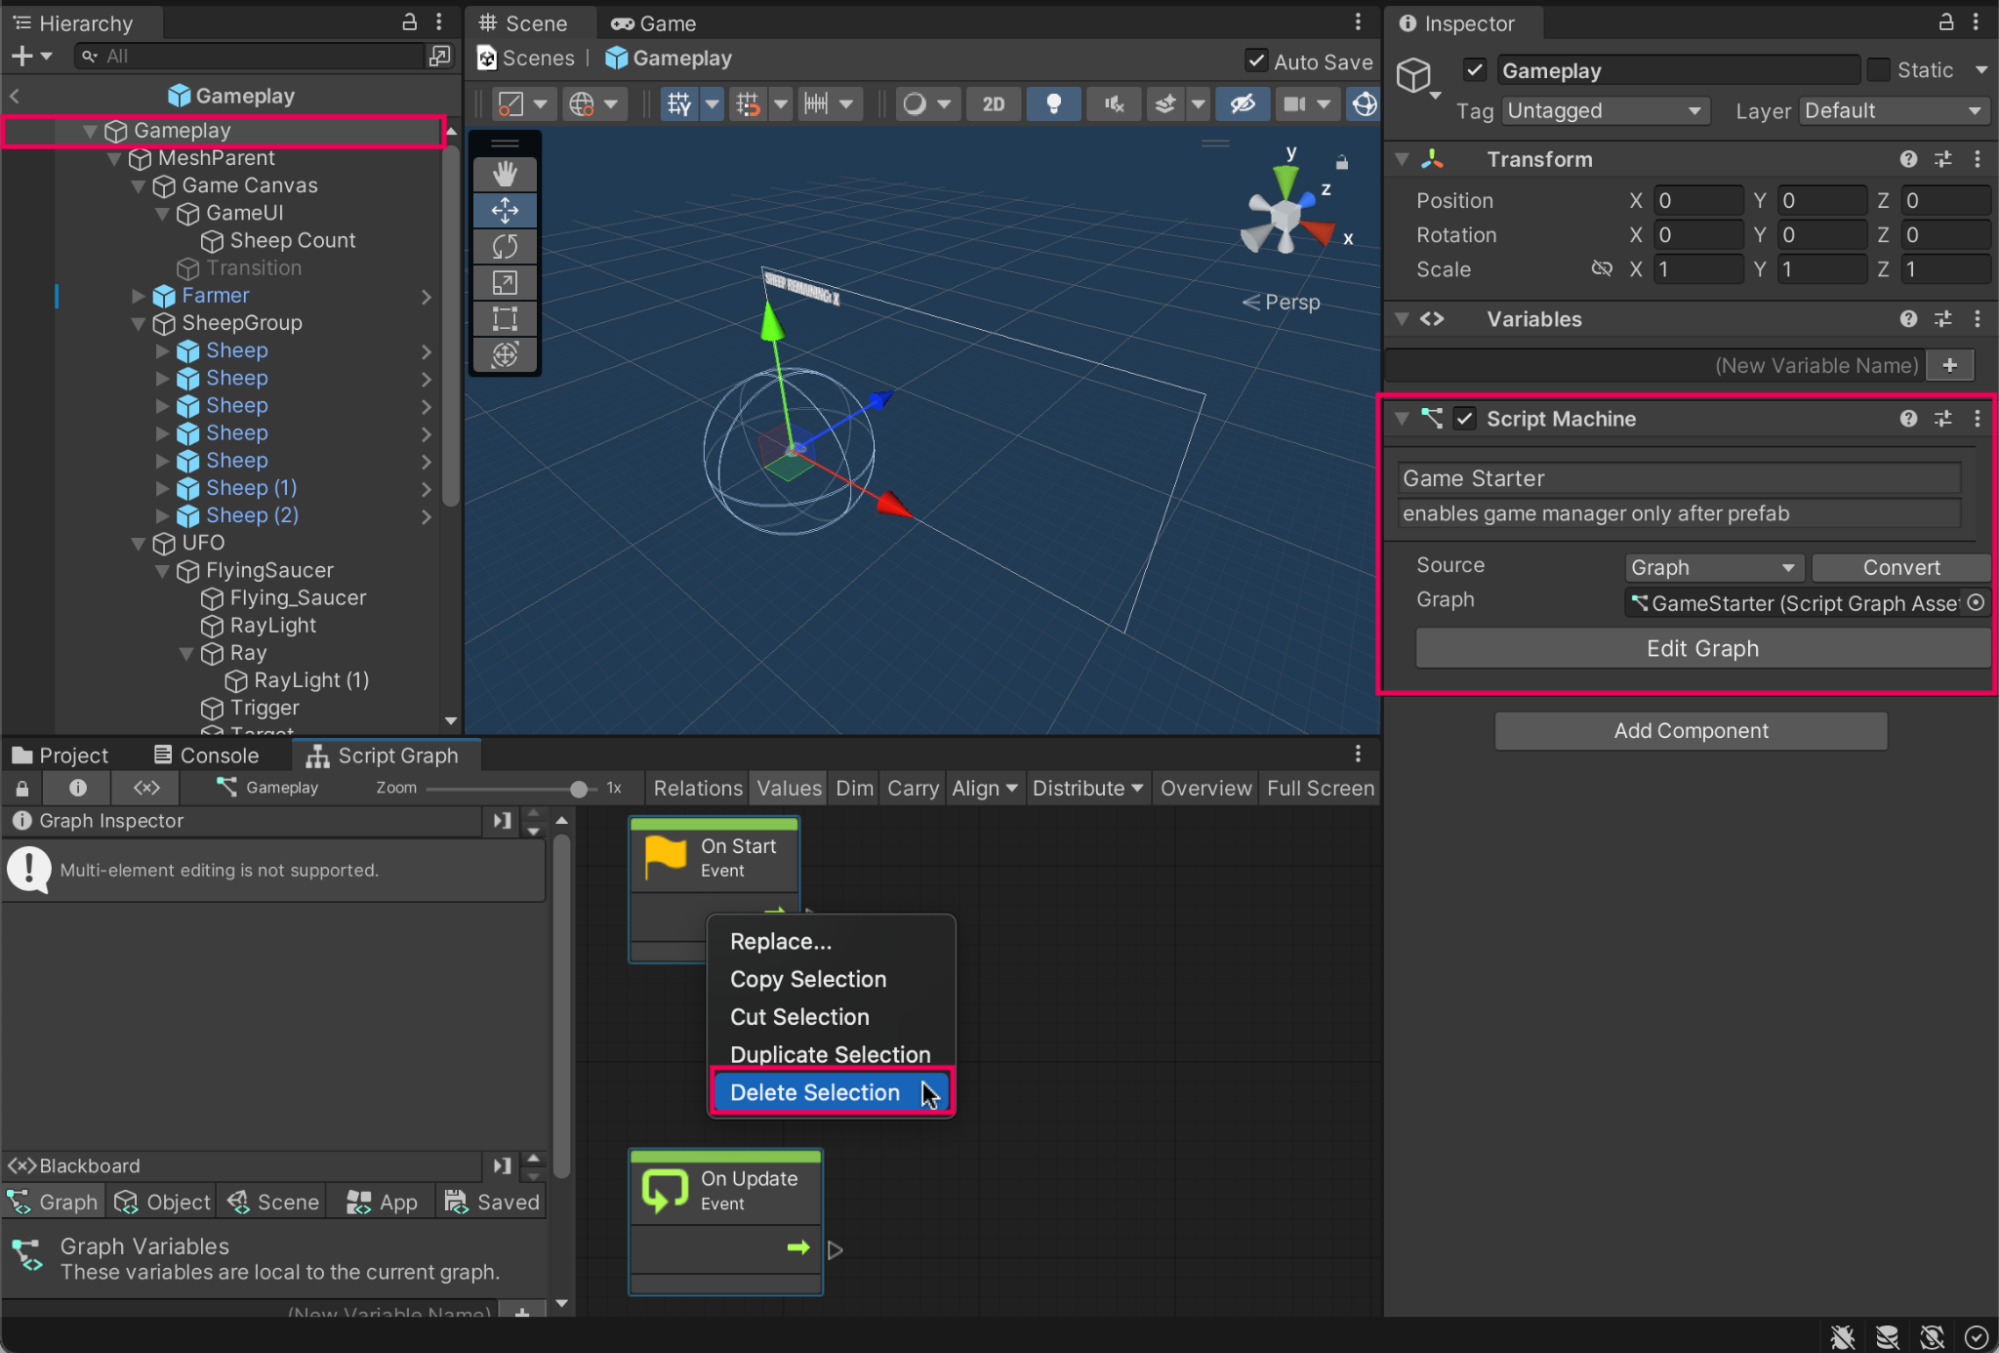
2. In the Hierarchy window, select the top level Gameplay GameObject and add a Script Machine component in the Inspector window.
3. In the new Script Machine component, select New. Name your new script graph “GameStarter” and save it in Graphs > Main Scene. Write a small summary and title and then select Edit Graph to open the graph.
4. Delete the Start and Update nodes.
7. Build the GameStarter visual script
Watch the video or follow the instructions below to see how to build the visual script:
1. In the Graph Editor, add an On Enable node.
2. Add a Game Object: Set Active node and set the value to True.
3. Add a Get Variable: Scene node and set its value to the _GameManager scene variable.
4. Connect the output of the Get Variable: Scene node to the Target input of the Set Active node.
5. Connect the On Enable node to the Set Active node.
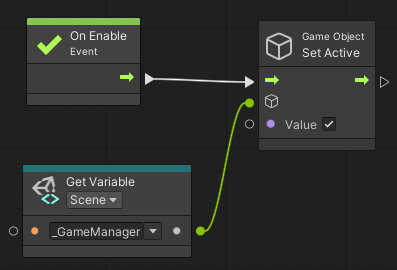
6. In the Hierarchy window, select the Game Manager. In the Inspector window, deactivate the GameObject.

Now the Game Manager GameObject will remain deactivated until the Gameplay prefab becomes active in the scene. You can test this in the Editor in Play mode. The Game Manager GameObject should become active and the cutscene UFO should fly into the scene.
You can also build and test this on your device to verify this. fix The cutscene should now play, the farmer should start snoring, and the sheep counter UI should work.
Note: If the Gameplay prefab is instantiated using a wrong rotation, you can solve this by following the steps of the previous mission, when you troubleshoot the rotation of your AR portals.
This change means that when the Game Manager GameObject is activated, all the Gameplay components will be available. The Game Manager GameObject will then be able to find and assign all of the objects to their associated variables and will run the cutscene, starting the game.
8. Set the Prefab scale
The game will now run, but the prefab is still extremely large. Before you build, you’ll add one extra node to the GameStarter script graph to fix this issue.
Watch the following video to see how to adjust the visual script or follow the instructions below:
1. Open the GameStarter script graph and add a Transform: Set Local Scale node.
2. Set the Vector 3 value of the Set Local Scale node to 0.03, 0.03, 0.03 or your preferred scale.
3. Connect the output of the Set Active node to the input of Set Local Scale node.
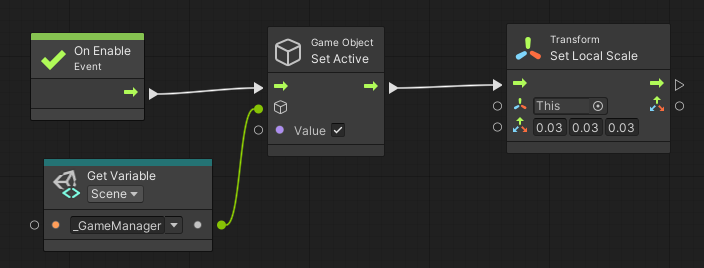
The local scale of the Gameplay prefab is up to your personal preference. You’ll need to test the experience on your mobile device to get a feel for whether you’d like the scale to be smaller or larger. Once you’ve tested it, you can return to the Set Local Scale node and adjust the scaling as needed.
4. Exit prefab editing mode.
5. Build and test the app on your mobile device.
The scale of the prefab should now be more appropriate for playing the game on a user’s table or floor.
9. More things to try
If you want to further develop your skills, explore new concepts, or improve your project, check out some of the optional activities below. Each activity is identified as being either Easy, Medium, or Difficult so you know what level of difficulty to expect.
These activities are entirely optional, so if you’re not interested, no problem — just skip this step.
We do recommend attempting at least one of them in order to get the most out of this learning experience, however. Good luck!
Easy - Add some corn to the surrounding area
In the desktop version of the game, there were vast fields of corn surrounding the fenced-in farm area. This worked great on the desktop version because there was a lot of available screen space and because optimization is less of a concern for desktop games.
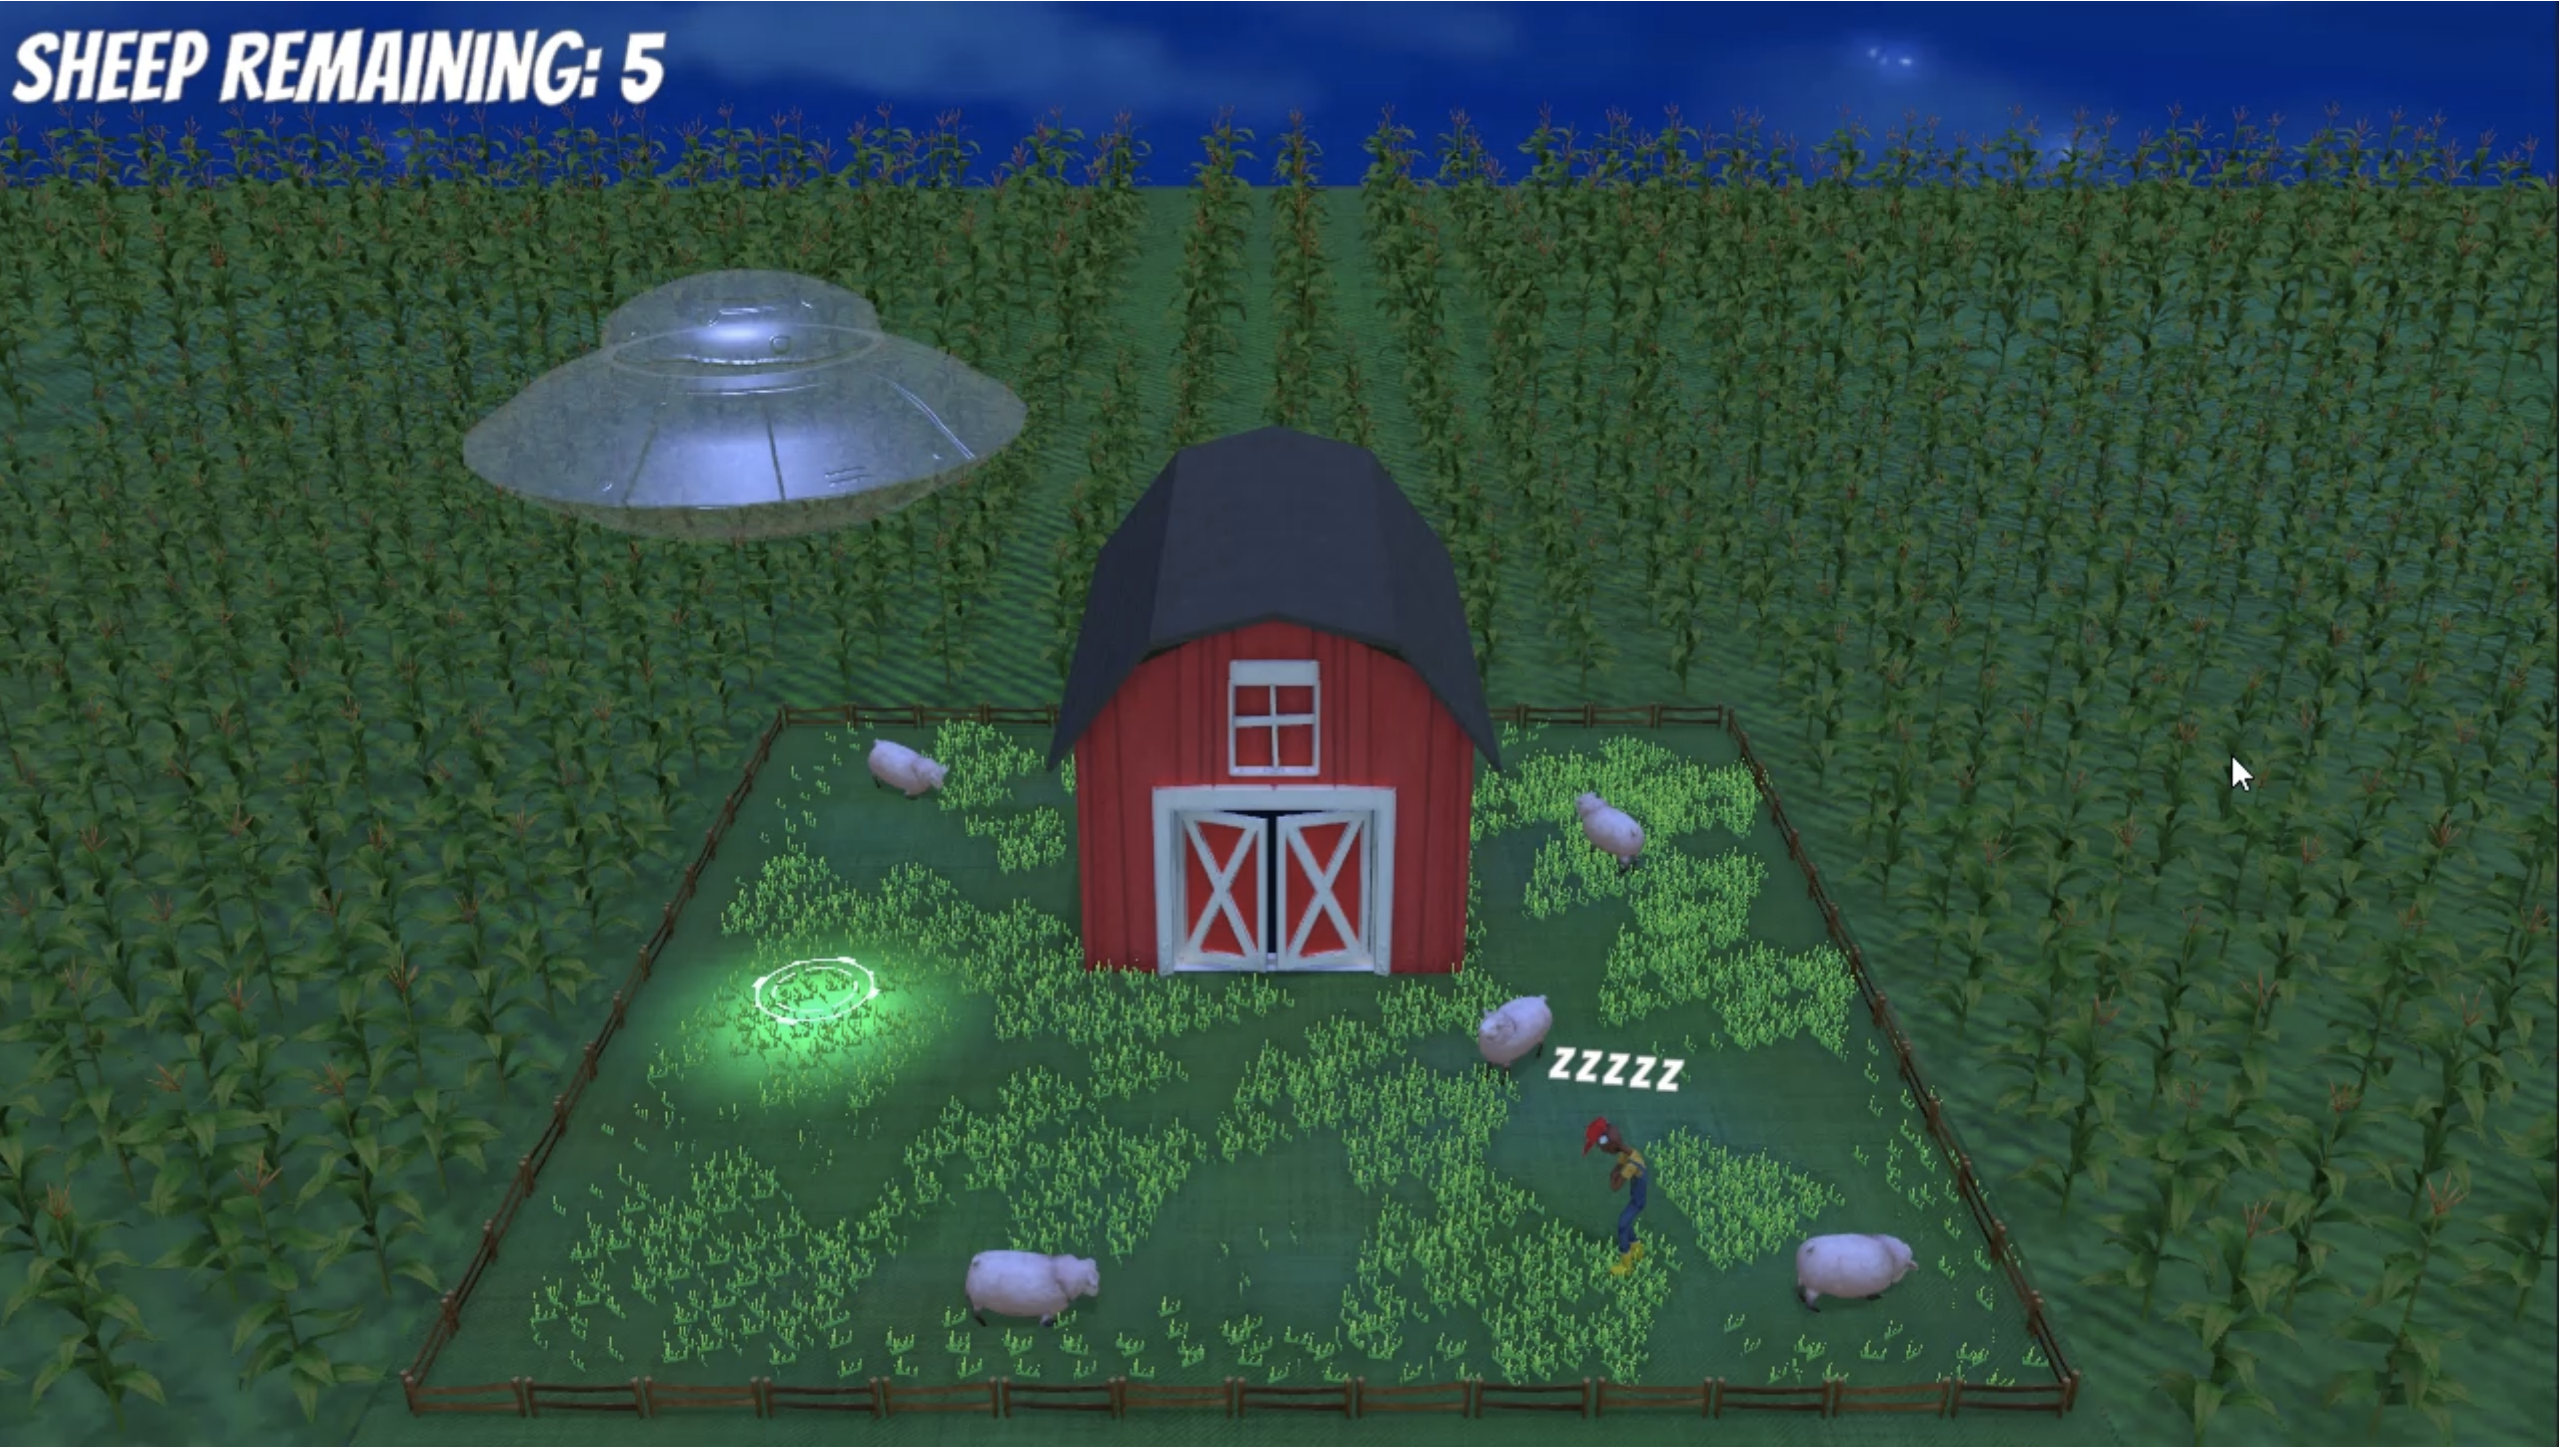
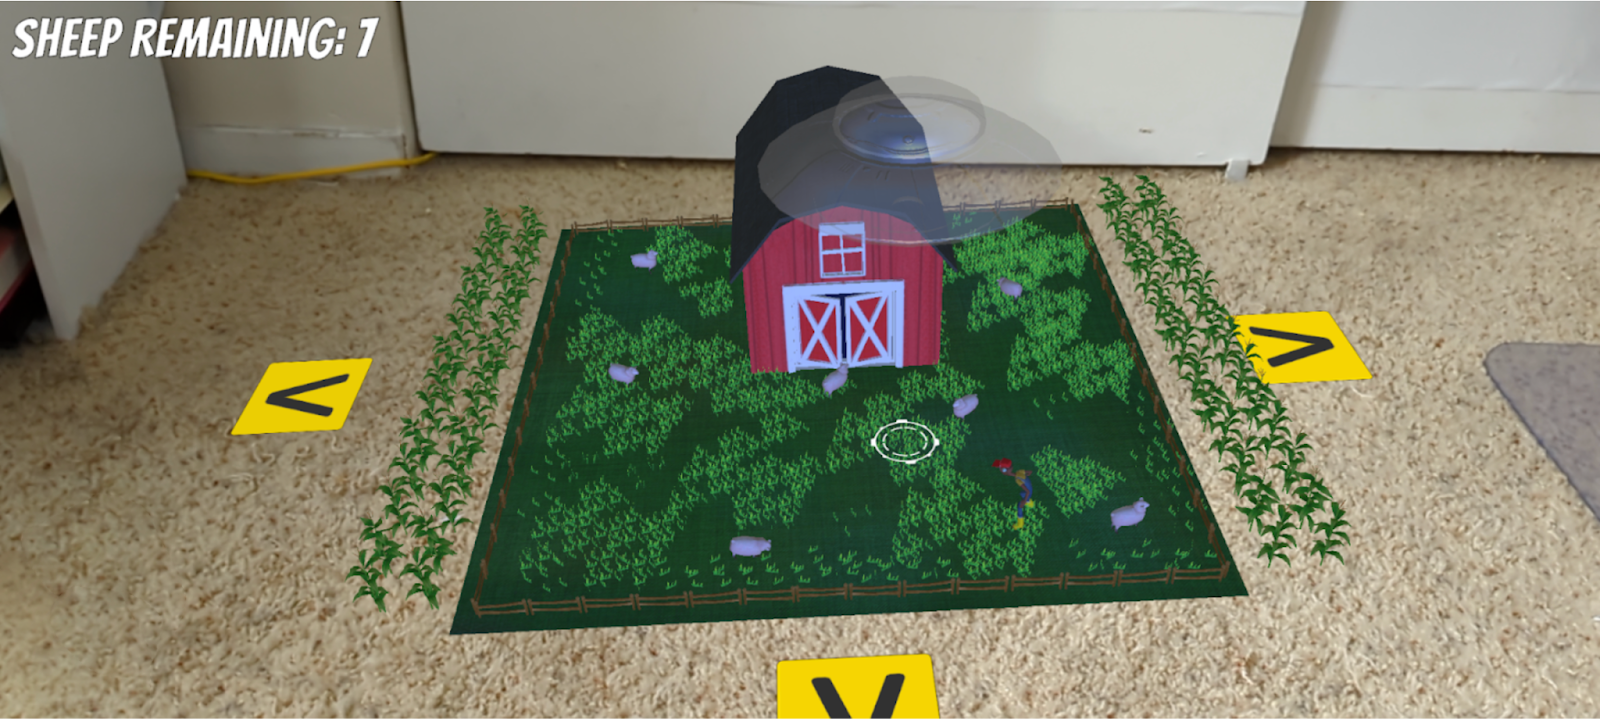
In mobile AR, on the other hand, it’s best to keep the play area as space-efficient as possible so that you can maximize the available flat surface area. Optimization is also more important for mobile AR — and adding thousands of ears of corn might slow down the game.
It might be nice to add just a few plants of corn around the Farm prefab though, as this will help tie in the images of cornfields the user sees in StartScene, WinScene, and LoseScene with what they see in MainScene.
Medium - Add a particle and sound effect when the play area is spawned
When the play area spawns into the world, it can be a bit jarring for the user when it suddenly appears. You can add a particle effect or sound effect to the spawning action to make this interaction feel more intuitive and less abrupt.
Difficult - Add instructions for scanning the environment
For first-time users of your app, it may not be obvious what they need to do to activate the play area. There should be some instructions for how to spawn the play area in their environment, either in the start screen instructions or in MainScene.
You could add a simple UI that instructs the users to scan their surroundings for horizontal surfaces, which then disappears after the play area spawns.
10. Next steps
When you scan the marker or tap to place the Gameplay prefab, the game will now begin as expected. The cutscene will begin with the UFO flying to the farm and then transition to its invisible state. The farmer will then begin to snore. The game is working!
In the next tutorial, you’ll implement mobile controls for the UFO.