Add particle effects to your filter
Tutorial
·
Beginner
·
+10XP
·
30 mins
·
(87)
Unity Technologies

Particle effects add movement to an AR app, making it more dynamic and visually interesting. There are a lot of fun opportunities for particle effects with face filters, too!
In this tutorial you'll do the following:
- Attach a particle system to your face filter.
- Customize your particle system to produce a desired effect.
- Build and test your updated app.
1. Overview
One type of special effect you can use in Unity is called a particle effect. Particles are simulated motion effects that range from a subtle splash of water to a massive fiery explosion. Particle systems have lots of settings to customize these effects.
In this tutorial, you’ll do the following:
- Attach a particle system to your face filter.
- Customize your particle system to produce a desired effect.
- Build and test your updated app.
Note: This tutorial introduces some basics of particle systems, but it is not a comprehensive introduction. Try Creative Core: VFX to develop your understanding of particle systems in Unity.
2. Explore a particle system
Before you start making changes to your app, take a little time to explore a particle system by following these steps:
1. In the Project window, navigate to Assets > _BasicFaceFilter > Particle Effects and double-click one of the particle systems to open it in the Scene view.
2. In the Hierarchy window, select the [Name]_ParticleSystem GameObject.
The particle system will begin to play in the Scene view.
3. In the Inspector window, expand the Particle System component if it is not already open.
The particle system properties are grouped into smaller subsections called modules that control the particle system’s behavior and appearance.
4. Select a few of the modules to expand and inspect them, or use the checkboxes next to the module names to enable or disable them.
Feel free to experiment with the particle system modules and undo any unwanted changes.
3. Attach the particles to the face tracker
Just like you added a 3D accessory, you’re now going to add a particle system to the AR Default Face prefab.
You’ll enable the Face Reference Mesh to guide you while you’re working in the prefab, and then you’ll disable it when you have your particle system’s transform (position, rotation and scale) set up.
Follow these instructions to create a new particle system:
1. In the Project window, navigate to Assets > _BasicFaceFilter > Prefabs and open the AR Default Face prefab.
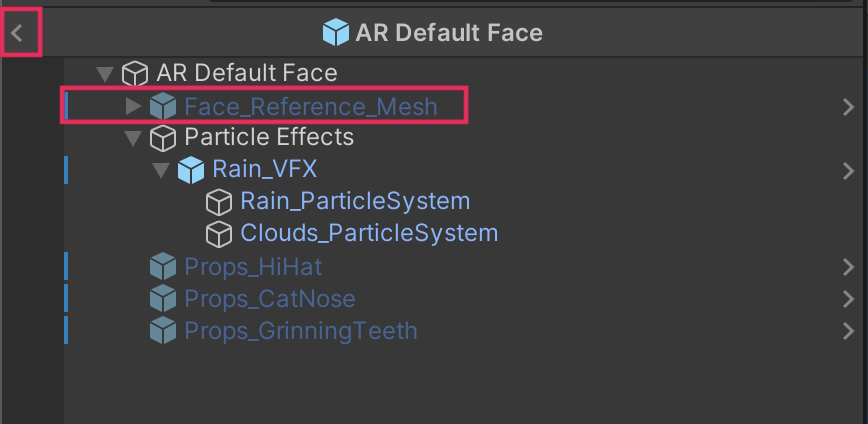
2. In the Hierarchy window, select the Face_Reference_Mesh GameObject that you added in a previous tutorial. If you don’t see it in the Hierarchy window, drag it into the Hierarchy window from the Project window.
3. In the Inspector window, make sure the Face_Reference_Mesh is marked as active. If you want, disable the 3D accessories you added in a previous tutorial.

4. In the Hierarchy window, right-click and select Create Empty to create a new GameObject as an anchor for the particle system.
The Transform position of this GameObject will act as the spawn point for the particles (where the particles will first appear).
5. Right-click your new GameObject and select Rename. Call the GameObject “Particle Effects”.

6. Use the Transform tools to move the Particle Effects GameObject into your desired position. If you need to refresh your memory, review the Transform tools and their shortcuts.
7. In the Project window, go to the Particle Effects folder. Drag one of the particle effects onto your new GameObject to create a child GameObject for the effect.
8. To preview an individual particle effect, select it in the Hierarchy window. You can select additional effects at the same time by holding Ctrl (macOS: hold Cmd). Adjust the position or rotation of the effects as needed.
4. Customize the particle system
One of the great features of particle systems is the wide array of incredible possibilities for customization. Every particle system can be a unique creation.
To show off your creativity, modify one of the particle systems that is supplied in the project, as follows:
1. Make sure the AR Default Face prefab is open. If it isn’t, go to the Prefabs folder in the Project window and open it again.
2. In the Hierarchy window, expand the [Name]_VFX GameObject and select a particle system GameObject.
For example, the Rain_VFX GameObject has two child particle system GameObjects: Rain_ParticleSystem and Clouds_ParticleSystem.
3. In the Inspector window, find and expand the Particle System component.
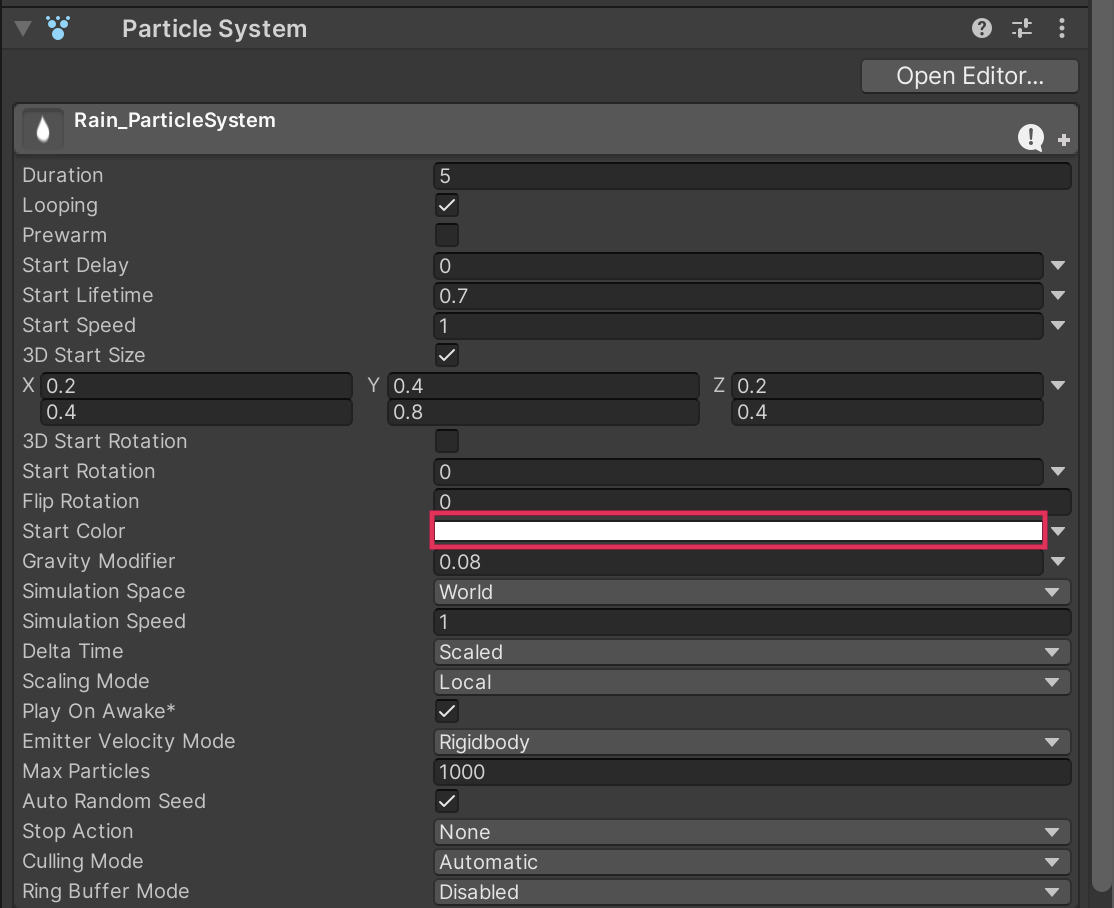
4. Select the Start Color property field to open a color selection dialog window.

5. Change the color and notice how the tint of the particle system changes.
6. Make sure the Simulation Space is set to World.

Particles can move in different ways depending on what kind of simulation space they are created in. The World simulation space will make the particles change their position with the movement of the face tracker!
7. Experiment with the other settings to see how they change the behavior of the particle system.
For example, you could adjust the Rate over Time property in the Emission module to change the number of particles that spawn. Be careful though – too many particles can decrease performance drastically!

8. When you're done customizing the particle system, make sure the face reference mesh is disabled.
You probably don’t want to see that when testing the app on your device. Then select the left-facing arrow next to the AR Default Face prefab name in the Hierarchy window to exit prefab editing mode.

5. Build and test
When you build the application for testing now, it should display the particle systems you added when a face is detected.
Follow these instructions to build and test your app:
1. Save the scene.
2. Open the Build Settings window (File > Build Settings).
3. Make sure that your device is plugged in and then select Build and Run to build the app on your device.
4. The application will open automatically on your device.
When a face is detected, the application should display everything you have added so far and the particle effects should play.
Note: For a reminder of how to build to your device, you can review the process for Android or iOS.
6. More things to try
If you want to further develop your skills, explore new concepts, or improve your project, check out some of the optional activities below. Each one is tagged as either Easy, Medium, or Difficult, so you can choose the level of challenge.
These activities are entirely optional, so if you’re not interested, no problem — just skip this step. We do recommend attempting at least one of them in order to get the most out of this learning experience. Good luck!
Easy: Adjust the existing particle systems
The built-in particle system in Unity has many settings to customize. The combination of these settings can make simple particle systems or very advanced effects.
Open one of the particle effects in the included project files and try modifying properties in the following modules of the Particle System component in the Inspector window:
- Emission: The properties in this module affect the rate and timing of Particle System emissions.
- Shape: This module defines the volume or surface from which particles can be emitted
- Color over Lifetime: This module specifies how a particle’s color and transparency changes over its lifetime.
You can learn more about particle systems in Creative Core: VFX!
Medium: Import and edit particle systems
There are many visual effects and particle systems in the Unity Asset Store. Find a free VFX asset from the asset store and import it into your project. A great option is the Unity Particle Pack, but you may need to edit some of the materials in that pack for them to display correctly. This pack includes many different particle systems that you can explore to see how more advanced particle systems are made.
Change some of the properties of the particle systems to make new effects and then add those to your face filter!
Difficult: Create new particle systems
Making your own particle systems can be a lot of fun. Add a new particle system to your scene and customize different modules and properties to create new effects.
Some ideas of particle systems you could try to make include the following:
- Stars that surround your face
- Superhero laser eyes
- Hearts floating upwards
Find out more about all of the options available for customizing particle systems in the Unity Manual.
7. Next steps
In this tutorial, you added a particle system to your face filter application and customized that filter yourself. Next, you’ll add animations to the accessories you added previously.