
Animator Controllers
Tutorial
Beginner
+10XP
30m
(899)
Unity Technologies
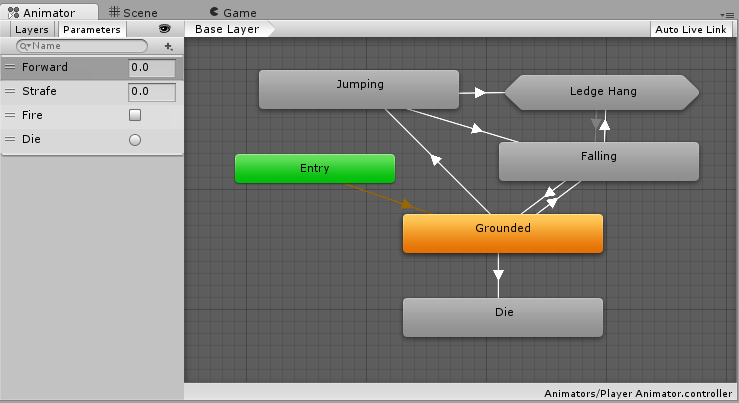
An Animator Controller is a Unity asset that controls the logic of an animated GameObject. Within the Animator Controller there are States and Sub-State Machines that are linked together via Transitions. States are the representation of animation clips in the Animator. Transitions direct the flow of an animation from one State to another. In this tutorial, you will learn to create States and use Transitions, Parameters, and Conditions.
Languages available:
1. Animator Controllers
This tutorial has been verified using Unity 2019.4.10f1 LTS - https://learn.unity.com/tutorial/animator-controllers-2019-3
An Animator Controller is a Unity asset that controls the logic of an animated GameObject. Within the Animator Controller are States and Sub-State Machines that are linked together via Transitions. States are the representation of Animation Clips in the Animator. Transitions direct the flow of an animation from one State to another. While Transitions direct the flow of animation logic, Conditions that are governed by Parameters control when animation states can flow to the next animation state. Parameter values are changed by events in scripts. For example, an avatar may be controlled by the user using keyboard input. Those input values modify the values of the Parameters and produce an animation linked to it based on the Condition set in the Animator Controller.
2. Creating States
1. In the Project window, right-click and choose Create > Animator Controller
2. Give the Animator Controller a name that makes sense for the animated asset (Figure 01).
3. Double-click on the Animator Controller to open the Animator window
4. Right-click in the empty workspace area and choose Create State > Empty (Figure 02).
5. Select the State and rename it in the Inspector (Figure 03).
6. Click on the radio button next to Motion and add the desired Animation Clip (Figure 04).
Alternatively to adding Animation Clips to a State using the radio button, users can drag and drop animation files directly into the Animator workspace. It will create a new State as well as associate the Animation Clip
7. Repeat steps 4 - 6 to create another State
3. Using Transitions, Parameters, and Conditions
1. Right-click on the Default Animation State (orange) and choose Make Transition (Figure 05).
2. Left-click on the second Animation State to create a Transition between the two States (Figure 06).
3. On the left side of the Animator window, select the Parameters window.
4. Add a New Parameter by pressing the “+” symbol (Figure 07).
5. Choose the data type and rename the parameter to fit the parameter need
6. Select the Transition between the two States.
7. In the Inspector, click on the “+” symbol to create a New Condition (Figure 08).
8. Select the new Parameter from the Conditions dropdown list
9. Change the Condition result to the necessary value to create animation logic (Figure 09).
Animator Controllers control the logic of our animations. They can be used to control the logic of multiple characters with similar rigs. Try it to streamline the development of your game.