
Configuring Photon Rigidbody Views
Tutorial
intermediate
+0XP
15 mins
(34)
Unity Technologies
In this tutorial, you’ll learn how to use and configure Photon Rigidbody Views to synchronize either 2D or 3D
Rigidbody information across Photon-networked Unity applications. Options are identical between the two and include the ability to synchronize velocity (rate of change in position over time), angular velocity (rate of change in rotation over time), and to teleport a Rigidbody whose change in position is greater than a specified distance.
Languages available:
1. Configuring Photon Rigidbody Views
Verified with: 2019.3
In this tutorial, you’ll learn how to use and configure Photon Rigidbody Views to synchronize either 2D (Figure 01) or 3D (Figure 02) Rigidbody information across Photon-networked Unity applications. Options are identical between the two and include the ability to synchronize velocity (rate of change in position over time), angular velocity (rate of change in rotation over time), and to teleport a Rigidbody whose change in position is greater than a specified distance.
2. Applying a Photon Rigidbody View
1. Load or create a PUN-enabled project with a valid AppId.
2. In a new Scene, create an empty GameObject by selecting Create Empty from the GameObject drop-down. Name it Photon.
3. Attach a Connect And Join Random component.
4. Create a Sphere by selecting 3D Object > Sphere from the GameObject drop-down.
5. Attach a Photon Rigidbody View.
6. Optionally, you can instead create a Sprite and attach a Photon Rigidbody 2D View. We will assume that you are using a Sphere, but the process is practically identical.
7. In either case, the proper Rigidbody component is also attached to the GameObject.
8. Click Enable teleport for large distances.
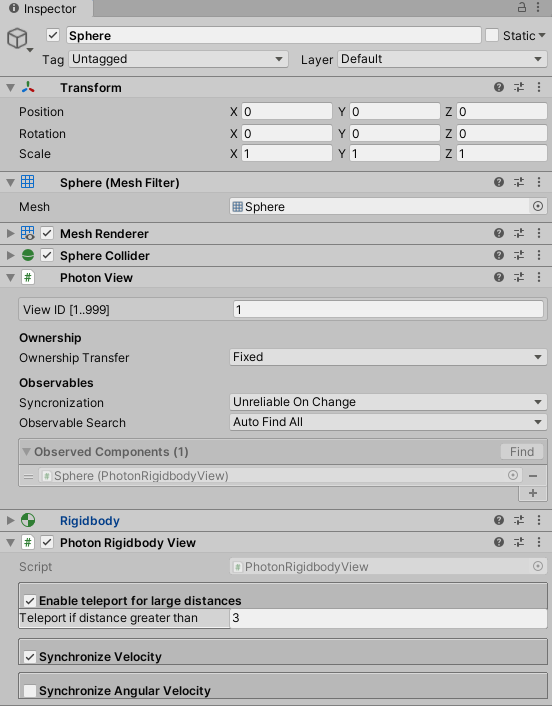
9. In the Photon View section, the Photon Rigidbody View should automatically populate the slot labeled Observed Components (Figure 03).
10. Position the MainCamera where the Sphere (or Sprite) is visible in its view and save the Scene.
3. Synchronizing Rigidbody Information
Let’s create a simple Script to reset the Rigidbody’s position. This will make it easier to observe the synchronization between instances.
1. Attach a new C# Script to Sphere, called ResetPosition, and open ResetPosition in your Script editor.
2. Inside the class definition, type:
private Rigidbody _rigidbody;
private Vector3 _startPosition;
If using a Sprite and Rigidbody 2D with the Photon Rigidbody 2D View, instead type:
private Rigidbody2D _rigidbody;
    private Vector3 _startPosition;
3. Inside Start, type:
 _rigidbody = GetComponent<Rigidbody>();
    _startPosition = _rigidbody.transform.position;
If using a Sprite and Rigidbody 2D with the Photon Rigidbody 2D View, instead type:
   _rigidbody = GetComponent<Rigidbody2D>();
    _startPosition = _rigidbody.transform.position;
4. Inside Update, type:
if (Input.GetKeyDown(KeyCode.Space))
    {
        _rigidbody.velocity = Vector3.zero;
        _rigidbody.transform.position = _startPosition;
    }
5. Save changes and return to the Unity Editor.
6. Save the Scene and build your project, making sure to include only this Scene in the build.
7. Launch the build, either on another machine or in Windowed mode on the same machine.
8. (If running the build on the same machine) If the Build starts in fullscreen mode, press Alt-Enter and drag the window to another position (or monitor, in a multi-monitor setup) so that both the running build and Unity Editor Scene view are visible.
9. Enter Play Mode.
10. Once both the build and Play Mode are running, press the space bar in the build.
11. The Sphere in both the build and the Editor should move to the starting position and begin to fall again.
12. Exit the build and Play Mode.
4. Conclusion
The Photon Rigidbody View component makes it incredibly easy to synchronize a 2D or 3D Rigidbody across instances of a Photon-enabled application.