Create real-time 3D audio effects
Tutorial
foundational
+10XP
20 mins
6018
Unity Technologies

Sound in real-time 3D must behave like sound does in the real world: it is louder as you get closer to its source, and even bounces off objects. In this tutorial, you will get a first look at the Unity features that make audio come to life.
In this tutorial, you will be able to:
- Define 3D sound.
- Explain the role of an Audio Listener in a Scene.
- Set an Audio Clip to loop.
- Convert background audio into 3D sound.
Languages available:
1. Overview
The background music you have added plays at the same volume wherever you are in the Scene. You can also add audio that changes volume, or even pitch, depending on where you move in the Scene, just as sound behaves in actual space. This is called 3D sound.
To explore how 3D sound works in Unity, it is important to understand how audio is played as well as received in the Scene. Just as the camera acts as the user’s eyes, an Audio Listener acts as the ears. It detects the audible sounds at a given location, and plays them back to the user. It is important to note that only one Audio Listener can be in a Scene! Every default Unity Scene has an Audio Listener attached to the Main Camera, so the user’s “eyes” and “ears” are together.
2. Role of the Audio Listener
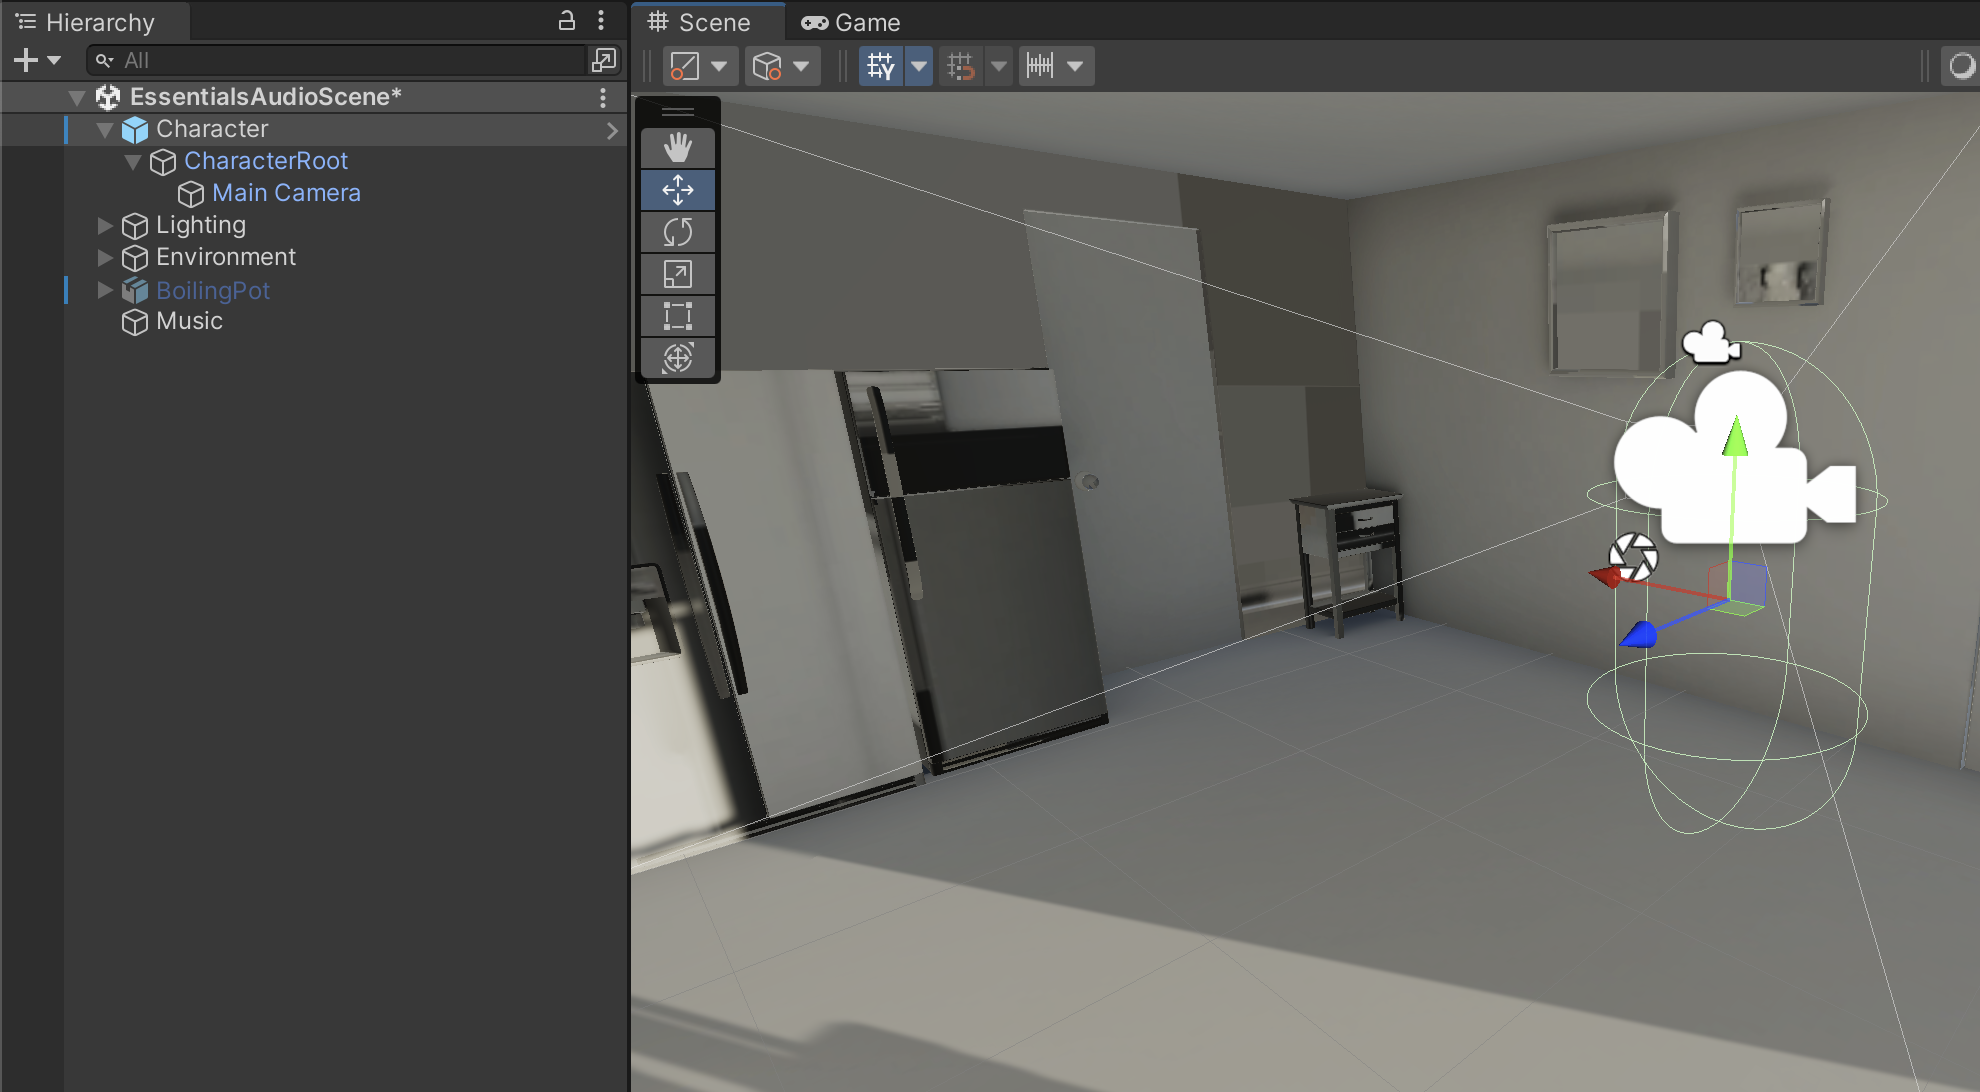
In this Scene, we have prepared a GameObject called Character to represent the user moving through the kitchen. The Character GameObject consists of the Main Camera (eyes) with its built-in Audio Listener (ears) and a capsule Collider (body; like a capsule primitive, but invisible — and as a Collider, it bumps into other GameObjects instead of going through them).
1. In the Hierarchy window, select the Character GameObject.
2. Select the left arrow next to Character to expand the Character GameObject and view its child GameObjects.
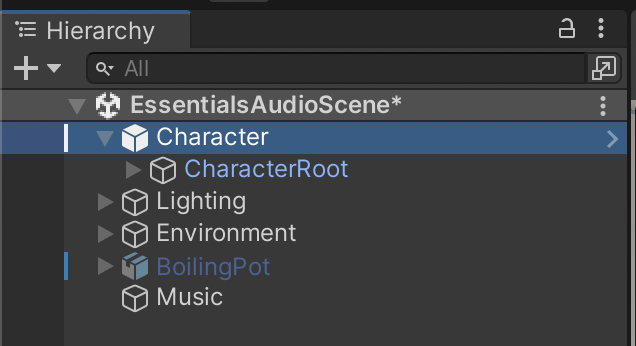
3. If you cannot see the Main Camera GameObject, select the left arrow next to CharacterRoot to show the Main Camera.
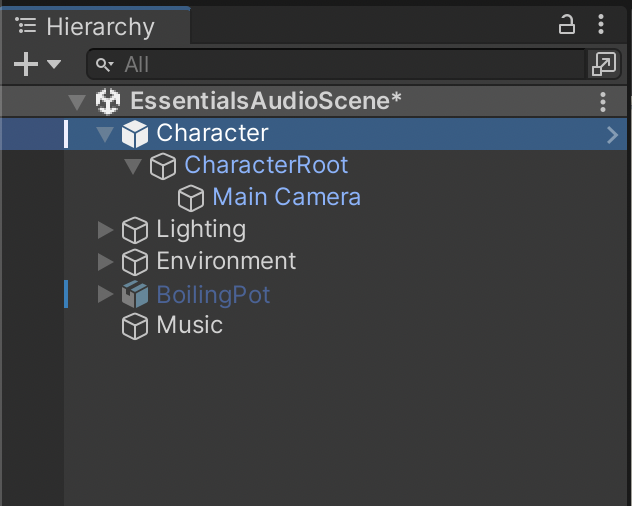
4. Observe the Character GameObject. You will see the outline of the Collider, and the Main Camera positioned roughly where the head of our character would be.
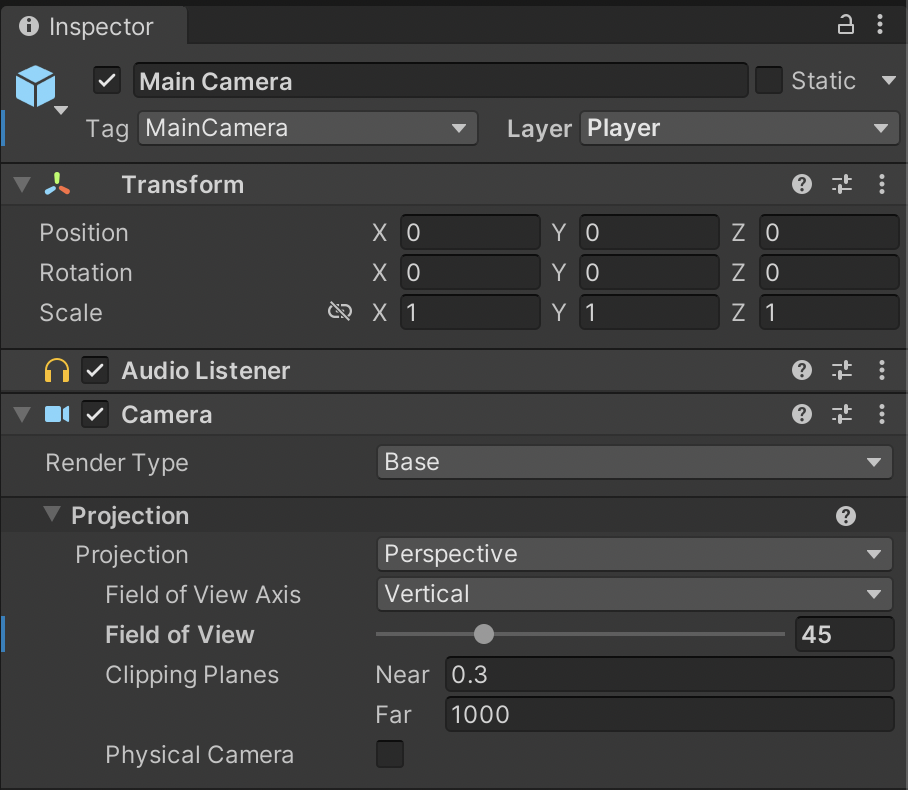
5. In the Hierarchy, select the Main Camera GameObject.
6. In the Inspector Window, you will see the Audio Listener Component. Note that this component has no properties.
3. Create 3D Audio
In 3D audio, Audio Clips sound differently depending on the location of the Audio Listener in the Scene. In this example Scene, we have provided a GameObject that makes sound to demonstrate 3D audio.
1. In the Hierarchy window, select the BoilingPot GameObject.
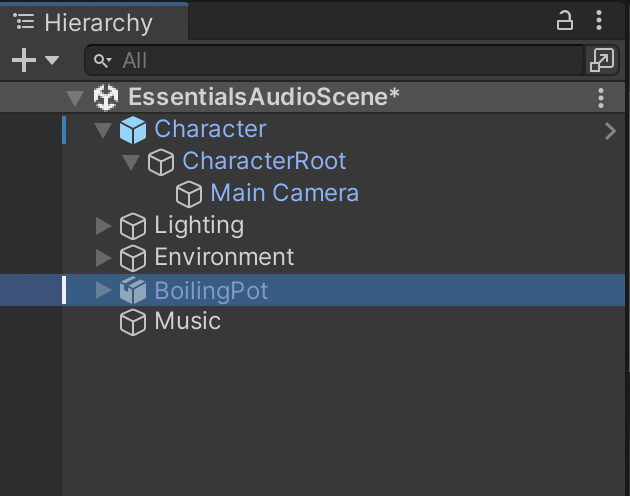
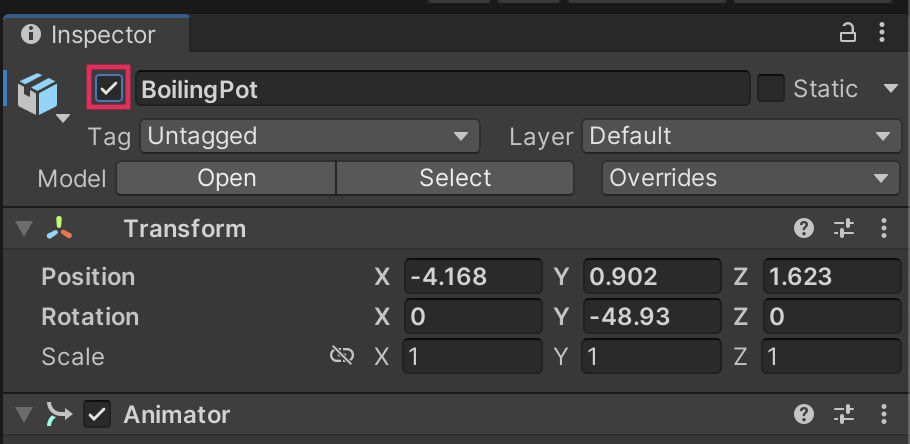
2. In the Inspector window, select the checkbox to the left of the BoilingPot’s Name field to enable the GameObject in your Scene.
3. Select the Play button to test. You will notice that there is now a copper pot making a boiling water sound in your Scene. However, no matter where you move in the scene, the audio will be the same volume.
4. Exit Play mode. In the Hierarchy window, expand the BoilingPot GameObject to see the GameObject’s children.
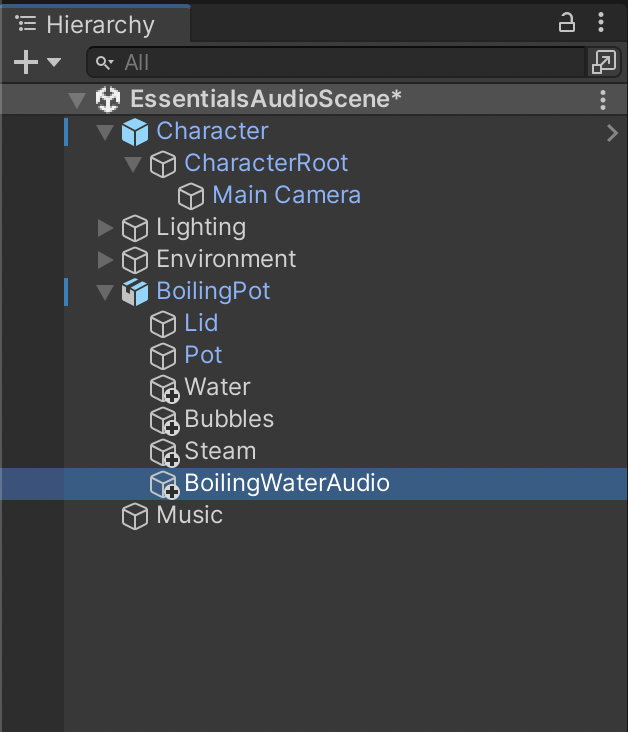
5. Select the BoilingWaterAudio GameObject that is a child of BoilingPot.
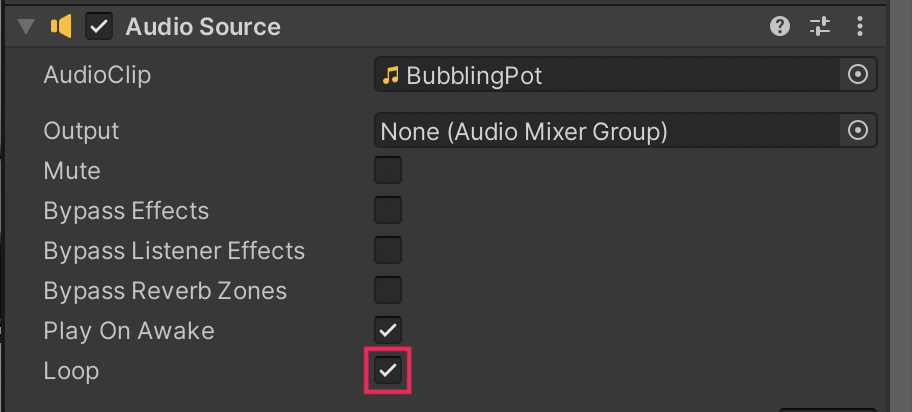
6. In the Inspector window, take a look at the Audio Source Component’s properties. For this Audio Source, we have enabled the Loop setting to provide the continuous boiling sound.
7. To convert this Audio Source to 3D sound, select and drag the Spatial Blend slider all the way to the right, or set its value to 1.
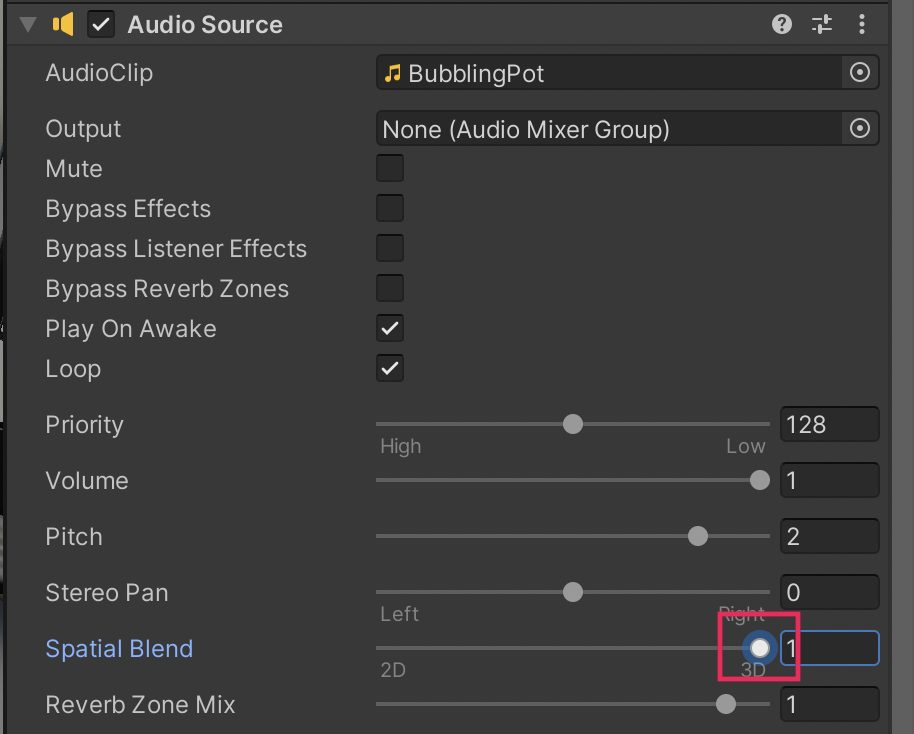
8. Enter Play Mode and move the Character around, nearer to and farther from the kitchen stove. The volume of the BoilingPot’s audio now increases the closer you are to the BoilingPot GameObject.
4. Set audio rolloff
The rolloff of an audio clip defines its range in 3D space, and the rate at which it fades at greater distances and becomes inaudible. You can set the rolloff of your sounds to simulate the ways that different sounds carry.
1. With the AudioSource GameObject selected, select the arrow to the left of 3D Sound Settings to expand the properties in the Inspector.
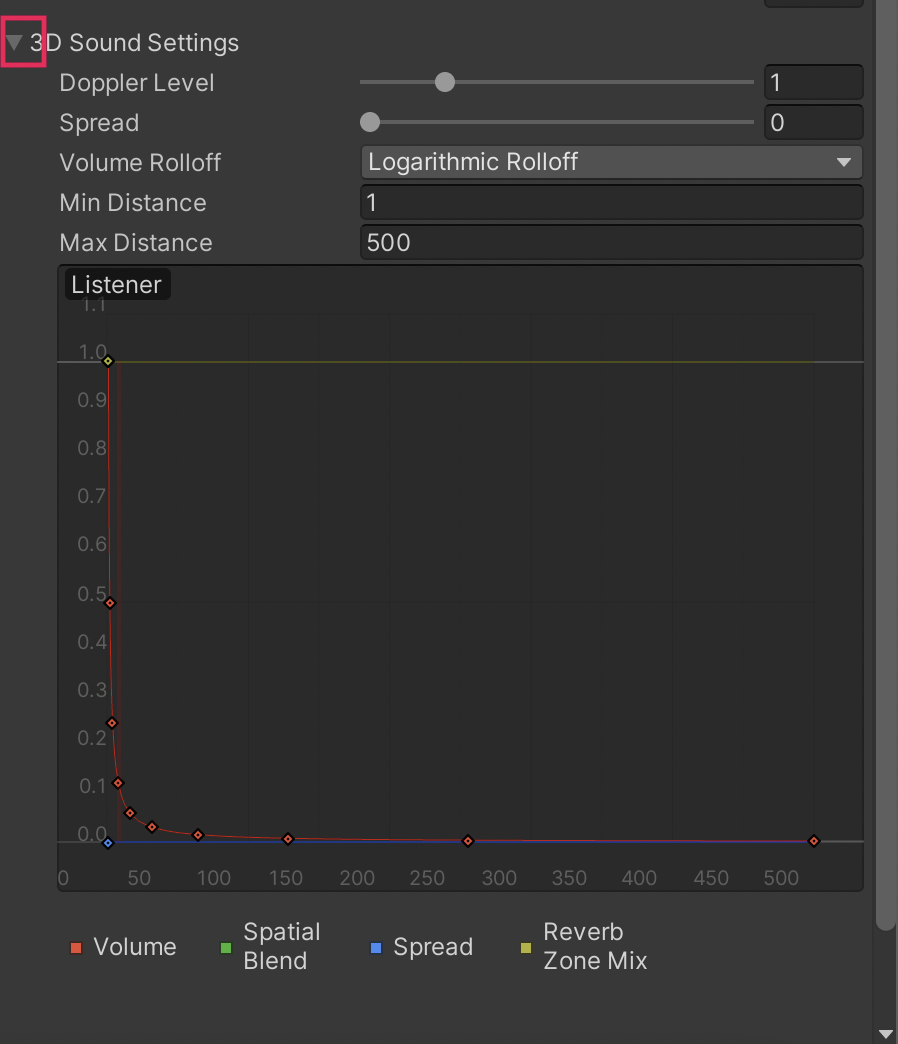
These settings control how volume and pitch can change based on the positions of the Audio Source and the Audio Listener.
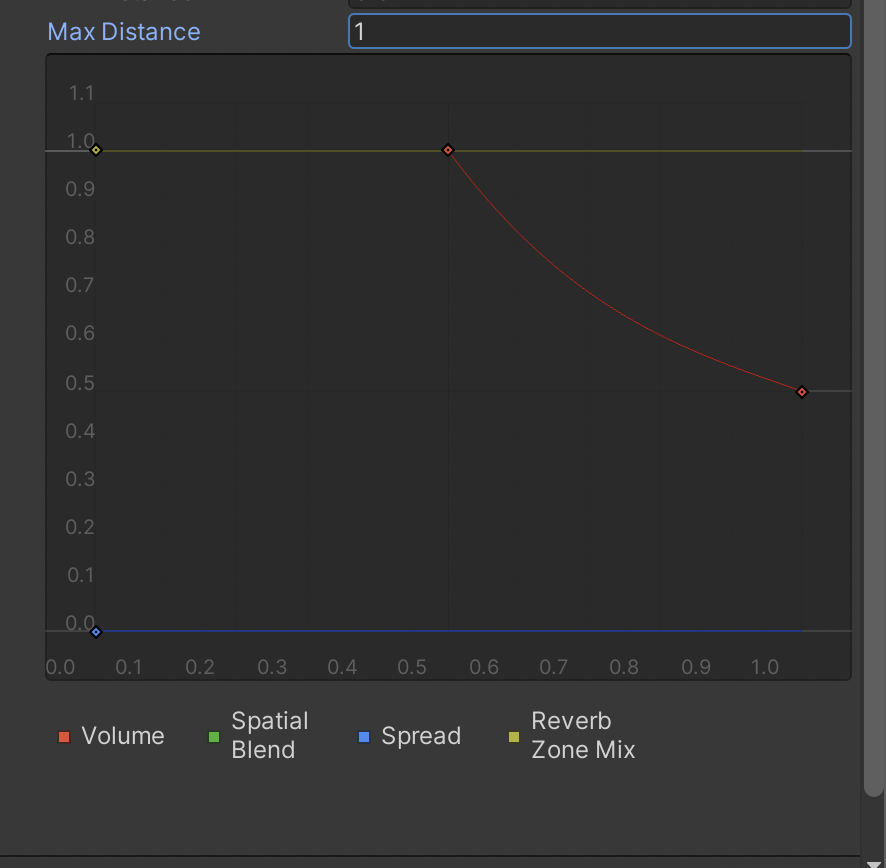
2. Set the Min Distance to 0.5 and the Max Distance to 1. Within the Min Distance, the Audio Source will play the clip at the maximum volume. Outside of this distance, the volume will reduce up to the Max Distance, where the user will no longer hear the audio.
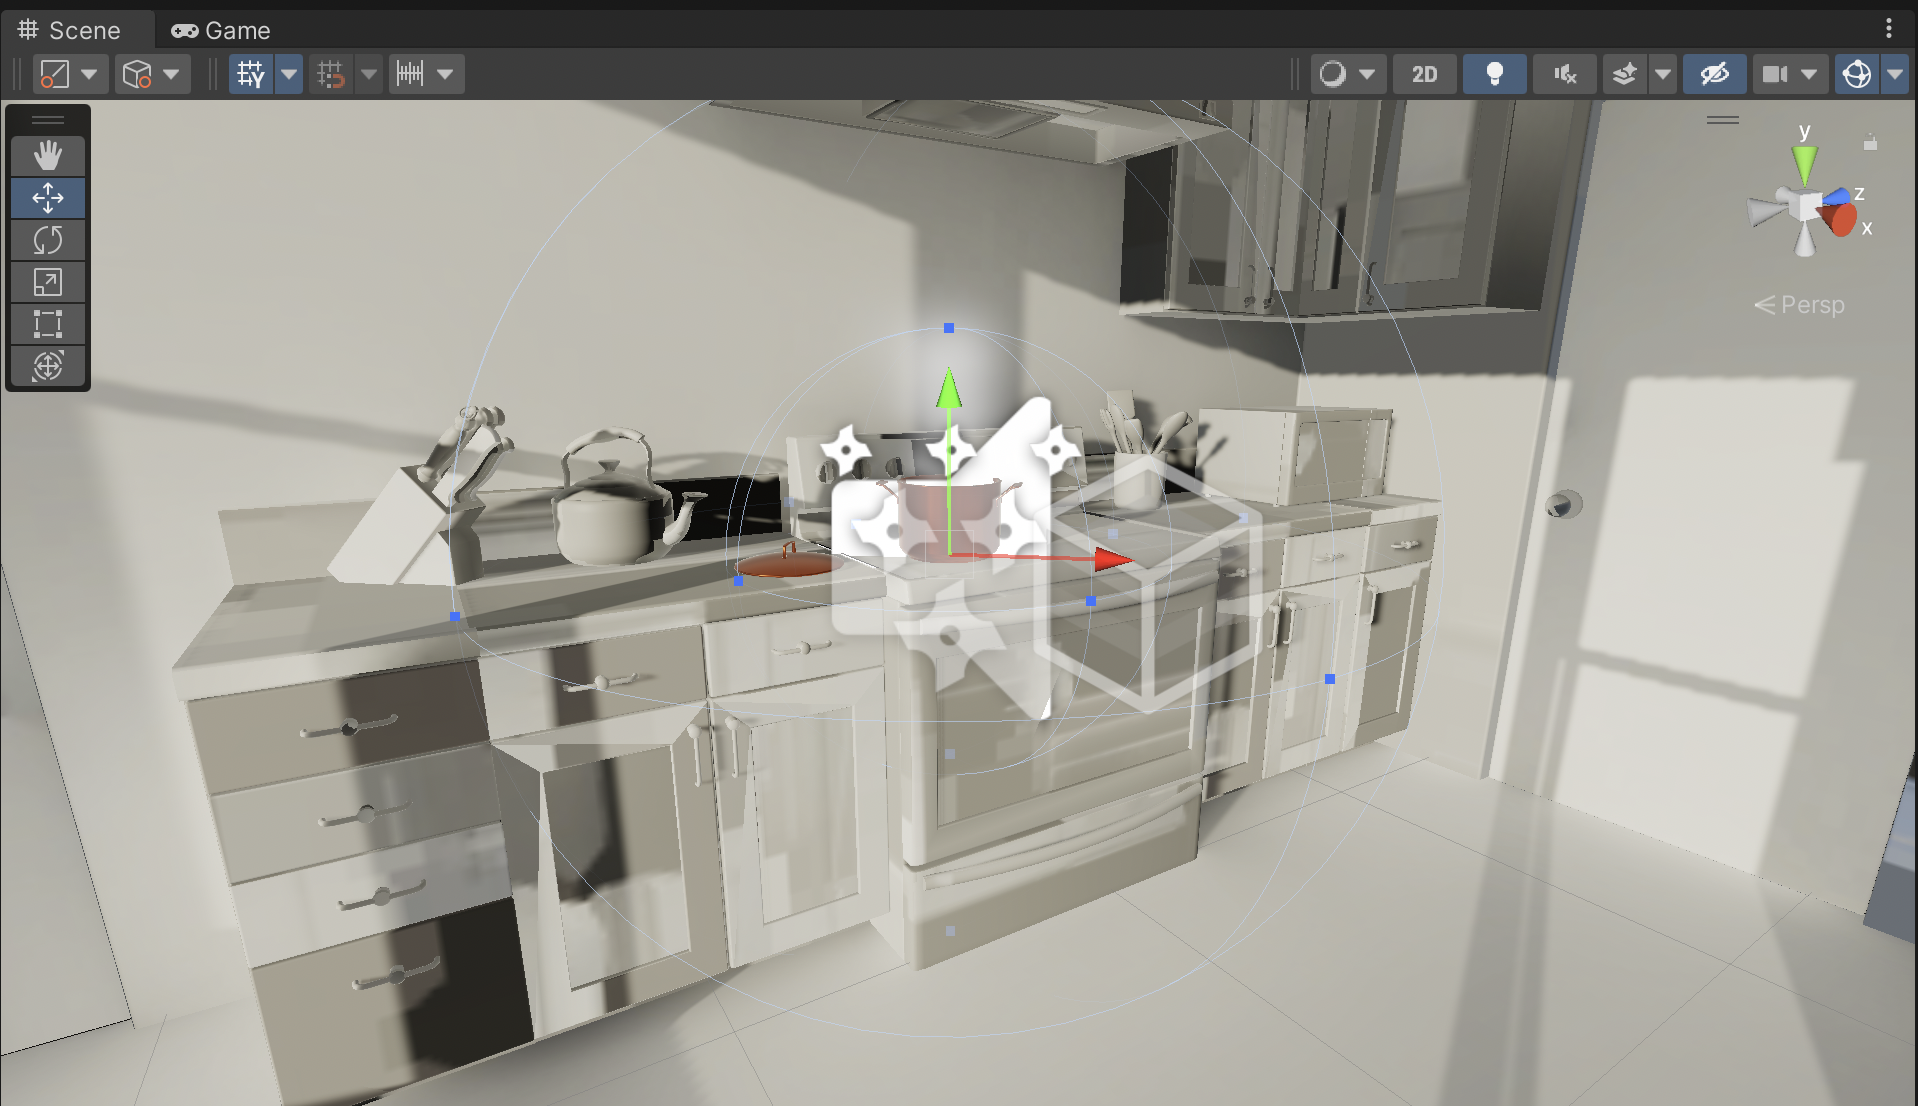
In the Scene View, the Min Distance and Max Distance are represented by two blue wireframe spheres. This will give you a visual indication of exactly where in the Scene the user will be able to hear the audio.
3. Enter Play mode to test your changes. Experiment with rolloff to make the BoilingPot very loud, or barely audible when your Character is at a given distance.
5. Next steps
You have added two types of audio to a 3D Scene: background music and 3D sound. Next, find some audio assets that you are interested in adding to this and other projects.