Get started with lighting in Unity
Tutorial
Beginner
+10XP
20 mins
261
Unity Technologies

Now that you’ve explored the role of a lighting artist and the basic behavior of light, you’re ready to think more specifically about lighting in Unity.
By the end of this tutorial, you'll be able to:
- Explain the difference between direct and indirect light.
- Define the term global illumination.
- Identify Unity’s global illumination system for URP.
- Explain the main differences between real-time and baked lighting in Unity.
Languages available:
1. Overview
In the previous tutorial, you reviewed the basics of how light behaves and began to learn about the role of a lighting artist in making real-time 3D experiences. You also completed an initial review of the light sources in the outdoor scene for this learning experience, both as a still image and in the Unity Editor.
By the end of this tutorial, you'll be able to:
- Explain the difference between direct and indirect light.
- Define the term global illumination.
- Identify Unity’s Global Illumination system for URP.
- Explain the main differences between real-time and baked lighting in Unity.
Let’s get started!
2. Examine the outside lighting example
You’ll be working in two example scenes over the next few tutorials: an outside scene and an inside scene. You’re going to start by working on the outside scene — before you do that, let’s review it!
Follow these instructions to examine the outside scene:
1. Open the Creative Core: Lighting project in the Unity Editor, if you haven’t already done so.
2. In the Project window, go to Assets > CreativeCore_Lighting > Scenes and open FinalScene_Lighting_Outdoor.
3. In the top menu, go to Window > Rendering > Light Explorer. This window lists all the light sources in your scene and key details that you can adjust directly from the window. You’ll interact with this more as you progress through this learning experience.

You can dock windows at a convenient location in your Editor by selecting the tab, dragging it over the window of your choice and then releasing it. Docking the Light Explorer window alongside the Project window often works well.
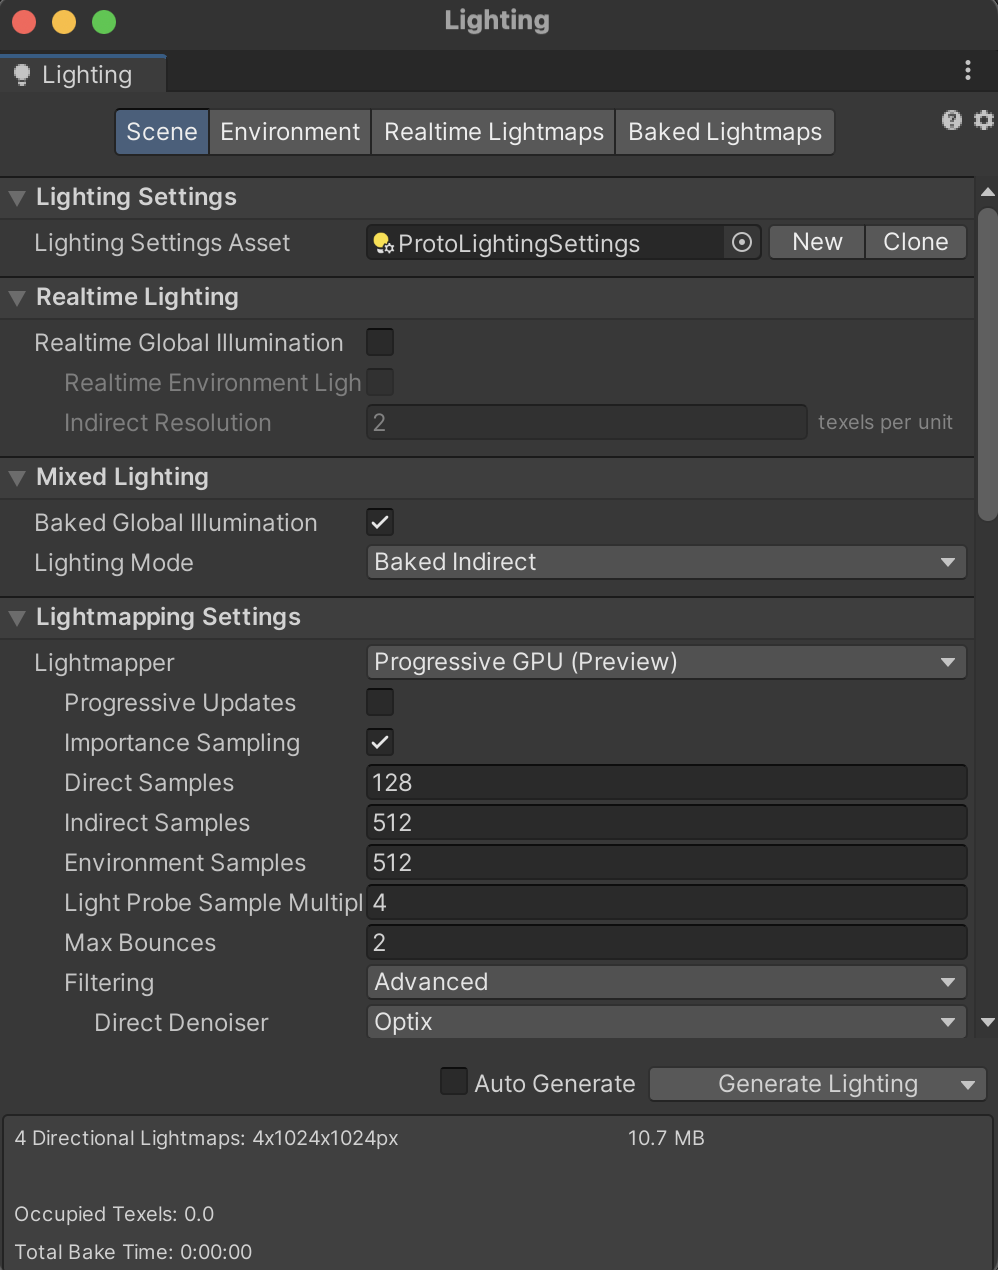
4. In the top menu, go to Window > Rendering > Lighting. You’ll use this window to adjust various scene-level settings as you work, so it’ll be helpful to keep it open. You can dock the Lighting window too — alongside the Inspector often works well.

5. Take a little time to navigate around the scene if you didn’t do so in the previous tutorial. The amphitheater is a great outdoor space to use for lighting practice. You can use the central space and different levels for some really interesting experimentation with light sources and shadows!
Now that you’ve taken some time to set up your windows and review the scene, it’s time to consider the systems that are used to light it.
3. What is the difference between direct and indirect light?
Before you get started with lighting in Unity, there’s one more underlying concept that you need to know: the difference between direct and indirect light. This will enable you to light scenes effectively and understand the role of the different lighting systems in Unity.
Direct light is light that is emitted, hits a surface once, and then is reflected directly into a sensor.

Indirect light is all the other light that ends up reflected into a sensor, like light that hits surfaces several times and light from the sky when you’re not looking at the sun directly. (Remember, the sun is a strong light source, so it’s very dangerous to do that!)

4. Unity’s global illumination systems
Global illumination is a group of techniques that you can use in Unity to provide realistic lighting results. These techniques are called global illumination because they simulate both direct and indirect light, rather than just direct light.
There are two different global illumination systems in Unity: the Baked Global Illumination system and the Realtime Global Illumination system.
The Baked Global Illumination system
The Baked Global Illumination system includes:
- Lightmapping: The process of pre-calculating the brightness of surfaces in a scene and storing the result in a texture called a lightmap. This global illumination system uses a specific lightmapper system called the Progressive Lightmapper to complete this process.
- Light Probes: A tool to measure (or probe) data about the light that passes through the empty spaces in your scene.
- Reflection Probes: A tool to simulate more realistic reflections in Unity.
Important: You’ll learn more about each of these things as you work through this learning experience — don’t worry if you don’t understand exactly what this means right now.
All render pipelines support the Baked Global Illumination system, and you’ll be using this system as you work on all of the scenes in this learning experience.
The Realtime Global Illumination system
The Realtime Global Illumination system includes:
- Lightmapping: This global illumination system uses a deprecated lightmapper called the Enlighten Lightmapper.
- Light Probes: Light Probes have some additional functionality in this global illumination system.
The Universal Render Pipeline (URP), which the Creative Core pathway uses, does not support the Realtime Global Illumination system.
Note: It is beyond the scope of this learning experience, but the update on global illumination for Unity’s 2021 versions and beyond has more detailed information.
Real-time and baked lighting in this learning experience
You’ll be using the Baked Global Illumination system and not the Realtime Global Illumination system in this learning experience. But you will read and learn a lot about both real-time and baked lighting, which may (understandably!) be confusing if you’re thinking about global illumination. So what is the difference?
Real-time and baked lighting are two different approaches that determine when the data for the lighting in your scene is calculated by Unity. Both real-time and baked lighting can be implemented in the same project, and combining them is often the best way to efficiently light a scene.
You’ll learn more about the difference between real-time and baked lighting approaches in the rest of this tutorial.
5. Real-time lighting in Unity
Unity calculates real-time lighting at runtime, when your game or other real-time experience is running (that is, when it is launched and users are engaging with the experience). Real-time lights are calculated once per frame, which means that they can be very responsive to moving characters and other elements in your scene.
Let’s explore what that means in practice:
1. In the Hierarchy, expand the Lighting GameObject.
2. Select one of the three StreetLamp GameObjects. It doesn’t matter which one you choose.
3. Move the street lamp around in the space using the Move tool (W) and observe what happens to the lighting in the scene.
This street lamp behaves as you might expect — both the light it emits and the shadow it casts are responding to your changes in real-time.
6. Baked lighting in Unity
When scenes get more complex, real-time lights can use a lot of memory, which can result in reduced performance — particularly for players or users with lower specification hardware. Baked lighting helps mitigate this problem by pre-calculating lighting data before runtime (when the user engages with your game or experience). This can reduce how resource-intensive it is for hardware to run the experience.
The process of performing the calculations and saving that data as a texture called a lightmap is called baking or lightmapping. If you’ve completed Creative Core: Shaders, you learned about textures and their role in rendering with Unity. The calculations for baked lighting that will be used in your project will be completed by a lightmapper system called the Progressive Lightmapper.
Baked lighting can be a lot more efficient, but it can also be used to implement lighting that’s a lot more realistic and engaging for users. However, this does mean that things won’t always respond in the way that you expect them to when you interact with them unless the lights and your scene are configured in a specific way.
Now try and experiment with the other street lamp in the scene:
1. In the Hierarchy or the Scene view, select the Baked StreetLamp GameObject. It’s the highest one in the amphitheater.
2. Move this street lamp around in the space using the Move tool (W) and observe what happens.
The light that this street lamp emits and the small bit of shadow that you can see it casts at its base are fixed by the baking process. They can’t respond to the live changes that you’re making in the Scene view. To update them, you would need to rebake the lightmap for the scene.
You’ll learn more about baked lighting and how to implement it in a scene soon — for now, you’ll begin with the basics of real-time lighting.
7. Next steps
In this tutorial, you learned about:
- Direct and indirect lighting.
- Unity’s global illumination systems.
- Real-time and baked lighting approaches.
As you progress through this learning experience, you’ll learn how to use both real-time and baked lighting to effectively light a scene. This means that you will use both real-time and baked lighting in this Universal Render Pipeline (URP) Unity project, which uses the Baked Global Illumination system to pre-calculate any lighting data for lights which are not real-time.
Don’t worry if that’s a lot to take in, we’ll guide you through it step by step as you continue!
Next, you’ll learn about the foundation of lighting in outdoor scenes: the Directional Light and the skybox.