Get started with post-processing
Tutorial
Beginner
+0XP
20 mins
9
Unity Technologies
Post-processing is just like applying filters to your photos. It can make your scene look more beautiful, interesting, or stylized. In this tutorial, you’ll learn when and why you might use post-processing, then open Unity and enable post-processing in your scene.
By the end of this tutorial, you'll be able to:
- Define post-processing and the purpose of a post-processing profile.
- Explain the purpose of post-processing, including visual style and visual fidelity.
- Set up post-processing in a scene.
Materials
Languages available:
1. Overview
Post-processing is the process of applying effects to an image captured by your camera in Unity to make it look better in some way.
These effects can range from very subtle color adjustments to complete aesthetic overhauls, allowing you to make your scenes more realistic, more stylized, or just more beautiful.
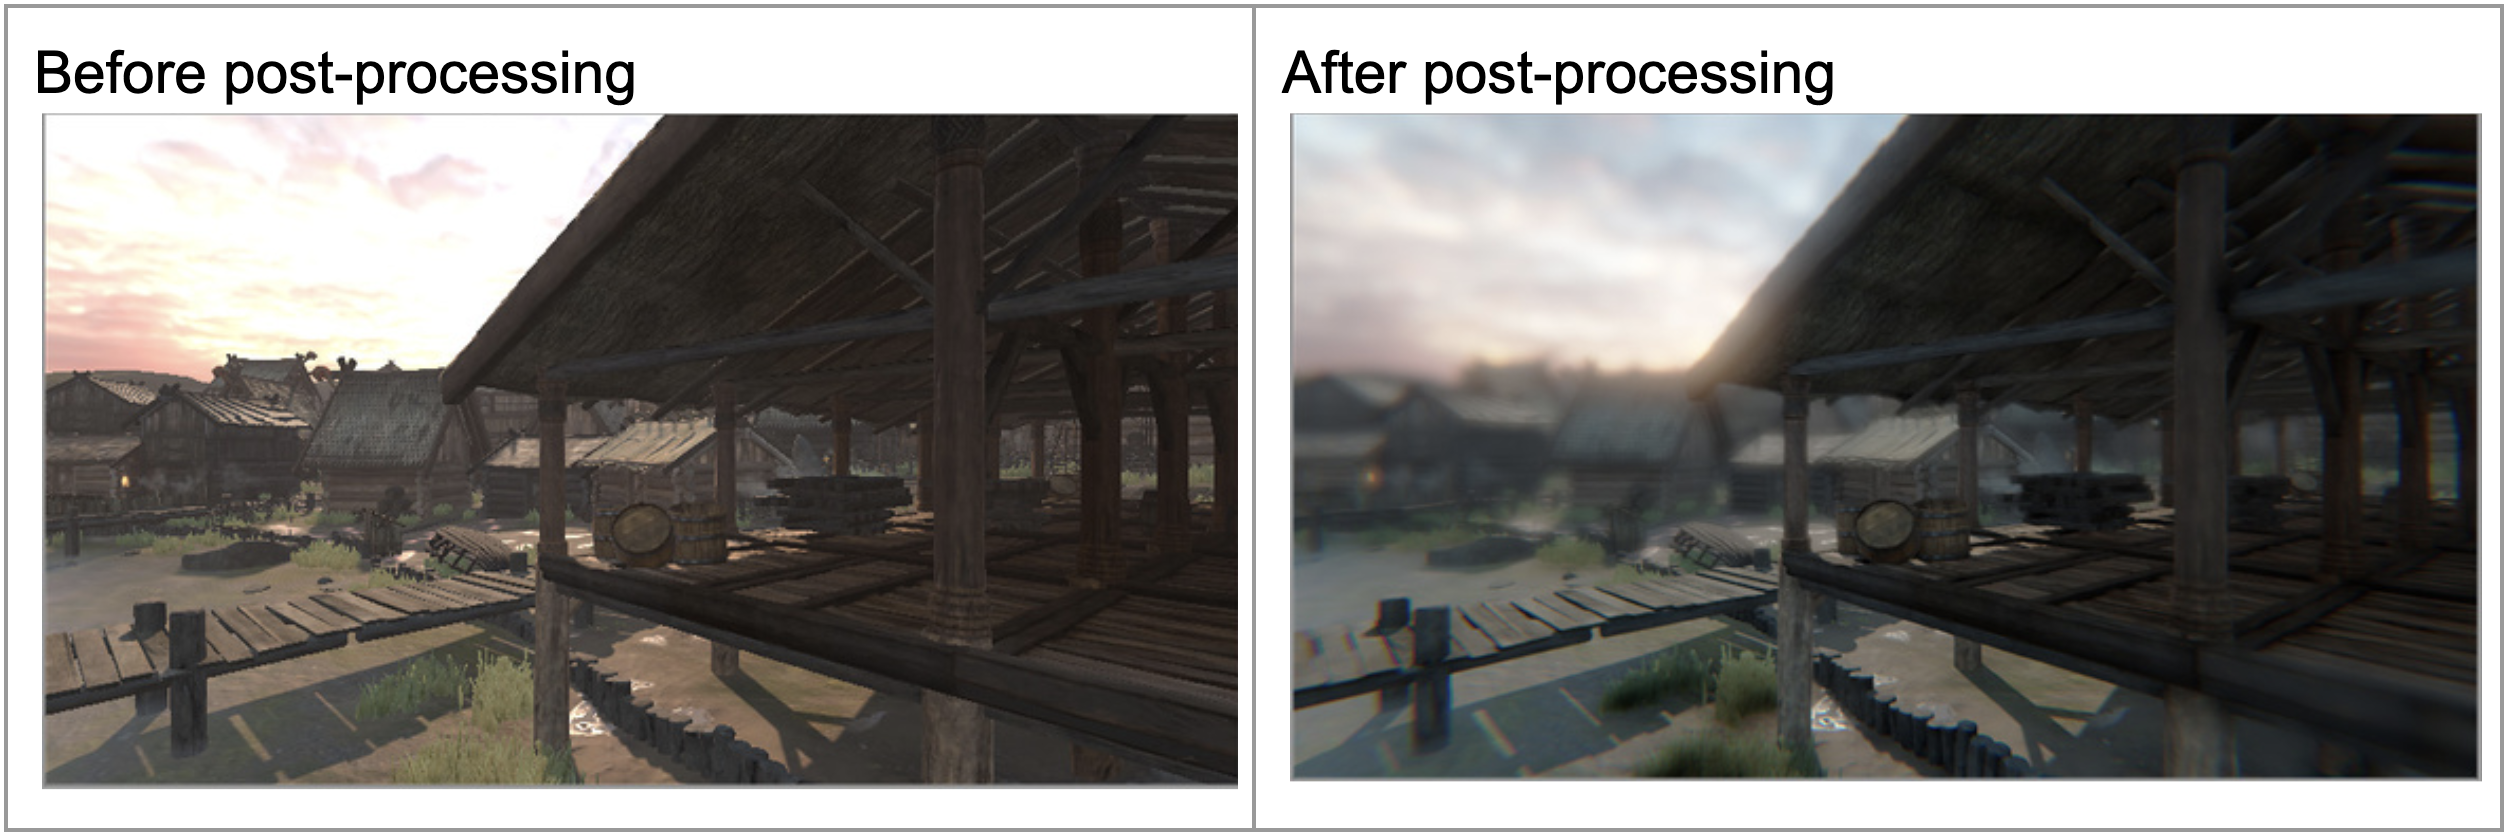
Images from the Unity User Manual for post-processing.
In this tutorial and the ones that follow, you will learn what post-processing is and why it’s important. Then, you will apply post-processing effects like Bloom, Depth of Field, and Color Adjustments to achieve a particular look or style in your scene.
By the time you’re finished, your scene could look like one of the screenshots below – or something completely different – depending on your stylistic choices.
Before diving into Unity, let’s learn a bit more about what post-processing really is and what we might want to use it for.
2. What is post-processing?
Have you ever taken a photo, but it didn’t quite turn out the way you wanted it to? Maybe the colors weren’t bright enough or it just didn’t look as cool as you had hoped for some reason.
That’s where post-processing comes in: to bring out the best in the images captured by a camera.
For example, let’s say you took this adorable photo of a squirrel eating a nut:

You could further process that photo after taking it using filters. In other words, you could post-process it.



You can do the same thing in Unity. After the basic image has been rendered by the camera, you have the option of further processing that image to make it look even better.
3. Assess visual style and visual fidelity
There are two main reasons someone might want to use post-processing: achieving the desired visual style and ensuring visual fidelity. Let’s look at each of these concepts:
Visual style
Visual style refers to the stylistic look and feel of your project. Check out the two examples below with completely different visual styles:
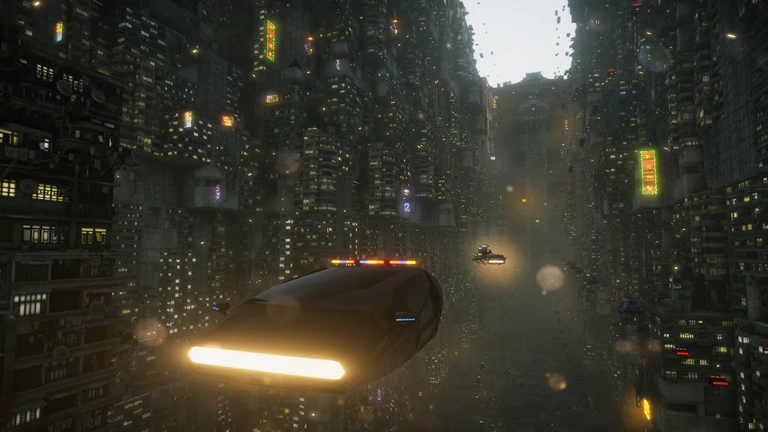
Image from Unity’s Megacity demo project.
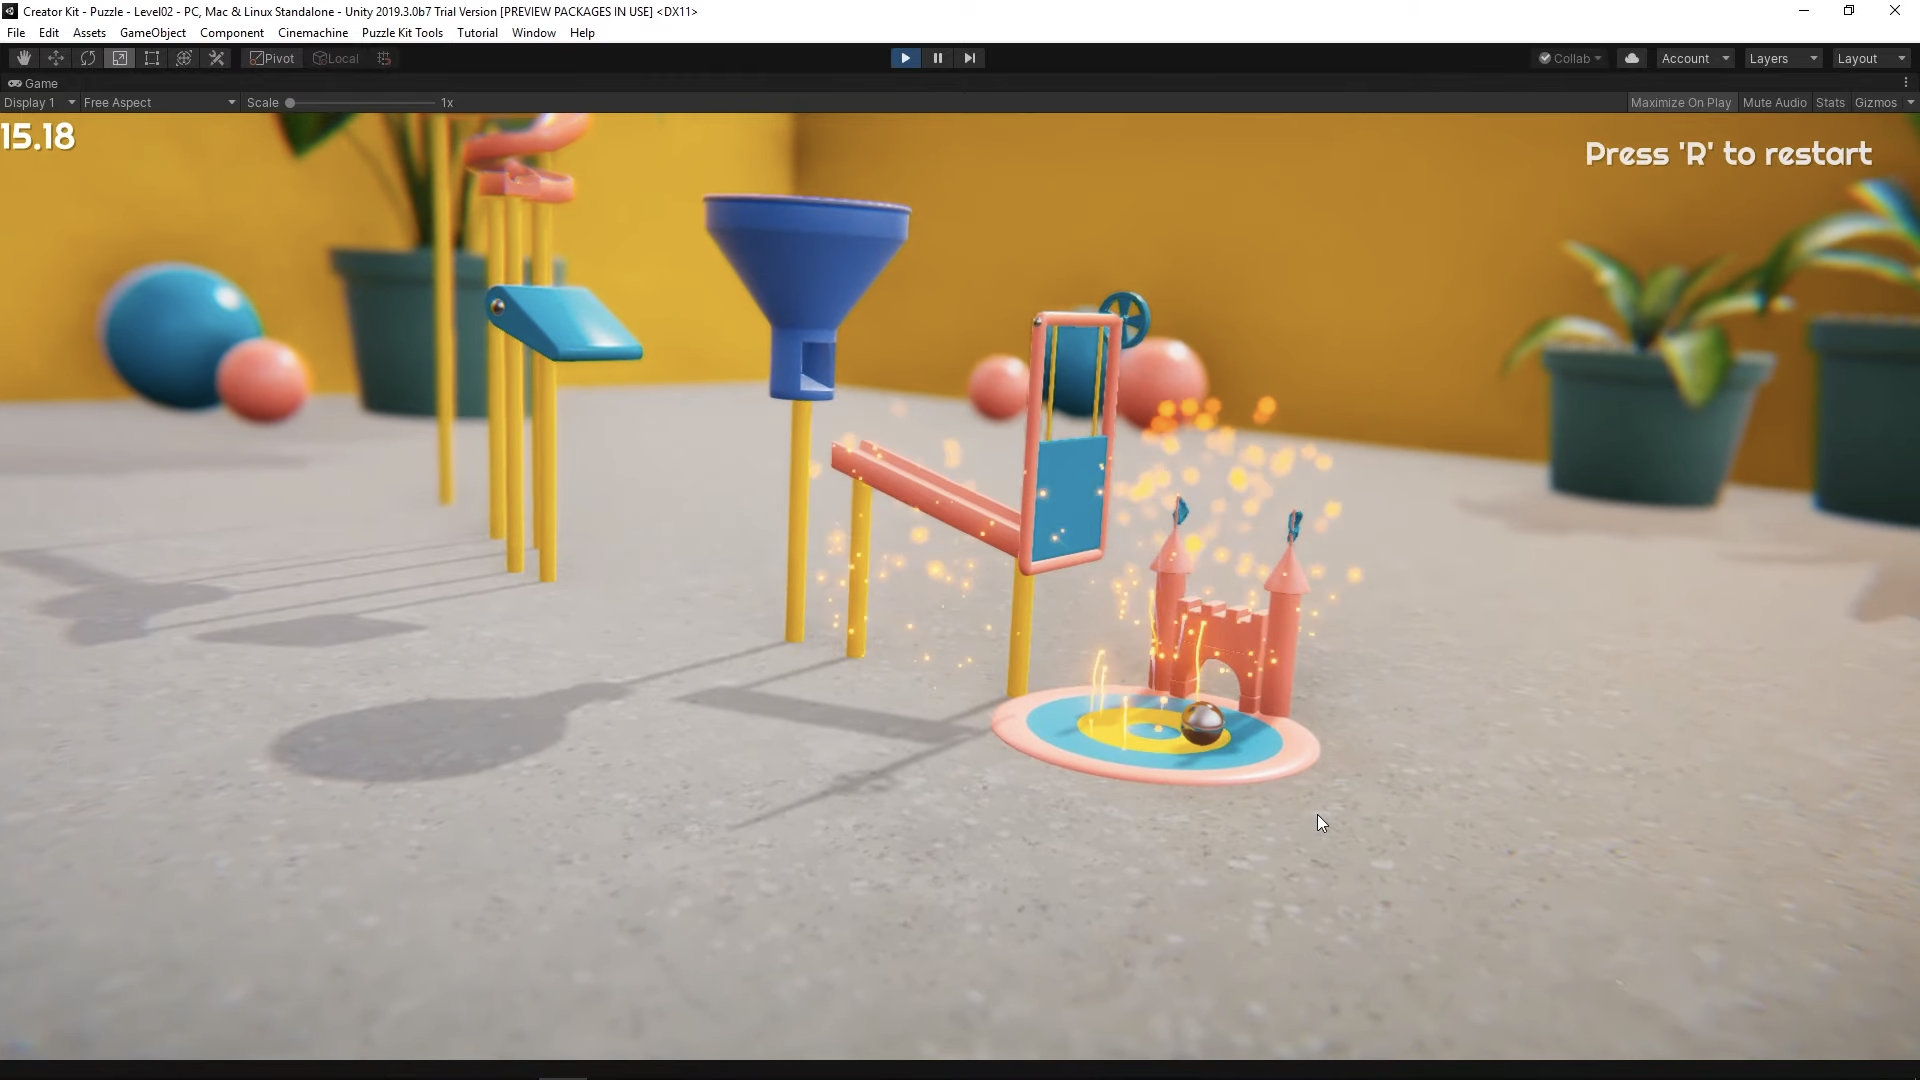
Image from Unity’s Creator Kit: Puzzle project.
Look at the examples above and try to answer the following questions:
- How would you describe the genre or visual style of each scene?
- How do you think these images could have been edited (or post-processed) to help establish that visual style?
Check your work
- The first image of the Unity Megacity has a dark, gritty, futuristic style. To establish this, the colors are very dark and the scene is hazy, but there are also extremely bright, glowing lights.
- The second image of the Creator Kit has a bright, cartoony, friendly style. To establish this, all of the colors are very vibrant. The background is blurry, establishing a “macro” effect that makes the objects look cute and miniature.
Post-processing can play a big role in establishing the visual style of a scene.
Visual fidelity
Visual fidelity refers to how accurately your scene reflects the world it is intended to represent.
Have you ever taken a photograph of a beautiful setting outside and noticed that the colors are a lot less vibrant than the ones you can see? With real cameras in the physical world and virtual cameras in Unity, it can be difficult to capture the beauty of an environment.
Maybe the scene is too bright. Maybe it’s too dark. Maybe your camera’s settings weren’t configured properly. You can use post-processing to correct for those things and make the scene look more like it would in real life.
Look at the examples below of a scene before and after post-processing:
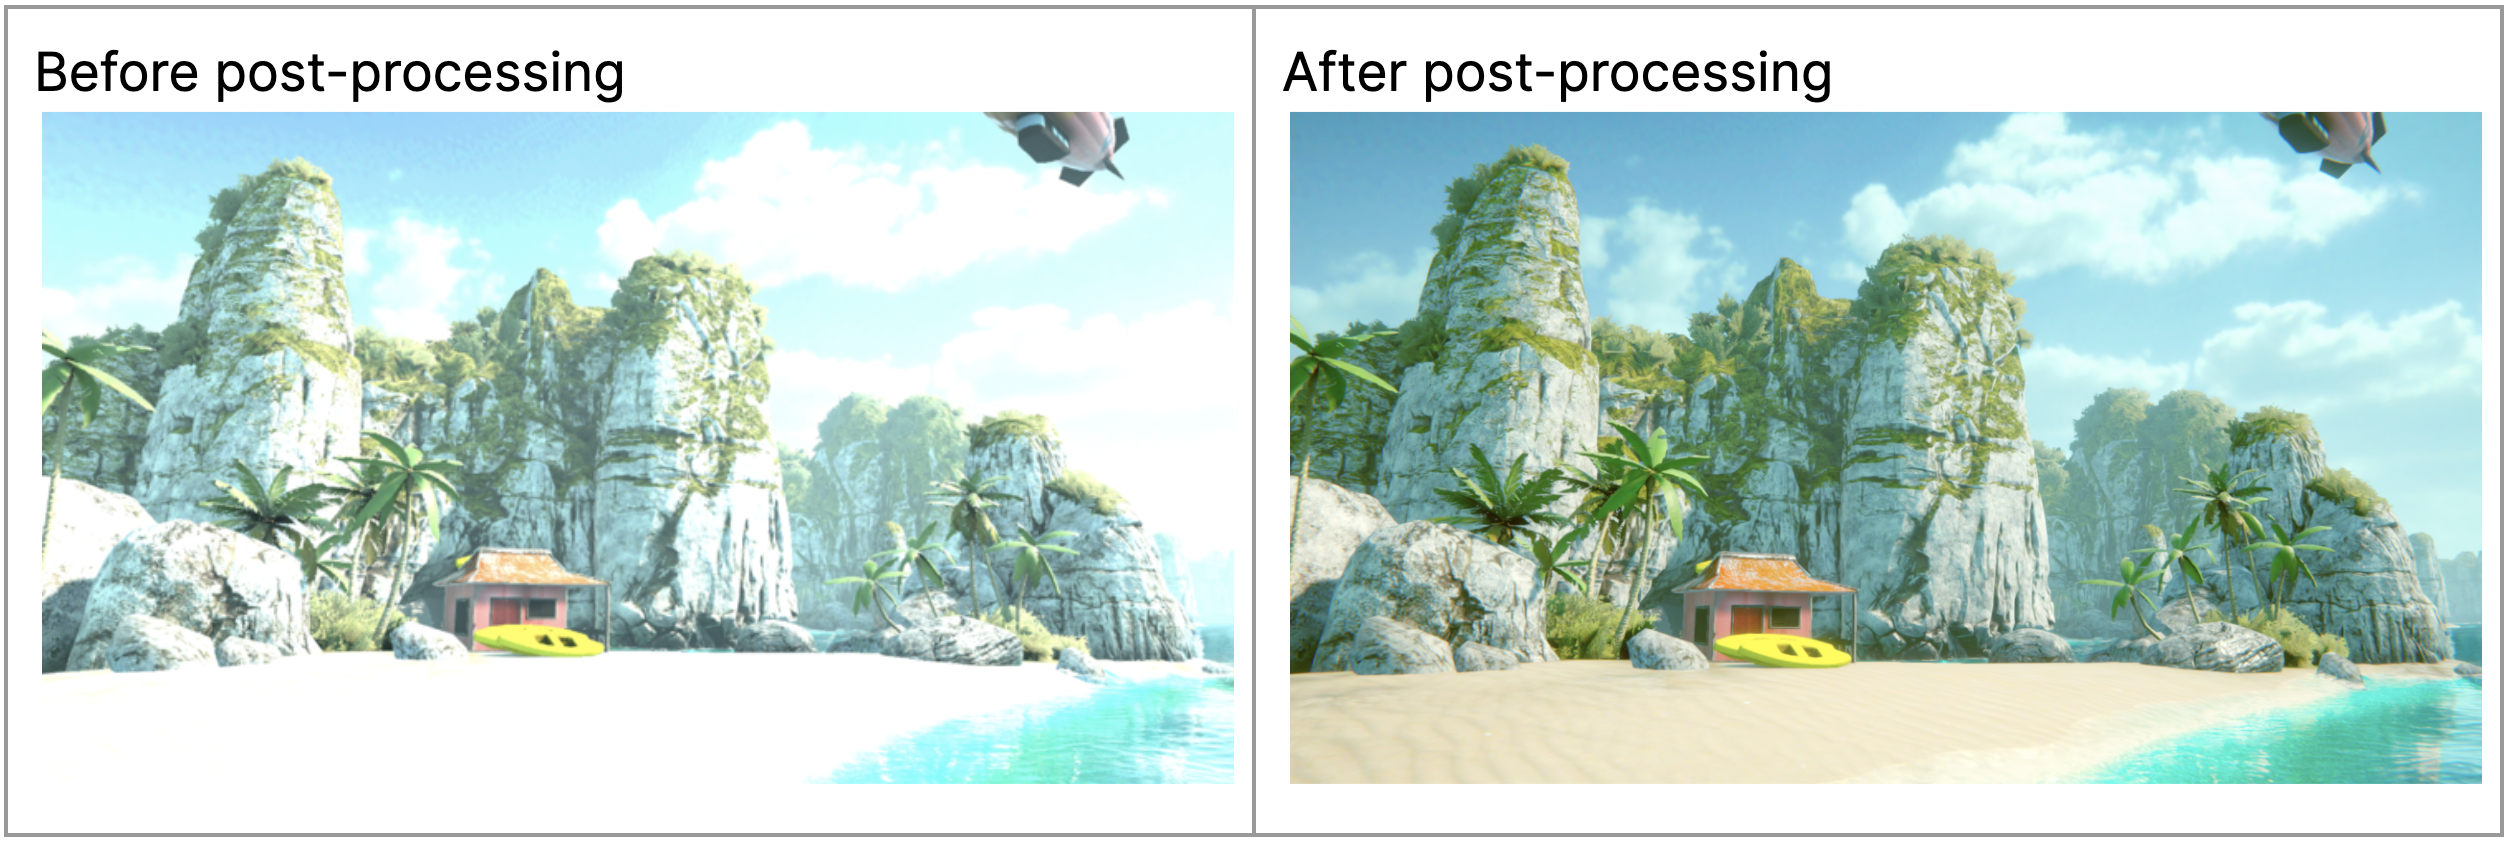
Images from the Unity User Manual for post-processing.
Now try and answer the following questions:
- What specifically is different about the two images above?
- How do the differences you identified improve visual fidelity?
Check your work
- The colors are more vibrant (look at the orange of the shack). Certain areas of the scene are much less bright, allowing you to see the yellow of the sand and the shape of the clouds.
- In real life, your eyes adjust to very bright surfaces, allowing you to see their details. The second image more closely reflects how your eyes would perceive this scene.
Balancing post-processing with performance
Visual style and fidelity are both important, but achieving them through post-processing does not come for free. Since these images are rendered and processed in real time, every effect you add taxes the computer’s processor and might slow down your scene. Although it will be tempting to load on every effect available, it’s important to weigh the visual benefits against potential performance costs and choose your effects wisely.
With this basic understanding of what post-processing is, let’s look at how post-processing is done in the real-time 3D industry.
4. What professionals work with post-processing?
Responsibilities
There’s not really a single job title dedicated to post-processing, like a “post-processing artist.” Instead, depending on the size and type of the production, different roles may be involved in post-processing for different reasons.
On larger productions with more specialized roles:
- A Color Grader: responsible for ensuring consistent coloring across a product will use post-processing.
- A Look Development Artist: responsible for ensuring there is a consistent look and style across a product may work with post-processing, among other tools.
On smaller productions where individuals have broader responsibilities:
- A Lighting Artist: mostly responsible for lighting interior and exterior environments may also do post-processing.
- A Technical Artist: mostly responsible for defining and maintaining artistic workflows may also do post-processing.
- An Environment Artist: mostly responsible for developing the models, materials, and textures of environments may also do post-processing.
Background
Although the jobs listed above require different backgrounds, a strong understanding of color, lighting, and visual design are necessary for all of them.
Tools
Most post-processing in real-time 3D projects can be accomplished entirely in Unity. 2D image editing software, such as Photoshop, could also be useful to create texture overlays on the screen (for example, a lens dirt effect).
5. Before you begin
New to Unity?
This learning experience assumes that you are already familiar with the Unity Editor. If you’re new to Unity, the Unity Essentials learning pathway has been designed to help you get set up and ready to create in the Unity Editor.
Update the Unity Hub
Before you begin to set up your Unity project, consider updating your Unity Hub to the latest release. If you are using an older version of the Hub, there may be differences between the guidance provided and your experience.
Review the Unity Editor basics
If you need to refresh your memory of the Unity Editor basics, you can take a moment to review Explore the Unity Editor at any time.
6. Open the post-processing project and run the scene
Now that you have some background on what post-processing is and why you might want to use it, let’s open a Unity Project and see post-processing in action:
To set up your Unity project:
1. Install Unity 6, if you haven’t already done so.
2. Download and unzip the project for this learning experience.
3. Move the project folder to a suitable location on your computer.
4. Add the Unity project to the Unity Hub.
5. Open the project from the Unity Hub.
6. In the Unity Editor’s Project window, open Assets > CreativeCore_PostProcessing > Scenes, and then open the scene TutorialScene_PostProcessing.
In the TutorialScene_PostProcessing scene, you will find an indoor gallery scene with various colorful objects in it.
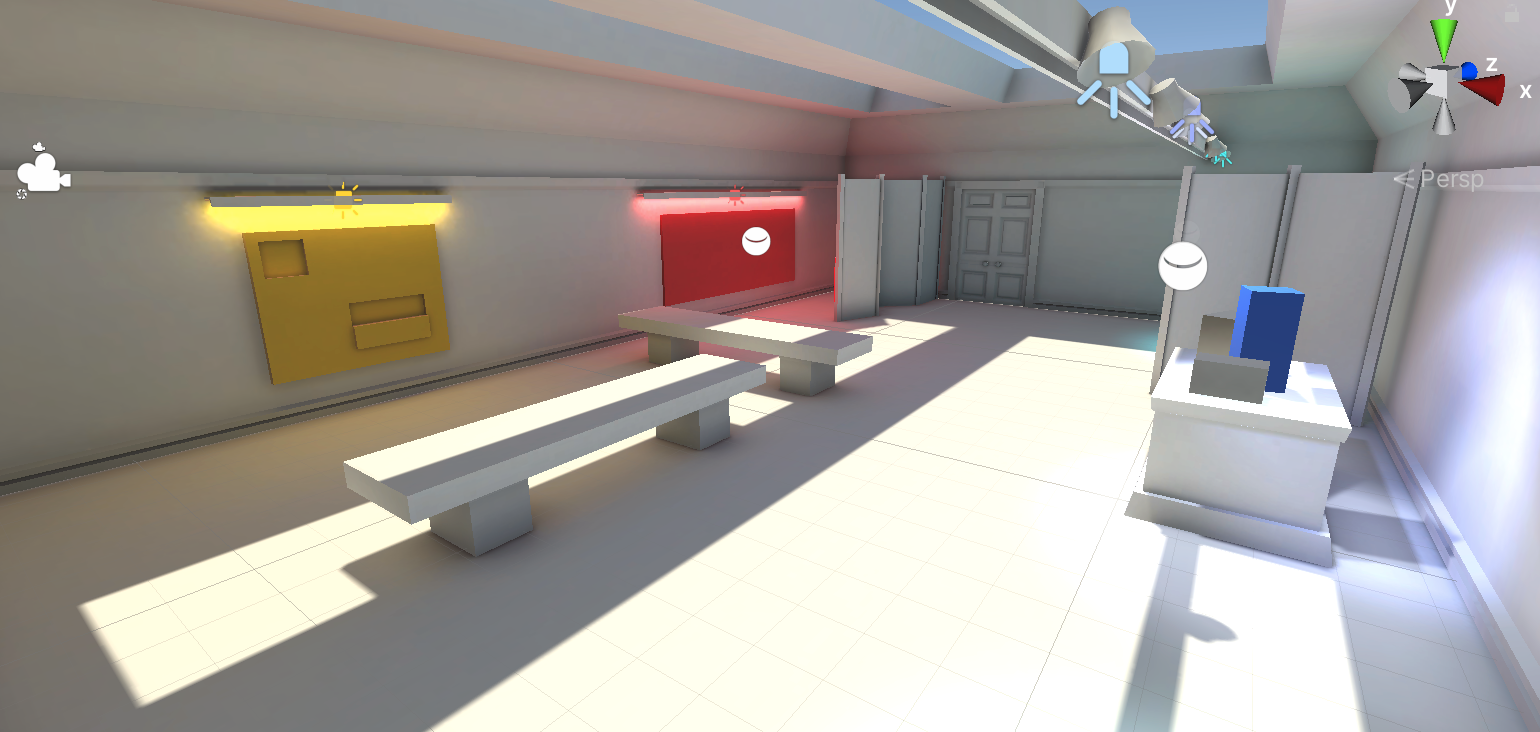
7. Press Play. You should be able to move around in Game view, using WASD to move and right-click and drag to rotate. You’re able to move around like this because we’ve added a Simple Character Controller to the Main Camera object.
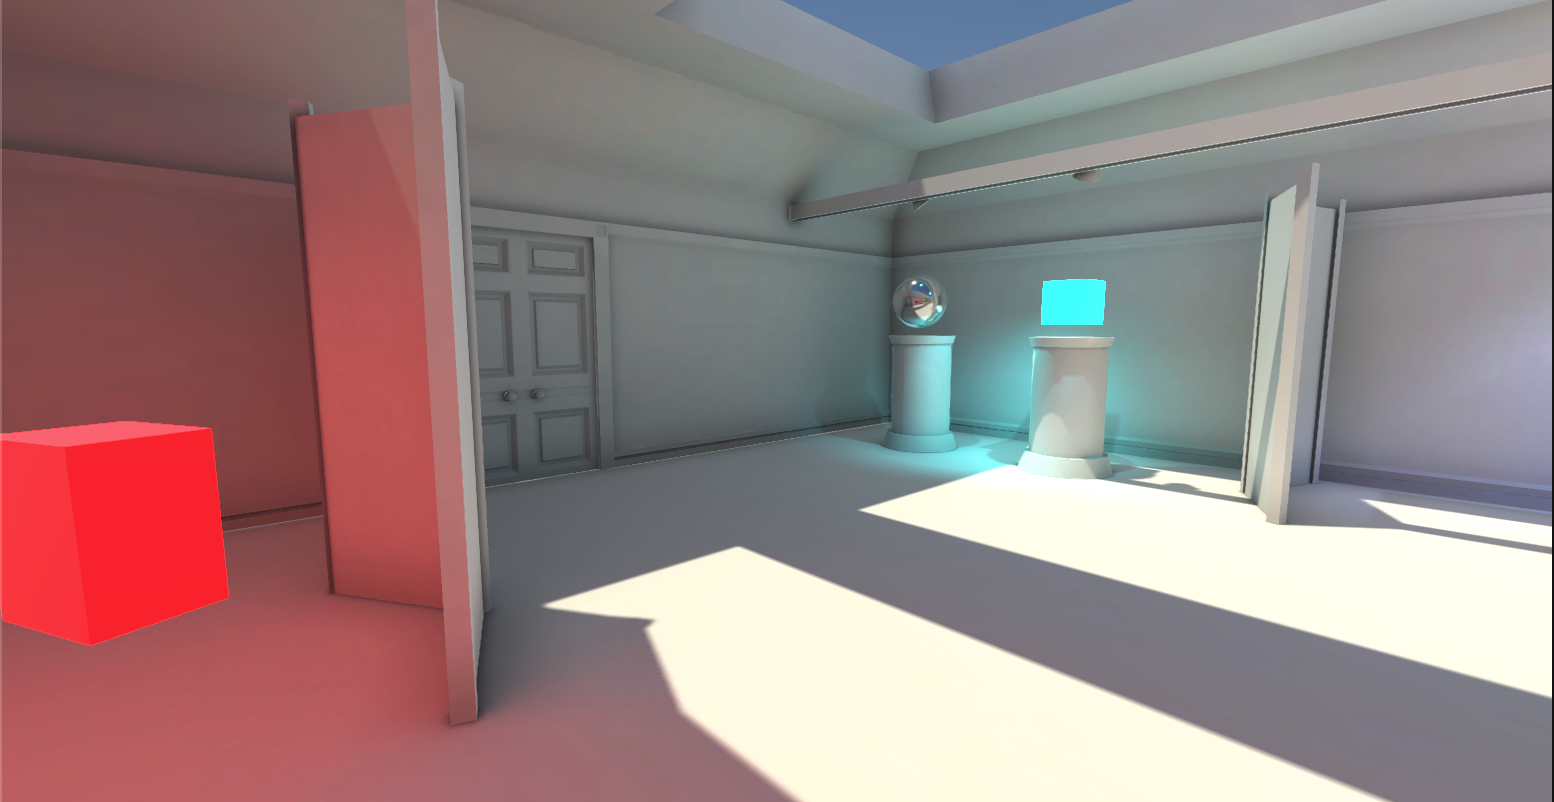
It looks pretty cool, right? Well, it can look even cooler with post-processing. Let’s enable that next.
7. Enable post-processing on a global volume
As you learned above, post-processing takes the image already captured by a camera and adds effects to it.
That means that post-processing can be applied on a per-camera basis. So let’s make sure our main camera has post-processing enabled.
1. Select the Main Camera in the Hierarchy, then in the Camera component, select the Post Processing checkbox within the Rendering foldout to enable it.
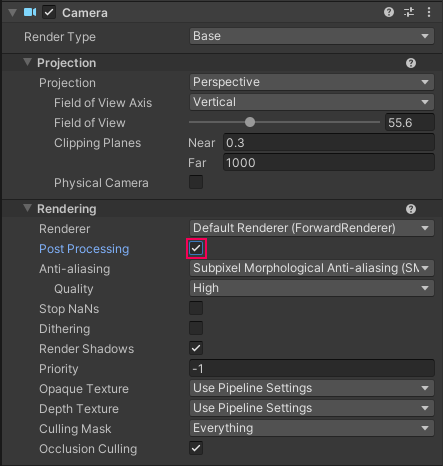
In order to actually apply new effects, we need to add something called a Volume to the scene. A Volume specifies a particular physical area within the scene. When a camera is inside that Volume, post-processing will affect what the camera renders.
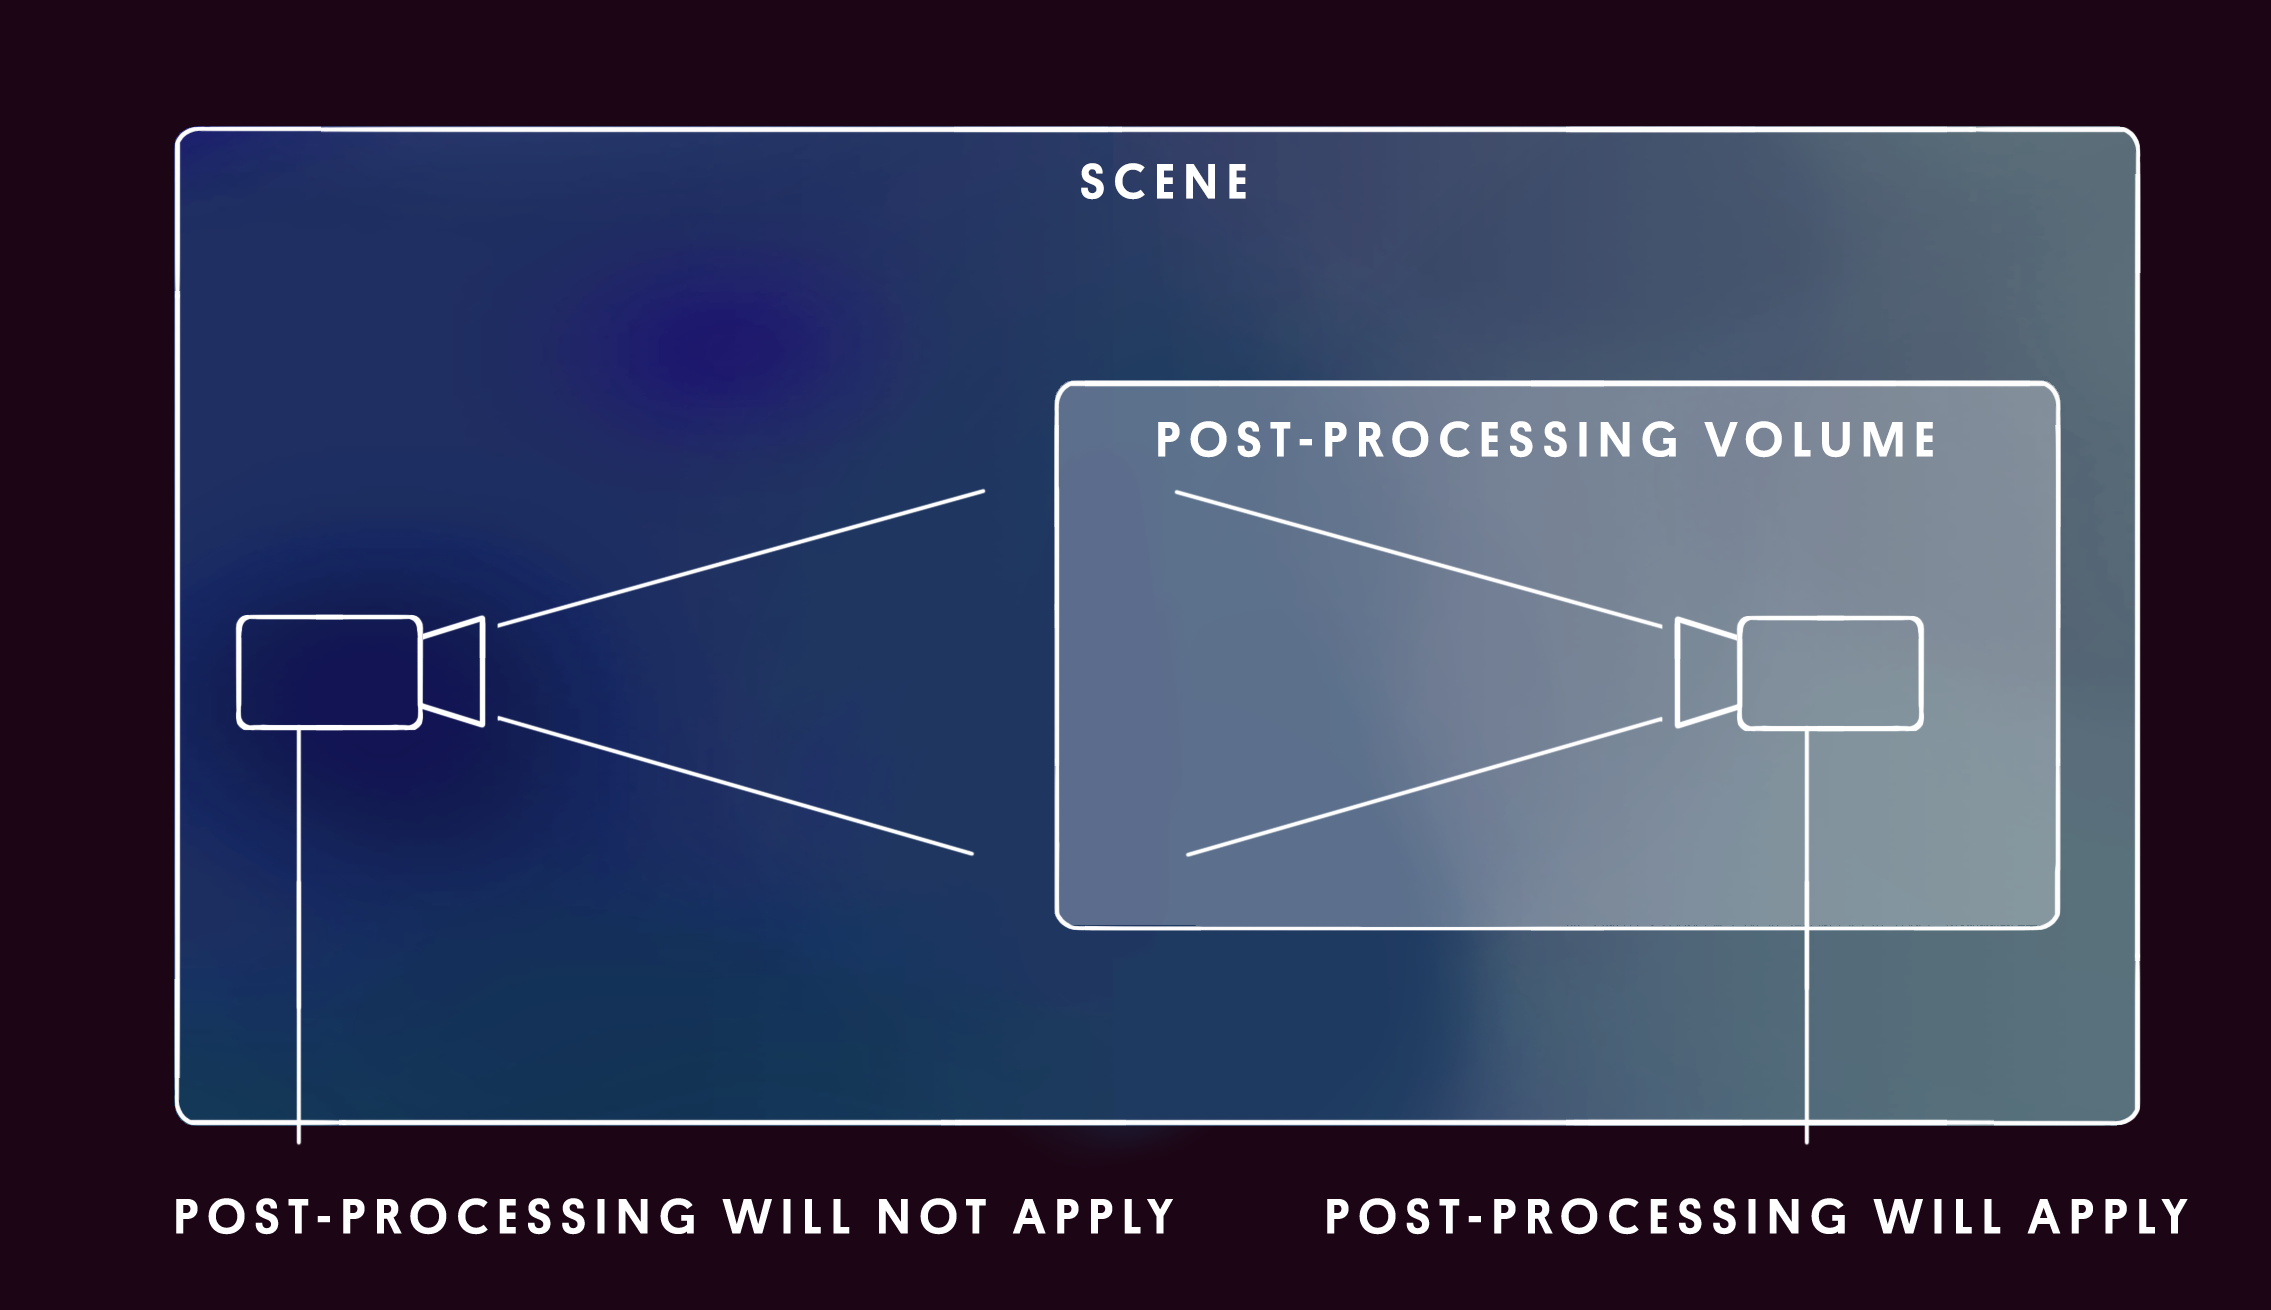
You can use a Global Volume, which will apply effects to the entire scene, or a smaller Local Volume, which will only apply effects when the camera is in a particular area. To keep things simple, let’s start with a Global volume.
2. In the Hierarchy, right-click > Volume > Global Volume, then rename the GameObject something more descriptive like “PostProcessing Global Volume”.
Nothing will happen yet. That’s because you need to apply a post-processing Profile to the Volume. The Profile defines which effects are applied to the Volume. You’ll create a new Profile from scratch in the next tutorial; but for now apply the example profile we supplied for you.
3. In the Volume component, use the object picker to select the PostProcessingProfile_Sample profile.

You should now see a major change in the look of your scene. Let’s evaluate what happened.
8. Identify the post-processing profile
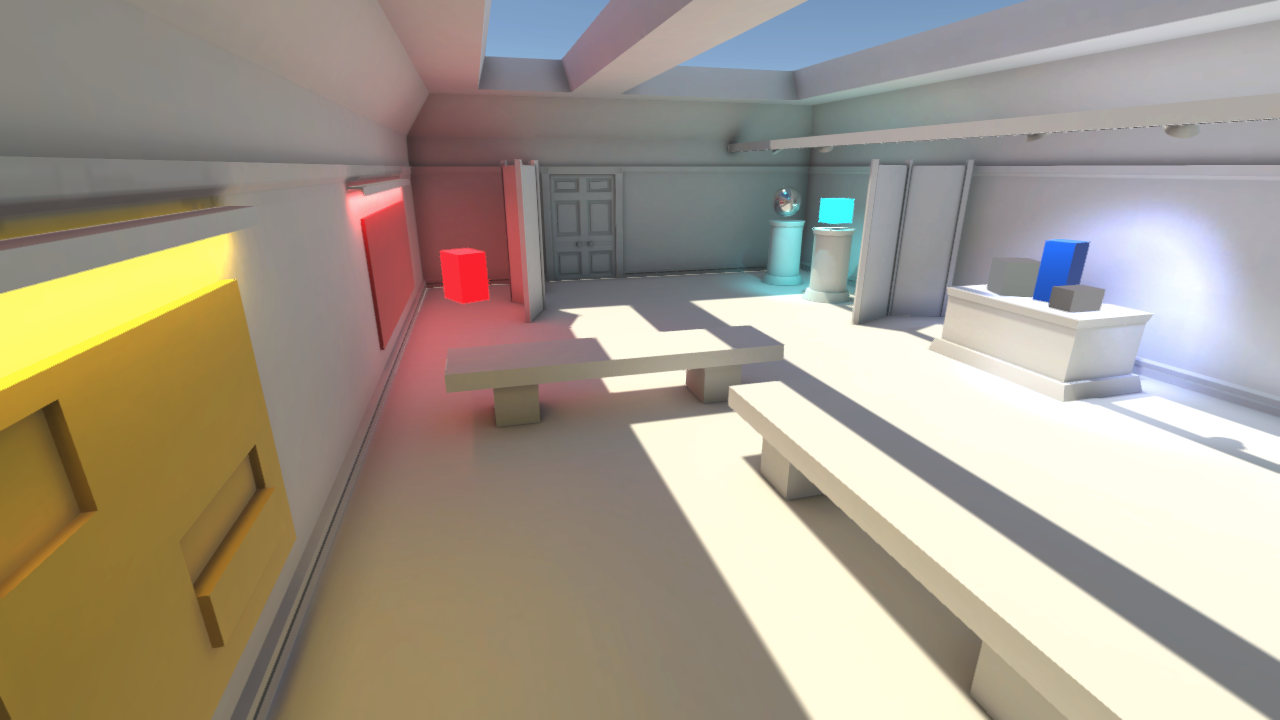
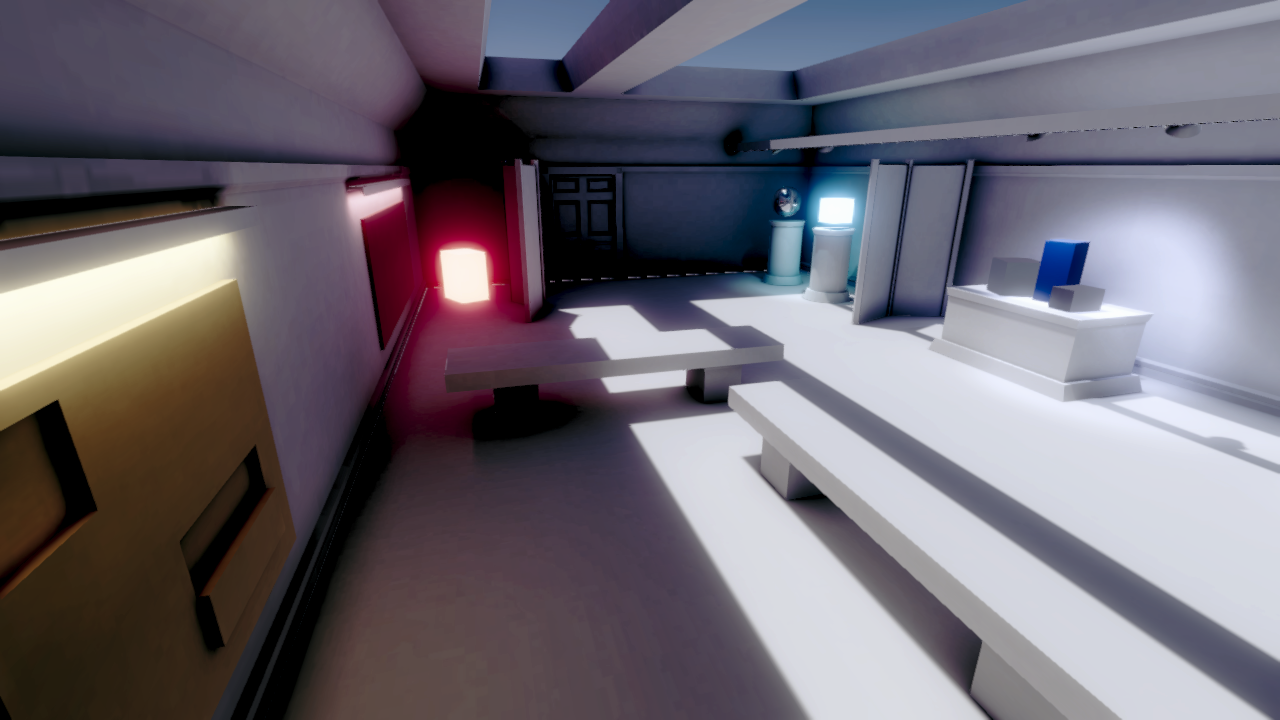
Look at the two images below. The first image is what your scene looked like by default and the second is what it looks like with a few post-processing effects enabled.
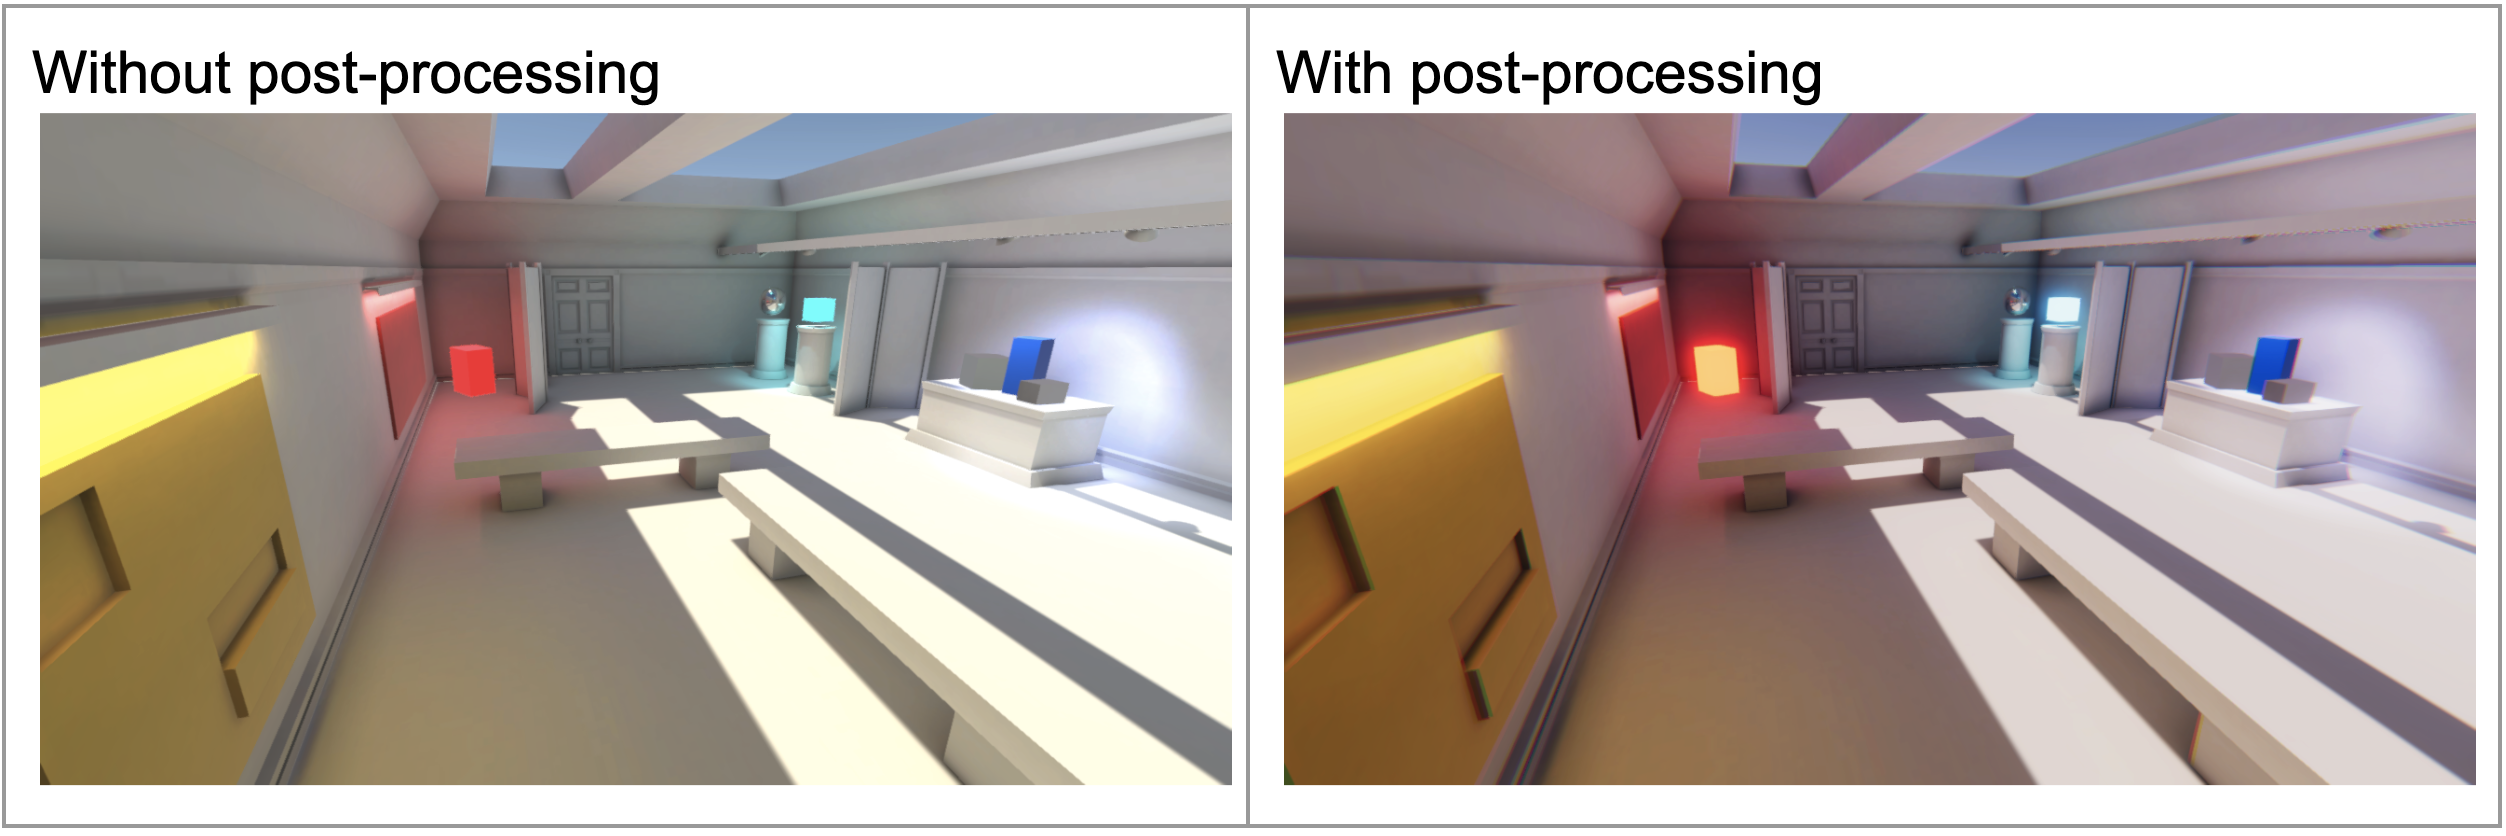
Now try and answer the following questions:
- What are the specific differences between these two images?
- What impact do these differences have on the overall visual style?
Check your work
With post-processing enabled:
- The red and light blue boxes in the corners of the room appear to be glowing.
- The shadows appear darker, contrasting more with the rest of the environment.
- All of the colors are more vibrant.
This post-processing Profile gives the room a more fun, cartoon style. This is similar to the colorful, high contrast pop art style shown in the example below.

9. A note about post-processing
Since post-processing is applied to an image that has already been rendered, it requires that the lighting, materials, or camera be set up in a way that allows for particular effects.
For example, you can’t make a material glow through post-processing if it wasn’t set up to glow in the first place using emissive materials.
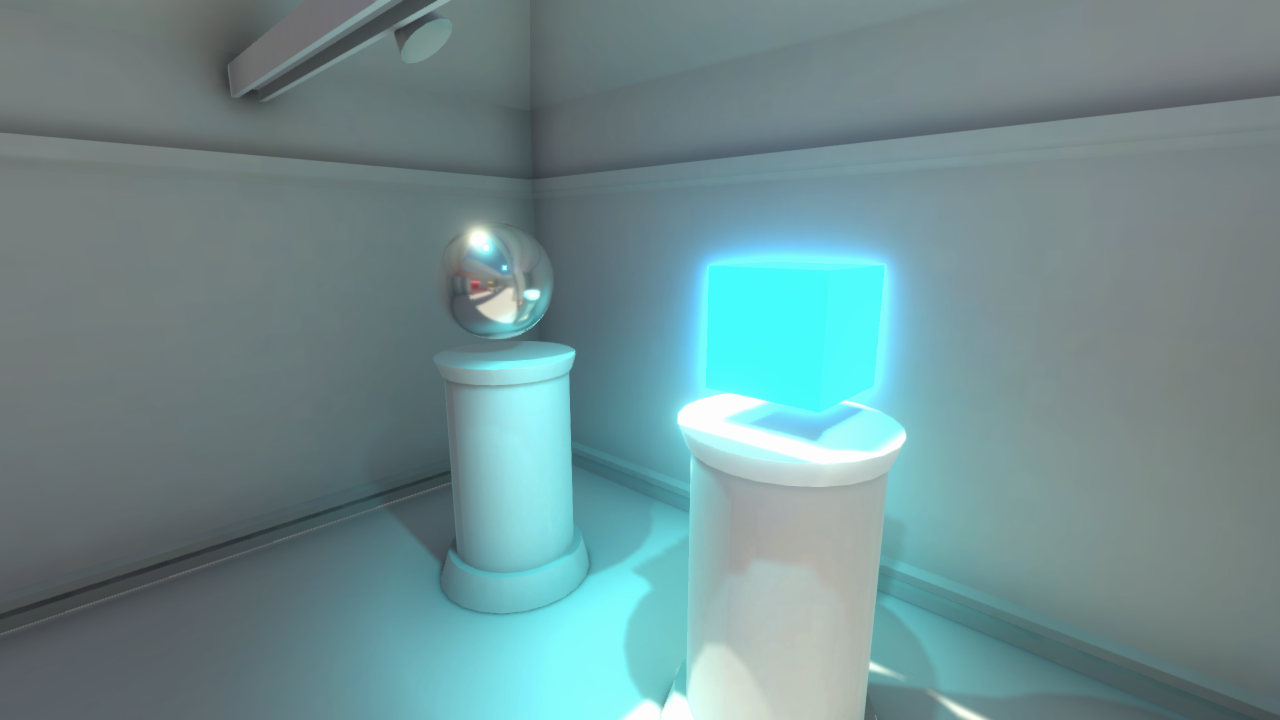
In this example project, all of the relevant settings have already been configured for successful post-processing.
However, for more information on these settings, you might want to check out the tutorials on materials, lighting, and cameras.
10. Explore: tinker with the sample profile
You may have noticed that when you selected the sample profile for the Volume component, a number of new modules appeared beneath it in the Inspector.
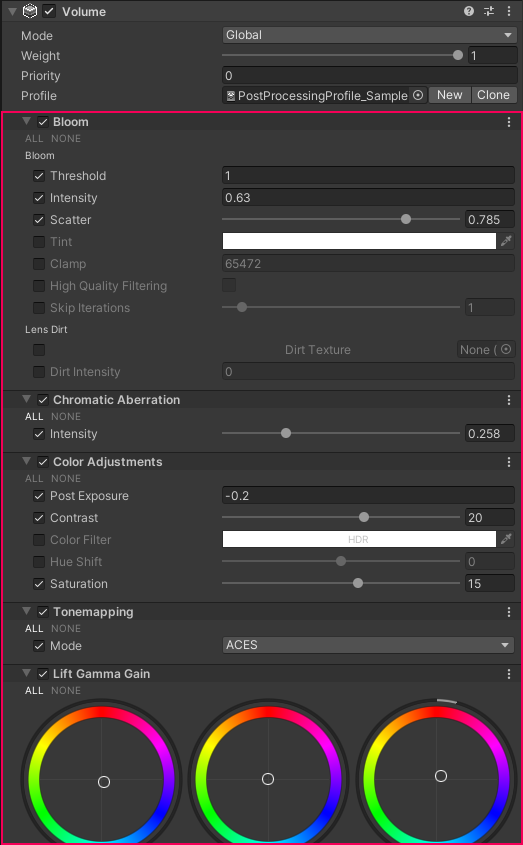
Deselect and select the checkmark next to the name of each module to see the effect it has on the scene. Then, play around with some of the values within each module.
If you want, use the post-processing documentation to learn more about each effect.
Don’t worry too much about making it look good at this point, we’ll do that in the next tutorial. Have fun with it and push the effects to the limit to see what they can do.
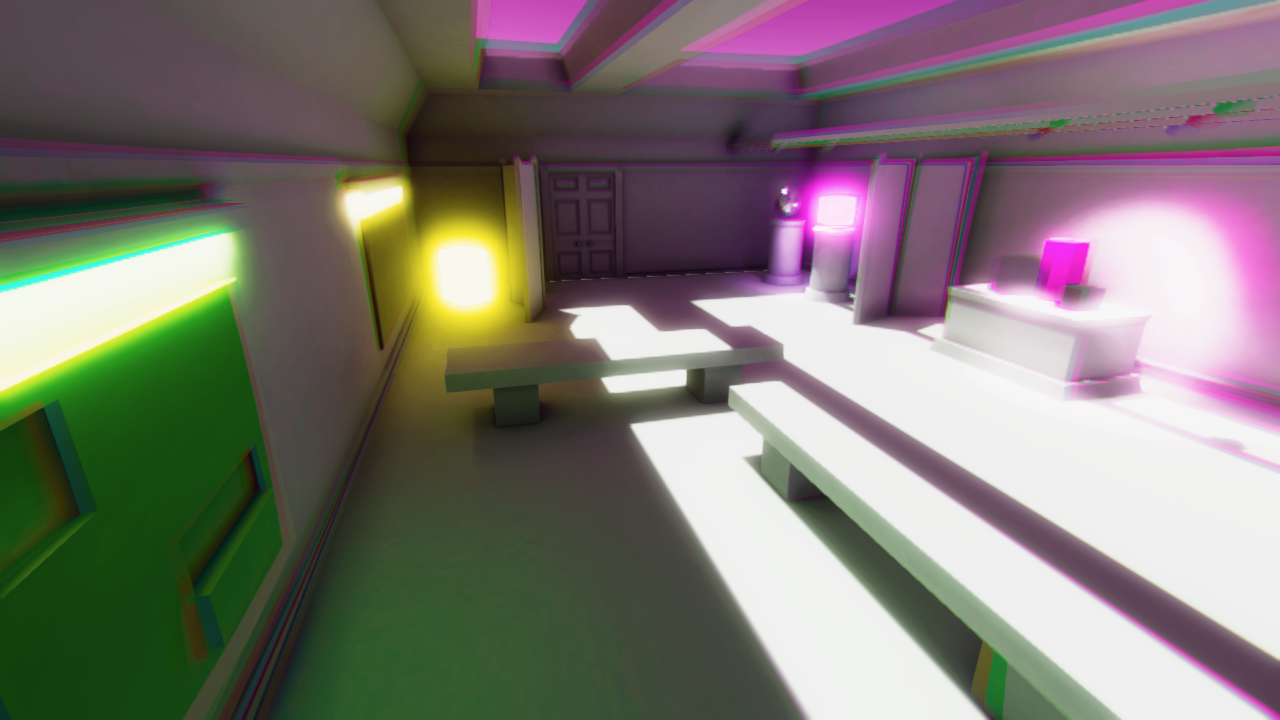
You can always undo changes with Ctrl+Z (Windows) or Cmd+Z (macOS) if you don’t like the edits you make!
11. Next steps
In this tutorial, you learned what post-processing is, why it’s used, and then experimented with it in a scene. In the next tutorial, you’ll create a new post-processing profile and configure it to achieve a particular style.