
How to publish to iOS - 2019.3
Tutorial
intermediate
+10XP
15 mins
(221)
Unity Technologies
Publishing for iOS is a bit different than publishing for platforms such as Windows or macOS. Due to restrictions in access to development tools, Unity can only create an Xcode project for an iOS game or app, rather than building the binary directly as with Android publishing. In certain cases, there are no required changes at all. In this tutorial, you will learn to publish applications to iOS
Languages available:
1. Introduction
If you are using Unity 2019.2 or below, click here.
Publishing for iOS is a bit different than publishing for platforms such as Windows or macOS. Due to restrictions in access to development tools, Unity can only create an Xcode project for an iOS game or app, rather than building the binary directly as with Android publishing. This workflow will show you the essential Player Settings to prepare your iOS game for Xcode. For more in-depth information, please see the Unity Manual for iOS Player Settings.
2. Technical Steps
1. In the Unity Editor, from the File dropdown, select Build Settings. In the Platforms window, select iOS. If the iOS support module hasn’t been installed, click the Open Download Page button to download the module, and install it. If necessary, close and reopen the Build Settings window.
2. Near the lower left corner, click the Player Settings button.
3. In the top of the Inspector, fill out your company and product names. For final distribution, it’s recommended that you create an icon for your game to replace the default Unity launcher icon. Depending on the nature of your game, you may also wish to override the default mouse cursor. By default, the cursor hotspot is at position (0,0), the upper left corner. (Figure 01)
4. In the bottom half of the Inspector, click on Resolution and Presentation. (Figure 02)
5. Set your game’s default and allowed orientations. For most purposes, “Default Orientation” is best set to Auto Rotation. Most apps and games are designed to run either in landscape or portrait mode, rather than both. Set your project’s allowed orientation(s). (Figure 03)
6. Click Resolution and Presentation at the top of this section to close it, then click on Other Settings. (Figure 04)
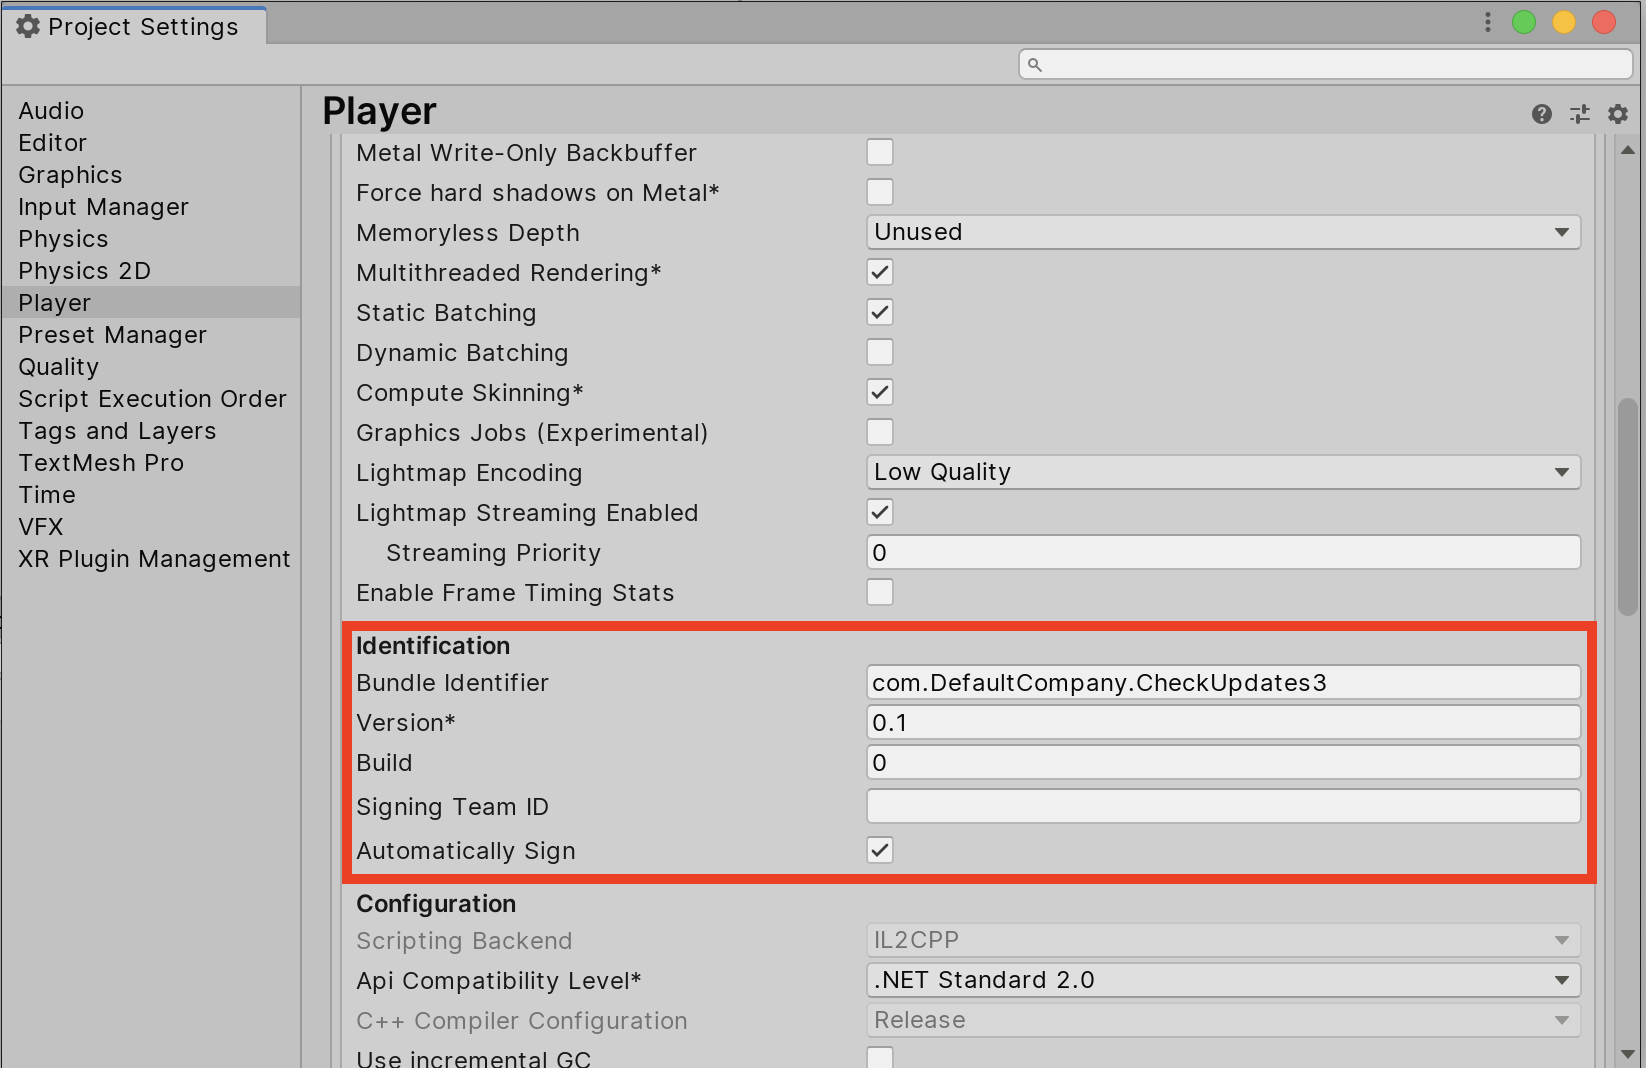
7. In Other Settings, for this introduction, we are only concerned with the Identification for our mobile project. (Figure 05) The package name is also known as the Application ID or bundle identifier, and is in reverse domain-name format. The bundle identifier for your game must be unique, and cannot be reassigned later. Your Signing Team ID can be found on your Apple Developer membership information page.
8. You are now ready to create the Xcode project. In the Unity Editor, from the FIle dropdown, select Build Settings. Click iOS in Platforms if it’s not already highlighted and click the Build button.
9. Create a folder for your Xcode project and click Save.
For information on building your game to an iOS device, please see this Unity tutorial.