
Unit 3 - Creative Challenge
Exercise
Beginner
+0XP
30 mins
Unity Technologies
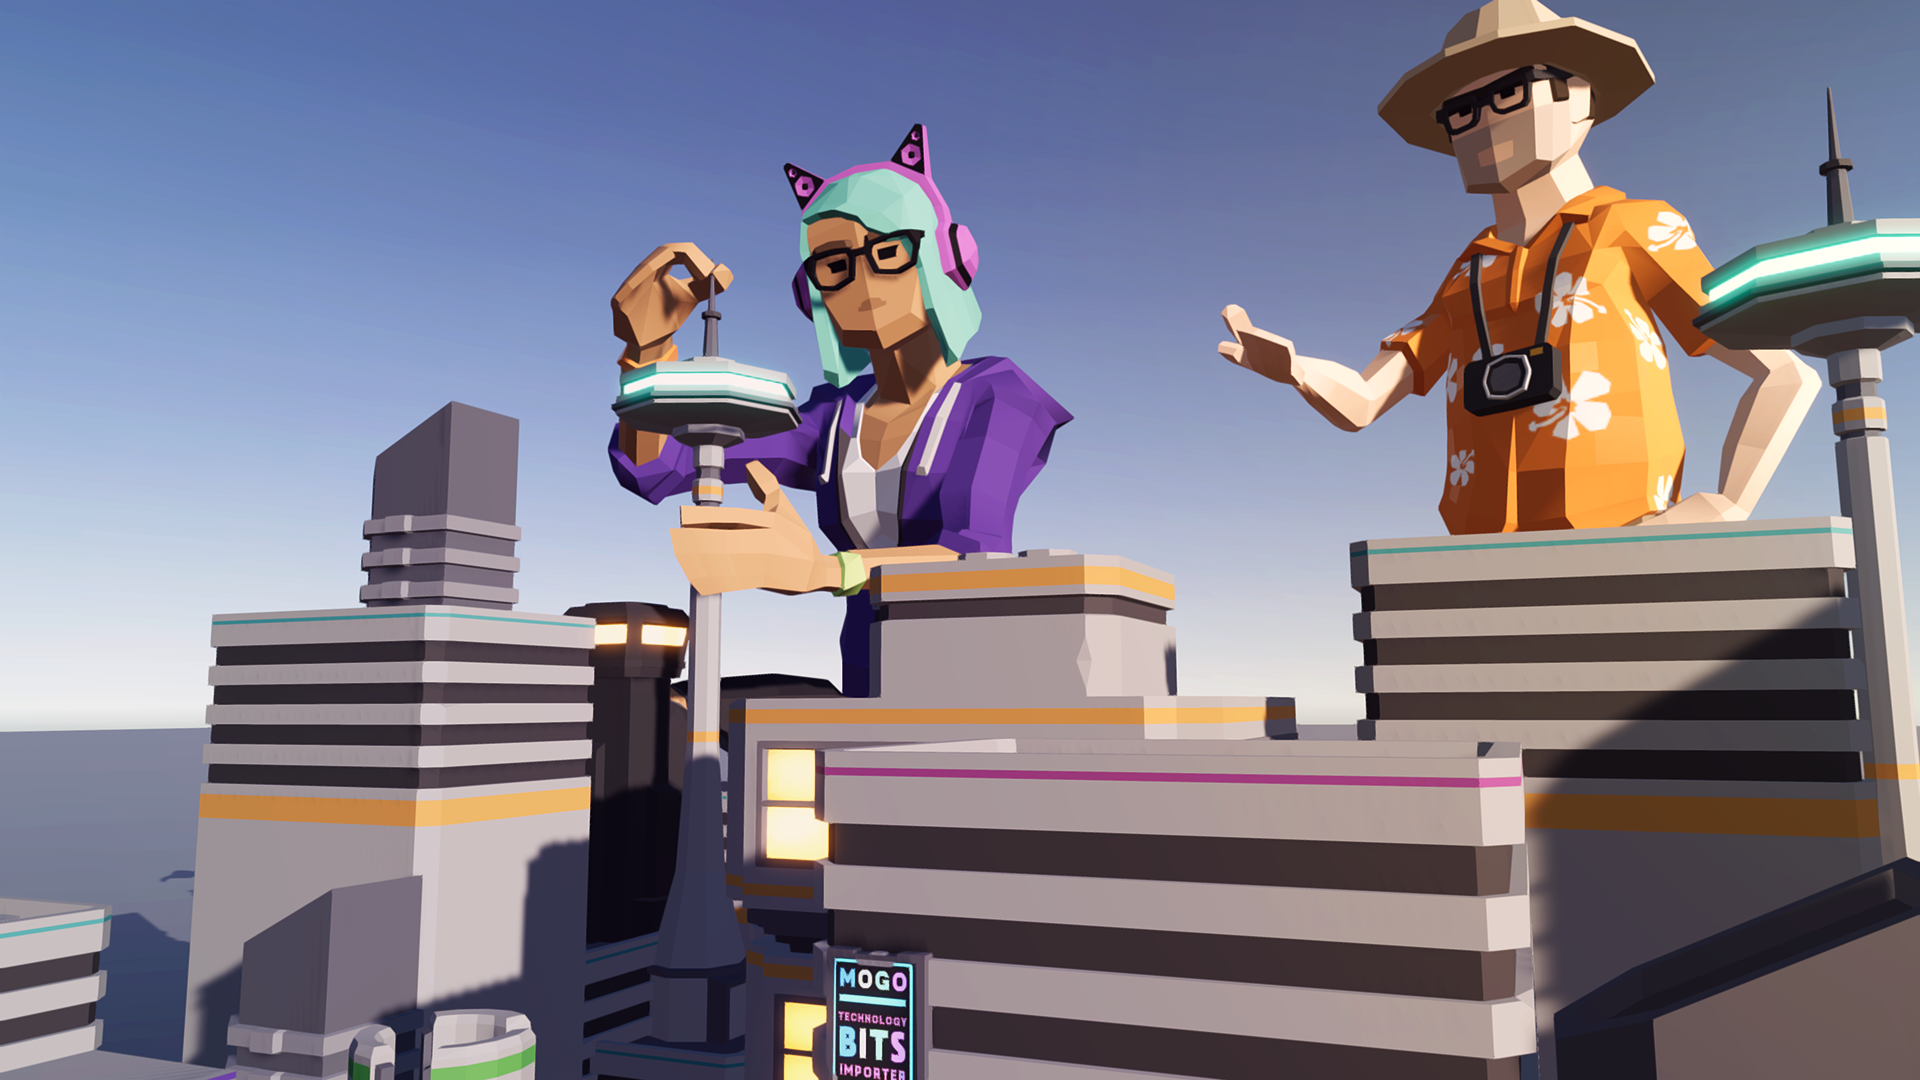
In this creative challenge, you’ll set-dress a new area of the city using props from the Unit 3 project and a prop of your own creation.
Languages available:
1. Challenge: Dress an Empty Part of the Set
Now that we've gotten familiar with creating simple props, placing existing ones, and adding basic lights to our Scene, we're ready to dress an empty part of the set.
An array of new props you can use in this challenge can be found in the Unit 3 Assets > Additional Props folder. You should also try modeling your own simple props in ProBuilder.
Remember: when dressing a set or modeling a prop, it’s important to refer to reference images. These can help guide you in understanding the reasoning behind a composition or prop:
Why are these props arranged in this manner?
What story is being told with the arrangement of these props?
Where is a particular light in a reference image coming from?
How, as a viewer, does this make me feel?
When is this Scene taking place?
These questions can start the brainstorming process in your set-dressing decisions and get you closer toward making a set feel lived in.
With that in mind, try dressing the part of the Scene shown below using the props in the folder. If you would like to work from a theme, try imagining this section of the city is an empty storefront and dress the area appropriately. Alternatively, you can select your own theme.
You’ll want to create your animation in the Unit3_StarterFiles project, in the Unit3CreativeChallenge Scene, which we hid in SyntyStudios_3DAssets > Scenes folder and named SciFi_Scene. You should rename the scene Unit3CreativeChallenge. Your set should include:
- At least five different props
- At least one new custom prop made in ProBuilder. Consider a stop sign, a barricade, or some other geometric object. Avoid organic shapes, with a lot of and use a reference image.
2. Submission
Once you’ve completed your project, take a screenshot and share it in our public gallery. Make sure to point out in your description which model you made in Probuilder. If you are unable to submit a screenshot in this step, please make sure you are signed into Learn with your Unity ID.
Please login to submit
3. Additional Learning
Here are a few additional tutorials and resources that you might find useful for learning more about modeling in Unity using ProBuilder and the FBX Exporter.
Complete this Tutorial
Submission Gallery

Bici abbandonata
Con probuilder è stato creato il segnale di pericolo

Unit3CreativeChallenge
The task was to decorate the empty part of the scene with five or more additional props and one or more custom props. My custom props are: a trash can, some trash inside it, a garbage bag, and a "pet-friendly" sign.

Sci-Fi City Storefront Set Dressing
In this project I dressed an empty part of the city scene using different props from the Additional Props folder. I placed multiple objects such as street lights, signs, and boxes to make the environment look more realistic. I also created a custom prop using ProBuilder by combining simple geometric shapes. I adjusted lighting and emissive materials to improve the mood of the scene and make the city look more alive.

women safety
to improve the needs of technology

FUTURISTIC CITY
A view of a futuristic city in night.

StoneVegas Casino Promo Code WIN120 Claim 120% up to 500 EUR + 250 FS + 1 Bonus Crab
This page explains how the StoneVegas Casino promo code can unlock a valuable welcome package for new players. By entering the promo code WIN120 during registration, users can receive a bonus that includes 120% up to 500 eur, 250 free spins, and 1 Bonus Crab. This offer increases the value of the first deposit and gives players more chances to explore the casino library. StoneVegas Casino features a wide range of modern slot machines, classic table games, and live dealer experiences from trusted providers. The bonus helps new players try several games without spending too much of their own balance. Using the promo code WIN120 ensures that the welcome reward is activated during the first deposit process. How To Use StoneVegas Casino Promo Code Using the StoneVegas Casino promo code is simple and only takes a few steps during the registration process. The code WIN120 unlocks the welcome package which includes a 120% deposit bonus up to 500 eur, 250 free spins, and 1 Bonus Crab. Following the instructions below will help ensure that the bonus is applied correctly. Visit the StoneVegas Casino website and open the registration page. Create a new account by filling in the required personal information. Locate the promo code field within the sign up form. Enter the promo code WIN120 exactly as shown. Complete the registration and confirm your account if verification is required. Make the first deposit using one of the available payment methods. After the deposit is processed, the 120% bonus up to 500 eur, 250 free spins, and 1 Bonus Crab will appear in your casino account. Once the bonus is activated, players can open the casino lobby and begin using their free spins and bonus balance on selected slot games available on the platform.